

By Mikey & Shelley Karrver
Hello, fellow makers and special effects enthusiasts! I am Mikey Karrver, the artist behind the curtain of Karrver Studio, alongside my wonderful partner, Shelley Karrver, who breathes life into all my creations so that I may stay hidden in the shadows.
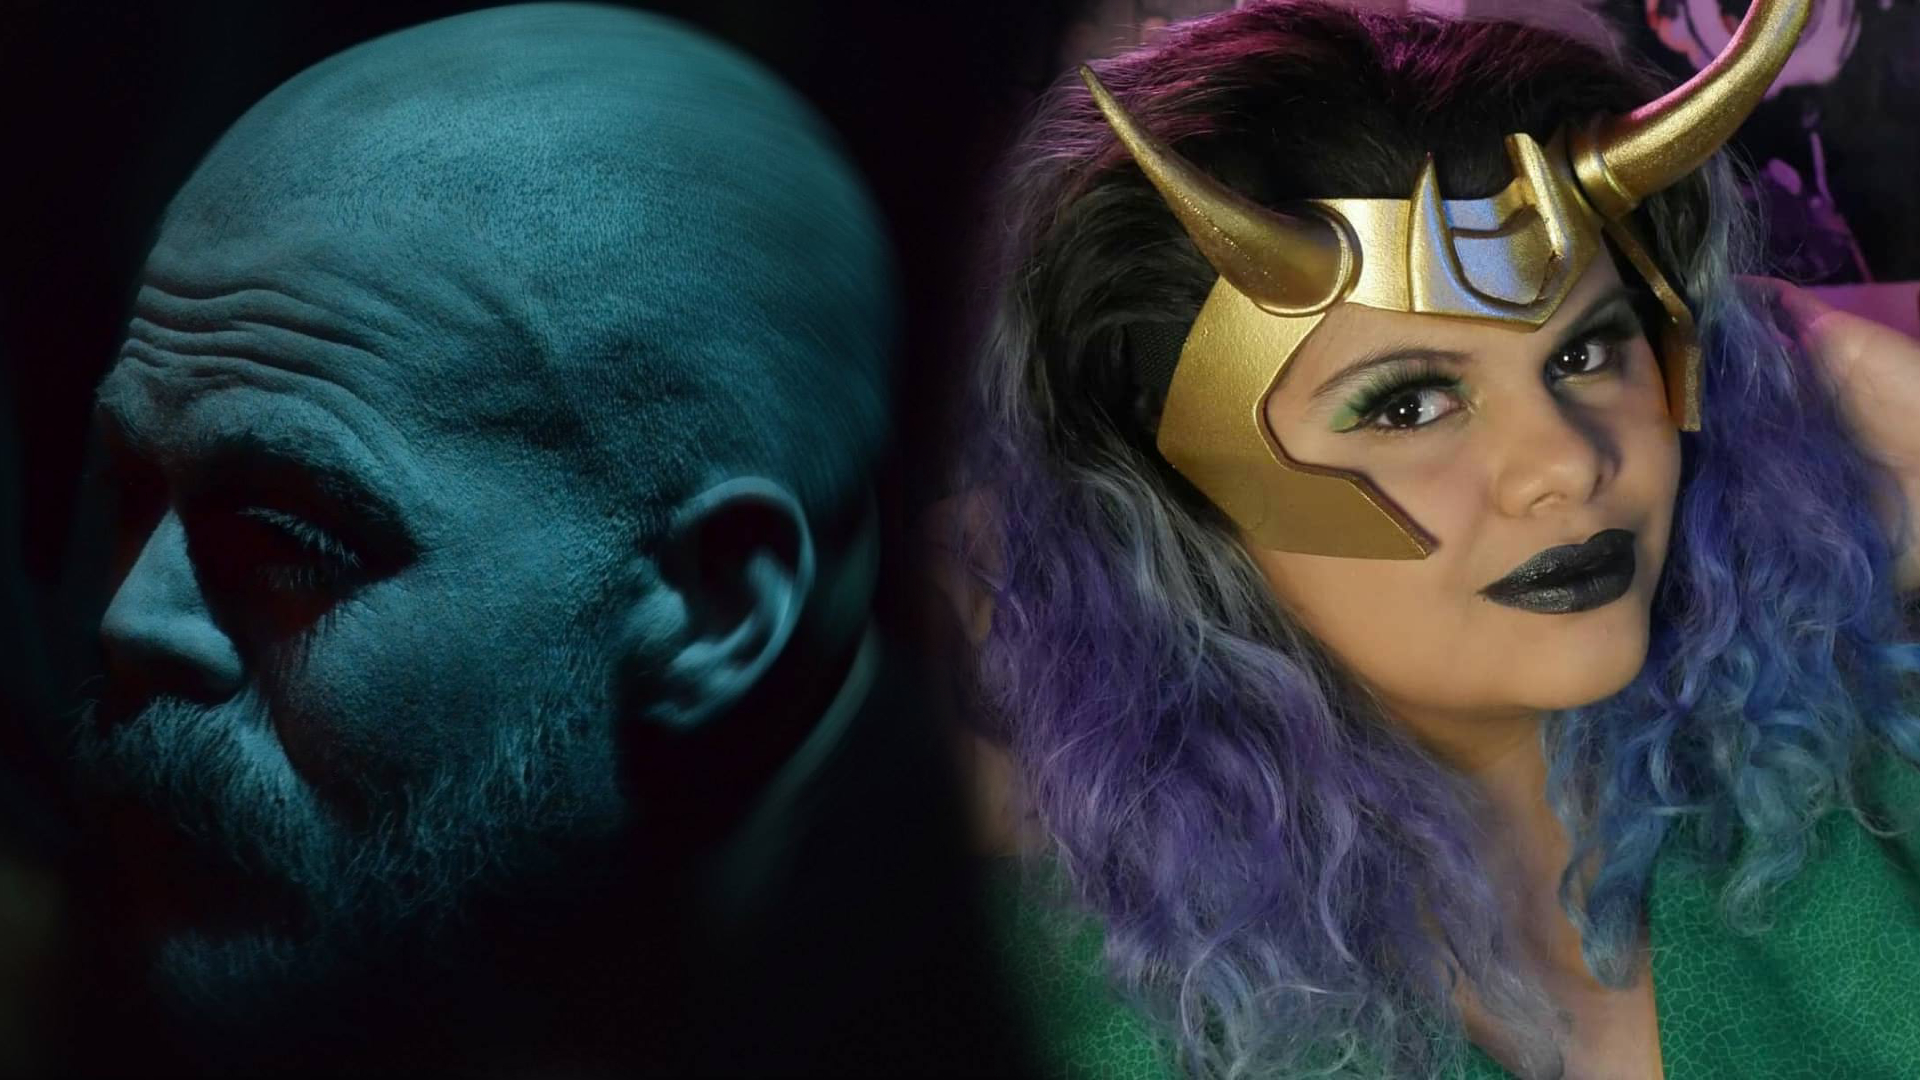 (2024 Halloween Costume Contest winners, couple Mikey Karrver and Shelley Karrver, the artists behind Karrver Studio.)
Jump To Section
- Getting into the Cosplay Costume-making World
- Creating The Dark Knight Returns Inspired Batman Suit
- Building the Batman Muscle Suit
- The process of Making Batman's Cowl and Chin
- Casting Realistic Silicone Skin
- Making Fake Teeth and Eyes
- Sewing the Batman Costume
- DIY Batman Accessories
Getting into the Cosplay Costume-making World
The year I discovered sculpting, I bought $100 worth of the cheapest oil clay I could find at the craft store, a basic sculpting kit, and began my journey as a sculptor. The very first thing I ever sculpted was my interpretation of a Jason Voorhees and Casey Jones mask. I molded it in plaster of Paris, cast it with car body filler/fiberglass, and had to smash it out of the mold because I didn't know any better, but I loved it. Here was something I created out of clay, smothered with stone, filled with liquid paste, and smashed into life to create something I imagined.
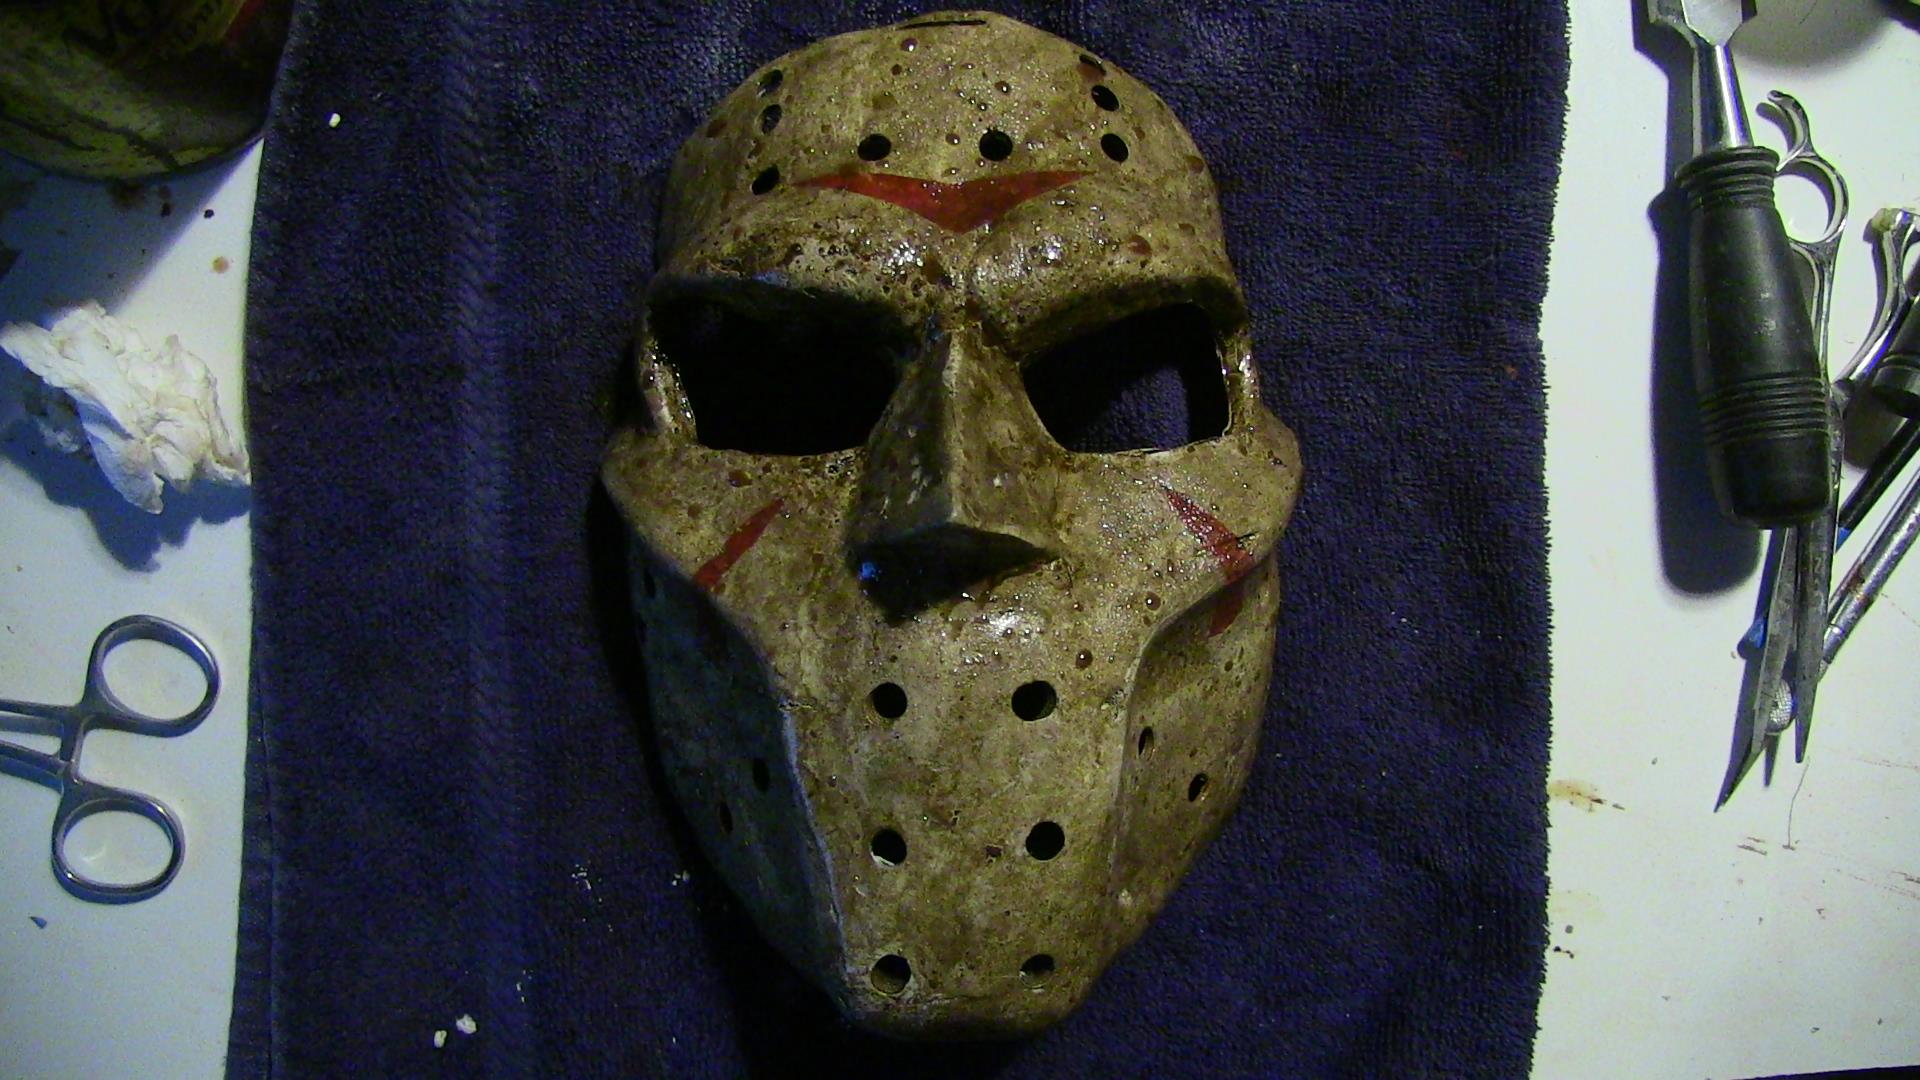 (Mikey Karrver's first sculpture, created in 2014, was a Jason Voorhees and Casey Jones mash-up.)
At this time, I had only been using my new skills as a meditative activity, something to show off during Halloween, until I met Shelley, who took me to my first Comic Book Convention! I felt like I was living under a rock, all these local people creating costumes all year round called Cosplay. I grew up loving Spider-Man and Batman, and here they all were, right in my backyard. I had to join the fun.
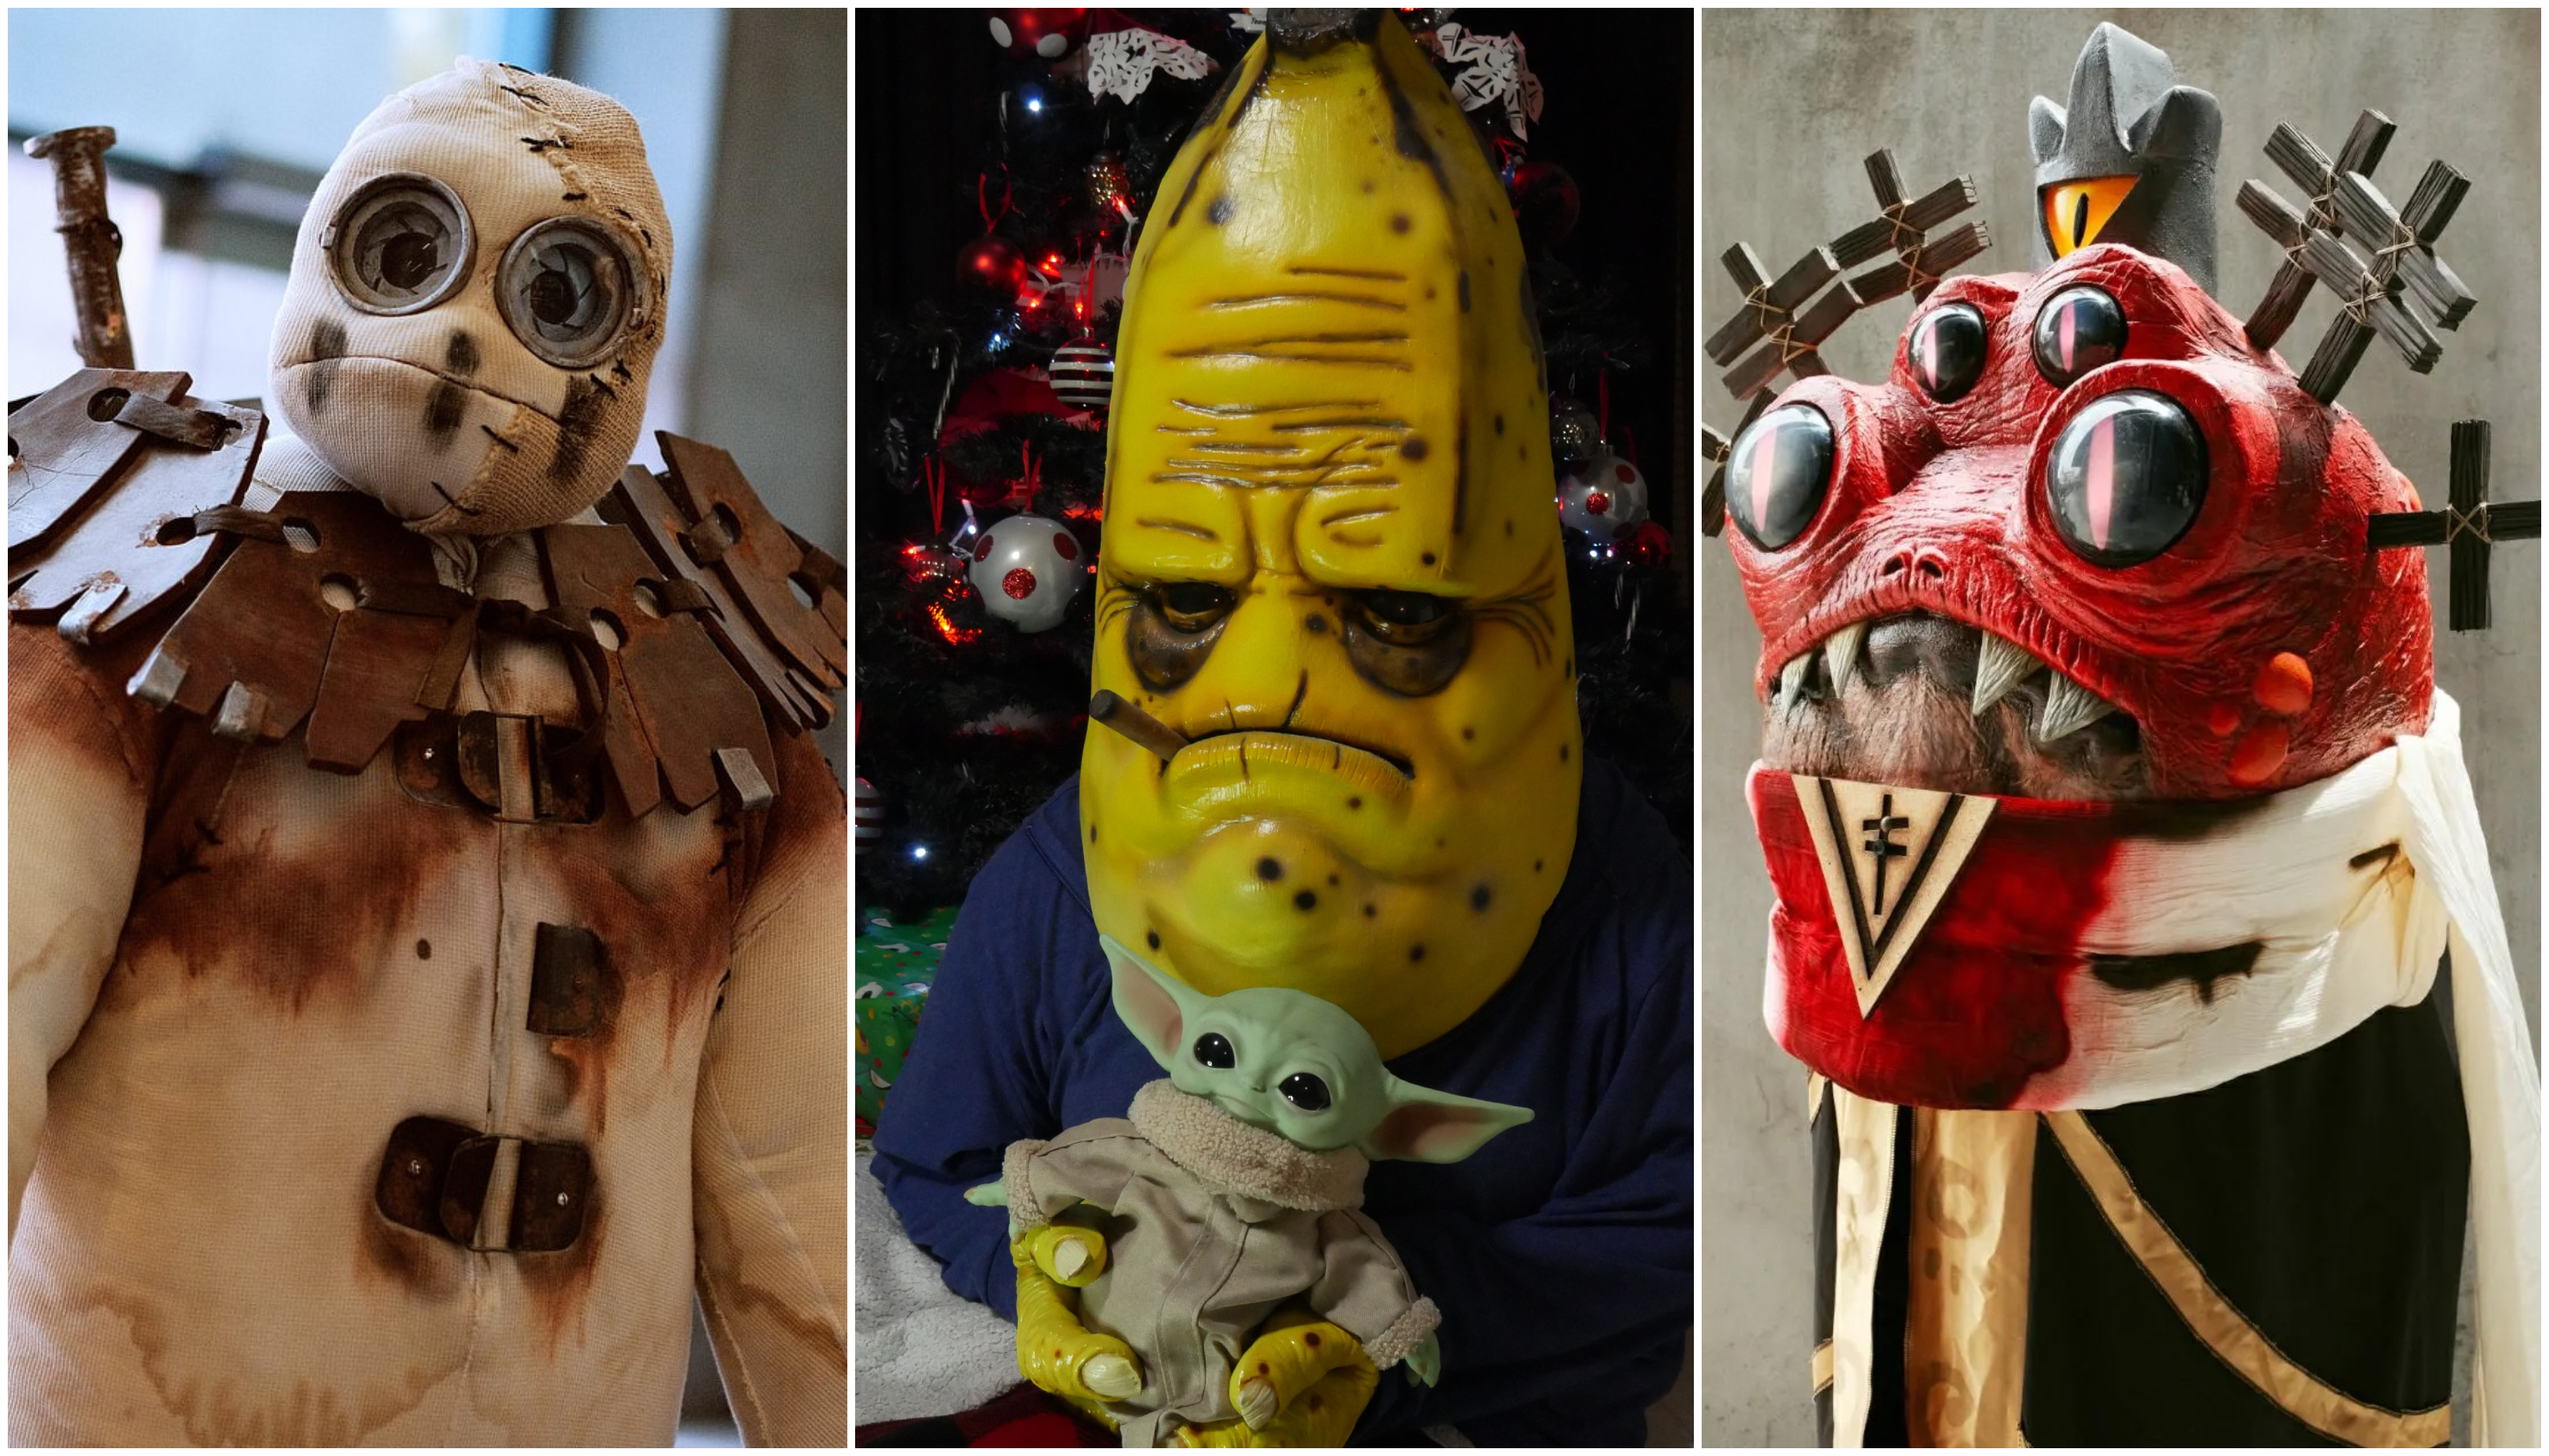 (From L to R: Mikey Karrver as 8 from the movie 9, Shelley Karrver as Rotten Banana inspired by Bananas in Pyjamas, and Shelley Karrver as Heket from the indie video game Cult of the Lamb.)
For the following seven years, I spent every moment of my free time either creating or thinking about creating. Every project had to have something new I could learn or significantly improve some aspect of making that I was lacking. We soon became known for bringing strange and unusual creations to conventions, and we embraced it!
 (From top left to bottom right: 1. Shelley Karrver as Man-Spider from the Spider-Man: The Animated Series, 2. Shelley Karrver as King Shark from the Harley Quinn animated series, 3. A digital sculpture based on a past project by Mikey Karrver, 4. Shelley Karrver as Albrekh from Star Wars: Episode IX.)
Creating The Dark Knight Returns Inspired Batman Suit
I grew up at the right time to fully enjoy the original Batman: The Animated Series and Batman Returns, so it was only a matter of time before we found a way to sneak a Batman costume into our schedule and, more importantly, our skill level. I wanted to test ourselves by making our first muscle suit, hiding Shelley's feminine body, and finally figuring out how to cast and paint silicone.
 (Shelley Karrver poses in the 2024 Halloween Costume Contest winner creation, The Dark Knight Returns, a.k.a. Batman, with Harley Quinn (Patchwork Cosplay by Emily).)
Frank Miller's The Dark Knight Returns was the ideal Batman for us! He was older, angrier, and shorter, although bulkier. We knew we wanted to exaggerate his features: a small skull with a giant chin and tiny hands and feet. It was the perfect challenge for everything we wanted to accomplish.
Building the Batman Muscle Suit
I started by making an EVA foam mannequin of Shelley. With this mannequin, I was able to take my time mapping out the muscle pattern our Batman would have under the suit, using many reference photos from the super-enhanced bodybuilding community.
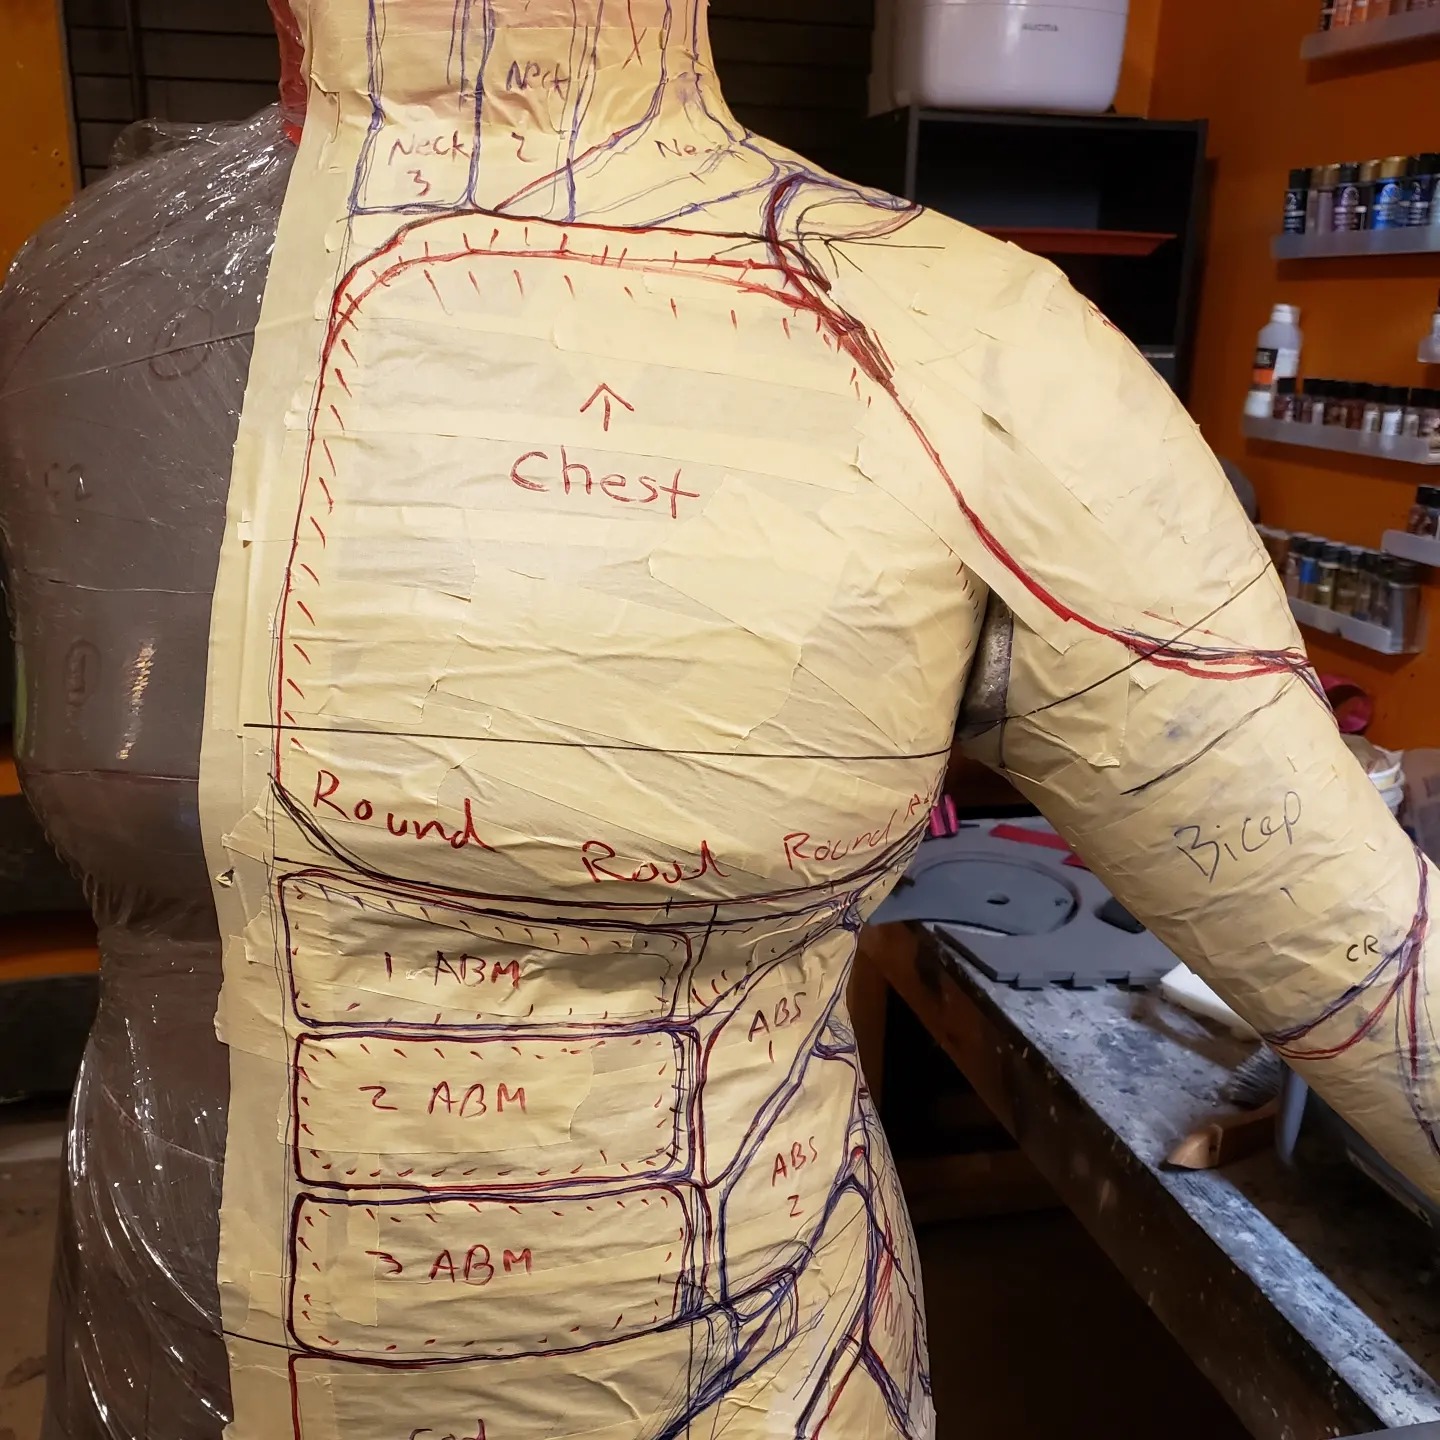 (The mapping of the muscle patterns on Shelley Karrver's EVA foam mannequin.)
After drawing all my muscle patterns onto upholstery foam, I used techniques I learned from Ted Haines’s How to Make a Dinosaur class in the way he cut and glued upholstery foam using 3M 74 spray. Using those techniques, I dressed our mannequin in a black morph suit and started gluing and pinning over 70 muscles to it.
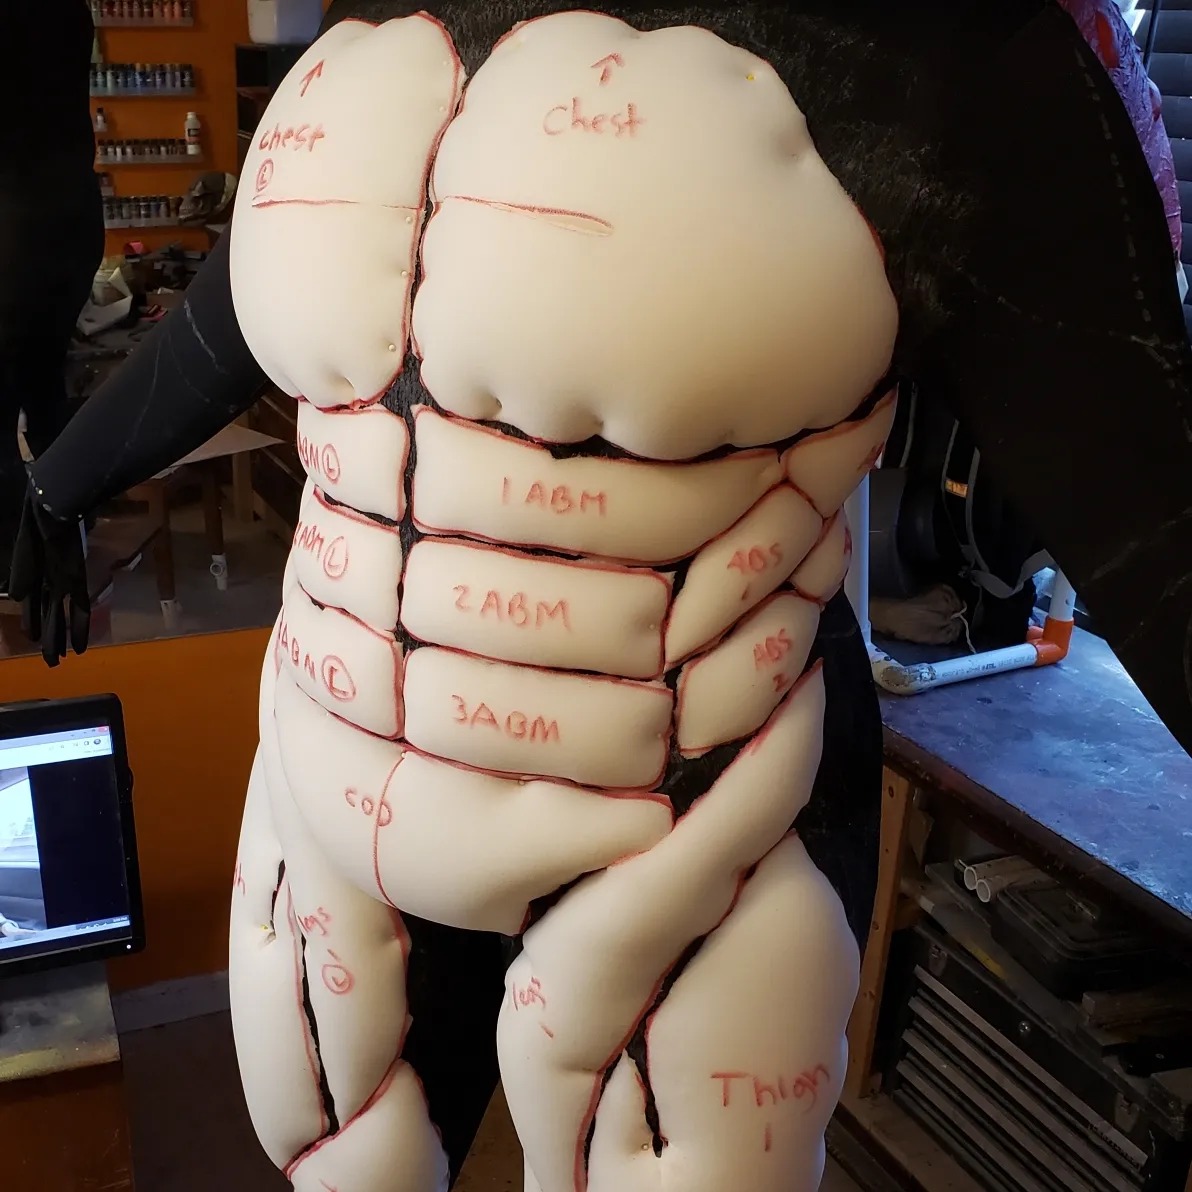 (Work-in-progress gluing and pinning the upholstery foam muscles to the morph suit.)
After extensively testing the muscle suit on Shelley, removing foam from areas, and bulking others until we were happy enough with the composition, I was then ready to tackle the head sculpt to keep everything in the proportions I wanted.
 (Shelley Karrver testing out the Batman muscle suit.)
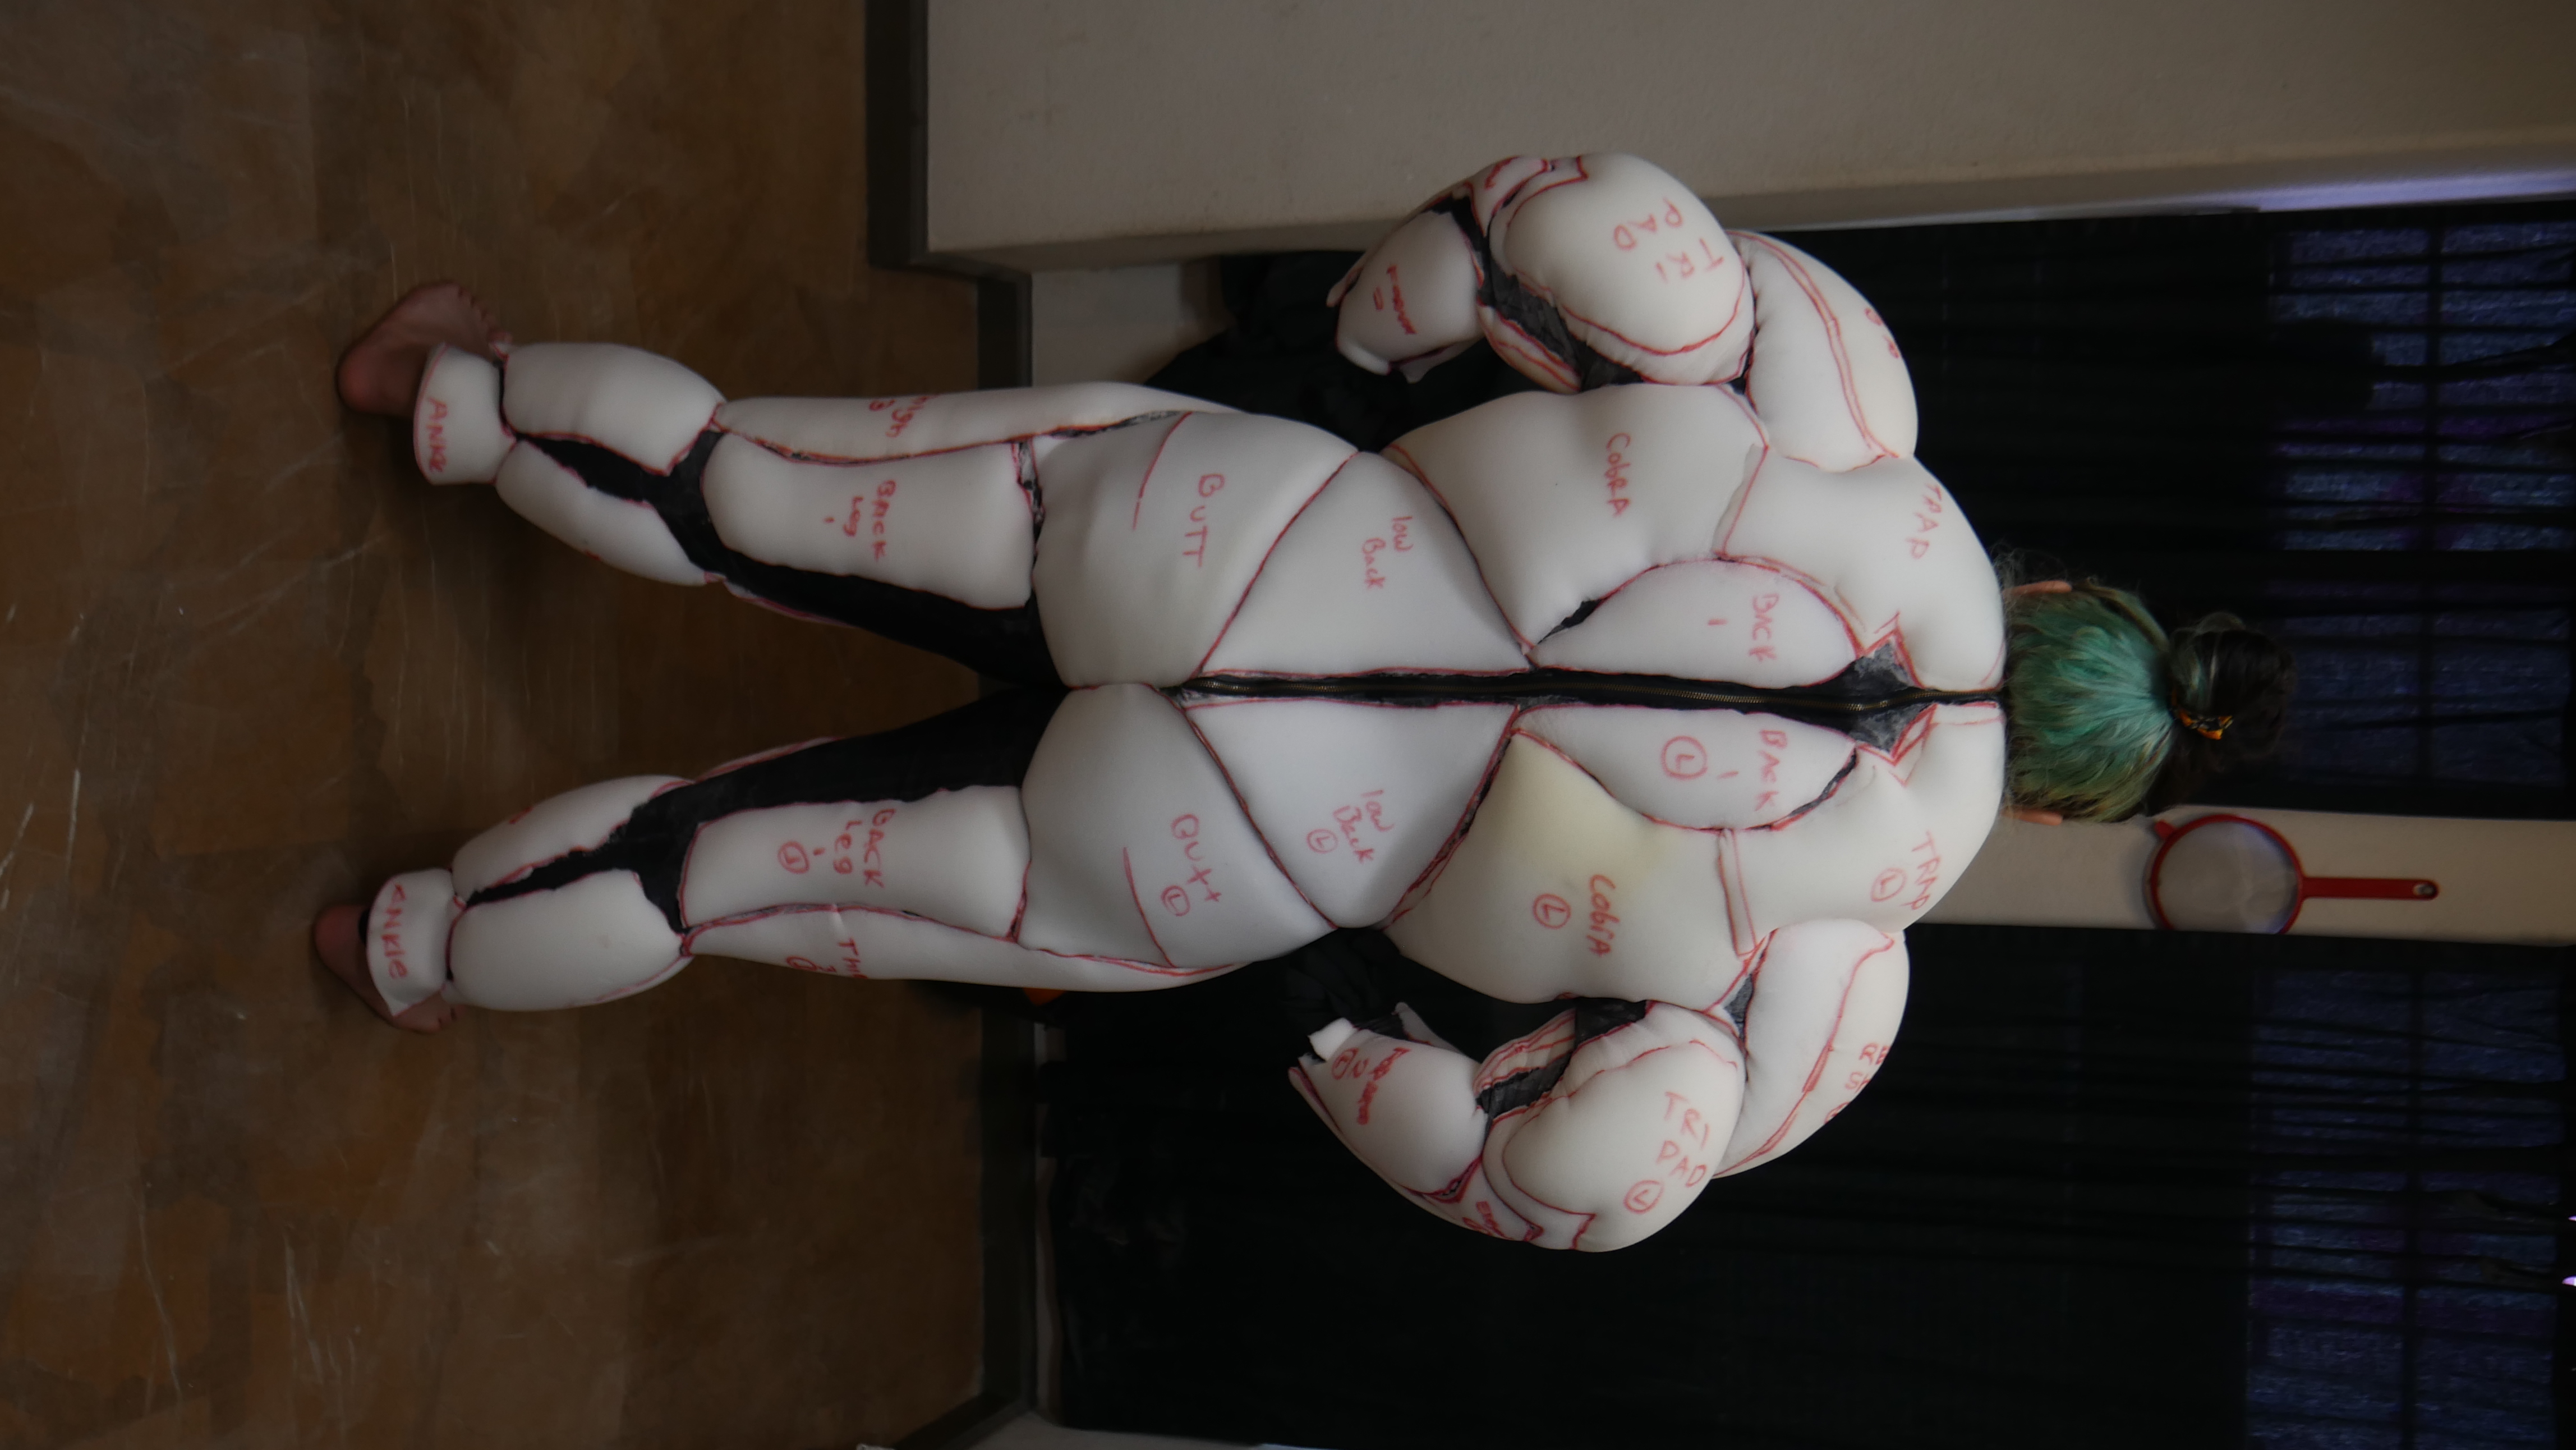 (The back view of the Batman muscle suit.)
Using the muscle suit on the mannequin, I took a plaster bandage mold of the suit's neckline to capture how the exaggerated neck muscles would flow into the cowl when sculpted on top of it.
The process of Making Batman's Cowl and Chin
I spent the next month on the cowl and chin. After all, these are the most iconic parts of Batman, and I knew I had to get them right if I was going to do him justice! The plan was to mold the cowl in such a way that it would have no seam line to deal with and for the cowl and chin to be of two different materials: silicone to give us that realistic skin and urethane rubber for that classic Batman look.
First, I blocked out the cowl to the point where it wouldn't have any major changes and then gave all my attention to the chin. I spent hours watching skin texture videos by Stuart Bray and Micah Ebbe, testing out ways to give our bat chin the perfect razor burn and crying over pore directional patterns.
 (The Batman cowl and chin are ready for the molding process.)
After 3 weeks of resculpting the pores and bumps, I had to move on and mold the chin in UltraCal, trying not to disturb the surrounding clay cowl. With the chin now safely molded, we could turn all my attention back to the cowl. I spent the next few sessions cleaning up the cowl’s scowling expression and added texture by simply rolling a crumpled tin foil ball over it until we were satisfied.
 (Molding Batman's chin in UltraCal 30.)
Researching all the Batman cowls used in the film, I found Jose Fernandez, the artist responsible for many of the old and new Batman cowls, most recently for bringing the Batfleck cowl used in Batman v Superman: Dawn of Justice to life, which is heavily inspired by Frank Miller's design. I used the behind-the-scenes photos of Rob Freitas and Jim McLoughlin molding the 'Batfleck' cowl as my inspiration for how I would tackle my own cowl mold.
 (Batman's chin was removed, and the cowl was molded with a brush on silicone.)
Using a brush-on silicone and a hard fiberglass mother shell, the top was ready to be cleaned out and flipped over to then lay in an even thickness of clay that would determine the casting’s overall depth. Once the clay was laid in, another fiberglass mold was created to make the core of the cowl mold. I was ready to cast everything up!
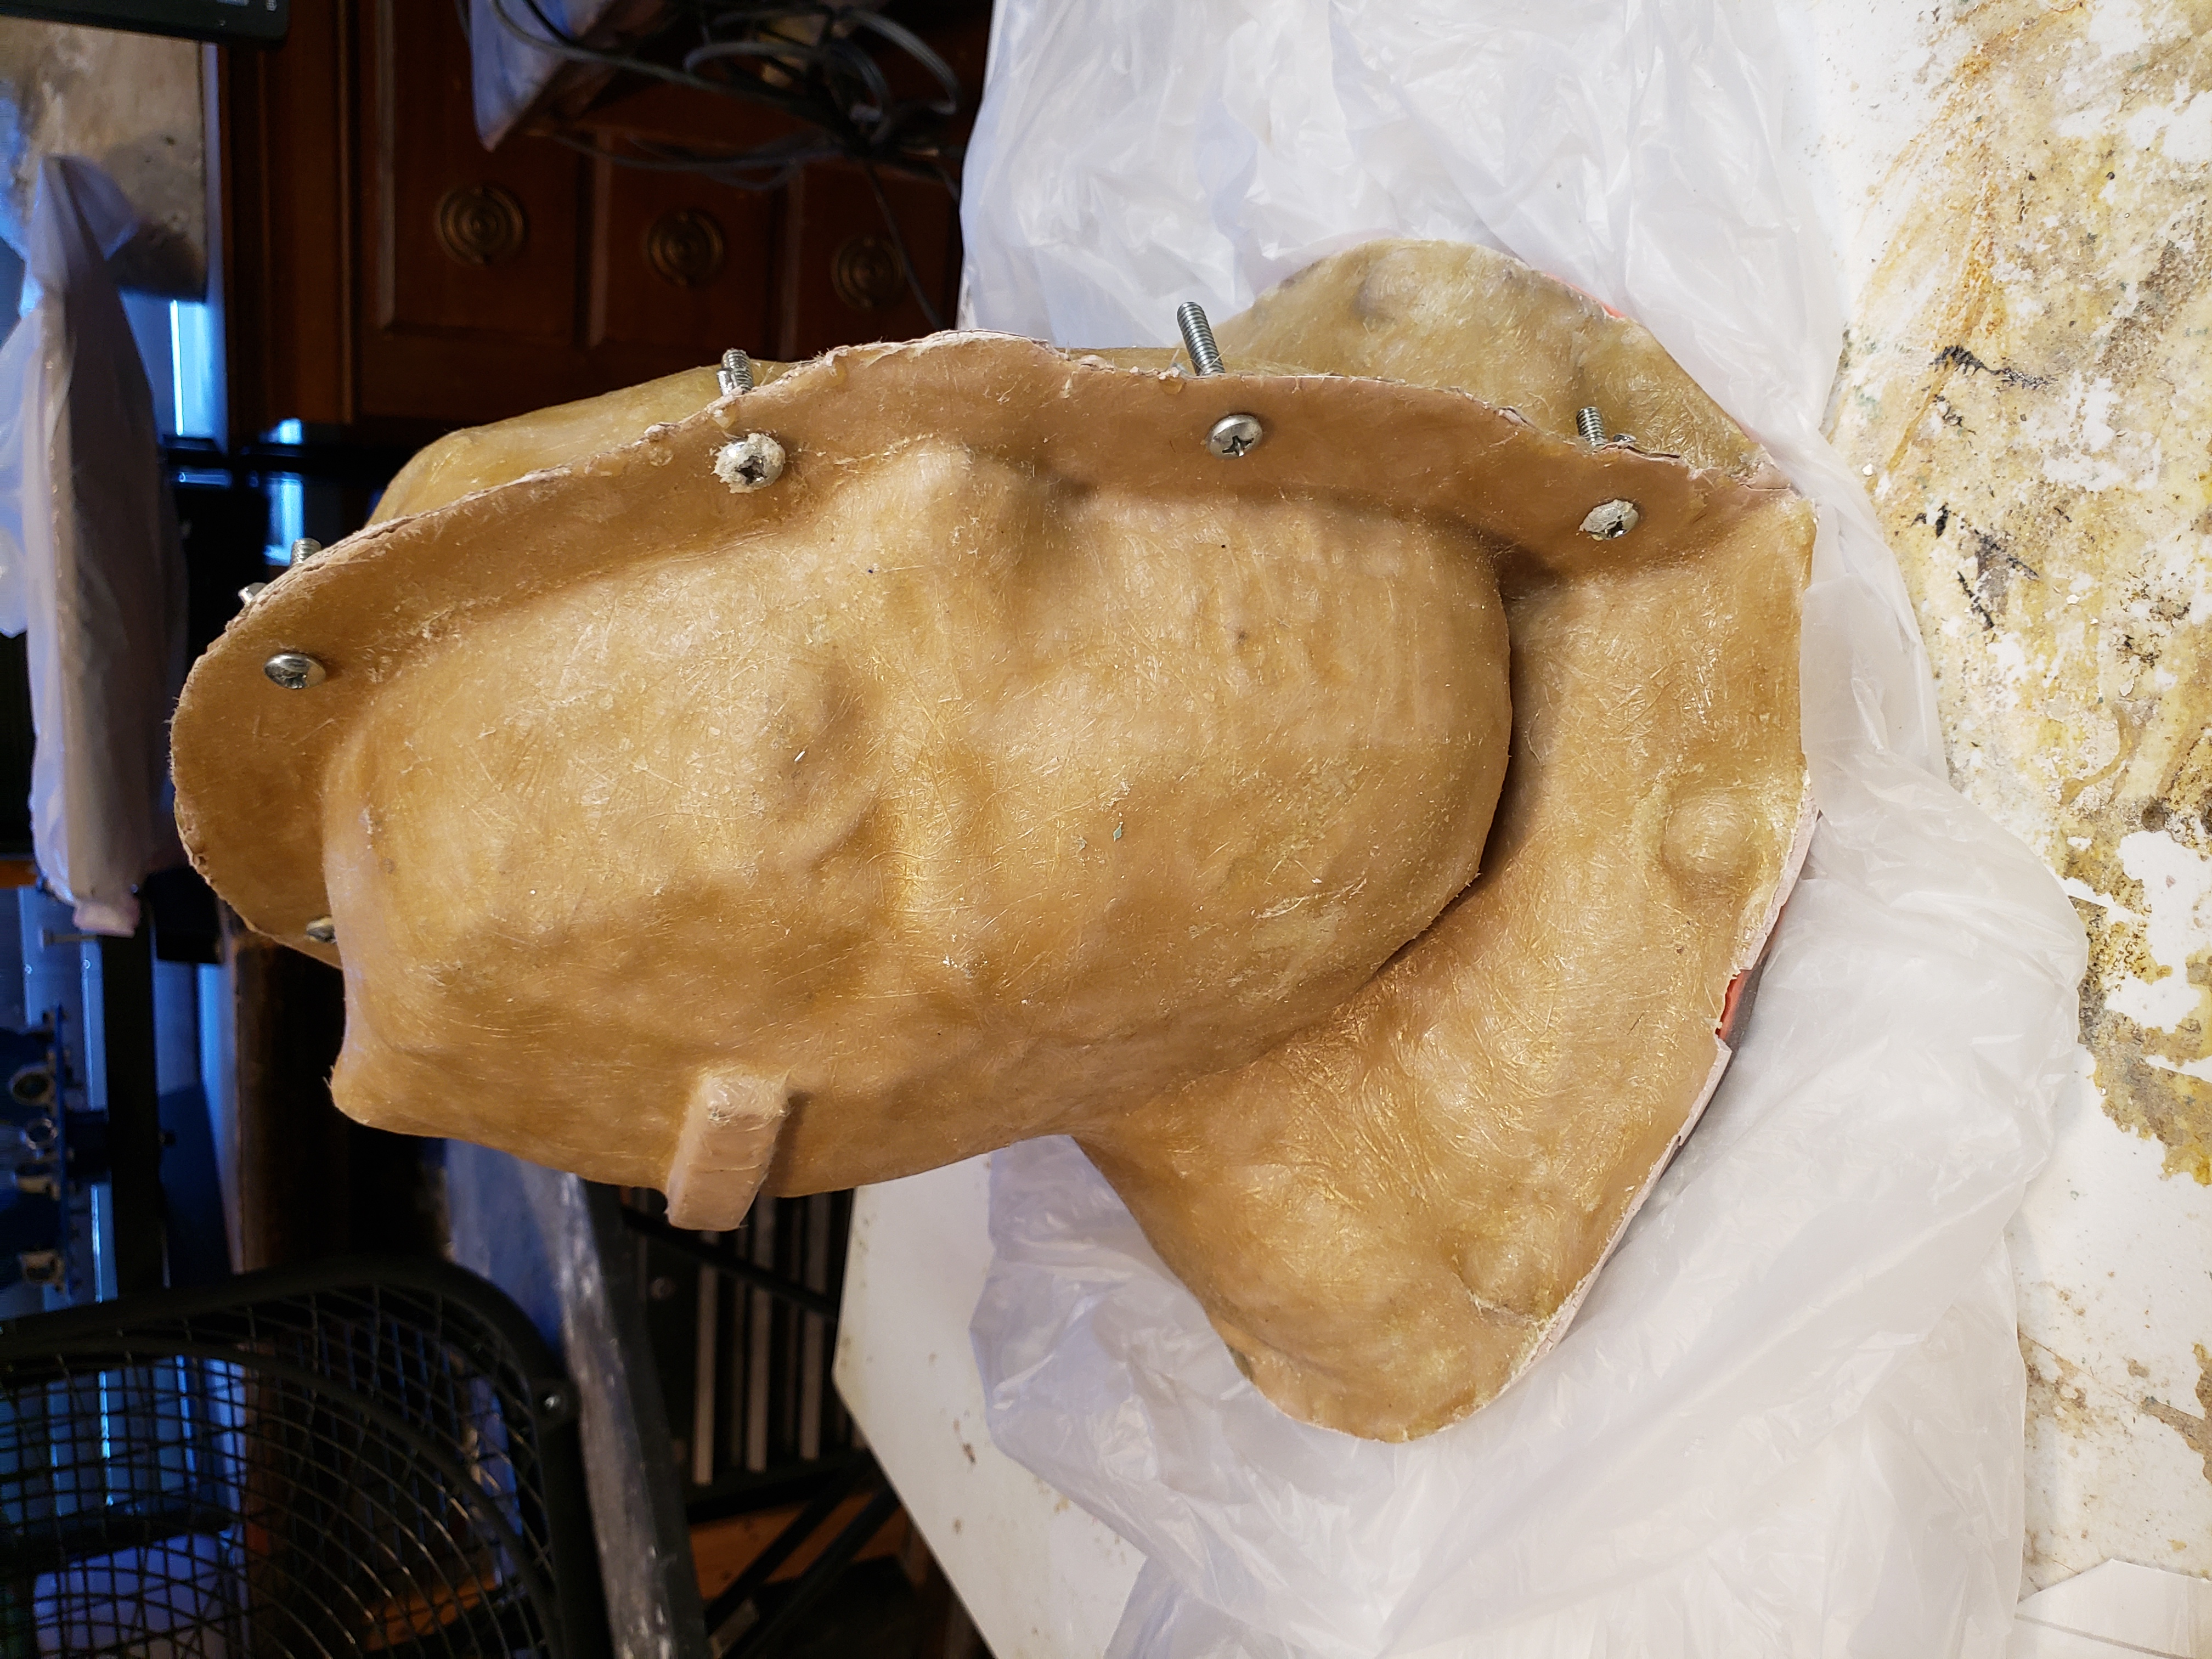 (The two-part fiberglass mother mold for the cowl.)
Now, we had originally planned on casting our cowl in Urethane rubber, but disaster had occurred. The 2-pint kits we had purchased had not been enough; somehow, the weight had compromised the silicone mold, making the casting thicker and not filling all the way up. We honestly debated quitting at this point, but that just gave us permission to experiment if this project wasn't going to turn out the way we intended.
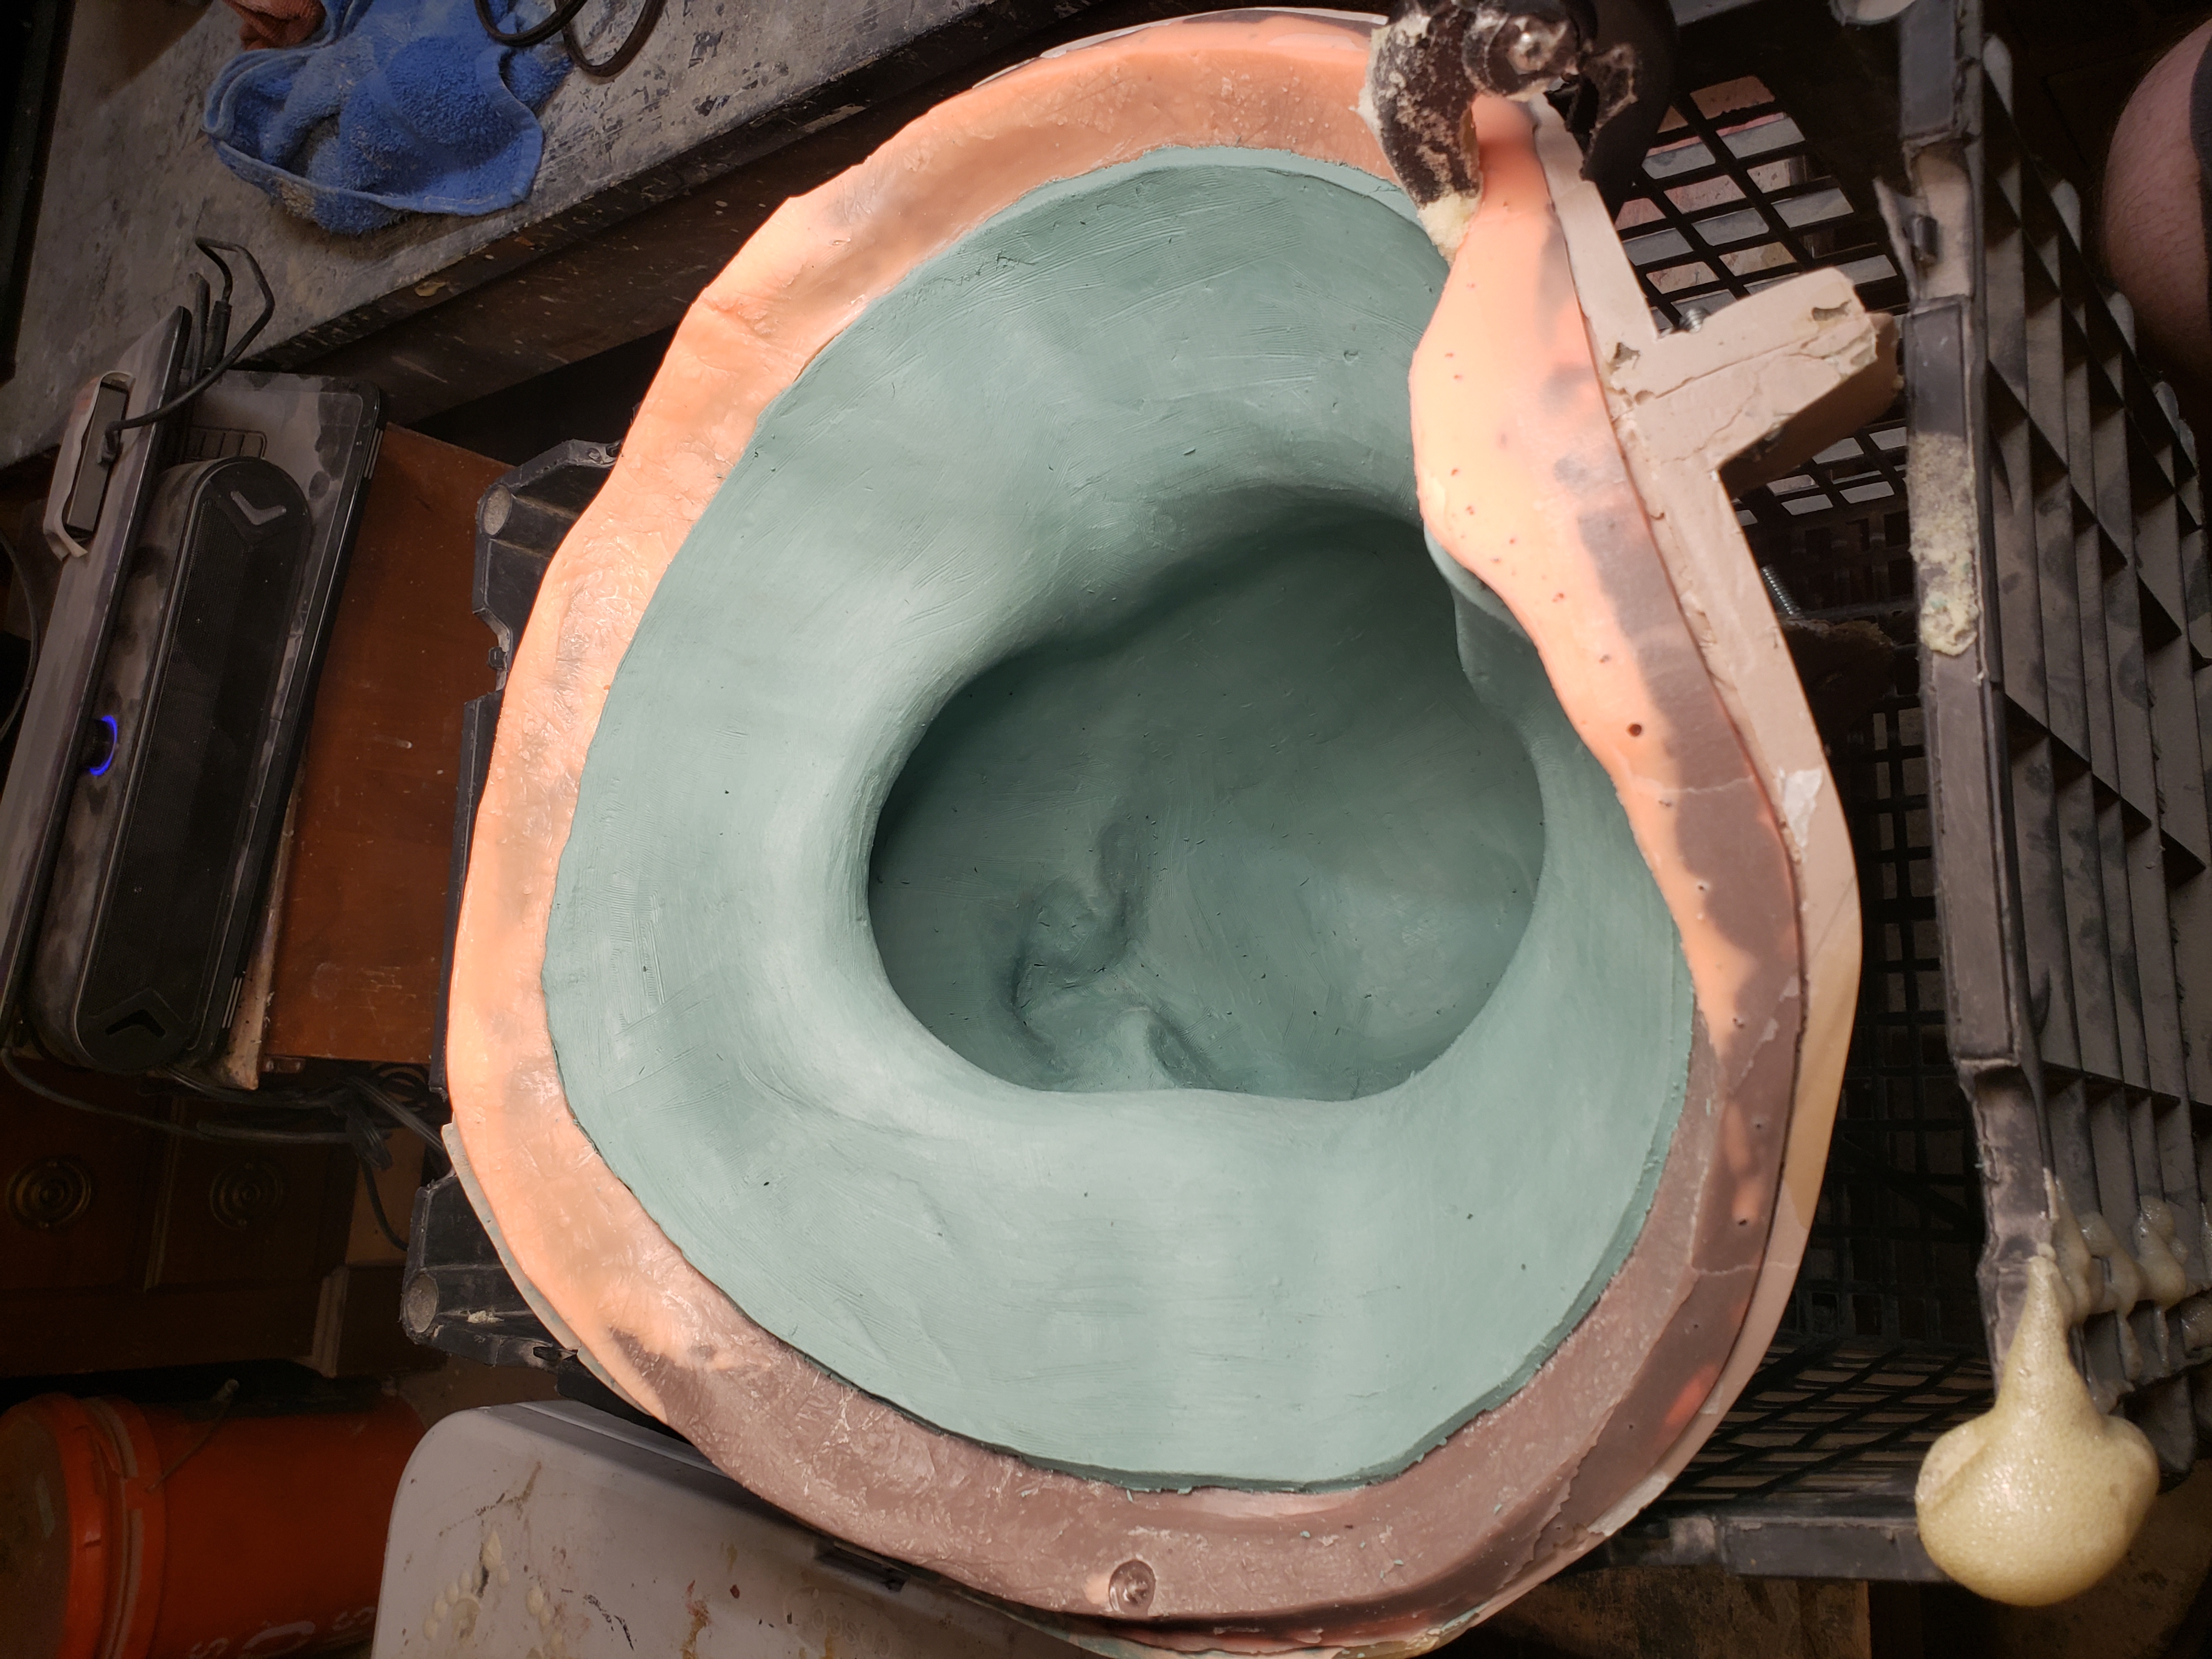 (Clay thickness added for core molding.)
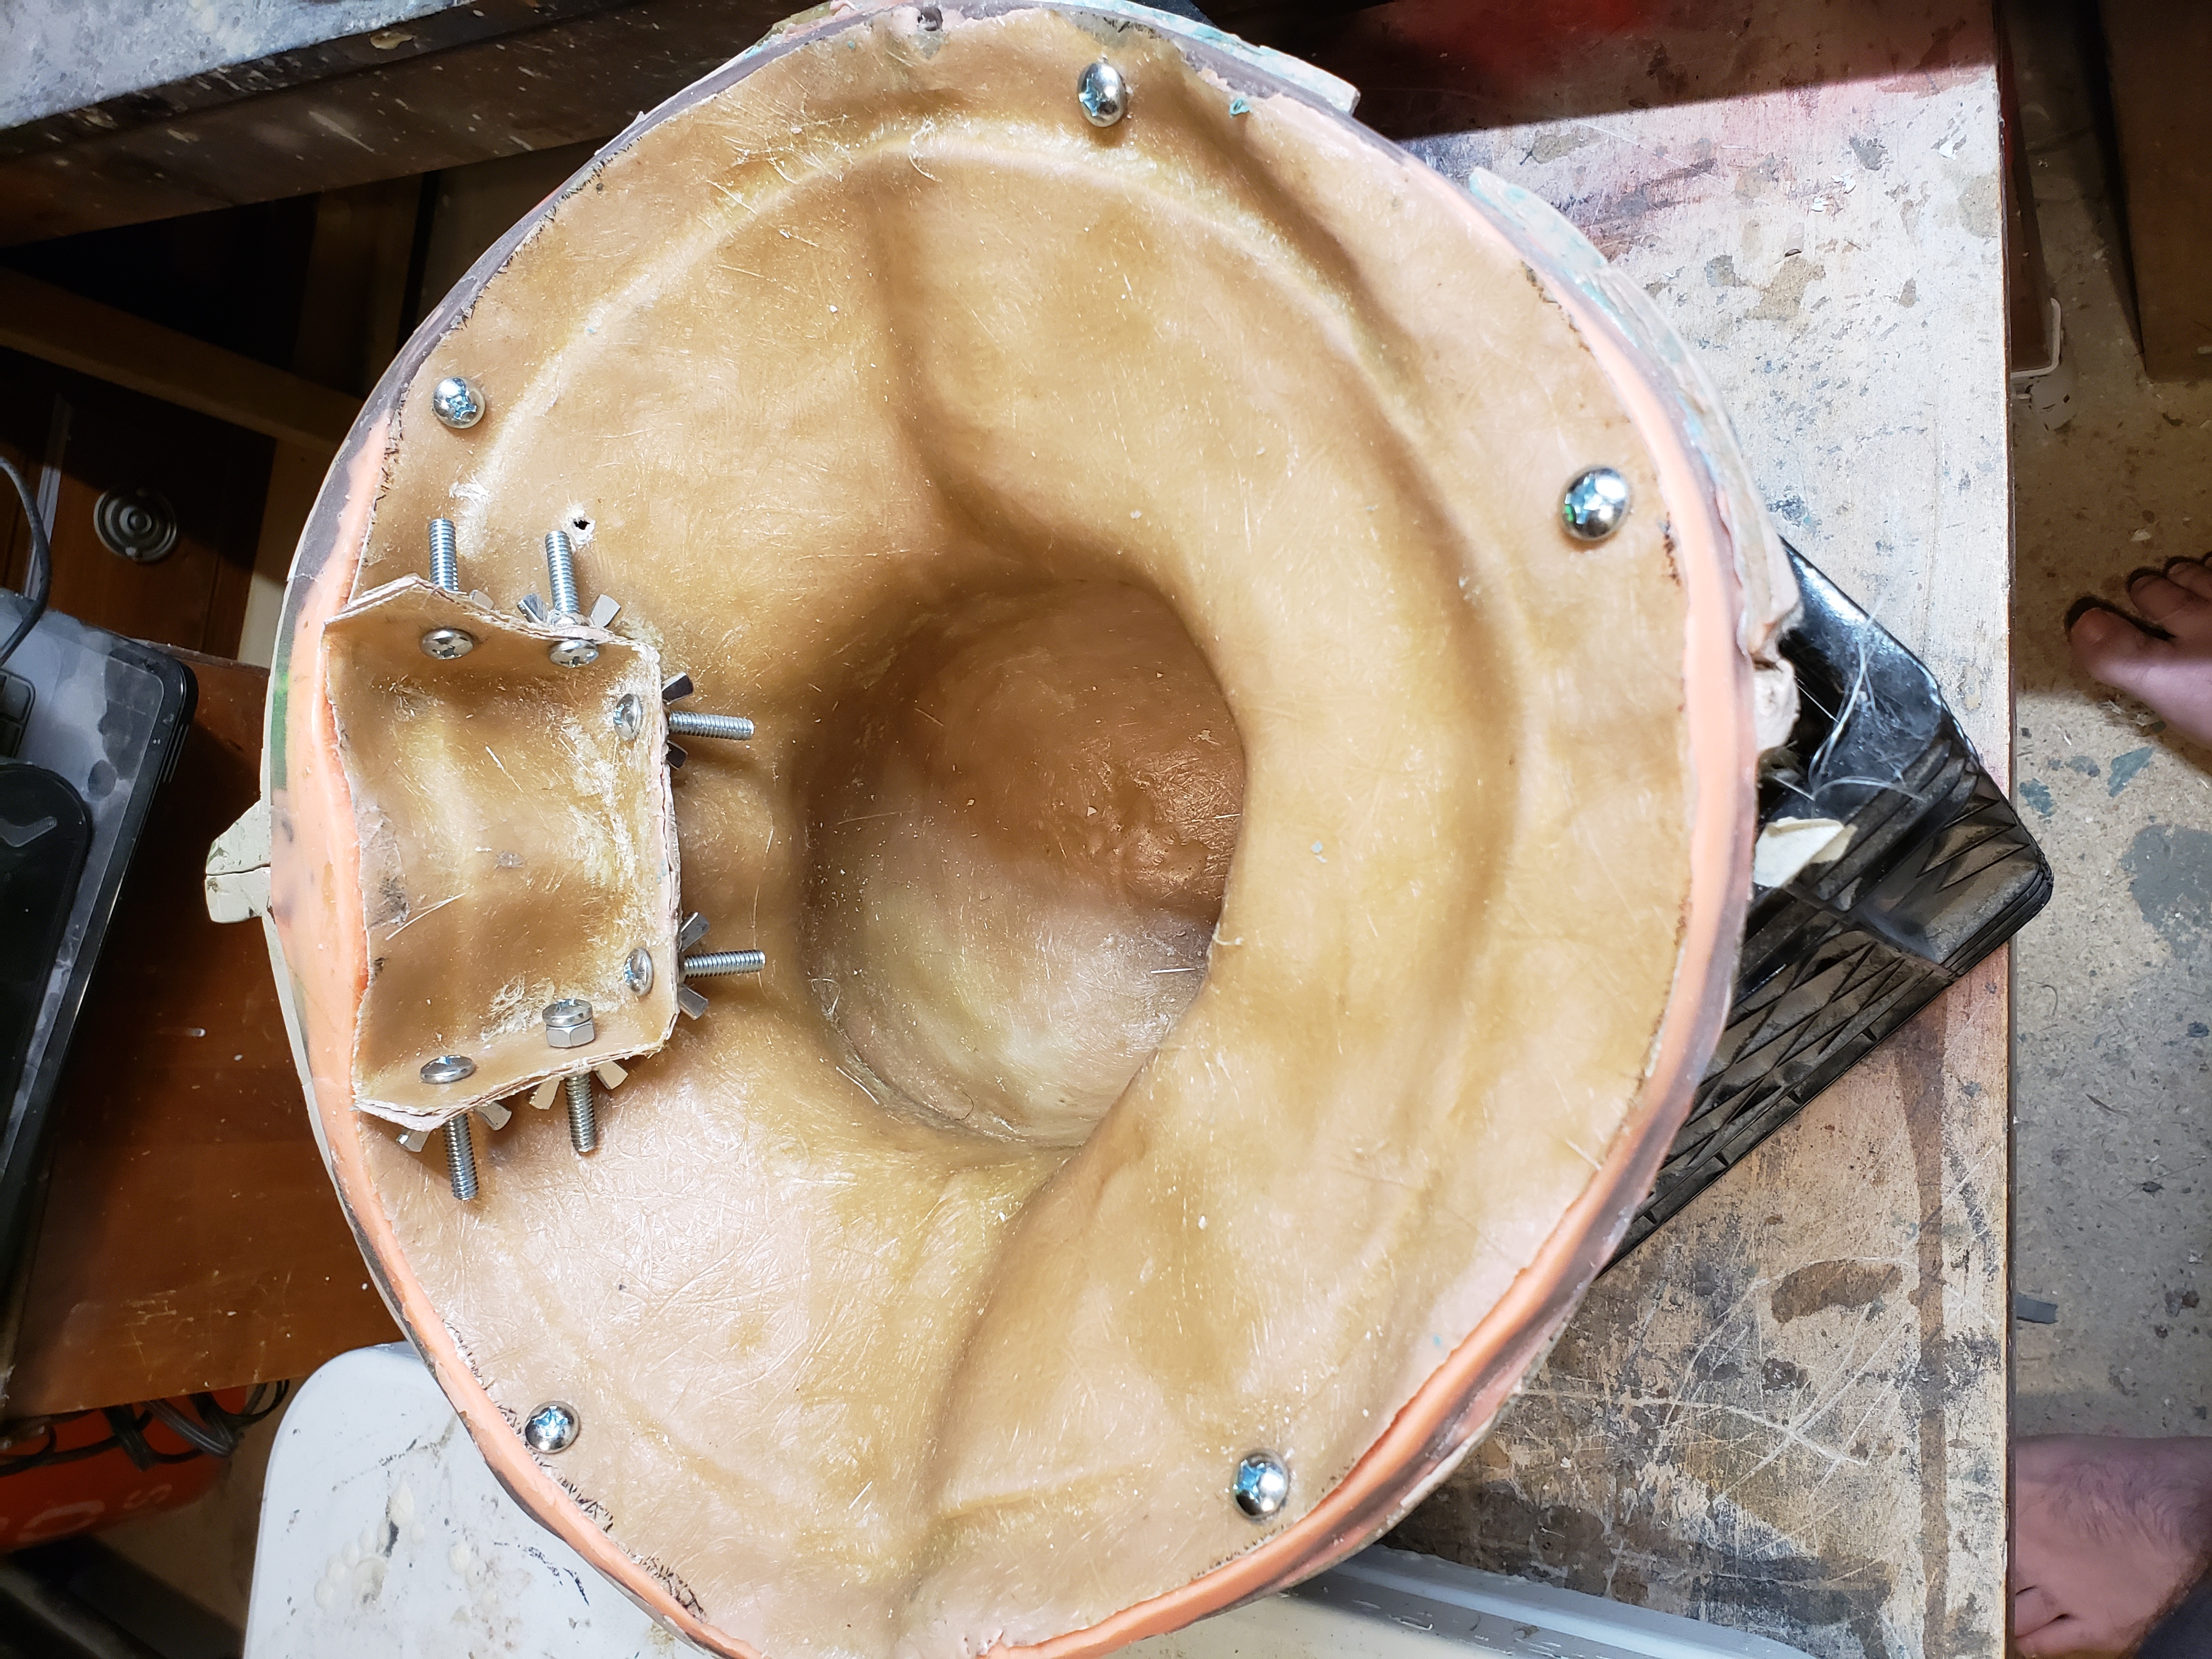 (The cowl's fiberglass core.)
Having used flexible Polyfoam on virtually every project we'd created, we looked there first as our cowl’s replacement material, and it worked like a charm. The thickness was perfect, it was lightweight, and it would still allow us to attach our chin without worrying.
 (The flexible polyurethane foam casting of the Batman's cowl.)
Casting Realistic Silicone Skin
We had molded many silicone molds, but this would be our first silicone casting for realistic skin! Using inspiration from Mike Cooke from Immortal Masks' Stan Winston School course on tinting/casting silicone and Adam Dougherty’s Youtube videos, we tinted our silicone and brushed in 2 layers, and on the third layer, we laid in strips of terry cloth so that we could backfill the chin with more polyfoam keeping it light and easy to attach to the cowl.
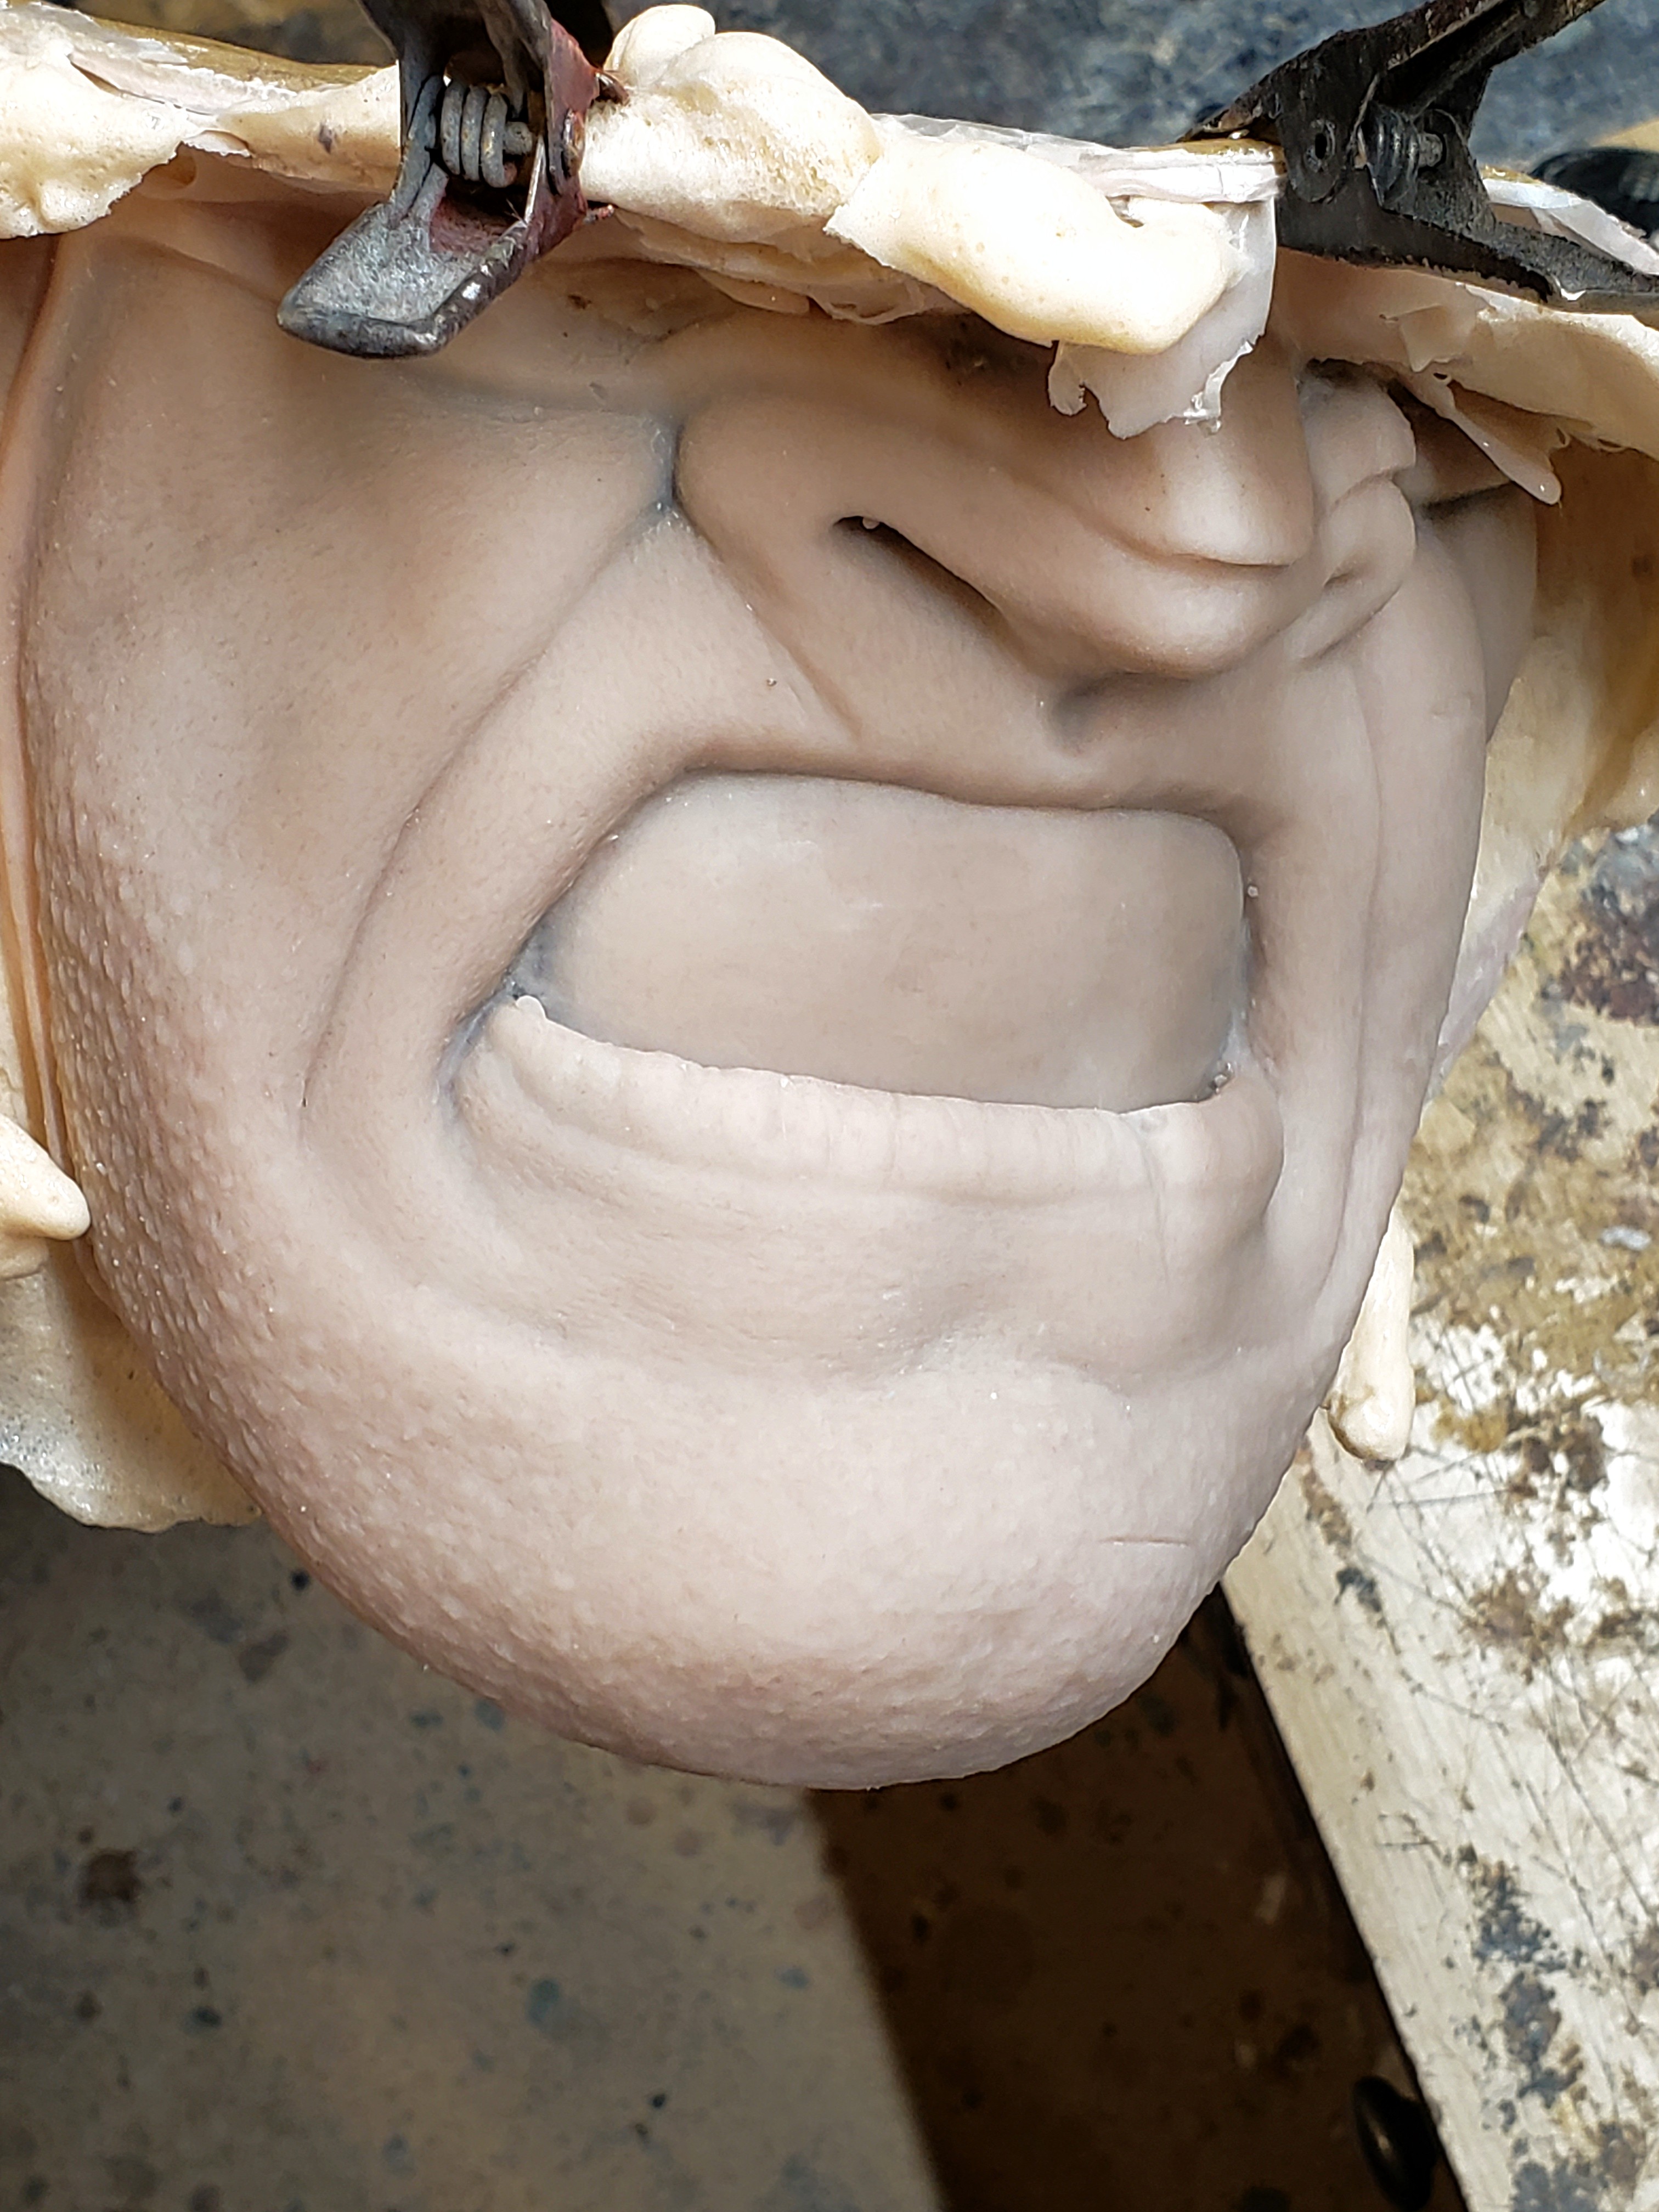 (The raw casting of the silicone chin; made out of Dragon Skin 10.)
Pleasantly surprised with how good the silicone chin came out, it was time to paint! Having never painted anything in silicone, I had to rely on the Stan Winston School courses by Jamie S. Grove and Tim Gore. I particularly enjoyed the idea of using silicone caulking as the paint base and sandwiching other non-silicone-based paints in between clear coats of silicone.
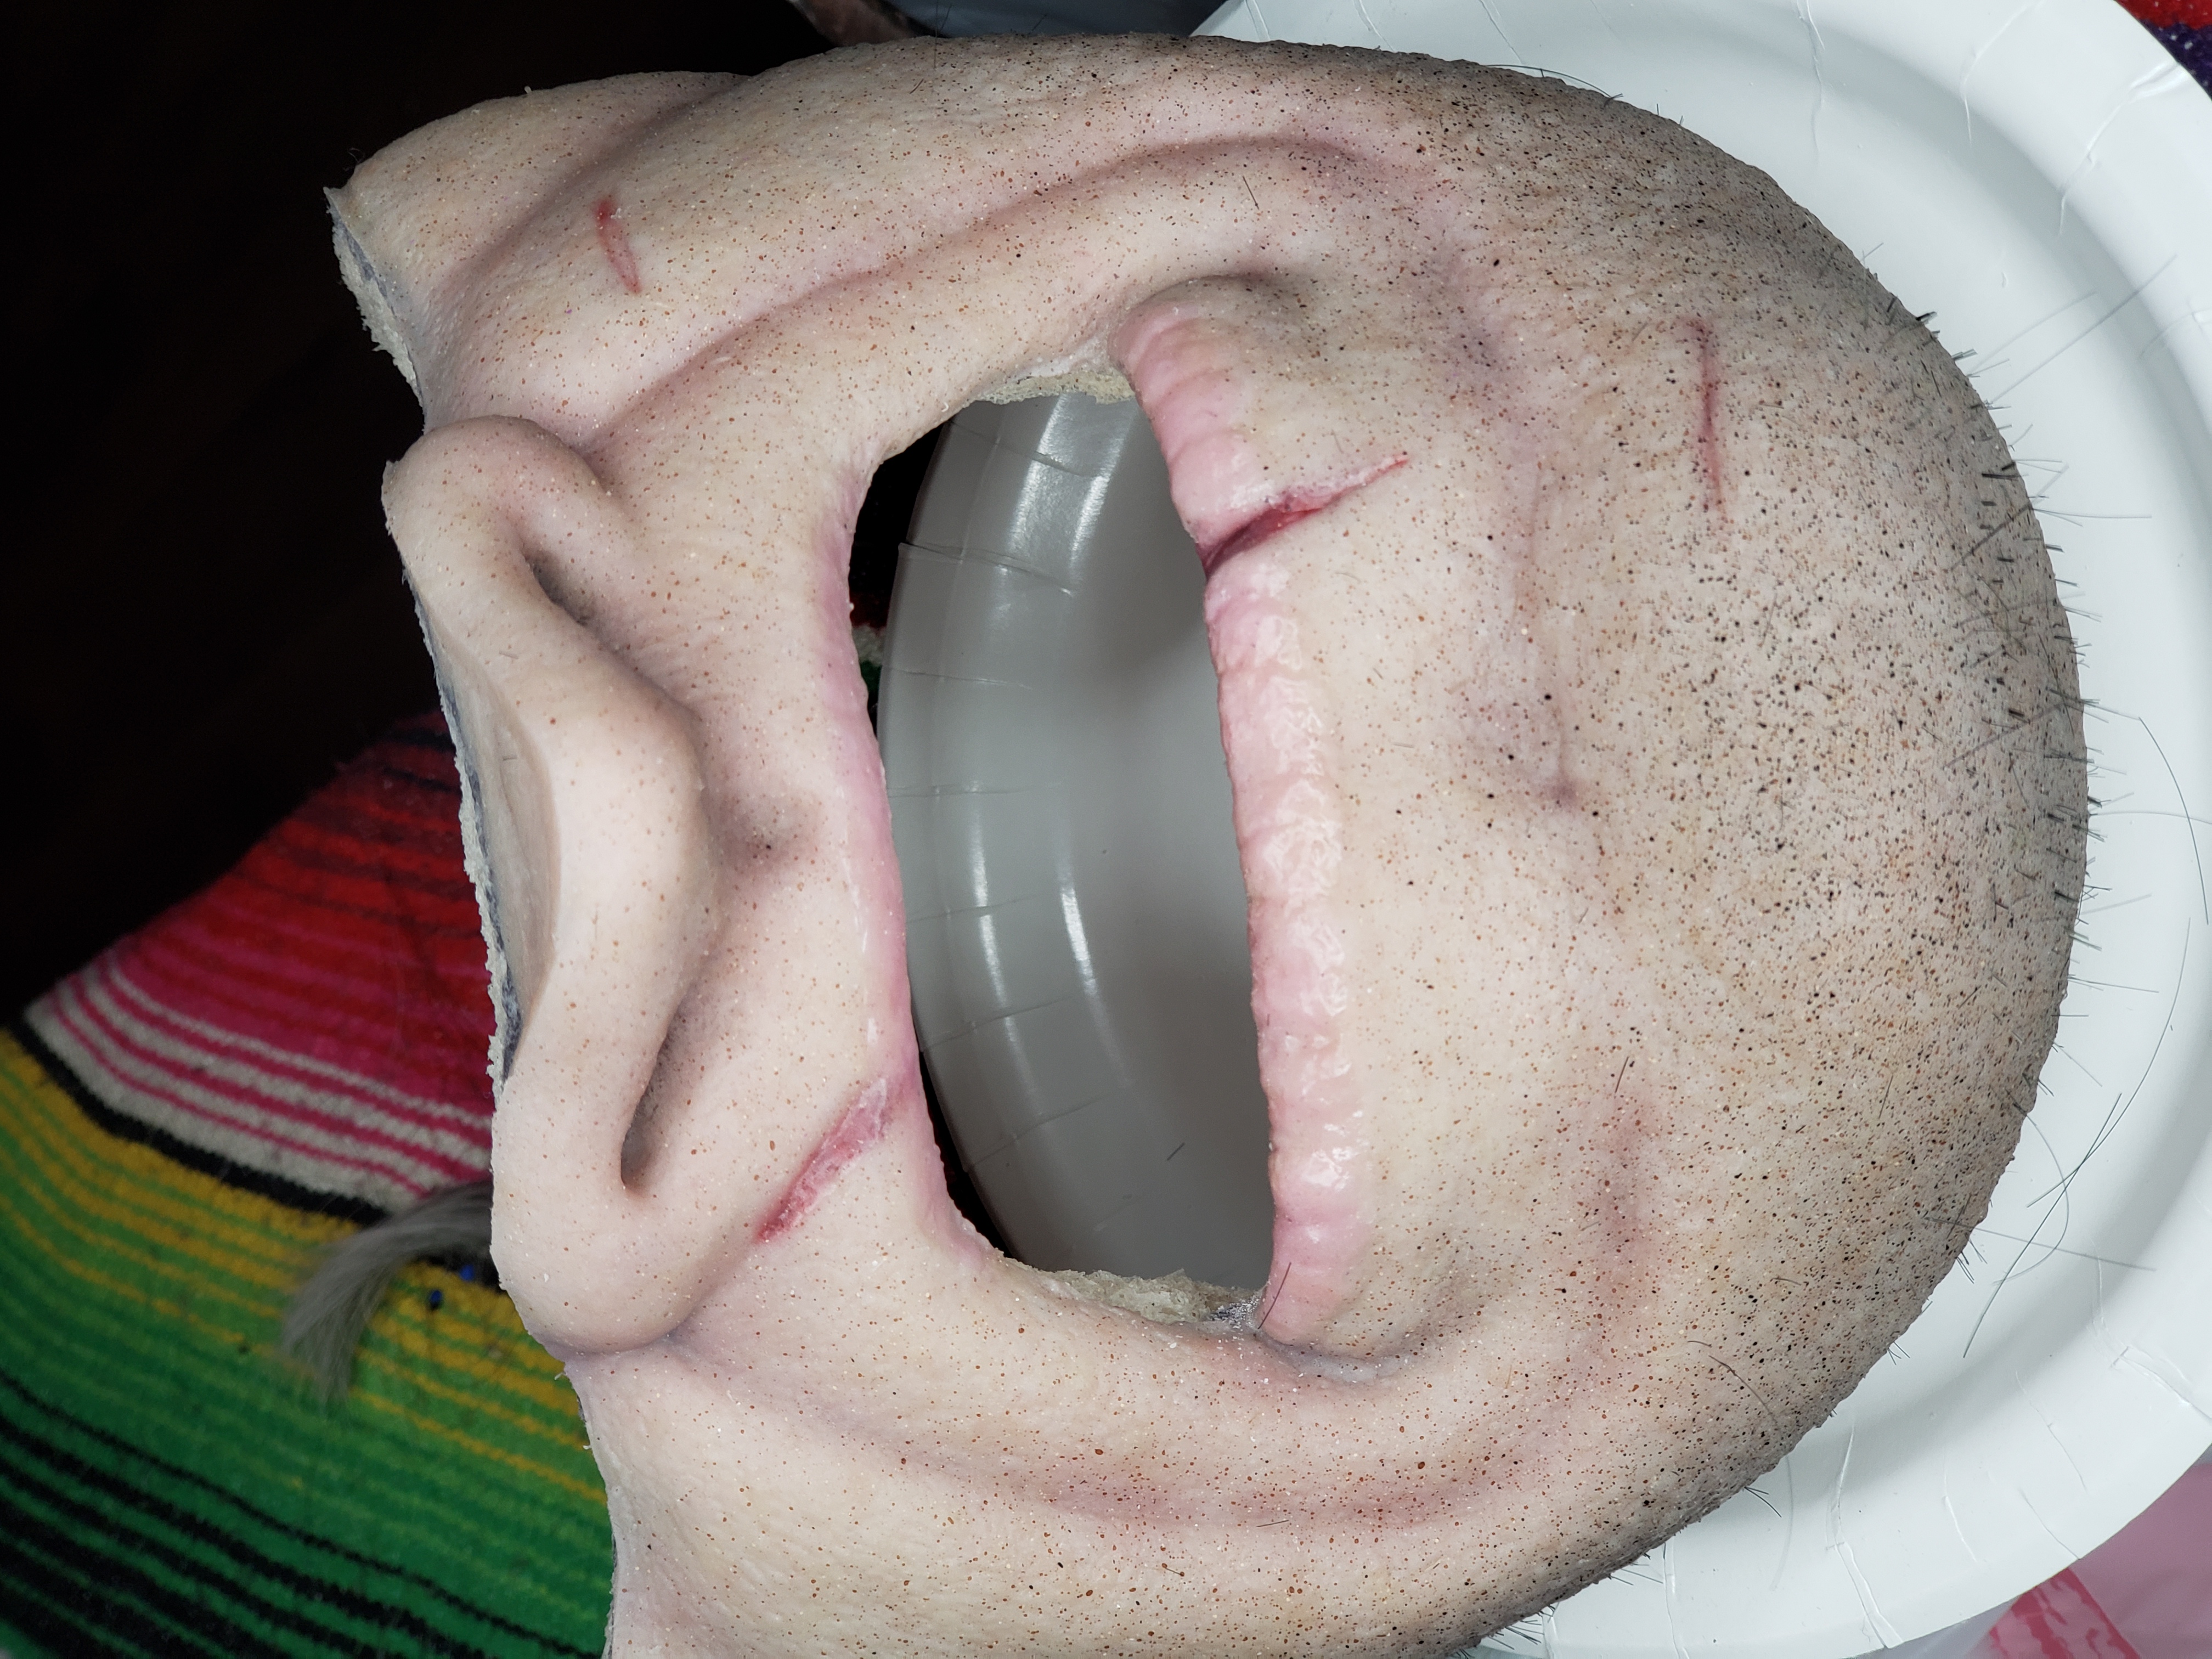 (The painted and hair-punched silicone chin.)
After a quick and rough hair-punching session of the chin to enhance the gruff, disgruntled appearance, it was time to attach the cowl and chin together using cyanoacrylate on each polyfoam counterpart.
 (Work-in-progress attaching the cowl and chin together.)
Making Fake Teeth and Eyes
With the head now as one, we focused on the teeth. I didn't want our Batman to have a perfect billionaire smile. I wanted the teeth of someone who gave up a little bit, who didn't care if they had chipped or broken teeth, but, most importantly, had an underbite as if being led by his chin at all times. Using the Stan Winston School courses by Cynthia Garza and John Cherevka on teeth, we tackled it similarly but used a urethane resin instead of dental acrylic simply because it was what we had, and we’re not familiar with dental acrylic yet.
 (The sculpted teeth after just being molded.)
For eyes in the past, we’ve had great success using a flat mesh design to help with eye lenses and hiding eye holes, but for this design, I really wanted the eyes to be domed just to give them more depth and a demon-like appearance. To keep it low effort, we used our laser cutter to design the same mesh figuration and lasered it into halved ping-pong balls to act as our Batman's demon-like domed eyes.
 (The full Batman mask being assembled. The eyes were made out of cut-in-half and then laser-mesh-cut ping-pong balls.)
Sewing the Batman Costume
With the mask finished, we could turn our focus back on the body. Using the muscle suit on the mannequin, I patterned out the suit using plastic wrap and masking tape to transfer the pattern onto four-way stretch fabric, doing quick work with our Serger sewing machine to make our heroes underwear onesie!
 (The patterned-out suit using plastic wrap and masking tape to transfer the pattern onto four-way stretch fabric.)
For the gloves and boots, we kept it very simple by sewing pleather cover extensions to existing gloves and boots. We added EVA foam fins to the gauntlets to make them safe yet iconic in silhouette. Using the same pleather for the cape, we added a royal blue four-way stretch liner with snap connectors for easy on and off points near the chest/cowl line.
 (Mockup of the bat symbol pinned on the Batman suit.)
DIY Batman Accessories
What is a Batman without his accessories? After creating a mockup of the chest emblem, we spent a session sculpting the chest symbol, a pouch, and a Batarang. I really wanted to show the chest symbol being used as a target as the Batman lore intended, specifically in Frank Miller's version after Two-Face has shot Batman directly in the chest, revealing body armor. All sculpts were molded in silicone and then cast multiple times in either polyfoam or urethane resin.
 (The Batman chest symbol sculpt in progress.)
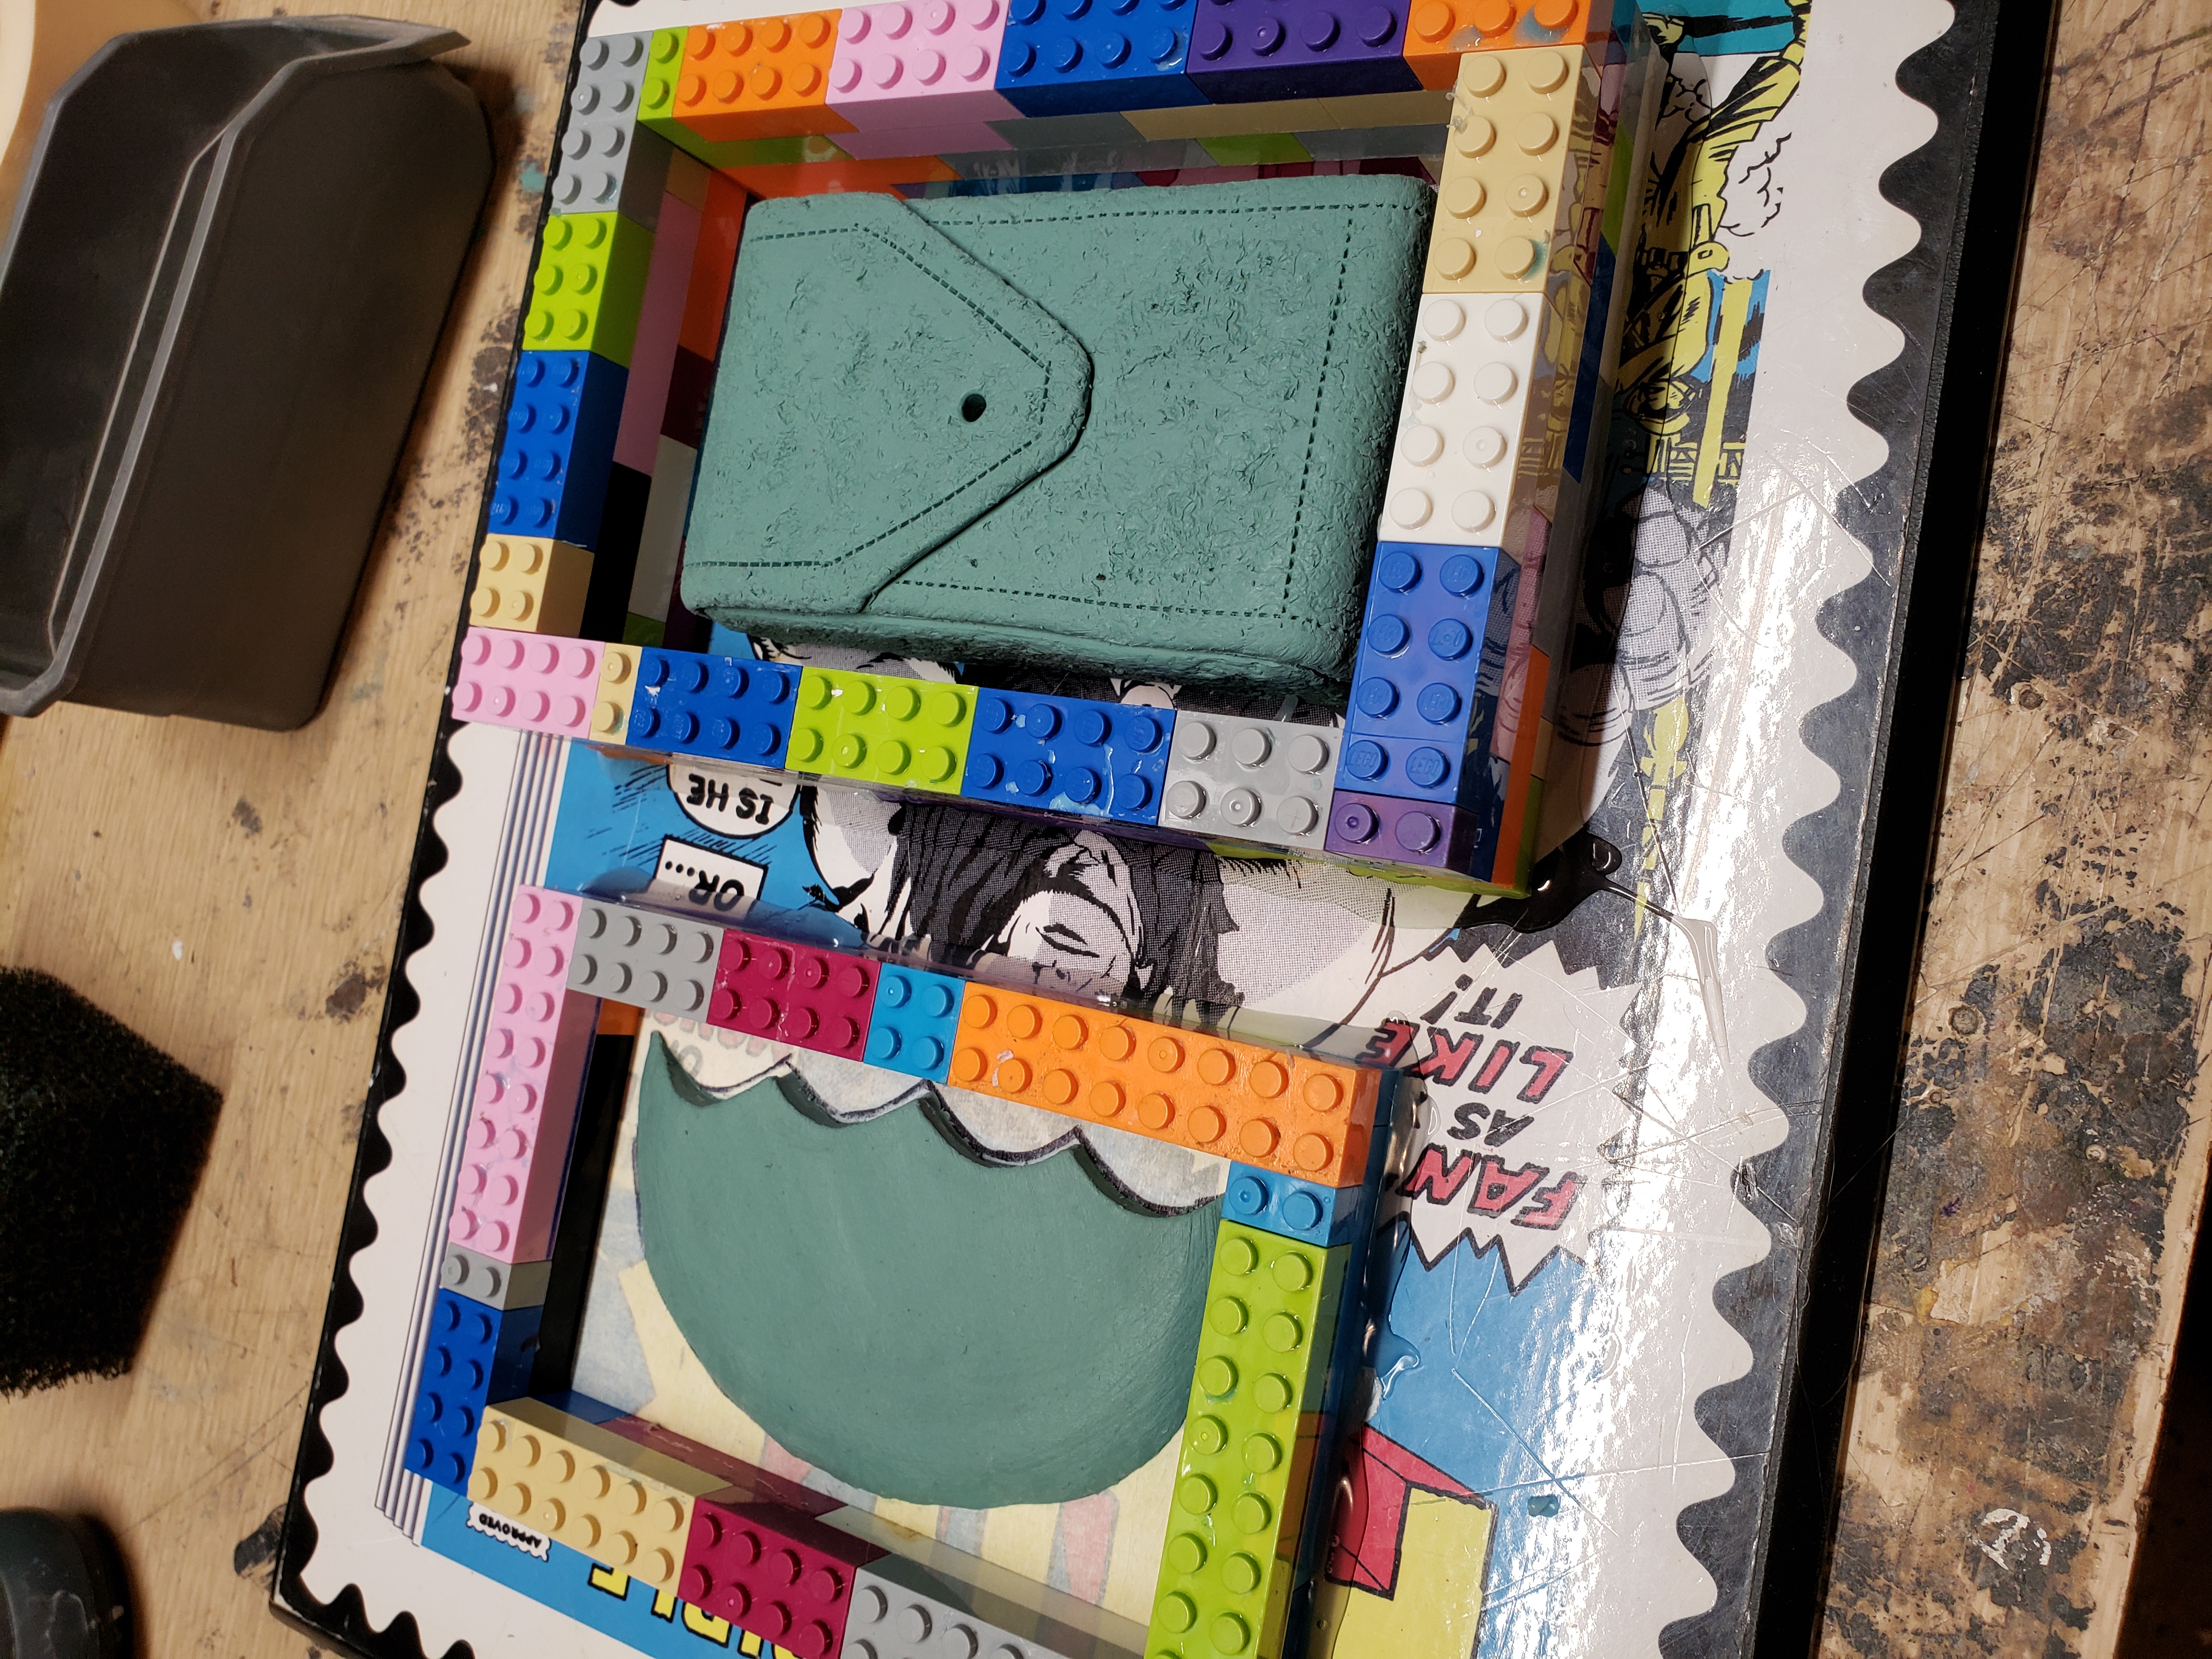 (The Batarang and pouch ready for the molding process.)
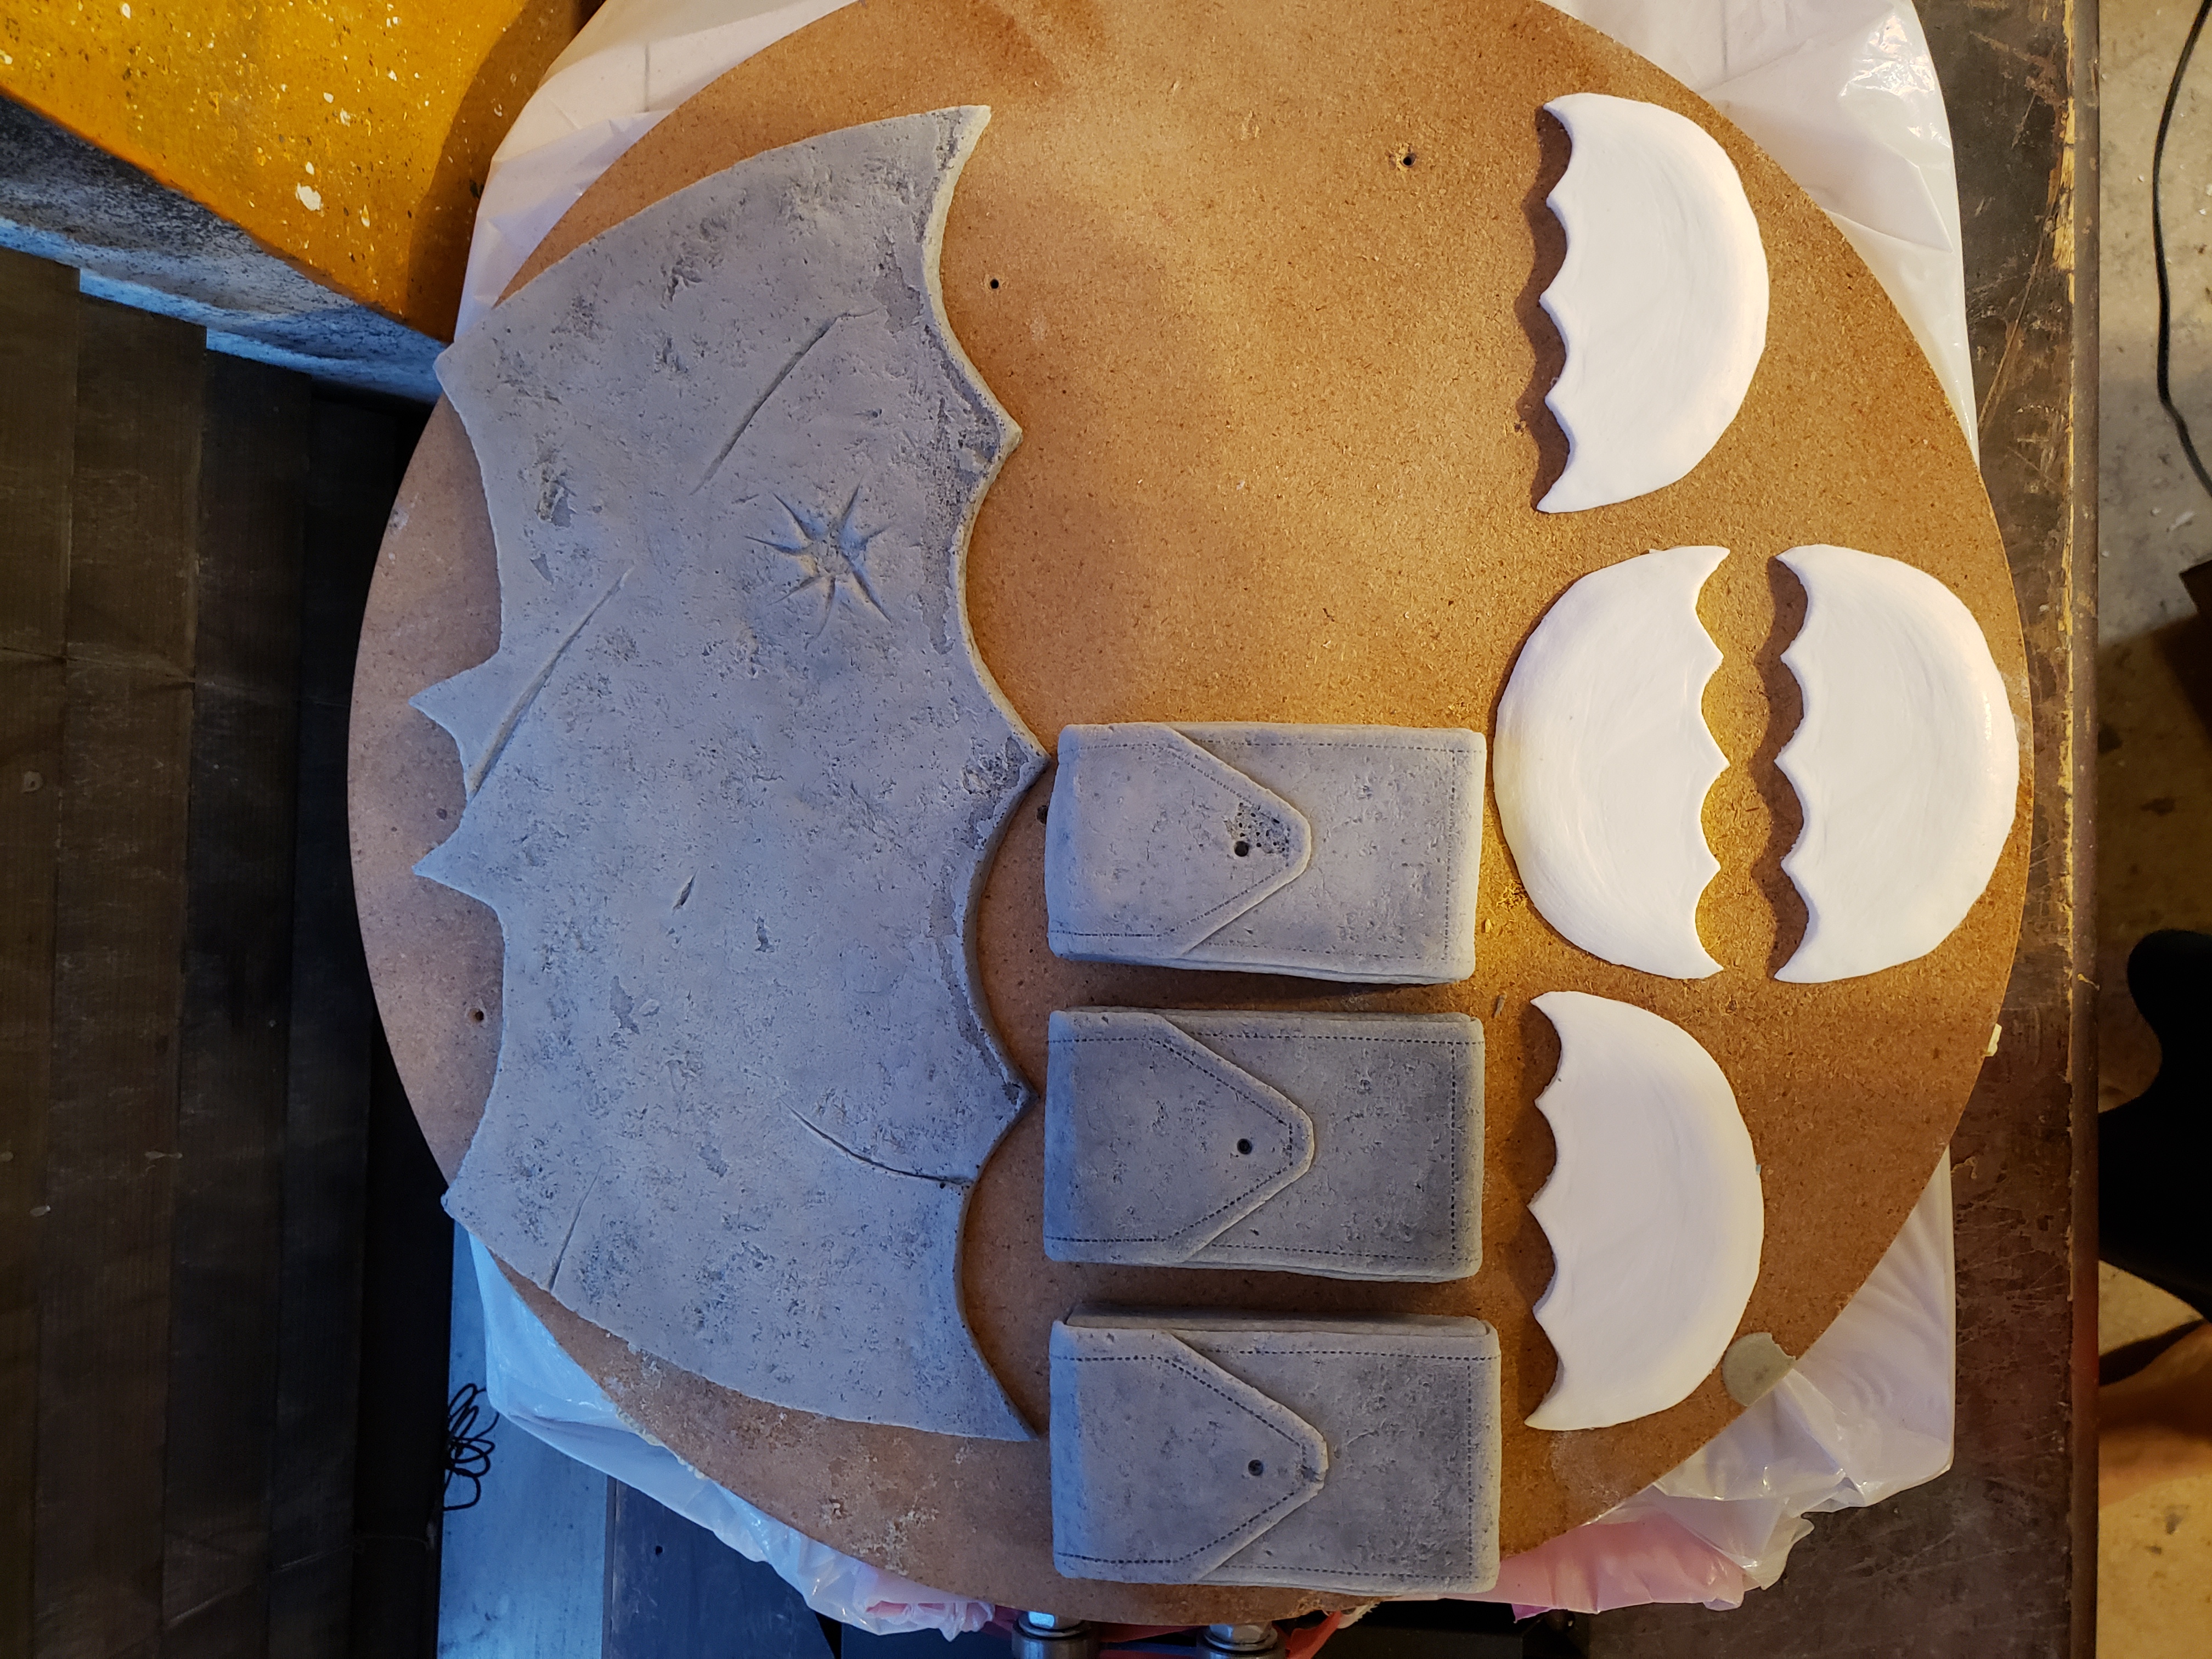 (Raw castings of the bat symbol, Batarangs, and pouches.)
With all the pieces painted and put together, it was time for me to stand back and allow Shelley to bring this character to life! Watching her run around the Convention floor freely, needing little to no assistance, was such a joy as the surprised looks on people's faces washed over them when they realized they were talking to a woman underneath all that muscle and grimaced rage!
 (2024 Halloween Costume Contest winner creation, The Dark Knight Returns, a.k.a. Batman by Mikey & Shelley Karrver.)
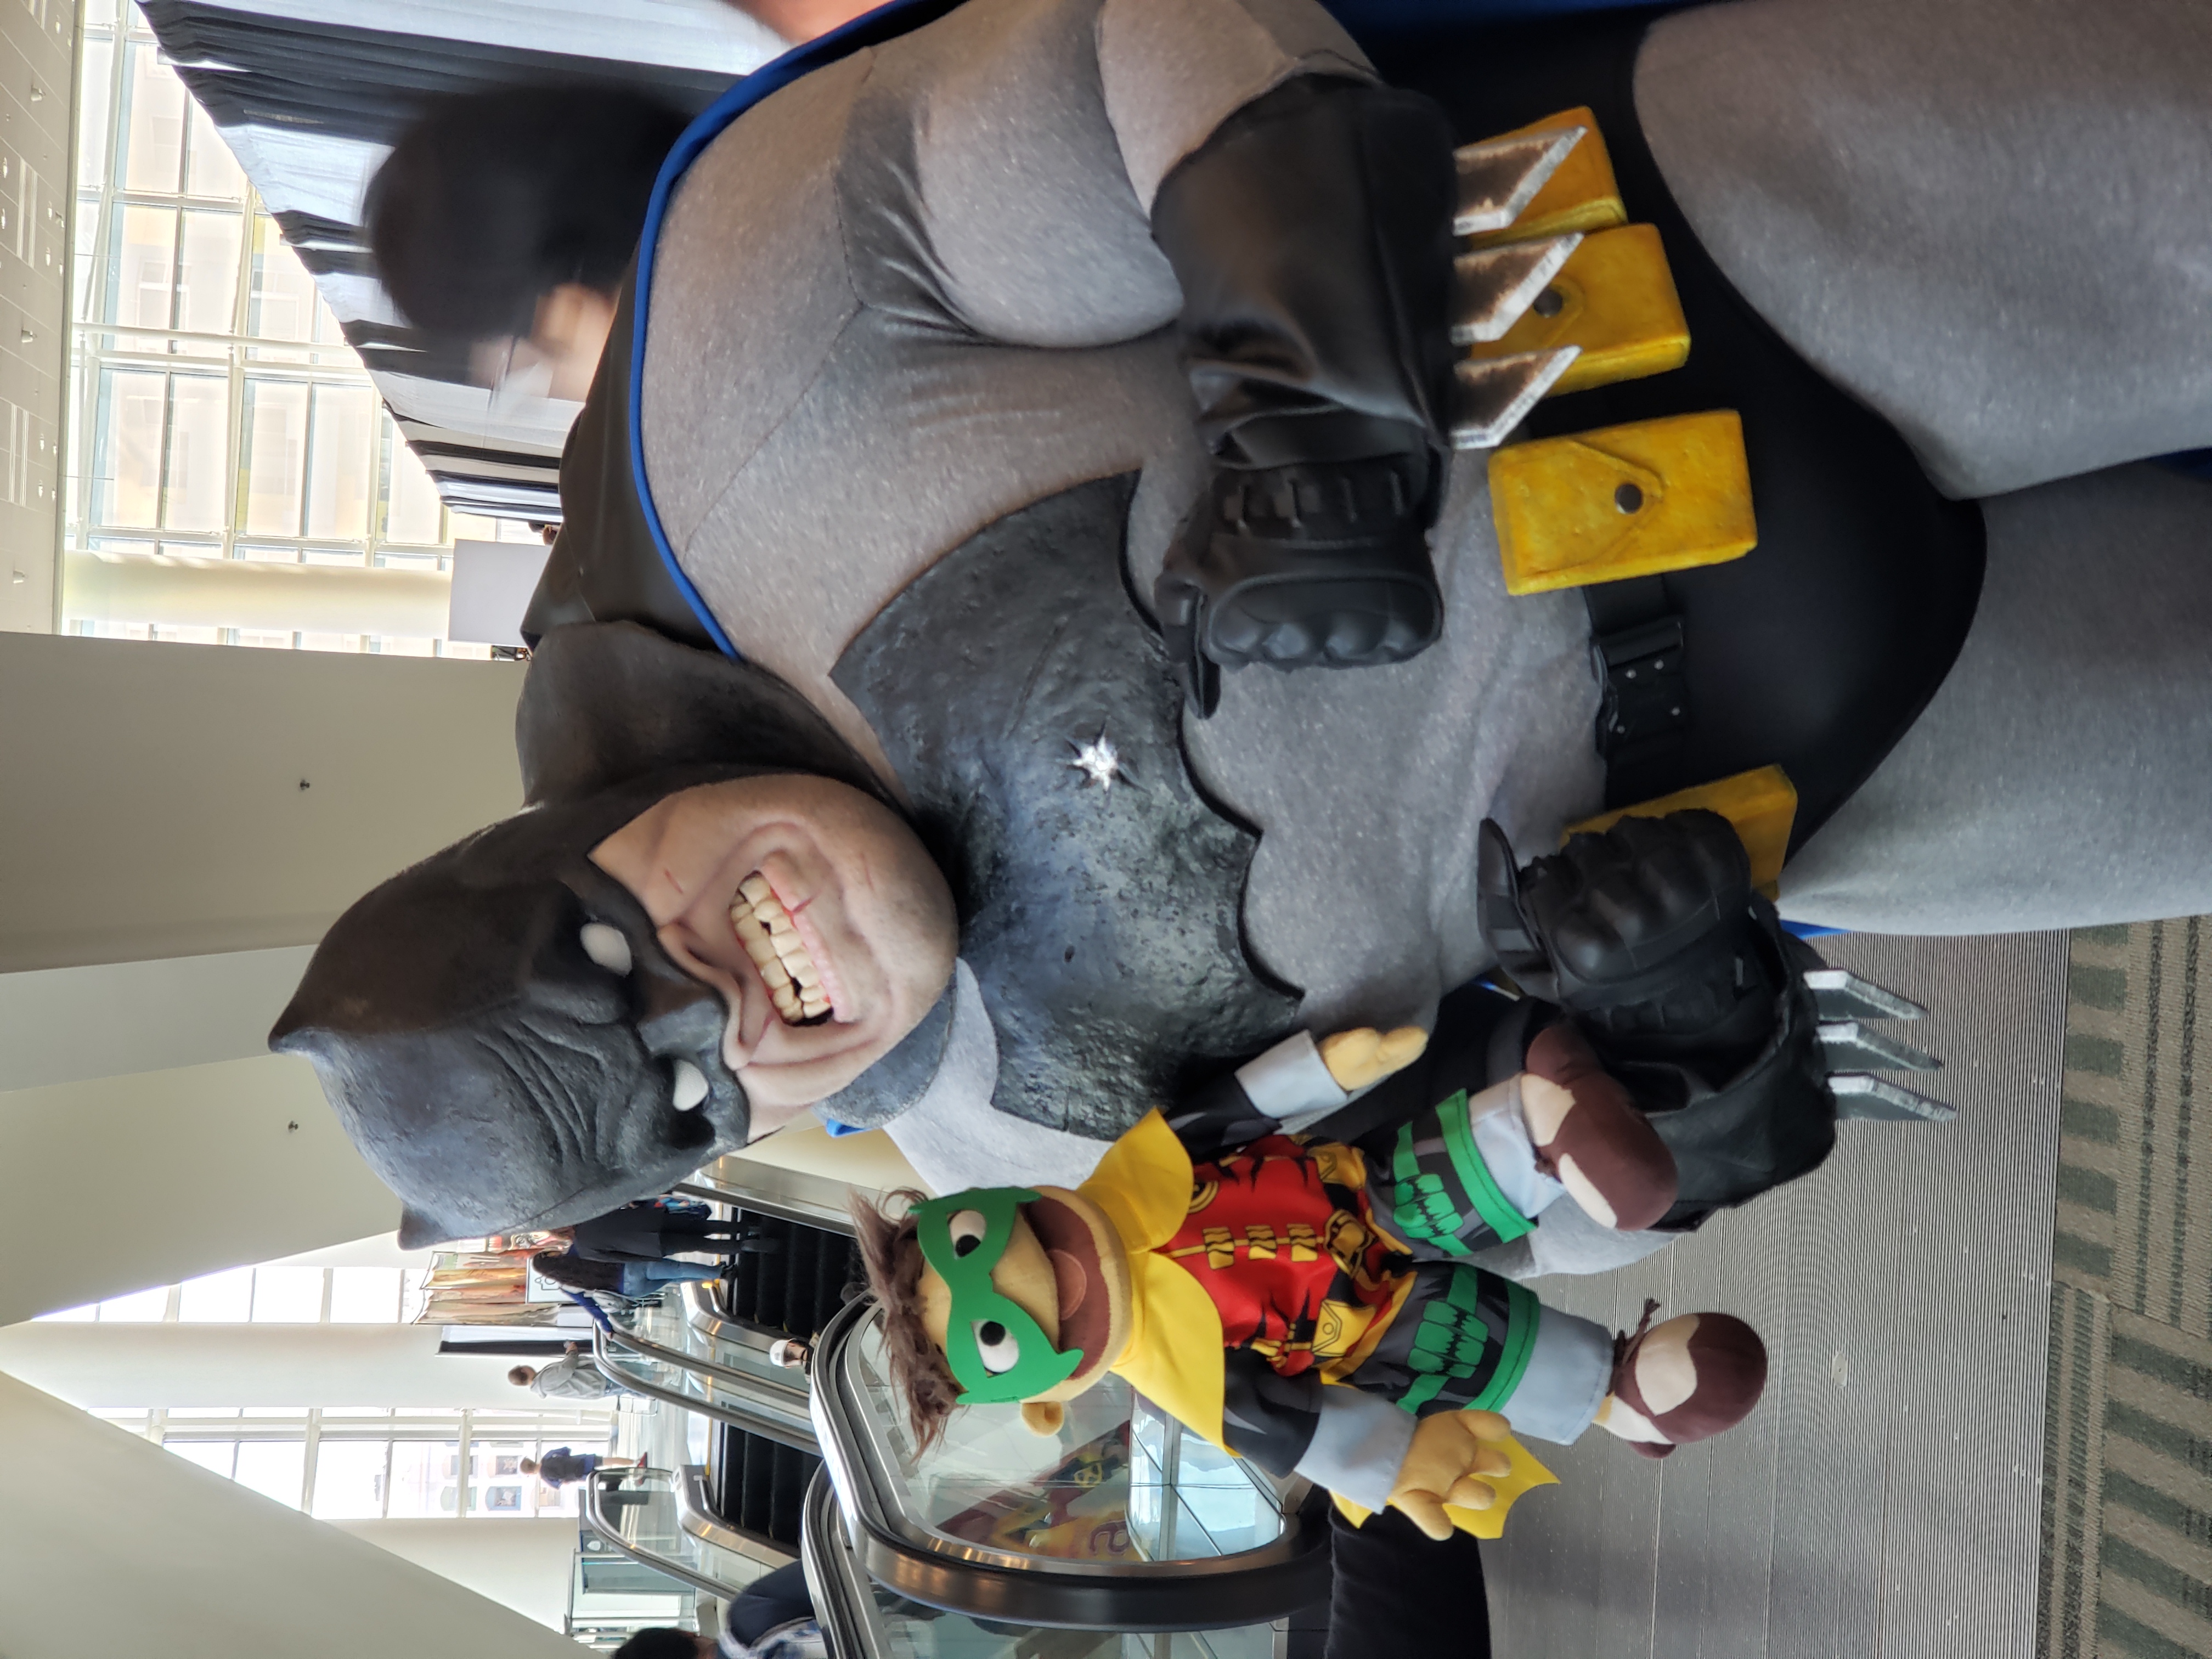 (Shelley Karrver in the Batman suit poses with a Robin puppet.)
After completing our Batman project, we dove into our biggest project to date: a 6’2” Krang from the Teenage Mutant Ninja Turtles franchise using all the skills I've acquired over the last decade. Currently working on a full silicone mask based on Hudson from the Disney series Gargoyles and eyeballing our first animatronic build for 2025.
 (Shelley Karrver posing in the 6’2” tall Krang costume from TMNT.)
Thank you to the Stan Winston School team for holding these contests throughout the year, allowing us to push ourselves, and inspire us through all the other artists that apply every year. I’ve been entering since 2017, and even after spending a weekend writing this up, it doesn't feel real, so thank you very much from the bottom of my heart.
Check out the Grand Prize unboxing video here, featuring the Pterodactyl mask by Immortal Masks!
- Mikey & Shelley Karrver
You can follow Mikey & Shelley Karrver on Instagram and YouTube.
Check out the 2024 Halloween Costume Contest Winner Announcement: The Dark Knight Returns, a.k.a Batman
View all the contest entries: 2024 Halloween Costume Contest
Watch Adam Savage’s Tested interview with Shelly and Mikey Karrver about creating their Batman costume inspired by The Dark Knight Returns:
SWSCA Courses Mikey & Shelley Karrver Used to Create Their Contest-Winning Batman Costume
- How to Make Fake Teeth with Cynthia Garza
- How to Paint Realistic Silicone Skin - Silicone Painting Techniques with Tim Gore
How to Make a Dinosaur course series with Ted Haines:
- Part One: Design, Foam Carving & Fabrication
- Part Two: Carving Teeth, Adding Detail & Texture
- Part Three: Painting & Finishing
Silicone Mask Making course series with Immortal Masks:
- Part One: Epoxy & Fiberglass Molding with Mike Cooke
- Part Two: Finishing the Epoxy & Fiberglass Mold with Mike Cooke
- Part Three: Casting & Demolding with Andrew Freeman & George Frangadakis
Platinum Silicone Mask Painting course series with Jamie S. Grove:
- Part One: Surface Prep, Mixing Paint & Airbrushing Flesh Tones
- Part Two: Eyes, Fine Detail, & Finishing
Painting Silicone Skin - Realistic Flesh Tones with Jamie S. Grove
Advanced Creature Teeth course series with John Cherevka:
Do you want to learn to sculpt, mold, cast, and paint? Try our online courses with Hollywood's Master FX Artists: FREE 7-Day Trial.