
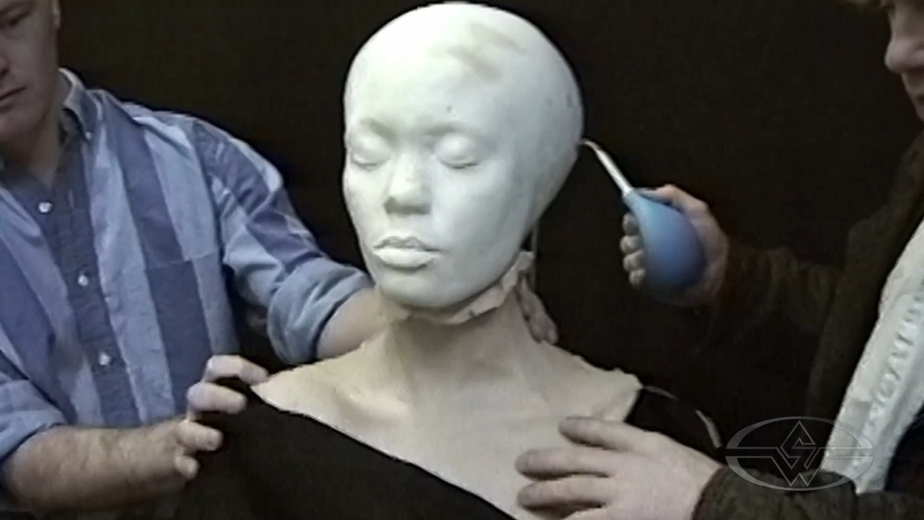
In this behind-the-scenes video from the Stan Winston Studio archive, Academy Award-nominated makeup effects artist, master monster maker, and co-founder of Legacy Effects Shane Mahan (the Terminator franchise, Predator 1 & 2, Aliens) reveals how to create a pulsating neck effect planned for Yvette (Thandiwe Newton) in Interview With the Vampire (1994).
Jump To Section
- The Bladder Effect for Yvette in Interview With the Vampire (1994)
- How the Pulsating Neck Effect Works
- Tips for a Camera-Ready Bladder Effect
To watch the complete video, click the player above!
In this making-of video, Mahan, who was responsible for the vampire makeup design and coordination at SWS, shares tips and techniques to sink your teeth into for your very own bladder effect projects!
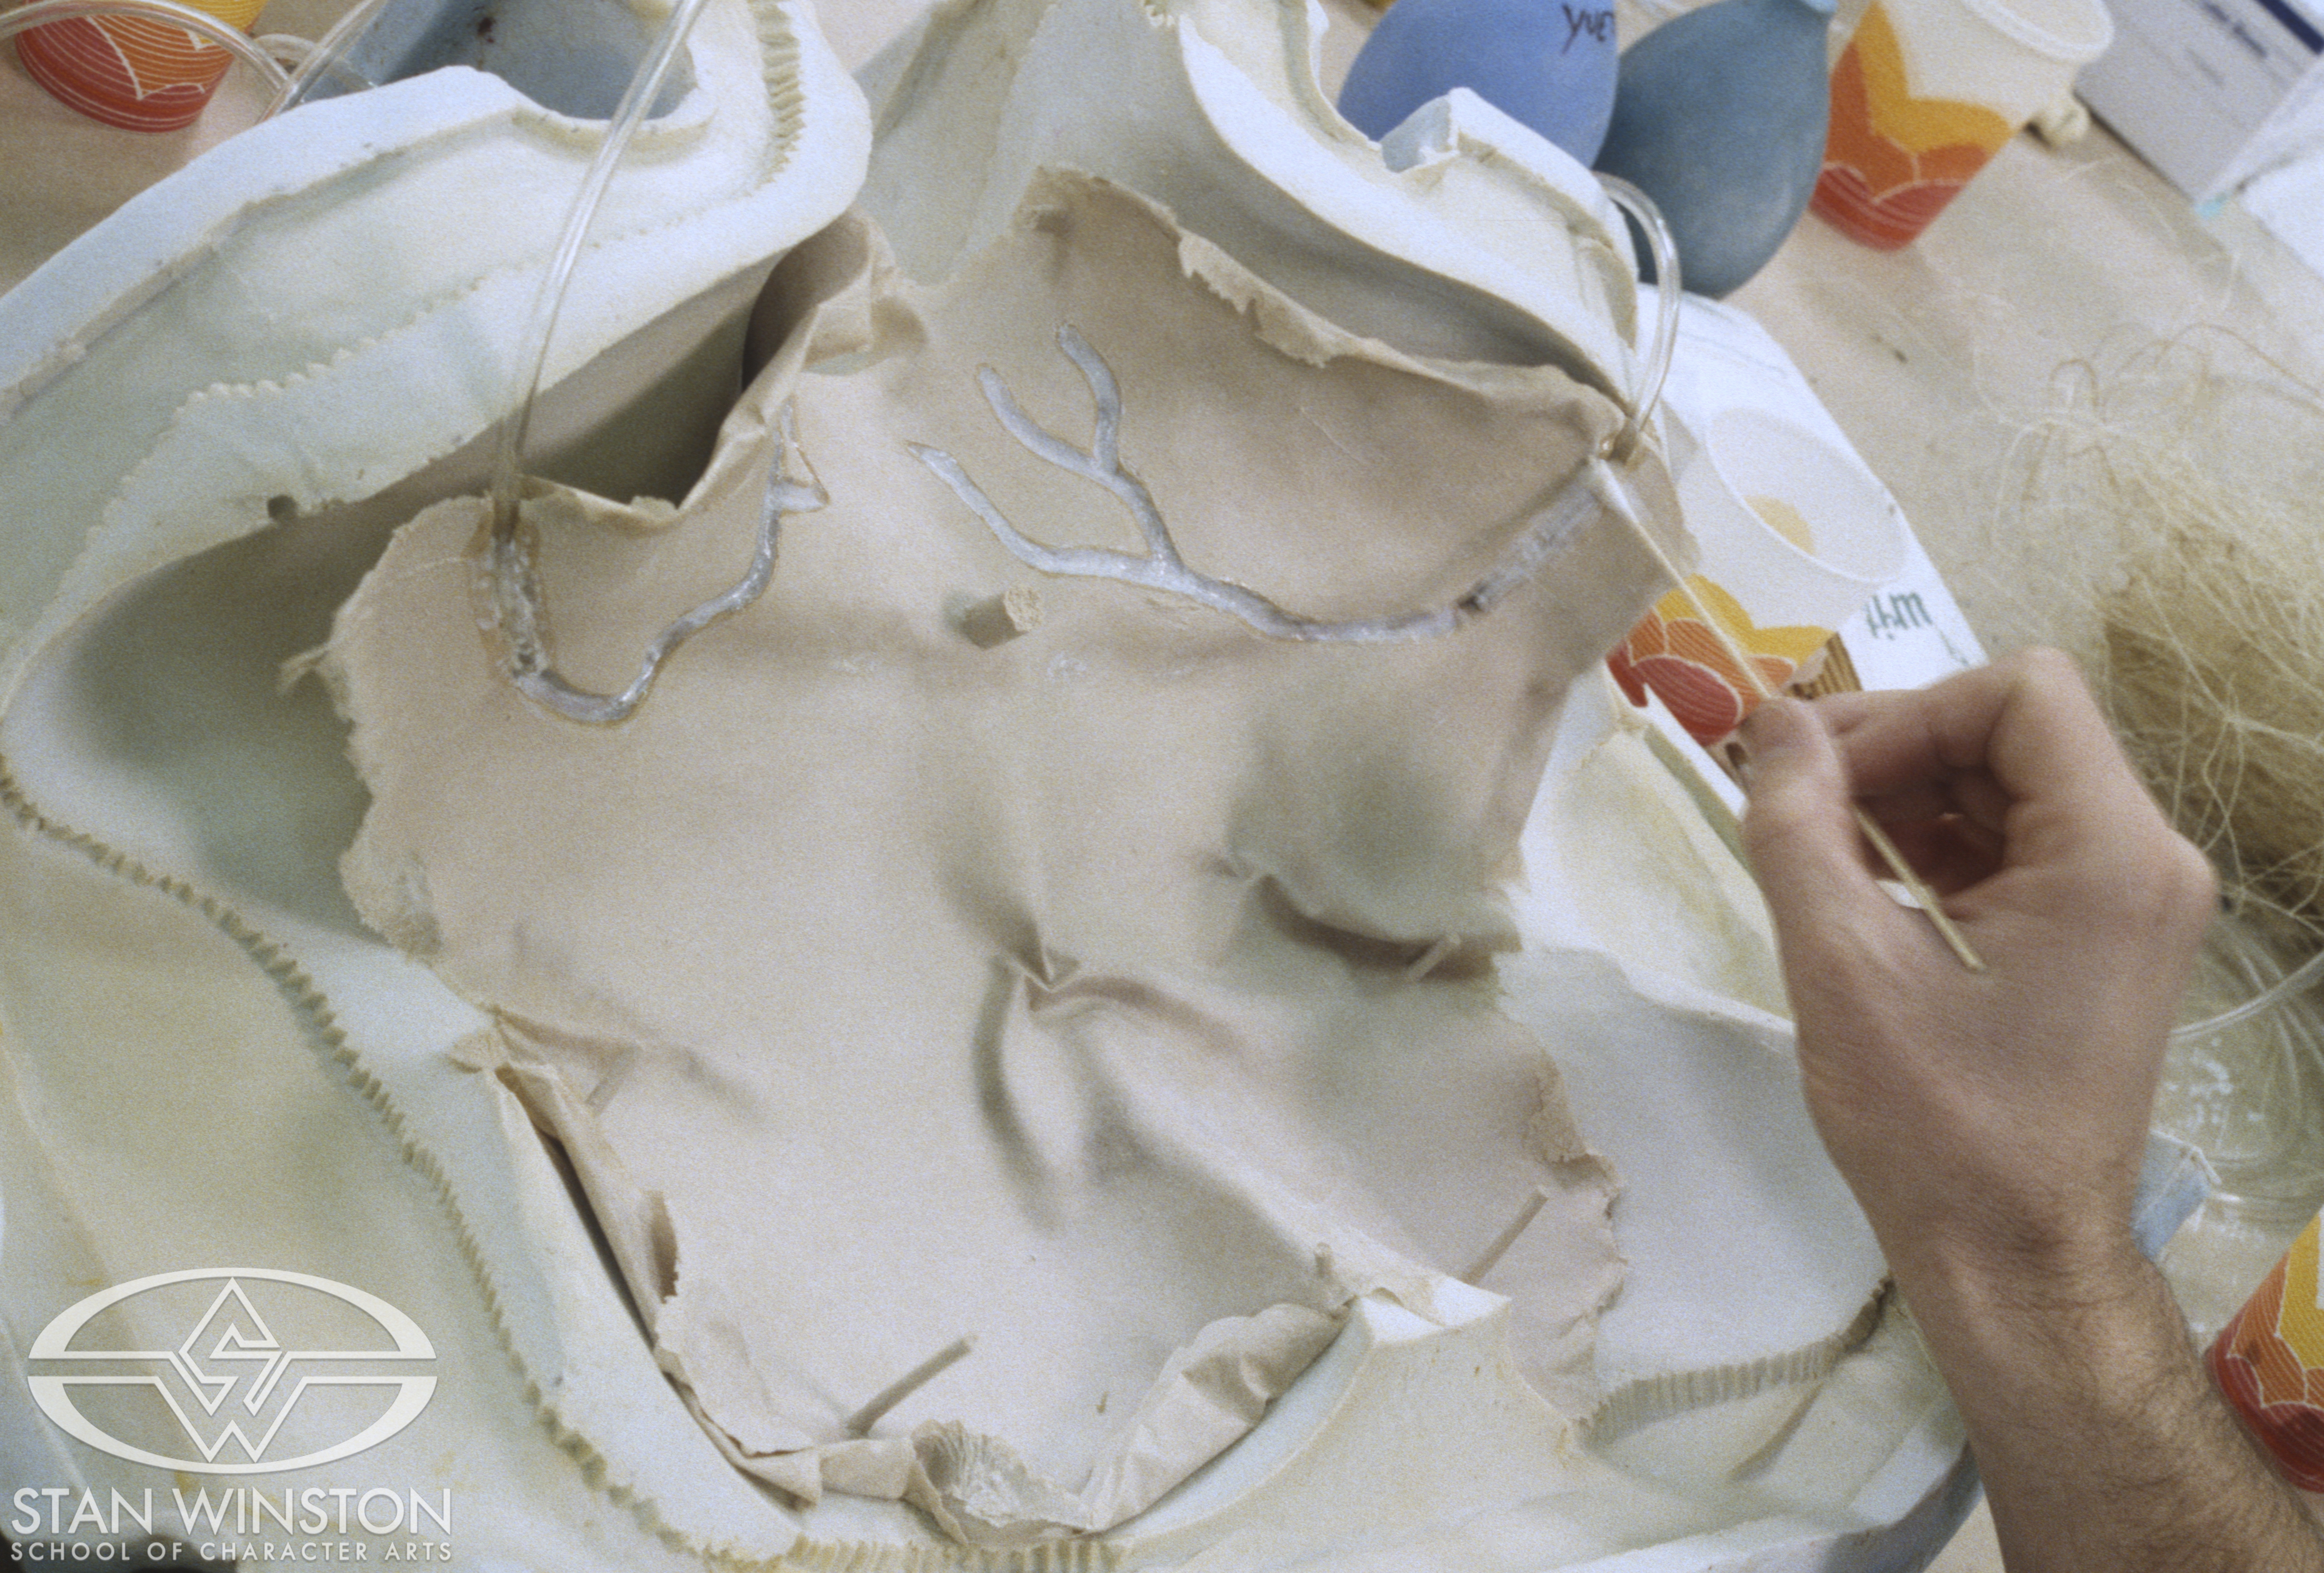 (Bladder tubing in a neck and chest prosthetic.)
The Bladder Effect for Yvette in Interview With the Vampire (1994)
 (Thandiwe Newton, who portrays the character “Yvette,” in Interview With the Vampire.)
Manan demonstrates the application of the prosthetic effect on a life cast of Thandiwe Newton. To achieve this pulsing neck effect, Mahan first places the front silicone blender piece so it fits under and is lined up with the collar bone.
Next, he runs the tubes from the squeeze bulb over the back leaving the bladder hidden under the false neck piece. The blender piece that covers the tubes is thin and should be pulled back tightly.
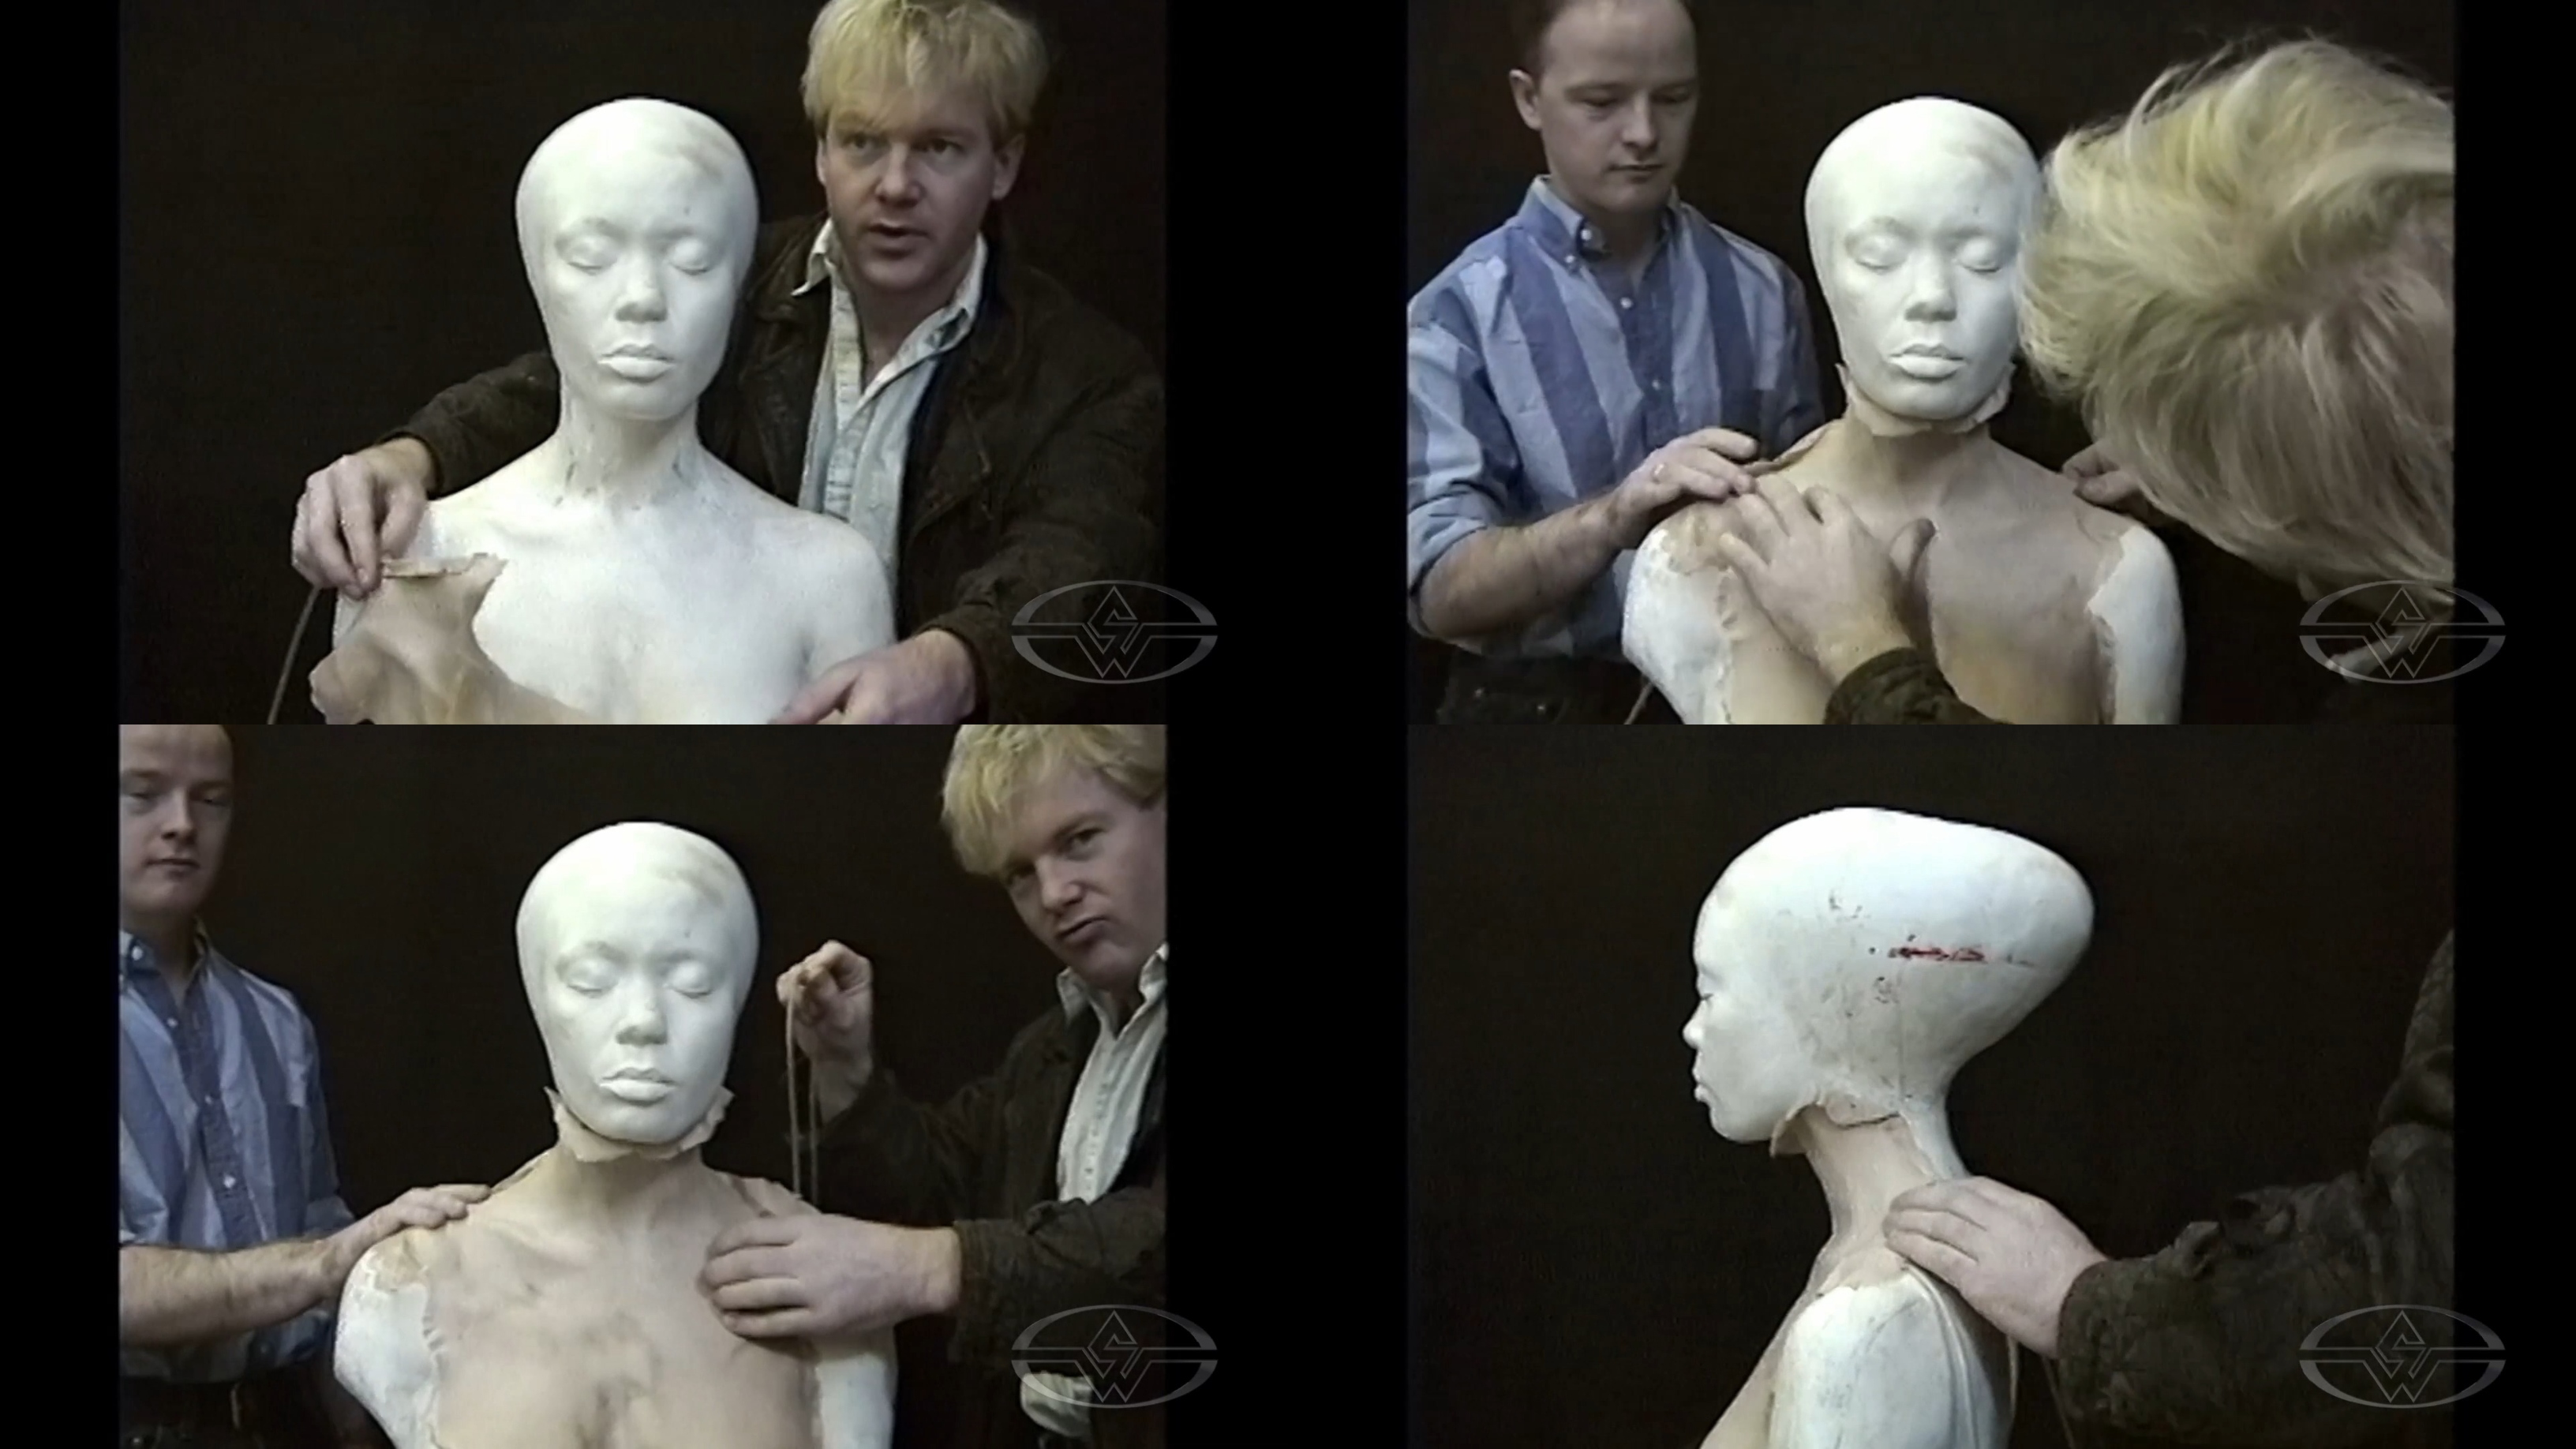 (Shane Mahan and special effects technician Lindsay MacGowan demonstrate where to place the front blender piece and bladder effect tubes.)
Mahan puts a back blender piece over the front piece to fit under the actor's hairline. Though the piece is a little loose in the demonstration, Mahan explains when gluing the piece down, it’ll fit snug and tight. The blend edge should fit and lay over the front piece, giving you a completely smooth neck for the effect.
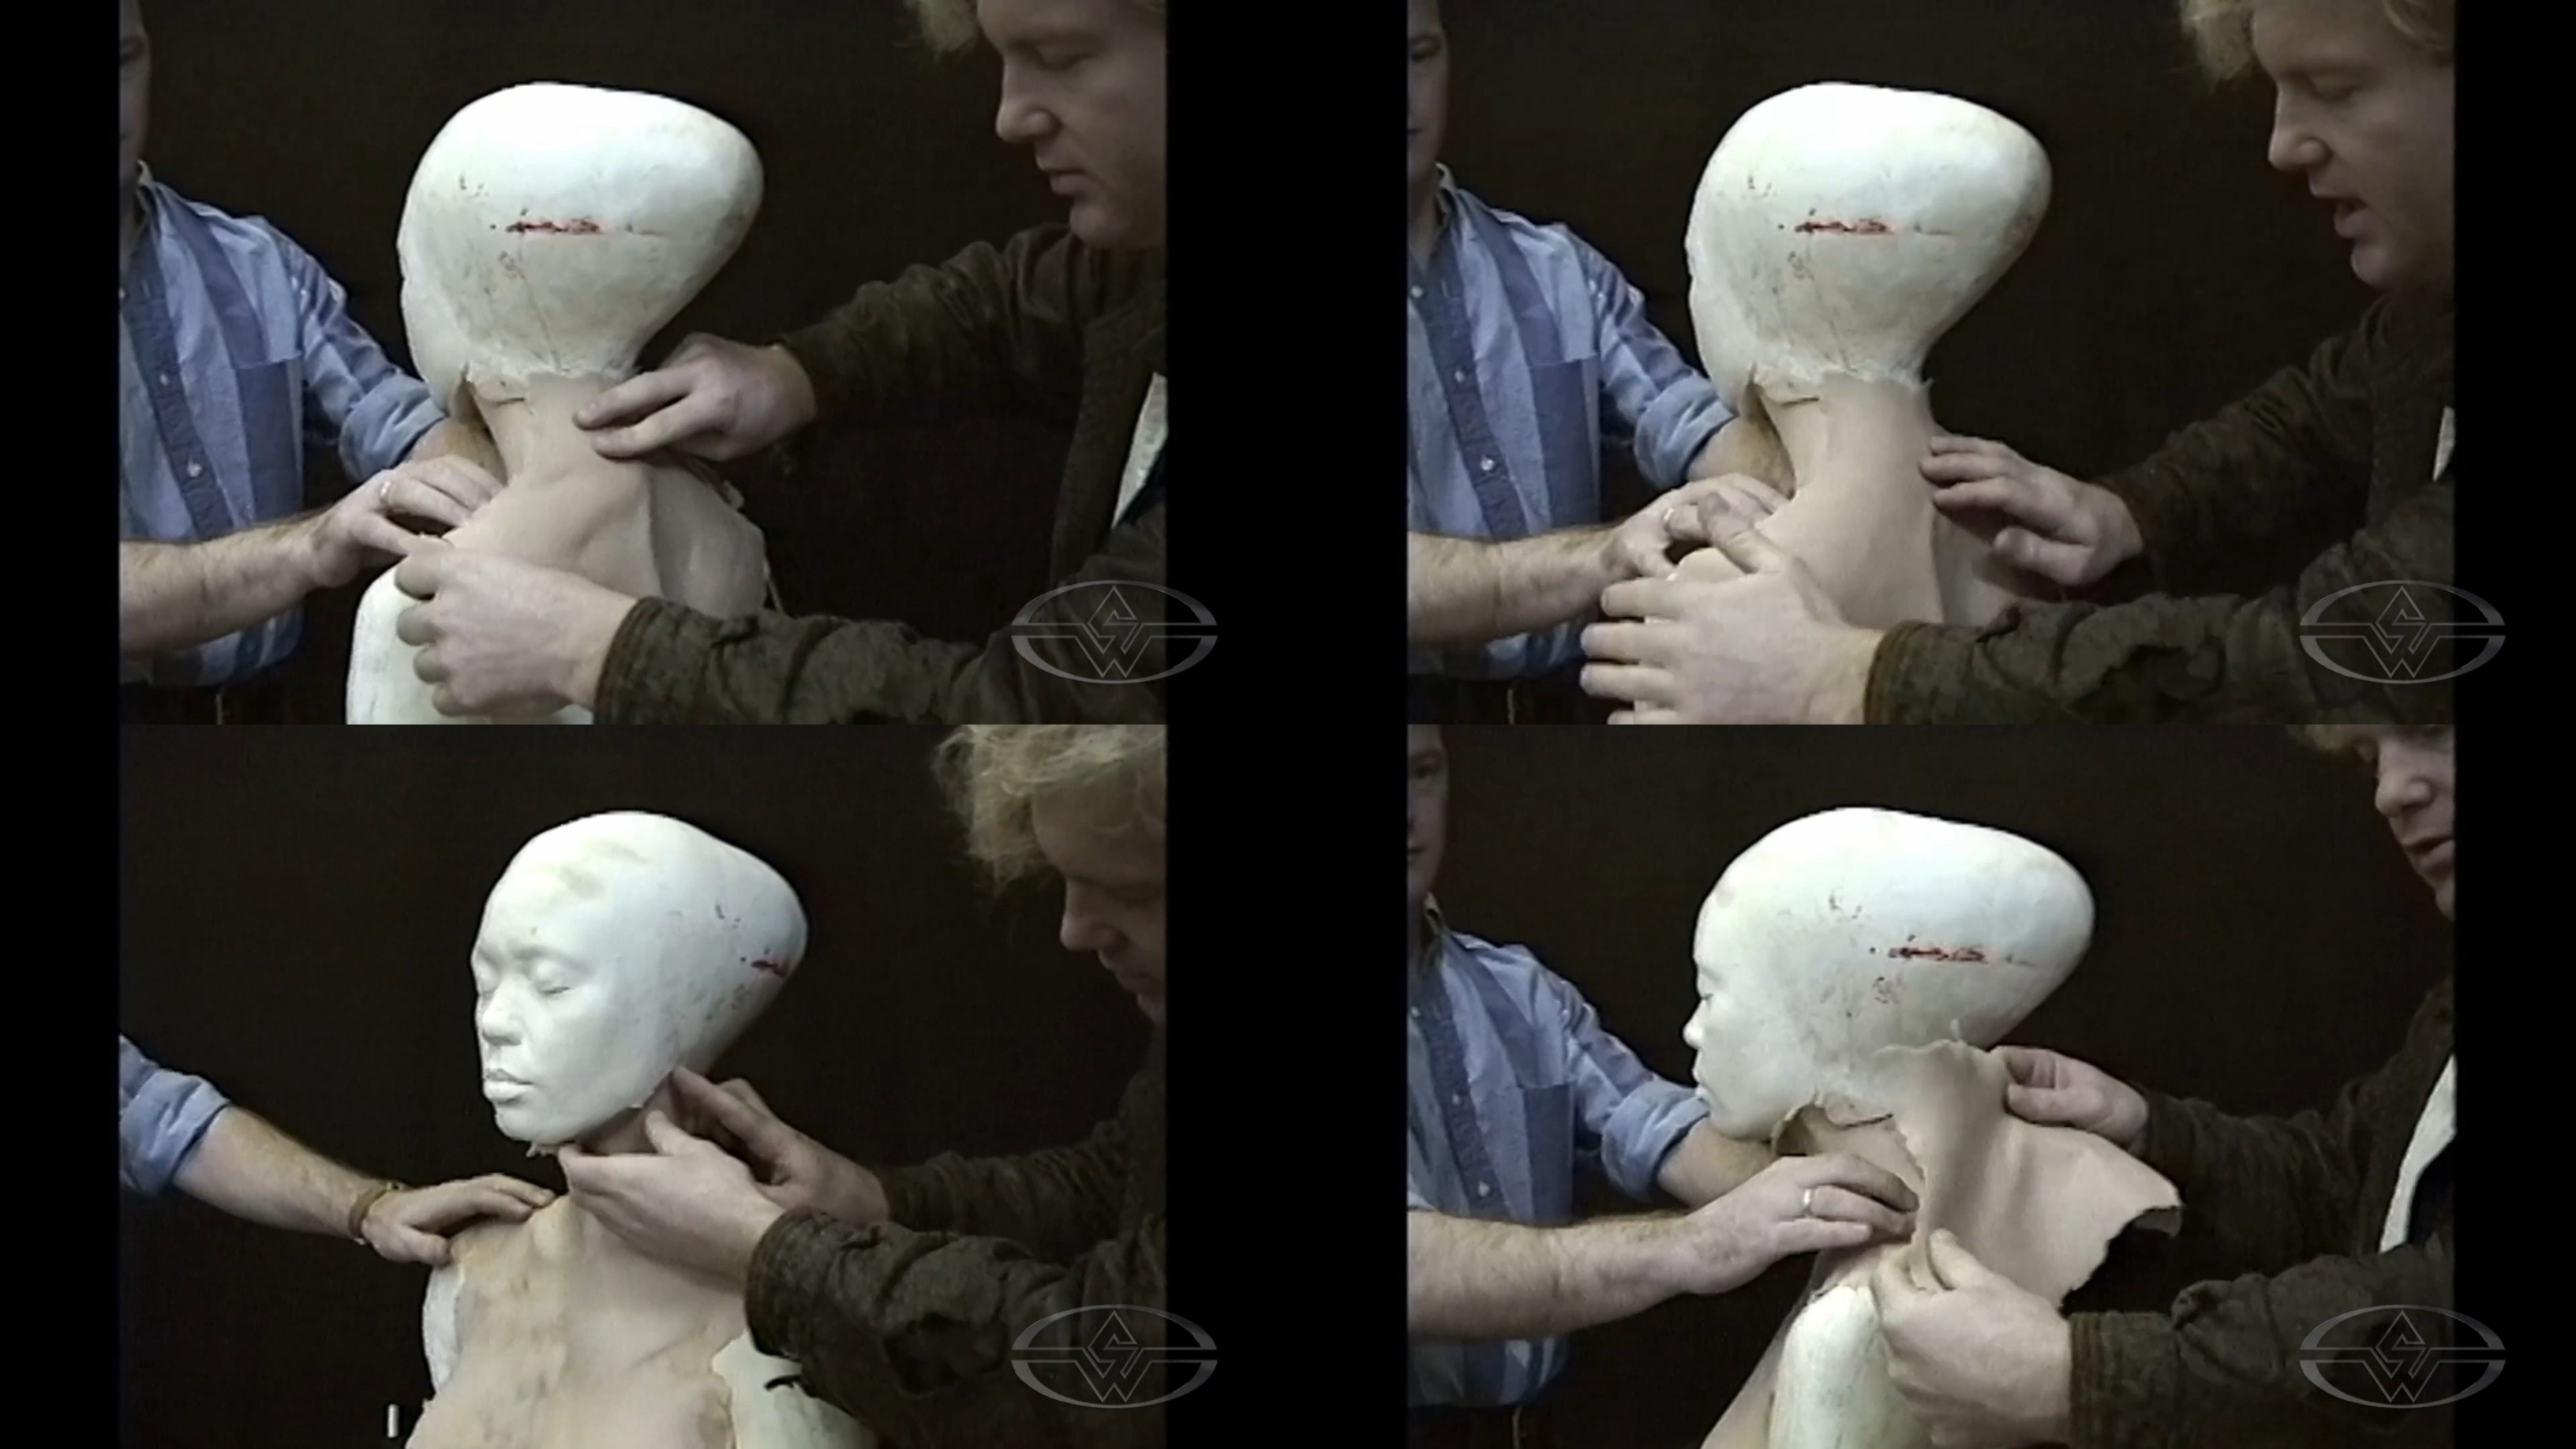 (Shane Mahan and Lindsay MacGowan show how the pieces should fit and where you can place additional, smaller pieces if necessary.)
Pro-tip: Small blender pieces that can fit underneath the very top of the neck can help mask the separation between the skin and the prosthetic if necessary, depending on your camera angle. If used, you would tuck them under the front piece and glue them down.
How the Pulsating Neck Effect Works
Mahan and MacGowan use a bit of cloth to show how Yvette’s costume must be carefully draped so it exposes just a portion of her neck. Separate hose lines attached to squeeze bulbs would need to be run through her costume.
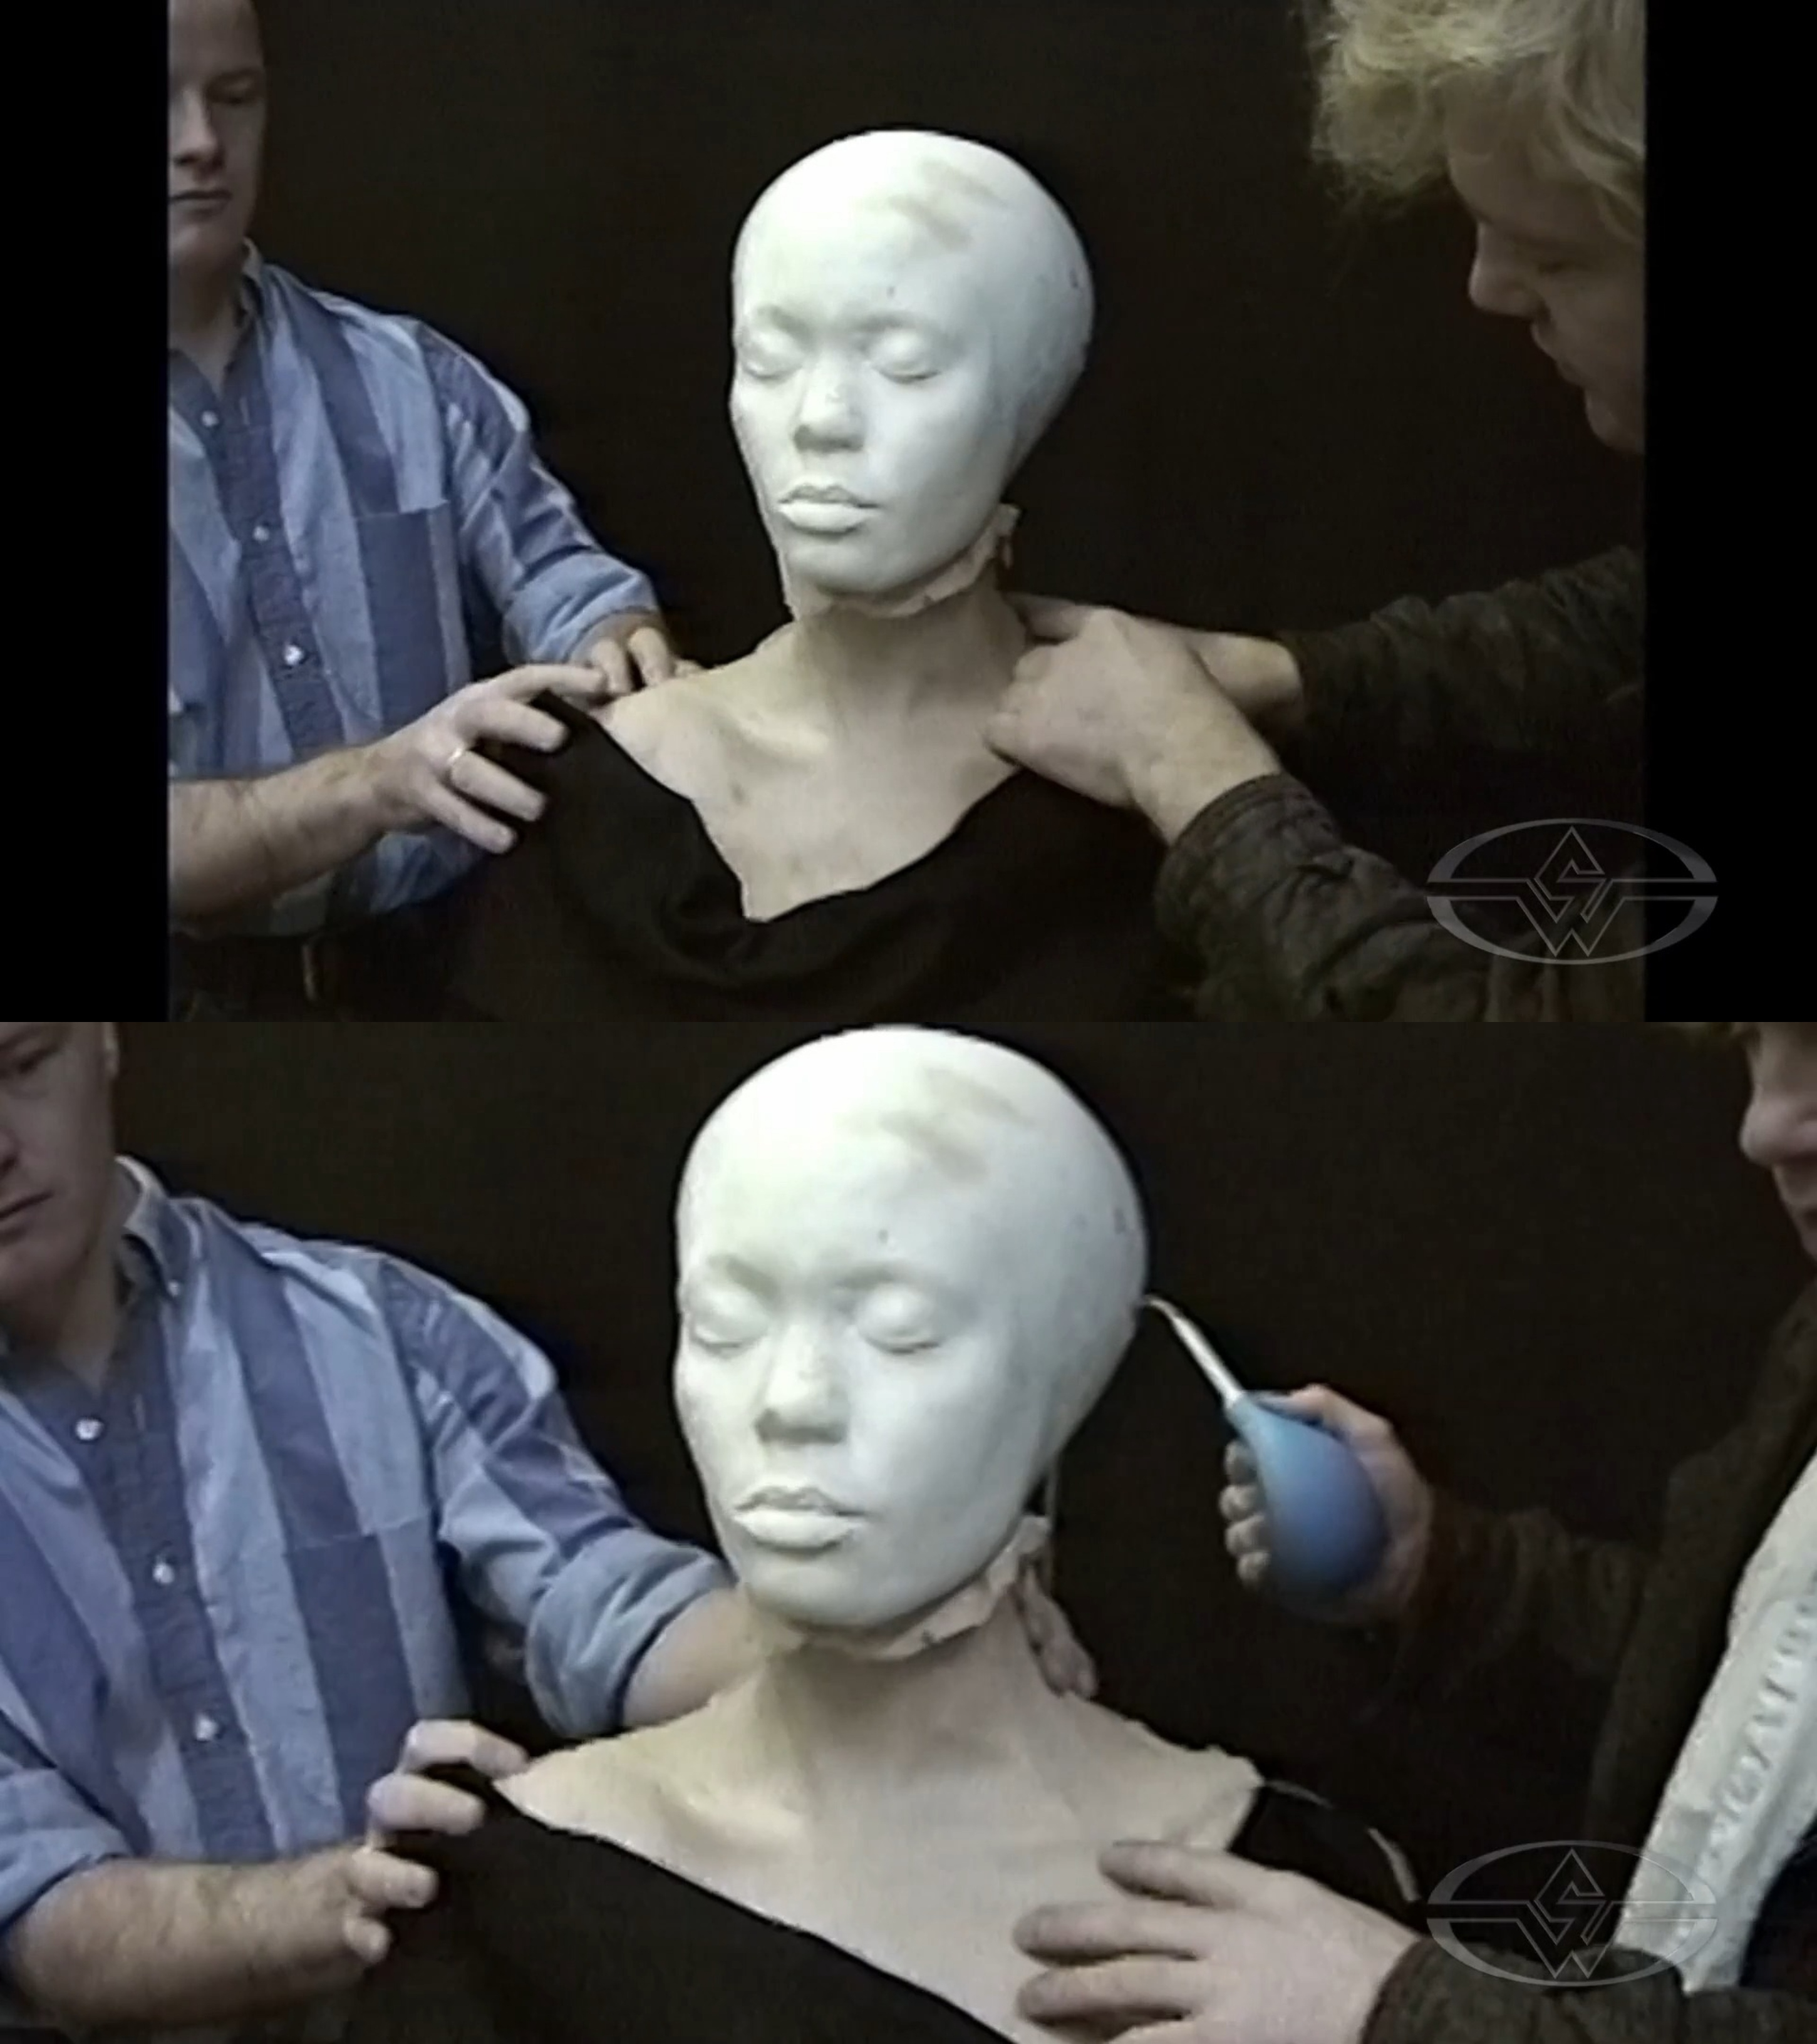 (Shane Mahan and Lindsay MacGowan present the pulsating neck effect.)
Once the blending pieces are secure and the seams are hidden, you're ready to start pulsing the bladder and positioning your camera and lighting precisely to best accentuate the effect.
Tips for a Camera-Ready Bladder Effect
The veins of the bladder run on both sides of the neck and are much more effective when they’re glued to the skin. Bonus points if you can get your lighting to cast some hard shadows across the neck which will make the pulsing even more apparent.
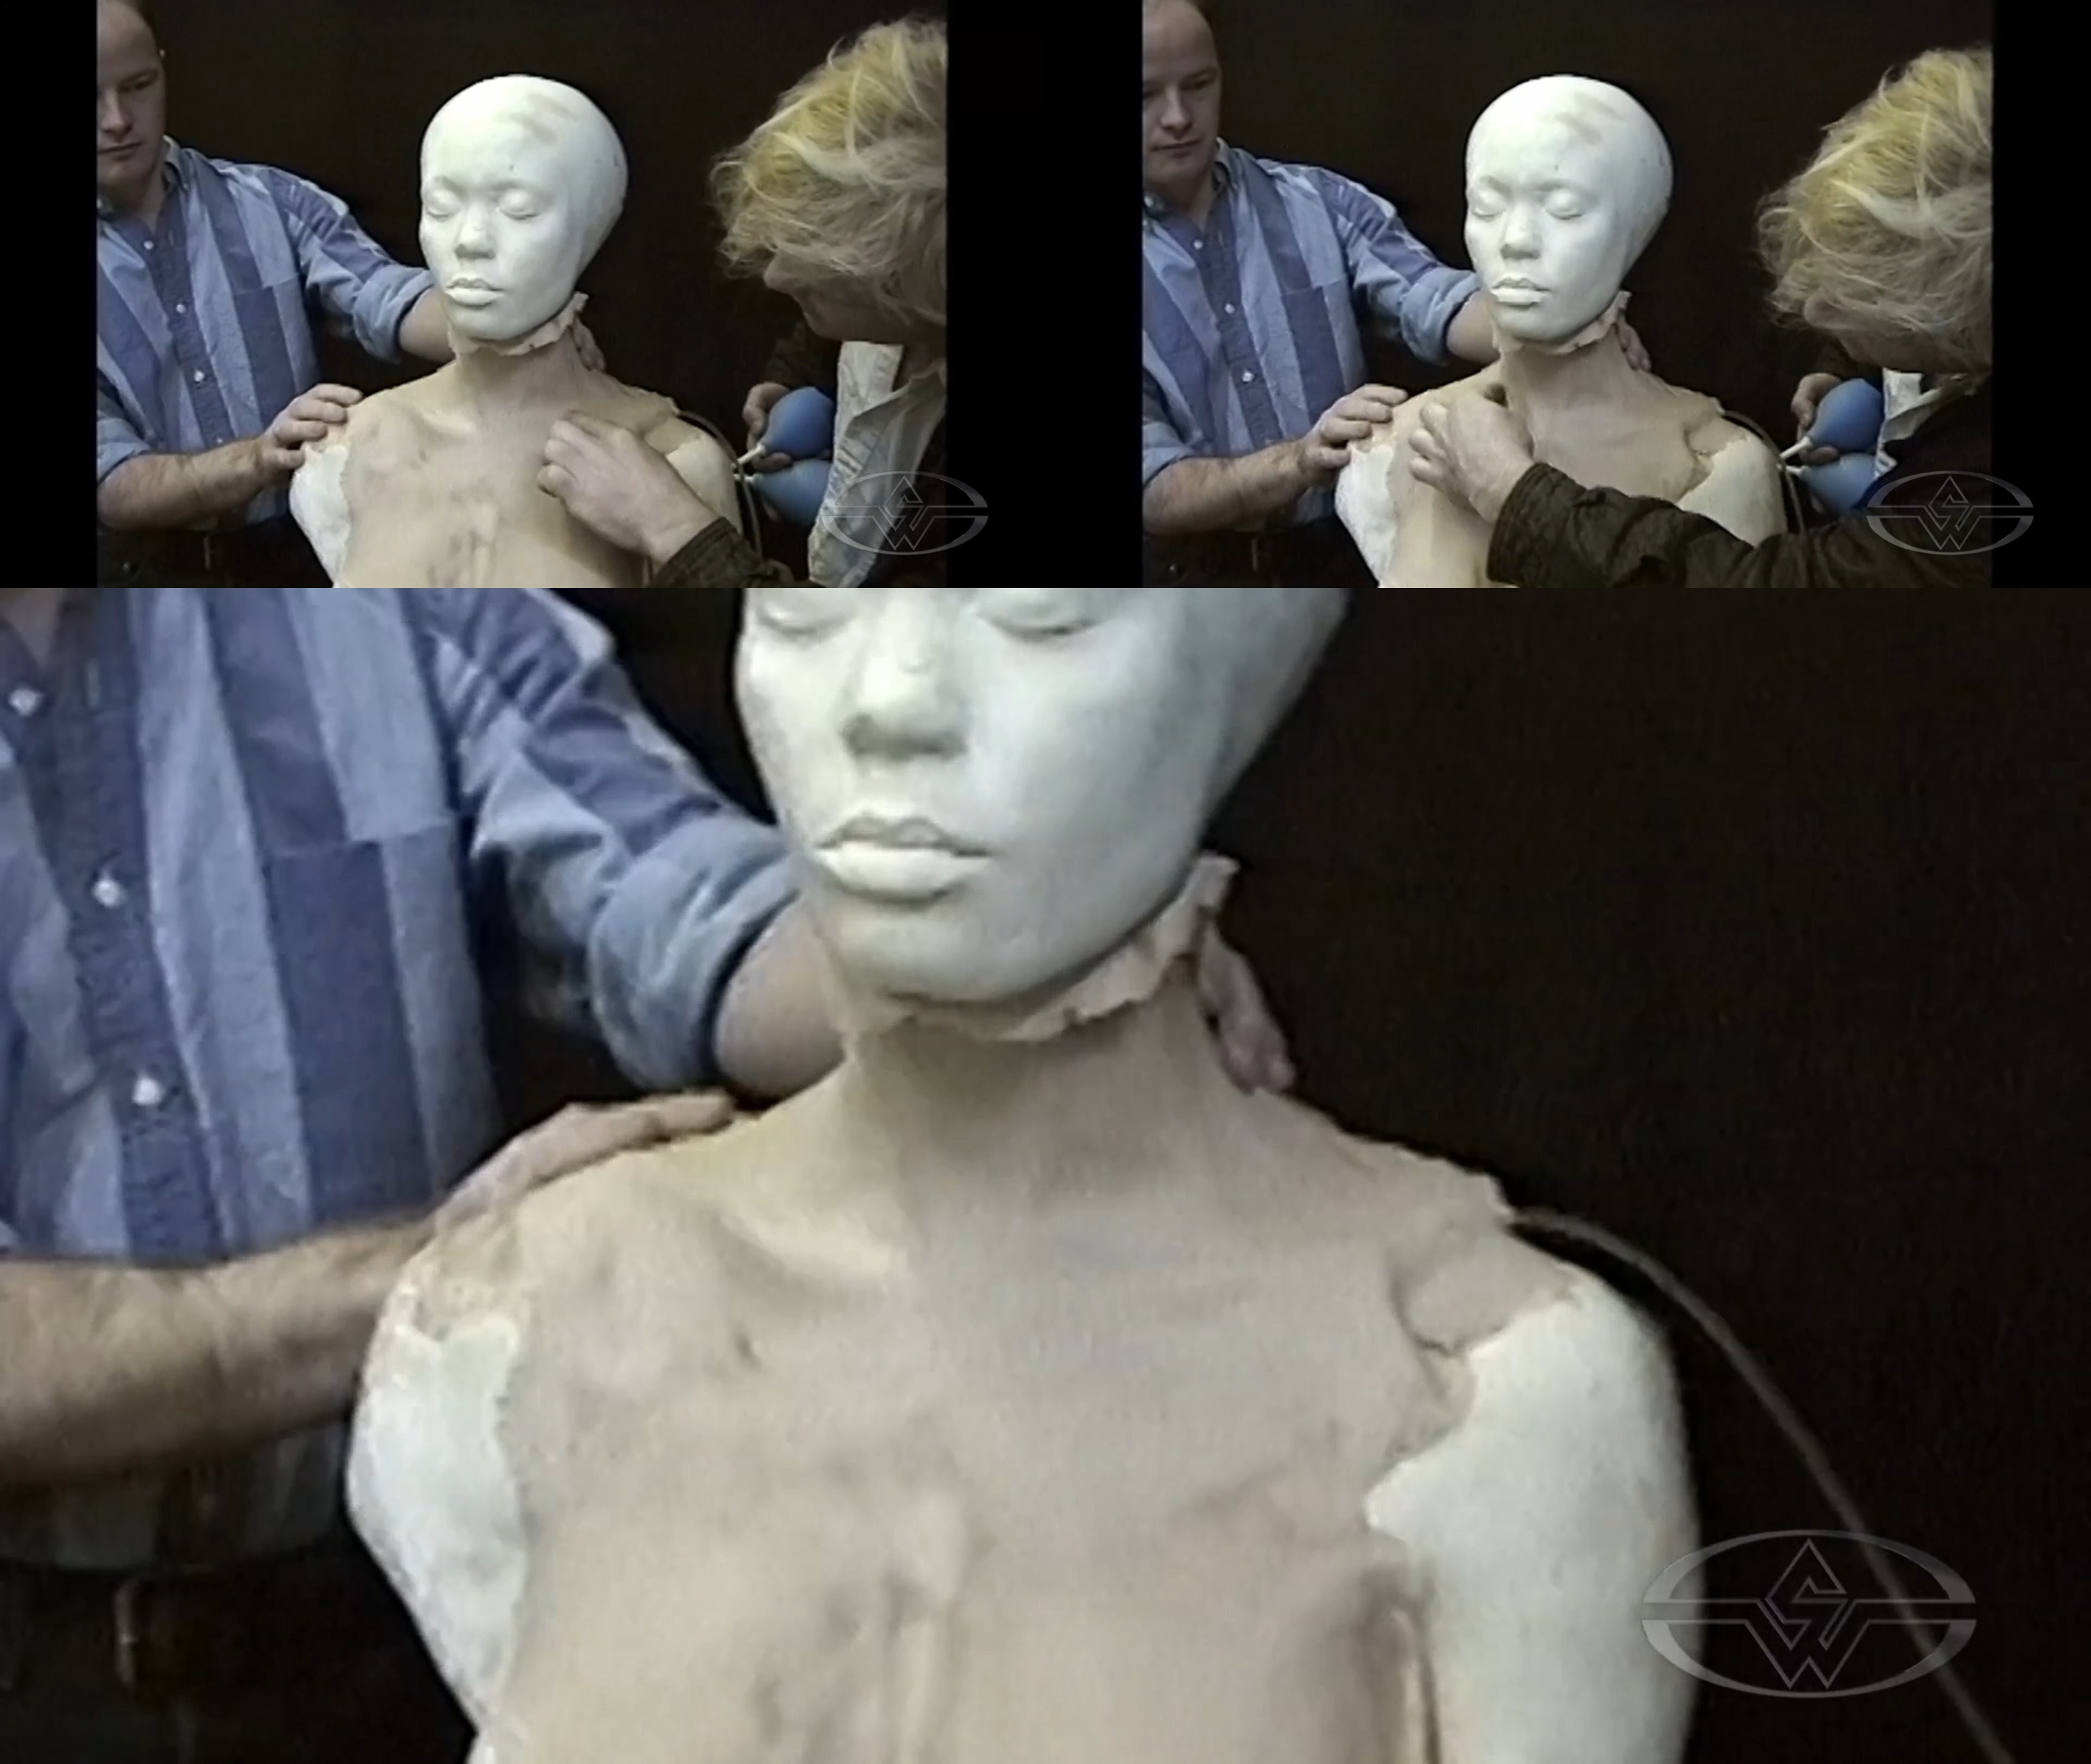 (Shane Mahan points out where the bladder veins run and how the complete effect will look once the shot is ready.)
To create your own pulsating neck effect, check out these courses with Gary J. Tunnicliffe & Mike Jay Regan:
- Transformation Makeup - Bladder FX Part 1: Design, Create & Test
- Transformation Makeup - Bladder FX Part 2: Apply, Paint & Shoot
Courses with the creators of Interview with the Vampire:
- Special Effects Sequence Design with Shane Mahan
- Hybrid Characters: Blending Practical & Digital FX with John Rosengrant
- Cable Mechanism Basics - Tentacles with Richard Landon
- Animatronics Design Basics with Richard Landon
- Hybrid Character Design: Practical to Digital with Christopher Swift
- Makeup Blood FX - Blow Your Brains Out with David Monzingo
- How to Make a Monster Puppet - Rods & Cables with David Monzingo
- Creature Screenwriting: How to Write Memorable Monsters with Stiles White and Juliet Snowden