

How To Make Alien Ears With Don Lanning
In this FREE excerpt from the Stan Winston School of Character Arts course, Character Design - Part Three: Space Creature Maquette Sculpture, master creature designer Don Lanning (Star Trek, The Avengers, Hellboy) shares his approach to designing and sculpting ears for an alien character, emphasizing the importance of organic, strange shapes and continuity. You’ll also learn useful techniques that can be applied to other character designs as well.
Jump To Section
- Using Clay and Water Techniques to Make Alien Ears
- Making Creepier, Non-humanoid Ears
- Creating Soft Cartilage Details
To watch the complete instructional video, click the player above!
In this lesson, Don Lanning discusses how to make extraterrestrial ears using just clay, water, a loop tool, and your fingertips! Give an ear to learn the must-knows about making non-humanoid physical features—how to turn inspiration into organic forms and integrate them with your alien.

Using Clay and Water Techniques to Make Alien Ears
As Lanning works his extraterrestrial sculpture, his inspiration speaks to him, prompting him to make a disturbing ear that has no flange. This is not your typical, realistic human ear. For this character in particular, this is an otherworldly hearing mechanism.
Using a large, double-ended loop tool, carve out a hole, or “bite,” with a strange shape on the side of your character’s head. Commit to the feeling and vision you have for this non-human, creepy auditory apparatus.
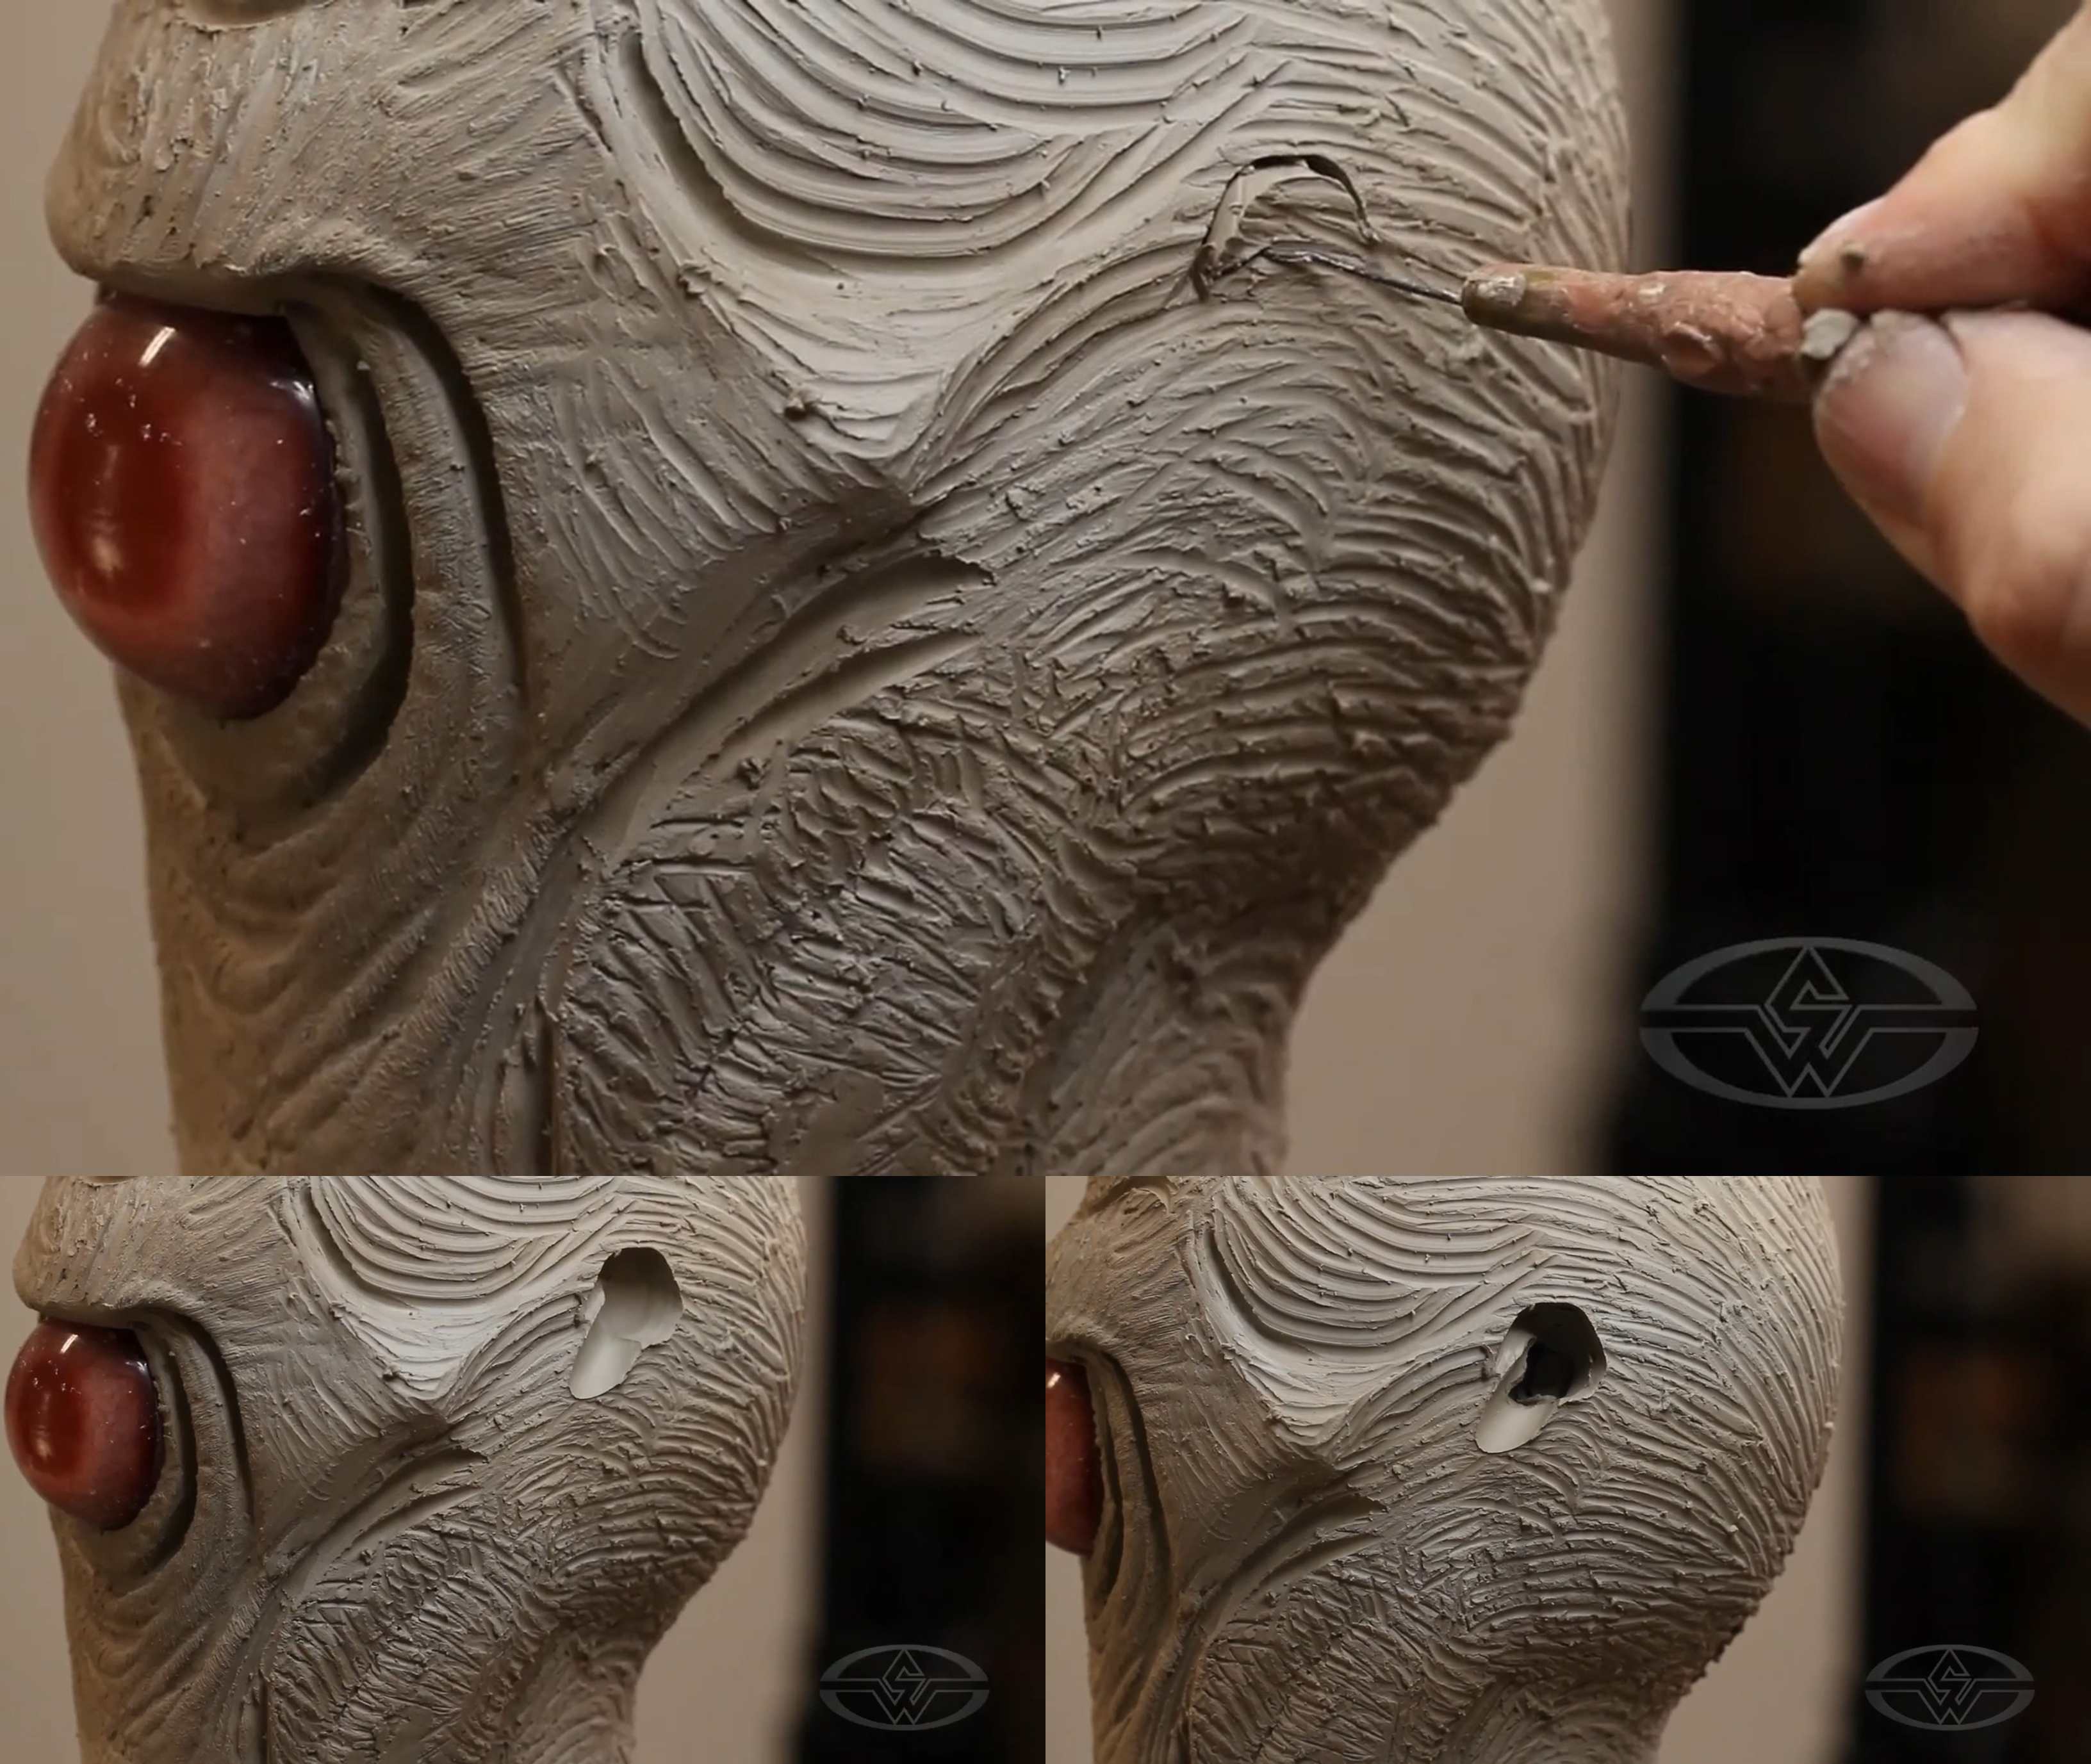 (Lanning begins his extraterrestrial ear-making process by carving out an unusually-shaped hole in his character's head.)
Next, trace a satellite line around the perimeter of the ear. Move your hand in a natural way as you begin tracing, discontinue at some point, and pick it back up so that the line isn't perfect, it has an organic shape.
 (Lanning traces around the hole to create and add structure to his alien's auditory apparatus.)
After you’ve traced along your alien’s ear, it’s time to smooth out the area.
Using the pad of your finger, slightly press on the interior part of the ear to lay it down and give it an organic feeling, then use a wet sponge for the surrounding area and tone down the appearance of any rake marks on your sculpture.
Lanning seeks "satisfaction" when he adds or adjusts a feature, and you should too. Let your creativity be your guide as you regard your work. Does it give you satisfaction? If so, then continue your work.
 (Using his fingertip and a wet sponge, Lanning softens the ear details.)
“And look at that right there,” Lanning says. “I’m so happy to show you a simple method that brings you something kind of creepy and interesting that’s easier.”
At this point, you have the central hole and some raised structure around it, indicating some cartilage, perhaps, for your space inhabitant’s non-human hearing apparatus.
Making Creepier, Non-humanoid Ears
Lanning wants to amp up the weirdness for his alien’s ears. He decides that he wants to add another hole.
Carve out a smaller additional hole above the other. Then, with the pad of your pinky, smooth out the edge of the hole.
 (To further add to the strangeness of his sculpt, Lanning carves out a smaller second hole.)
Lanning likes the second satellite bite so much that he decides to add one last aperture for his character to receive sound. And once again, uses his pinky to smooth out the edges.
Make the right amount of holes for your own alien.
 (Lanning adds a third hole and softens the edge of the cut, using the same fingertip technique.)
To burnish all elements of the ear, put a little water on your fingertip and buff out each hole.
 (Lanning uses his moistened fingertip to burnish all three holes.)
“The joy, of course, of the water-based clay is that it lays right down and does a very organic thing for you—and that’s just beautiful." Observing his constellation of orifices, Lanning remarks. “So, we’re a long way away from a normal, humanoid ear.”
To integrate the forms in your sculpture, go back in with the round end of your loop tool, and in what looks like a fleshy part of the ear, carve out and around the main hearing apparatus to create structure. Repeat this step on any other openings to create continuity.
 (Using the round end of his loop tool, Lanning carves around the holes giving depth to the structures.)
Creating Soft Cartilage Details
To finish the ears, wet your fingertip and buff out any hard edges to give the shapes a softer, more natural appearance. (About as natural as alien ears can look!)
For this step, you can use a sponge. However, Lanning prefers using his finger. Your fingerprints have all the abrasive surface you require to keep the burnishing subtle.
 (To give all elements of the ear an organic appearance, Lanning uses his fingertip and water to smooth the edges.)
“Instead of just being blunt holes pushed into the side of your design, by using this water technique and a little bit of echo line work, now you have soft cartilage surrounding each opening,” he explains.
Ultimately, you’ll want to burnish the holes and cartilage details underneath to create a soft shadow. This, Lanning says, is what gives this strange feature enough anatomy to feel real and like it belongs in the world of this character. Continue softening until you’ve achieved your desired look.
 (Lanning looks at his space creature and its new ear, satisfied with the end result.)
And there you have it—creepy cool, out-of-this-world ears!
WATCH THE “CHARACTER DESIGN” COURSE WITH DON LANNING: