
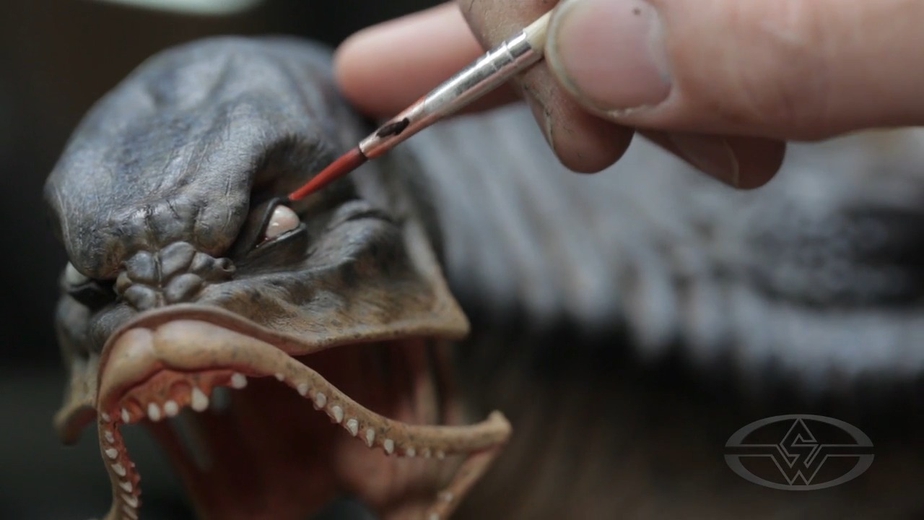
In this FREE excerpt from the Stan Winston School of Character Arts course, Monster Maquette Assembly, Painting and Finishing Techniques, special effects character creator and master monster maker Timothy Martin (Alien vs. Predator, Hellboy, The Thing) reveals his methods and tips on how to paint eyes, teeth, and nails for monster maquette display figures and creature model-making projects. You’ll learn how every subtle detail breathes life into your character so you can transform your very own monster maquettes!
Jump To Section
- Mixing Colors and Preparing the Eyes
- Painting Teeth and Other Details
- Painting Nails and Claws
- Applying a Red Wash to Eyes
- Airbrushing Creature Eyes
- Top Layer - Repeating the Wash
- Painting Irises and Pupils on Human Eyes
To watch the complete instructional video, click the player above!
In this lesson, Timothy Martin breaks down tried and true techniques for painting high-quality monster maquettes into simple, easy-to-follow steps. You'll learn to give your otherworldly creature maquette an uncannily realistic appearance using just a few fine detail brushes and some paint.
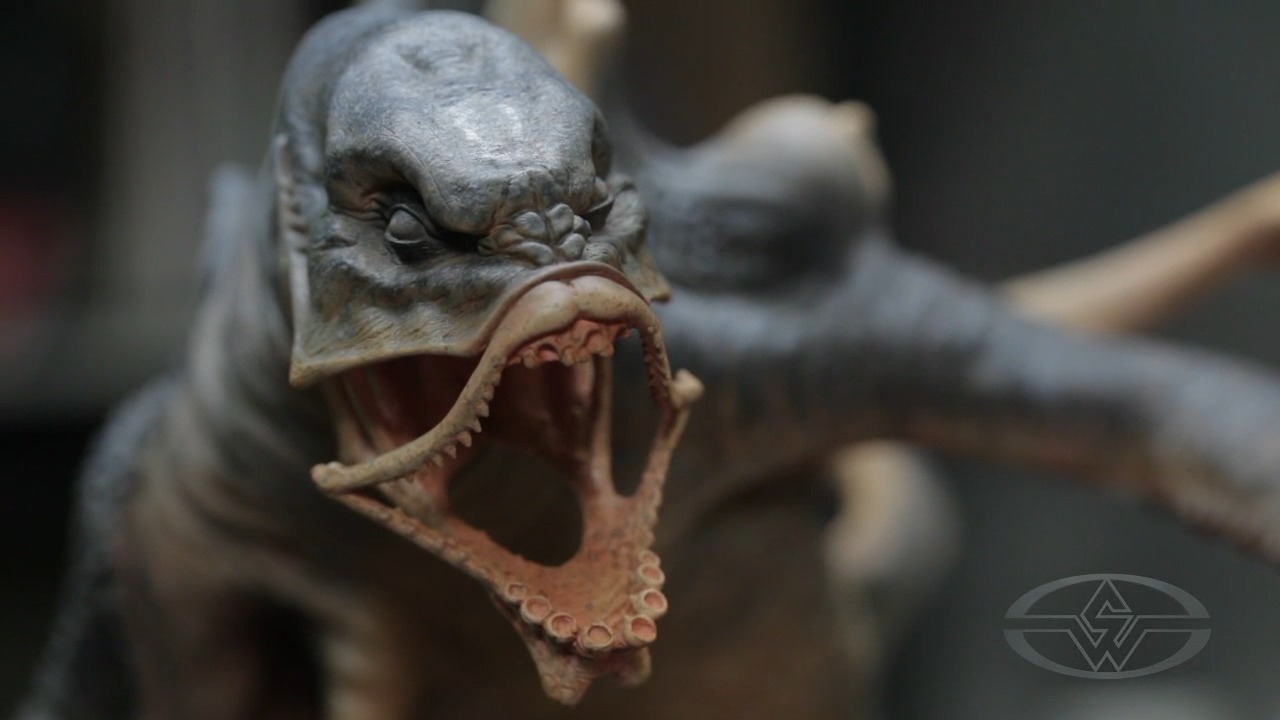
Mixing Colors and Preparing the Eyes
Even mythical characters, like the Leviathan monster, require natural, lifelike features—natural colors are a good place to start.
Before painting your aquatic creature maquette, mix a small amount of solid white paint with the Skin Illustrator “Sand” color to create a convincing, bone-like shade. This color will be used for the eyes and teeth. It looks better than pure white eyes which tend to come off as too flat, bright, and ultimately, unrealistic.
Now, you’re ready to put your brush to work!
Begin painting the whites of the eyes, or “scleras.” You can start by working from the middle of the eye and out toward each color.
Apply a few layers to keep your creature’s eyes free of brush marks or streaks.
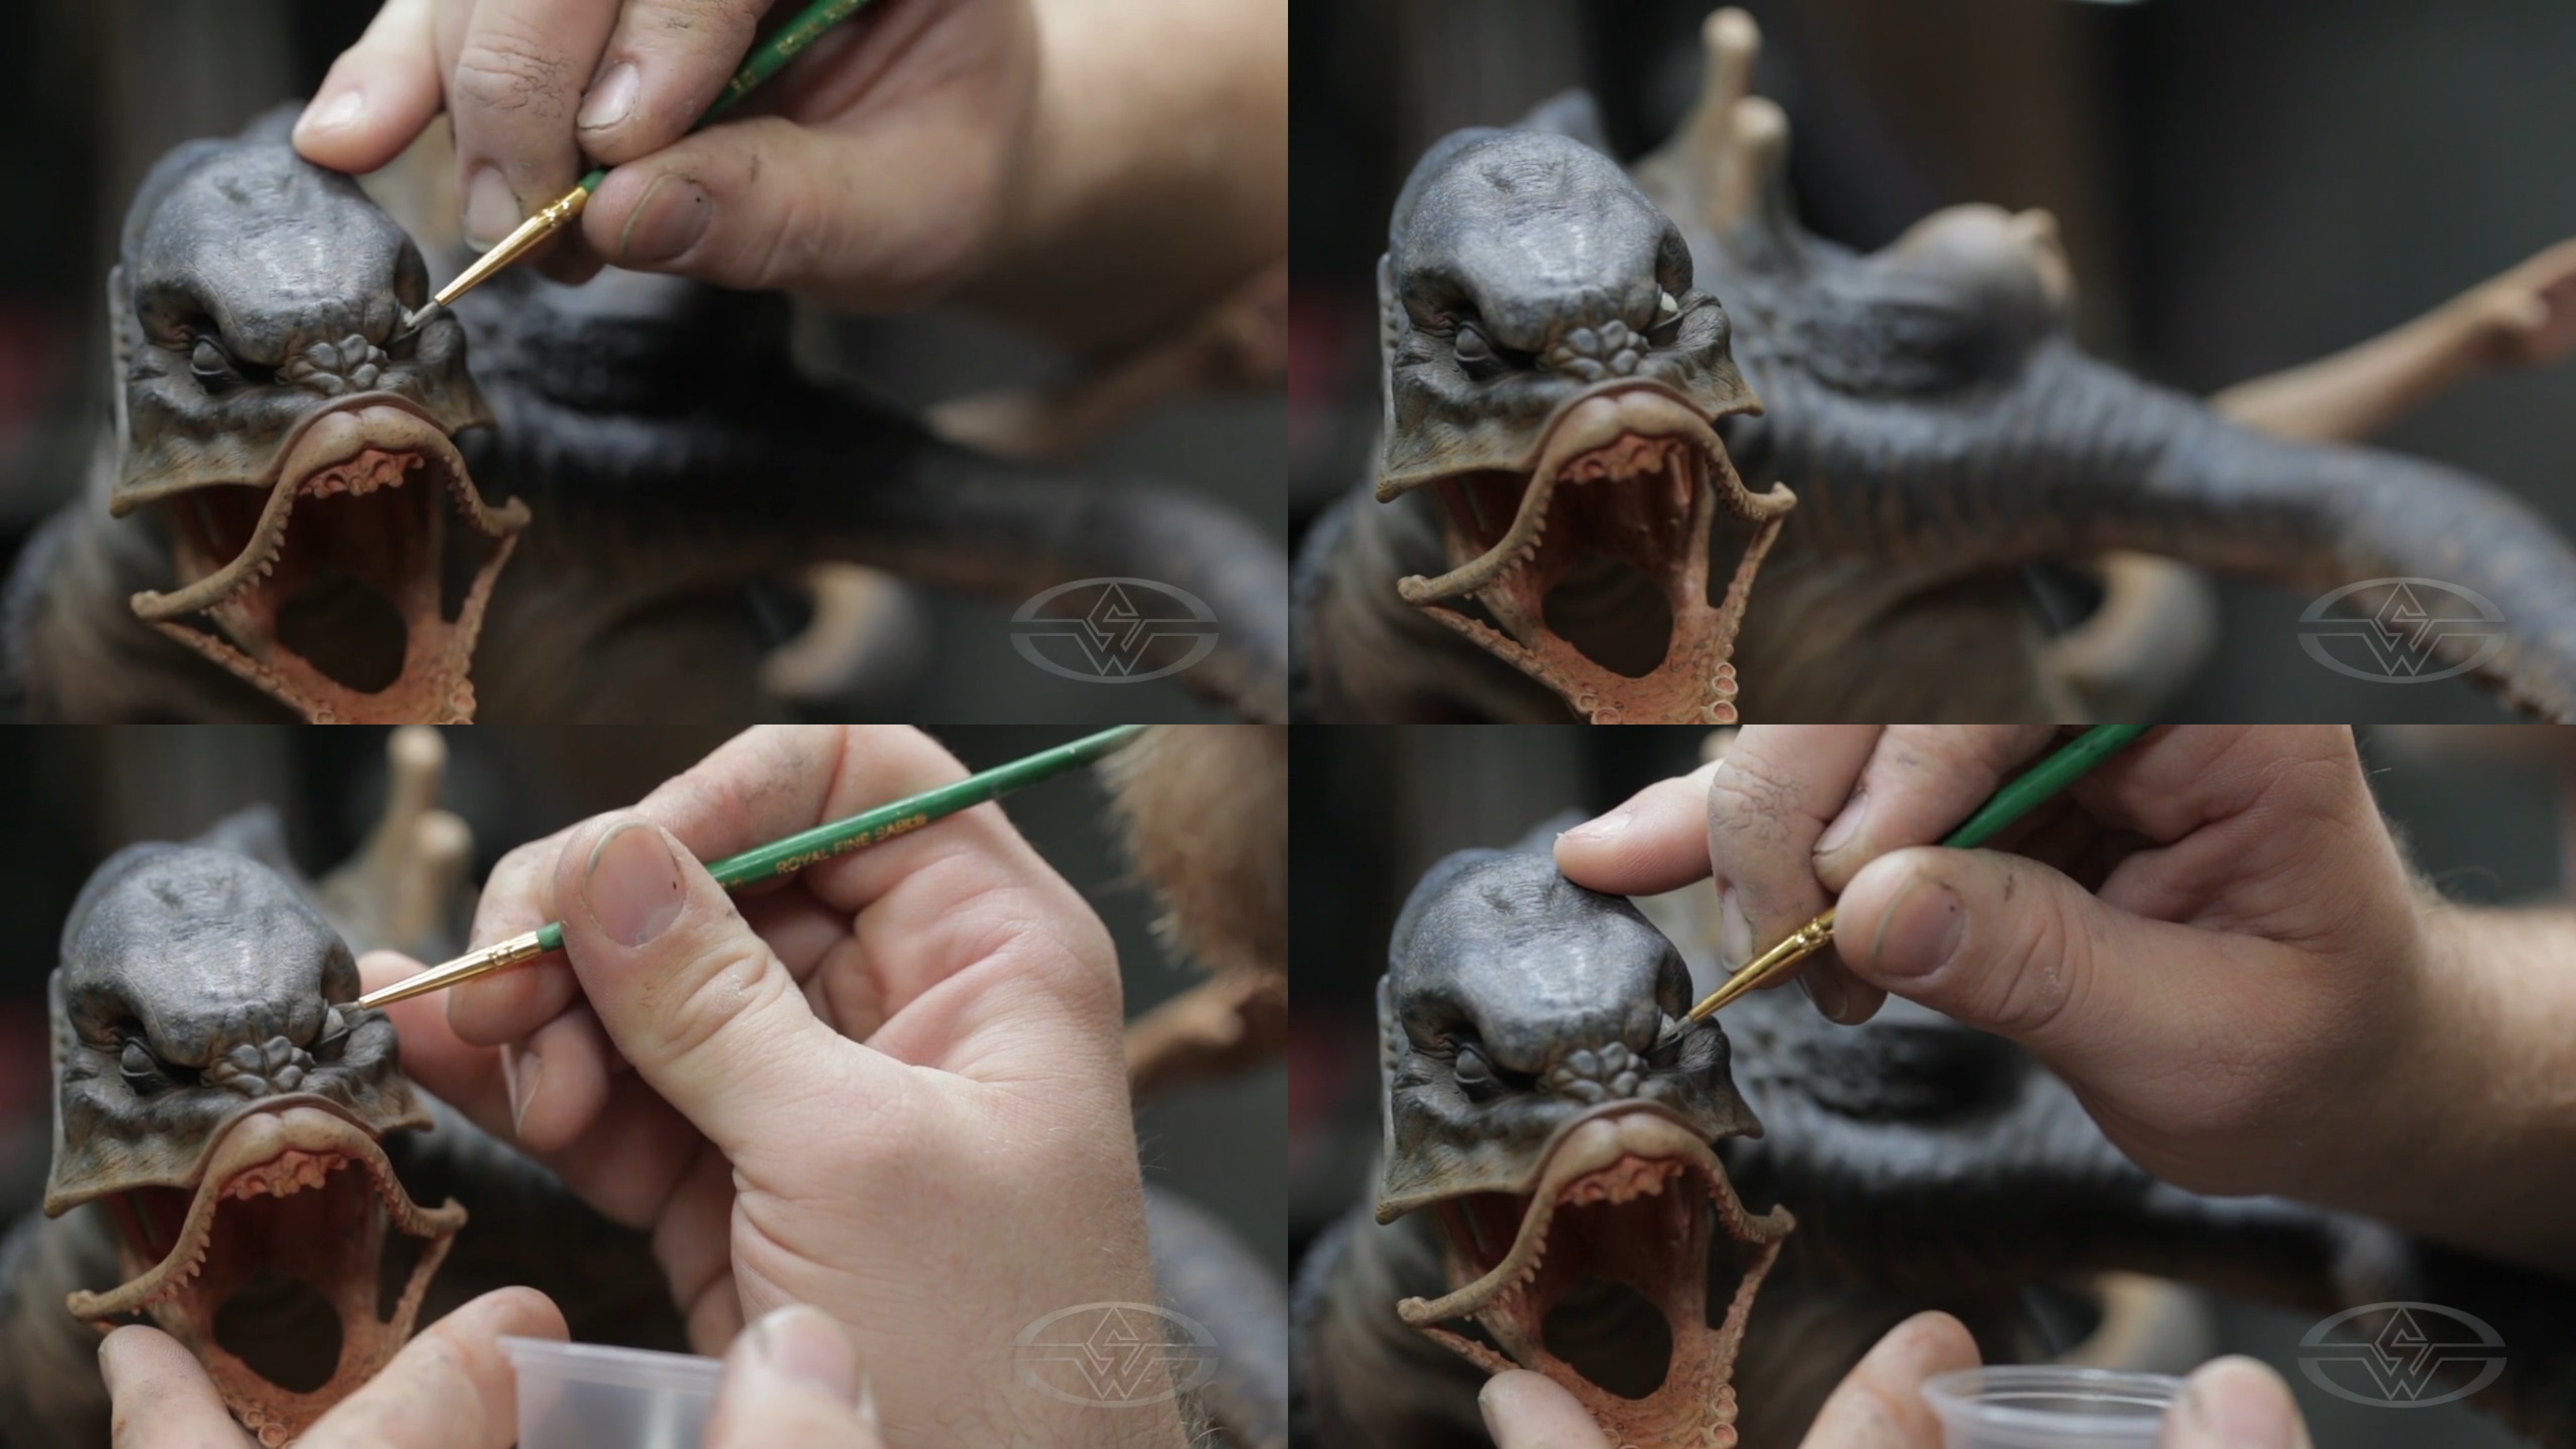 (Timothy Martin carefully paints the whites of his Leviathan monster's left eye using an off-white shade.)
Try to keep as steady of a hand as possible to prevent accidentally touching another part of the eye. But if you do get paint where you don't want it, don’t worry—it’s all fixable, Martin says. If you touch another part with your brush or overpaint something, you’ll go back and forth with your brush anyway. Many layers give a better result.
 (Timothy Martin repeats the process on the creature's right eye.)
Painting Teeth and Other Details
With the same bone-white paint, move on to painting your Leviathan’s combination of shark and human teeth.
Use small, controlled strokes to carefully paint every tooth. Merely use the tip of the brush to add color for the smallest detail work, like the bottom teeth.
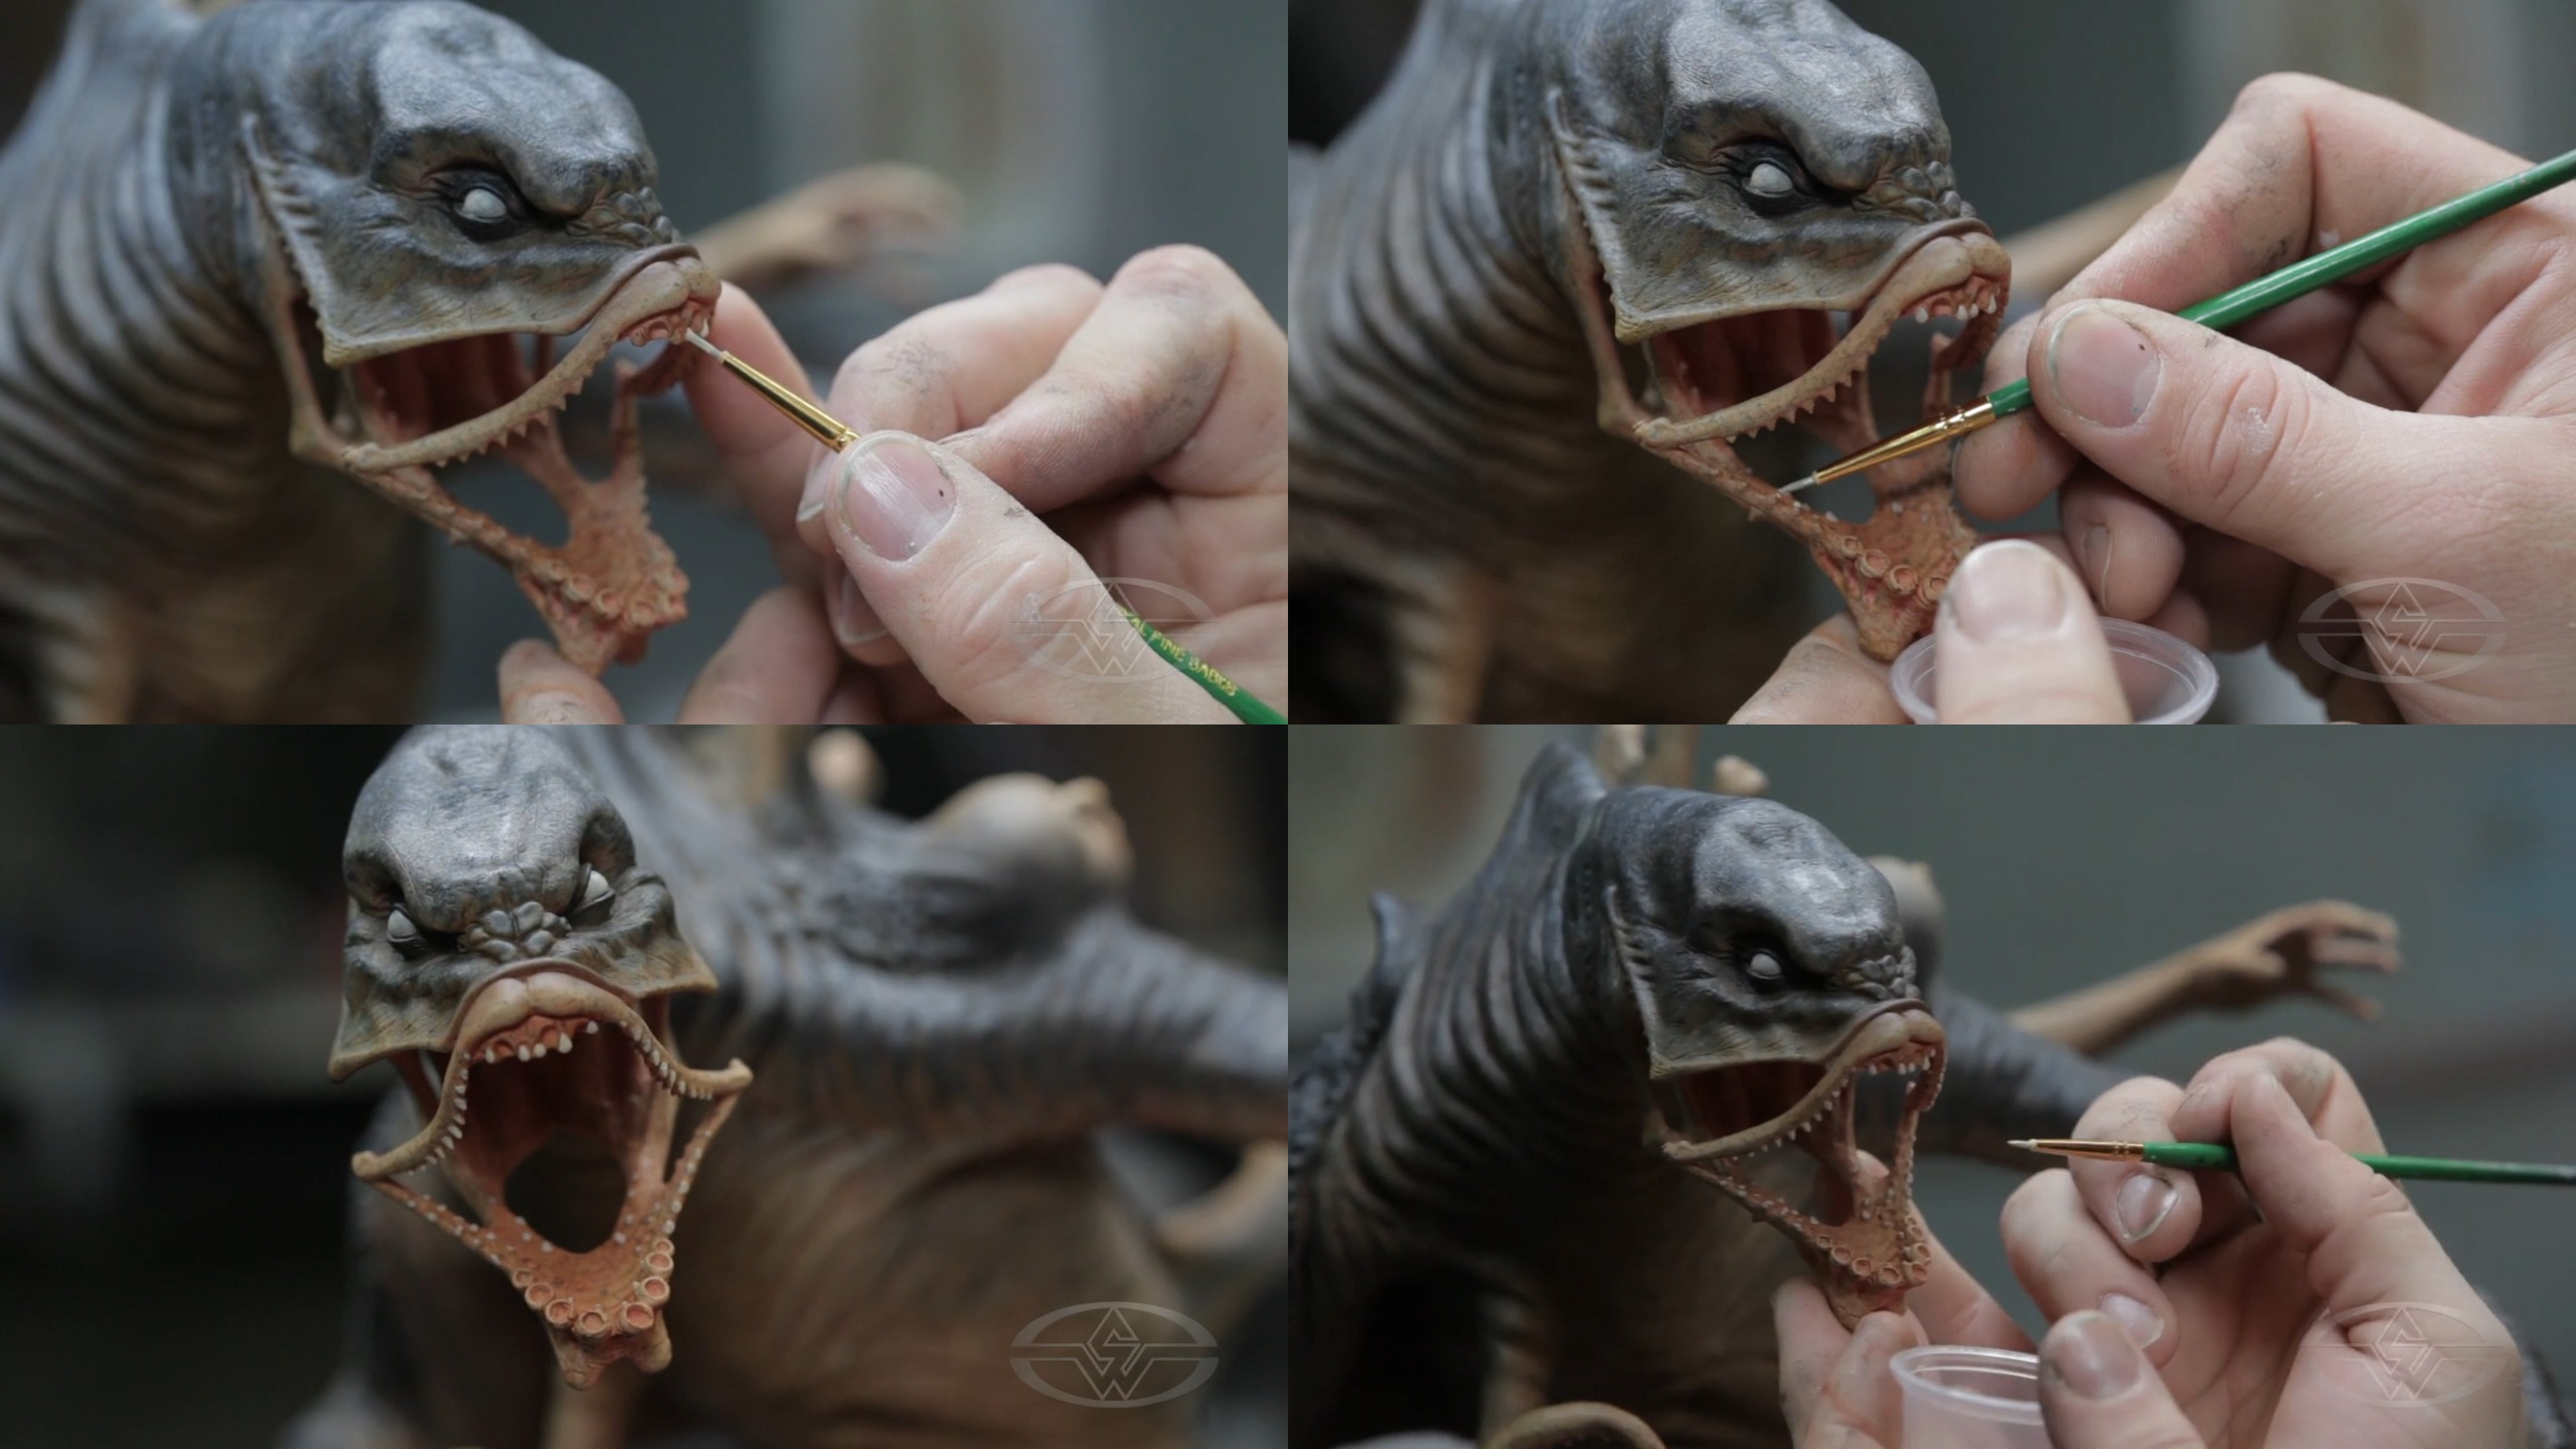 (Timothy Martin gives the Leviathan's unique set of human and shark teeth a complete color makeover with a warm, off-white shade.)
These chilling chompers will look more organic with this off-white tone in comparison to a stark white. Then, as a next step, doing a wash over the paint helps dim the vibrancy of the teeth.
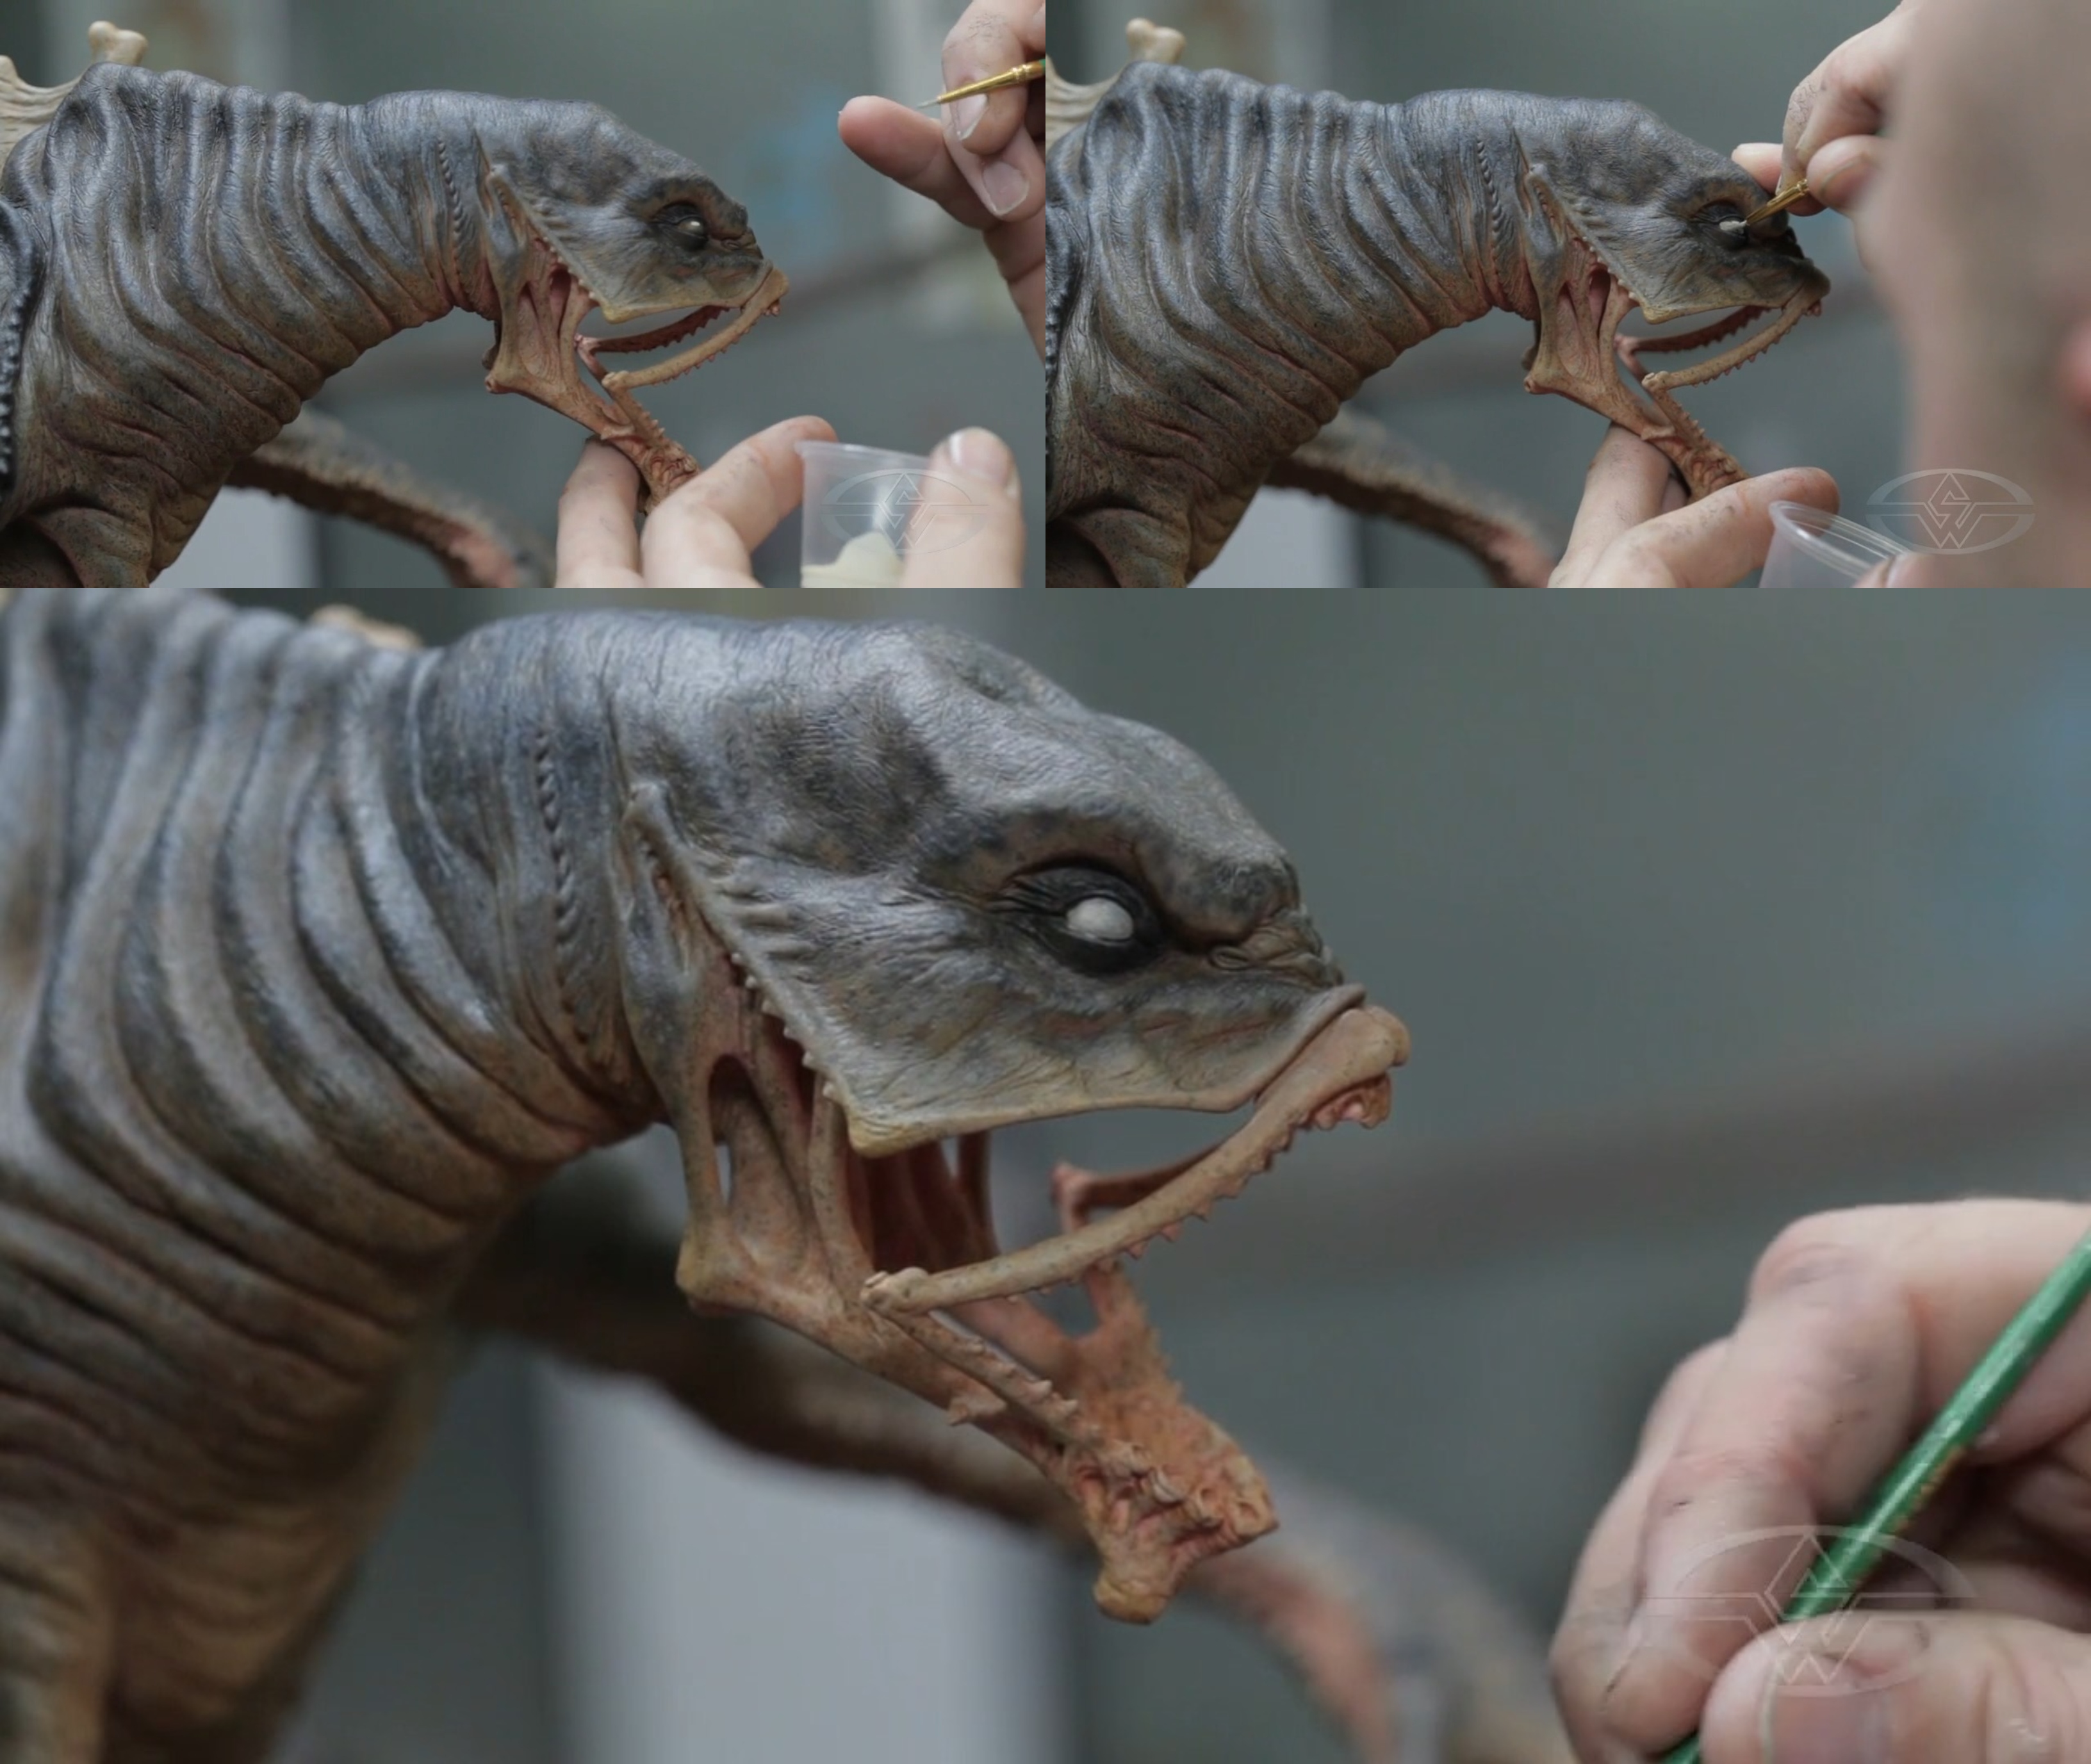
At this point, the creature’s eyeballs should be completely dry and ready for another layer. Completely paint over both eyes with the same yellow-white color.
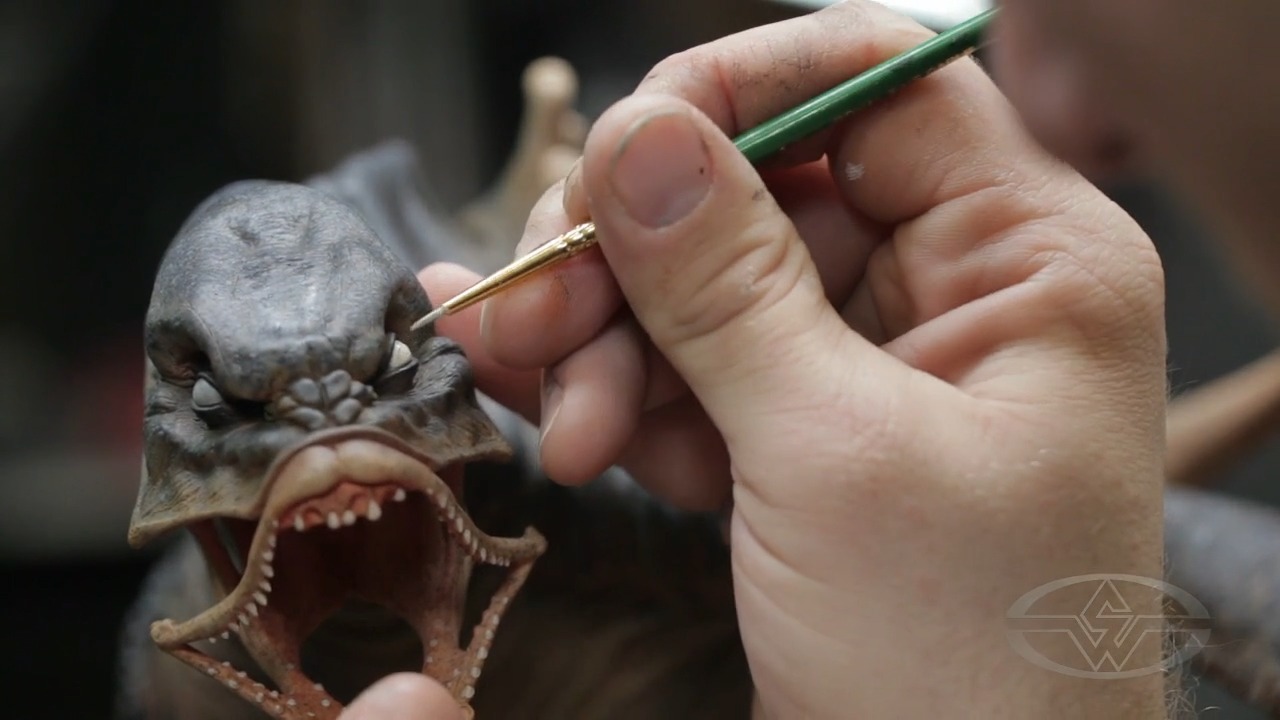 (Timothy Martin adds another layer of paint to the whites of the aquatic monster's eyes.)
Take that same color to precisely paint the eyes of the human character who’s been subsumed by the creature.
For the man’s teeth, lightly dry-brush them to paint them, but also tone down the vividness, which can be a giveaway when you're striving for realism.
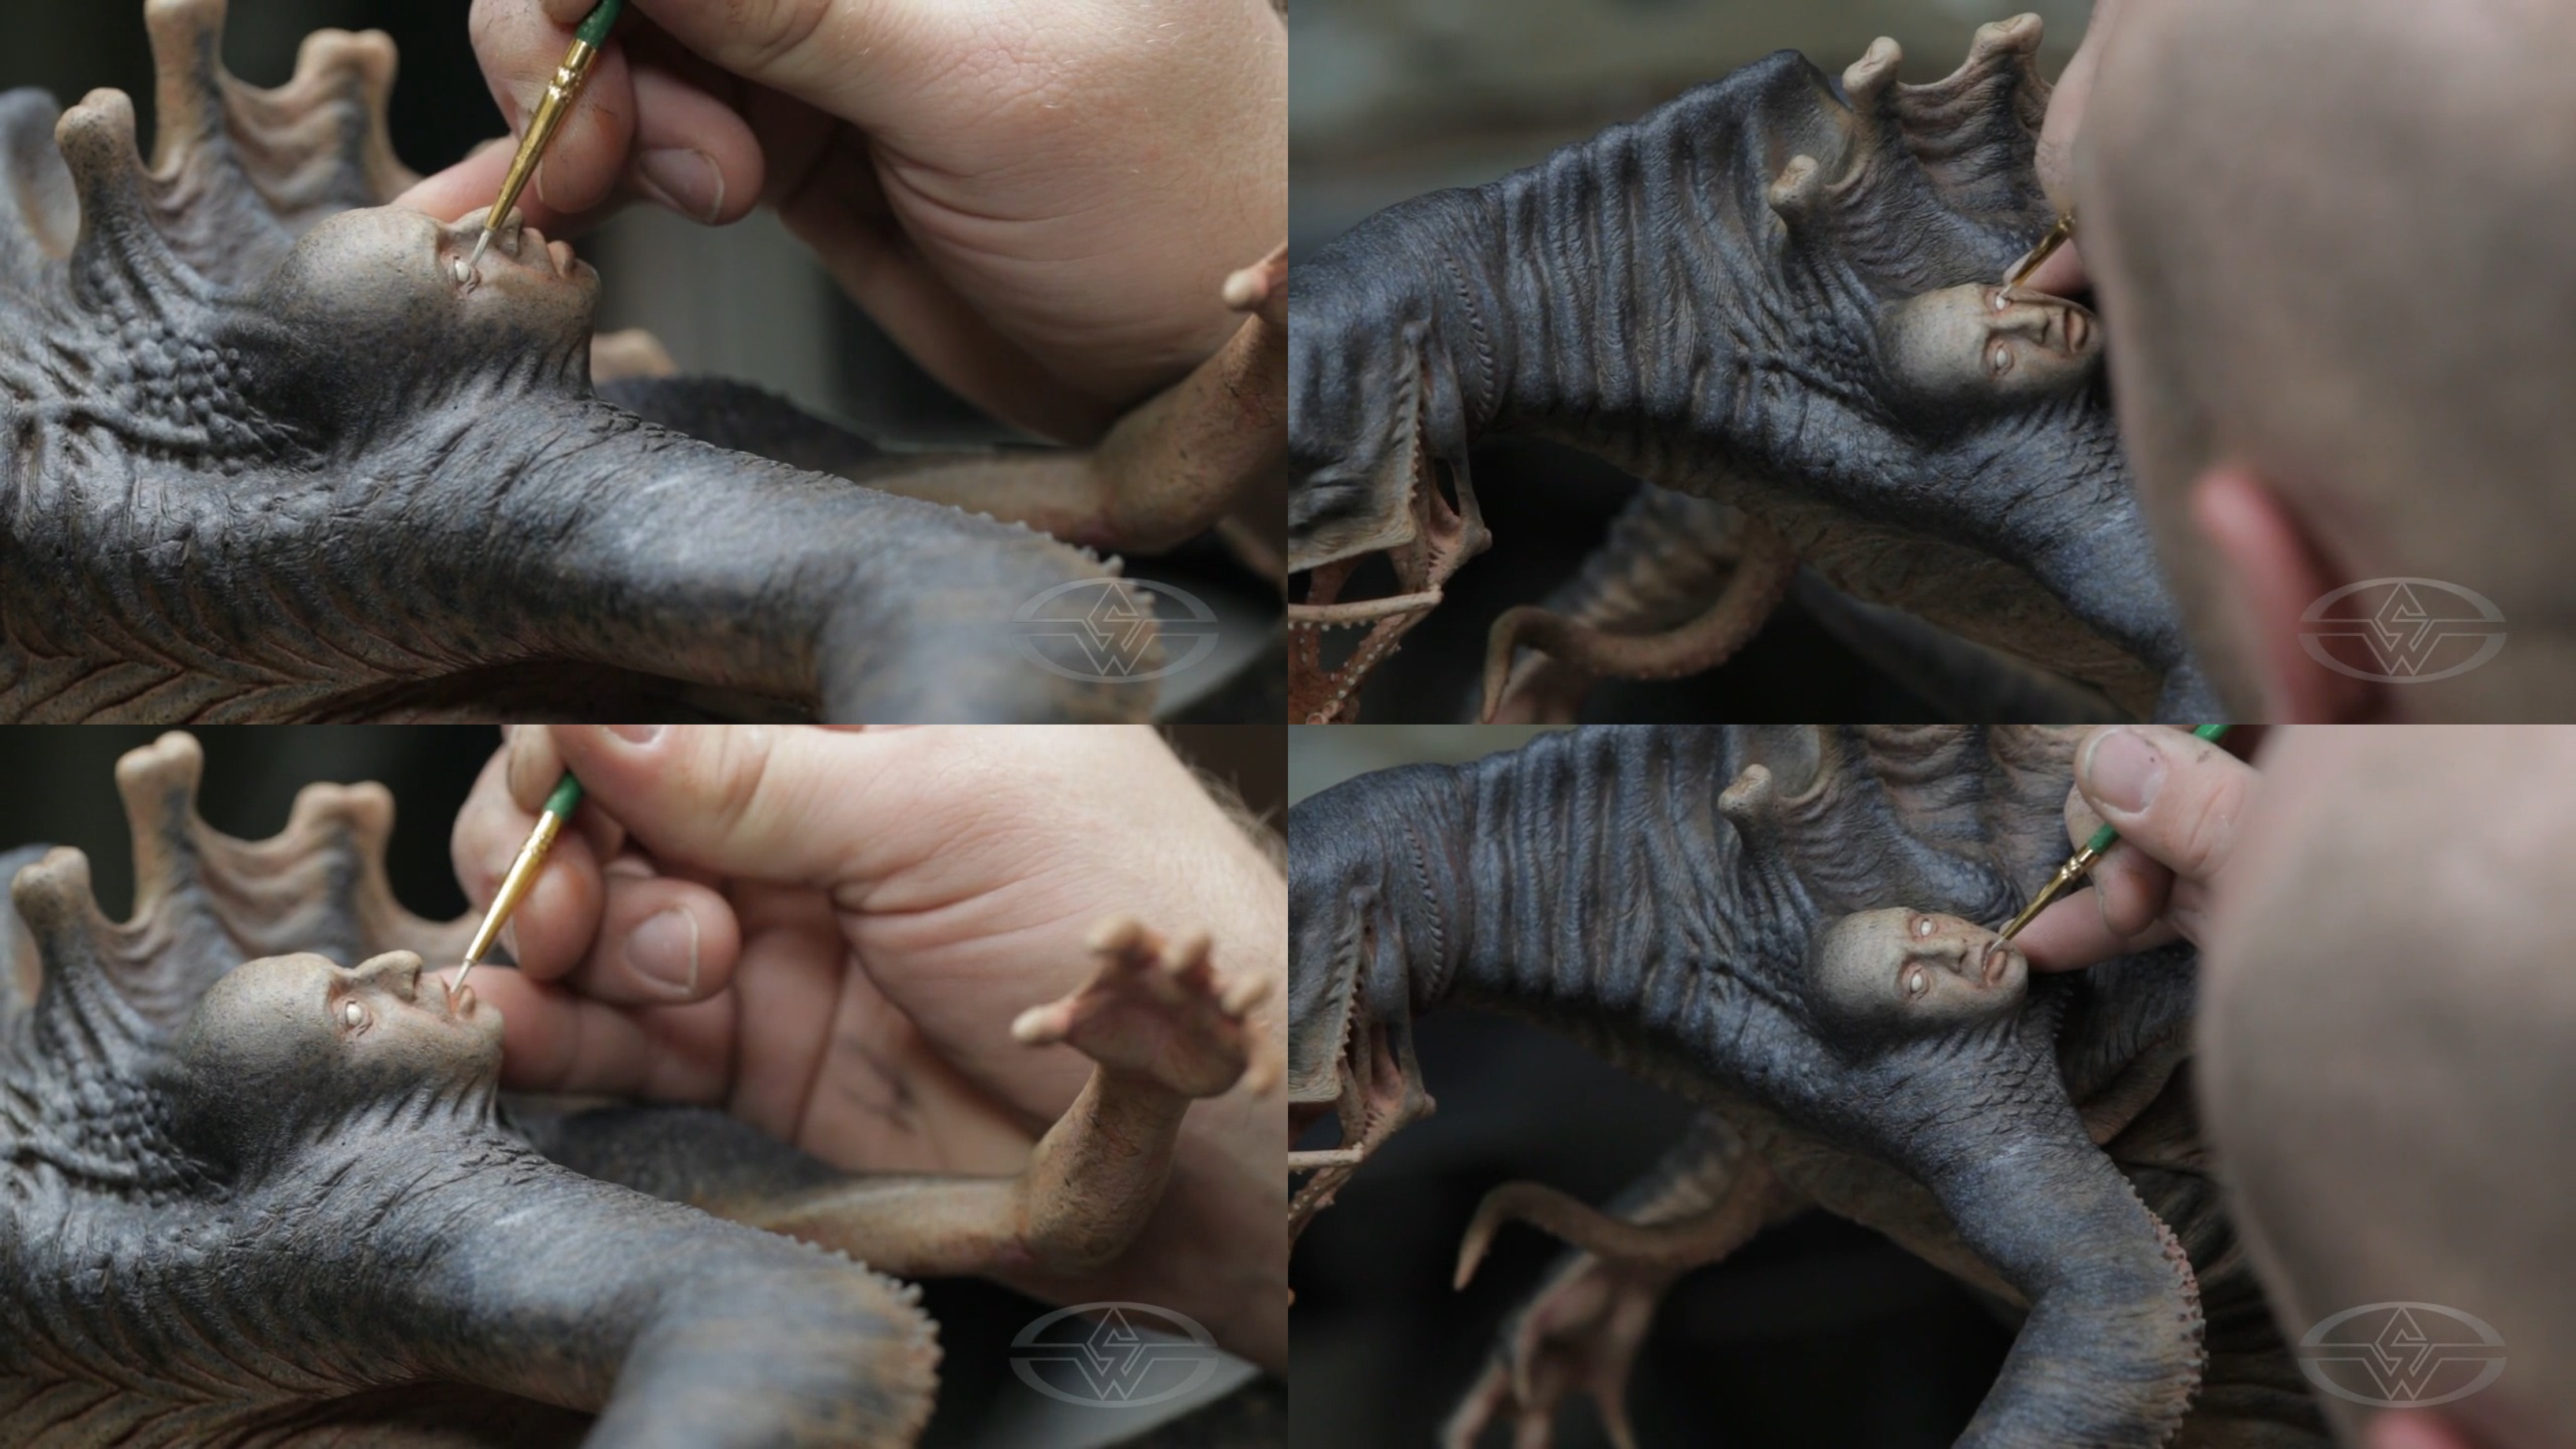 (Timothy Martin shifts his attention to the human character, using the same off-white shade to paint the whites of his eyes and dry brushing the man's teeth.)
Painting Nails and Claws
Going back in with the same eye color (it’s a versatile shade!), slightly dry-brush your human's fingernails to highlight them.
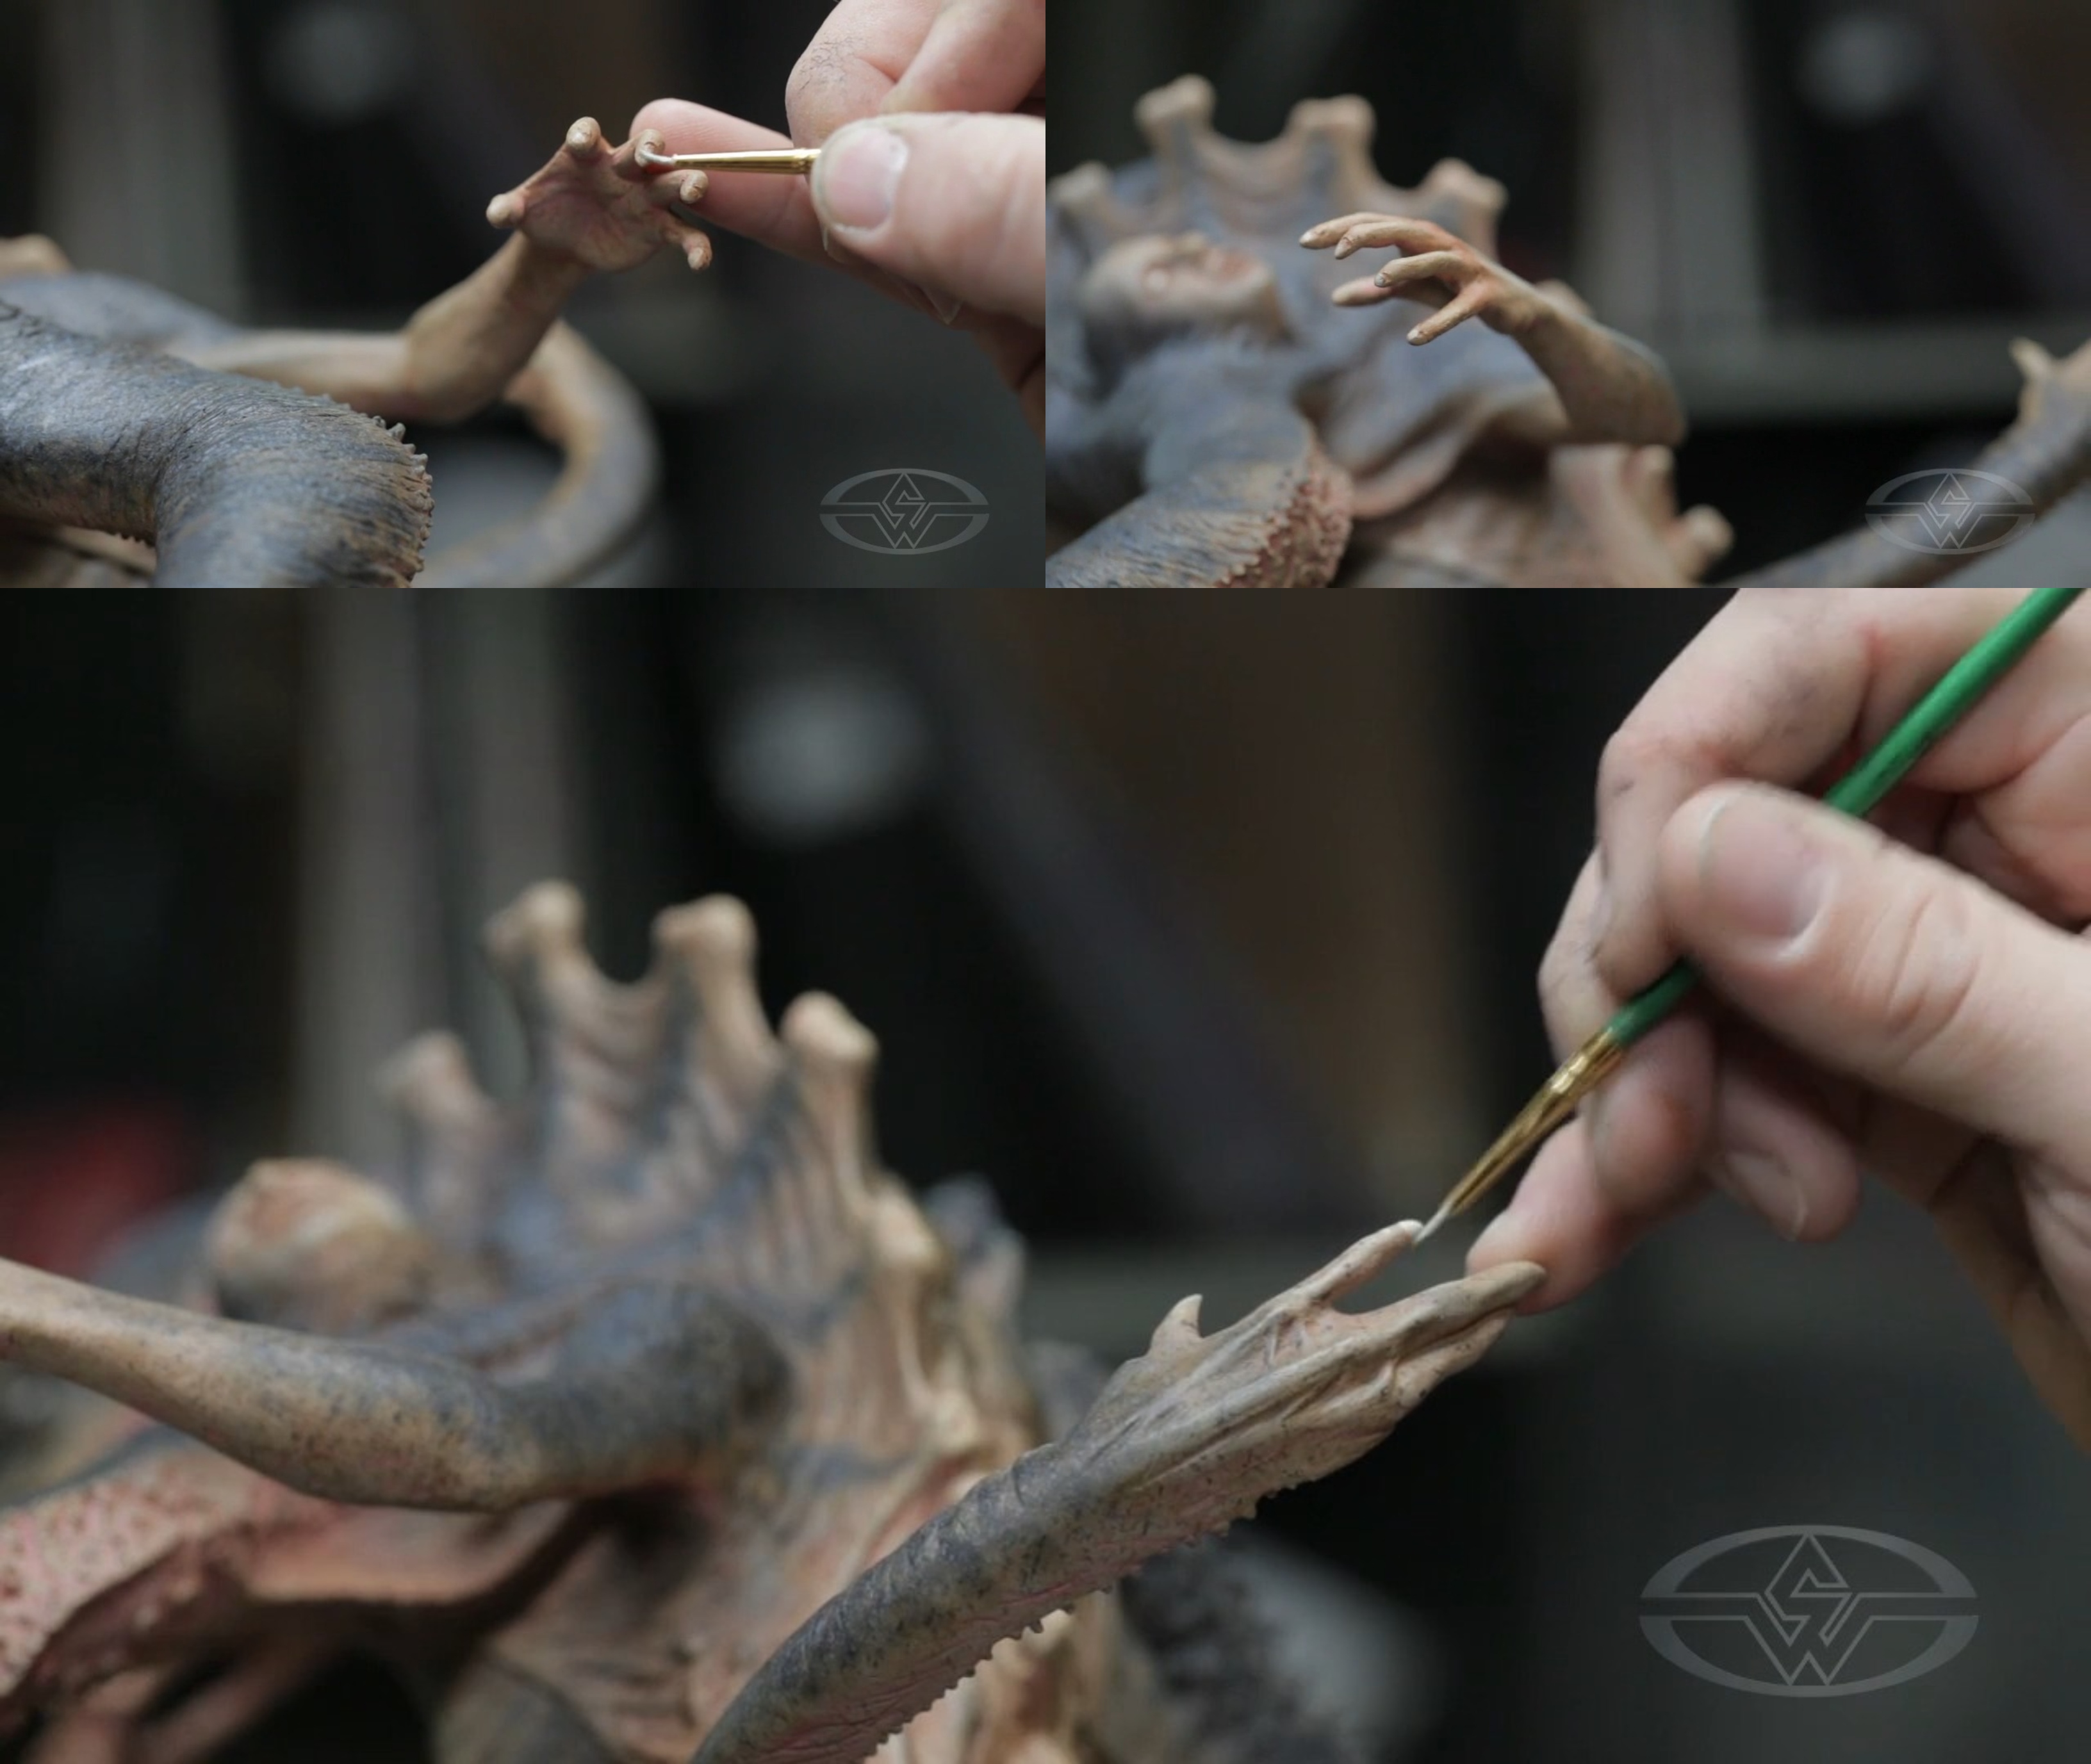 (Timothy Martin paints each nail with complete precision.)
Next, accentuate your character’s claws.
By dry brushing the claws, you can change them from a fingernail claw into an extended, weird bone-looking hand. Dry-brush the tips of the claws to make them a little bit lighter.
With the same tooth color, use a tapping motion to paint the eel tail monster’s teeth.
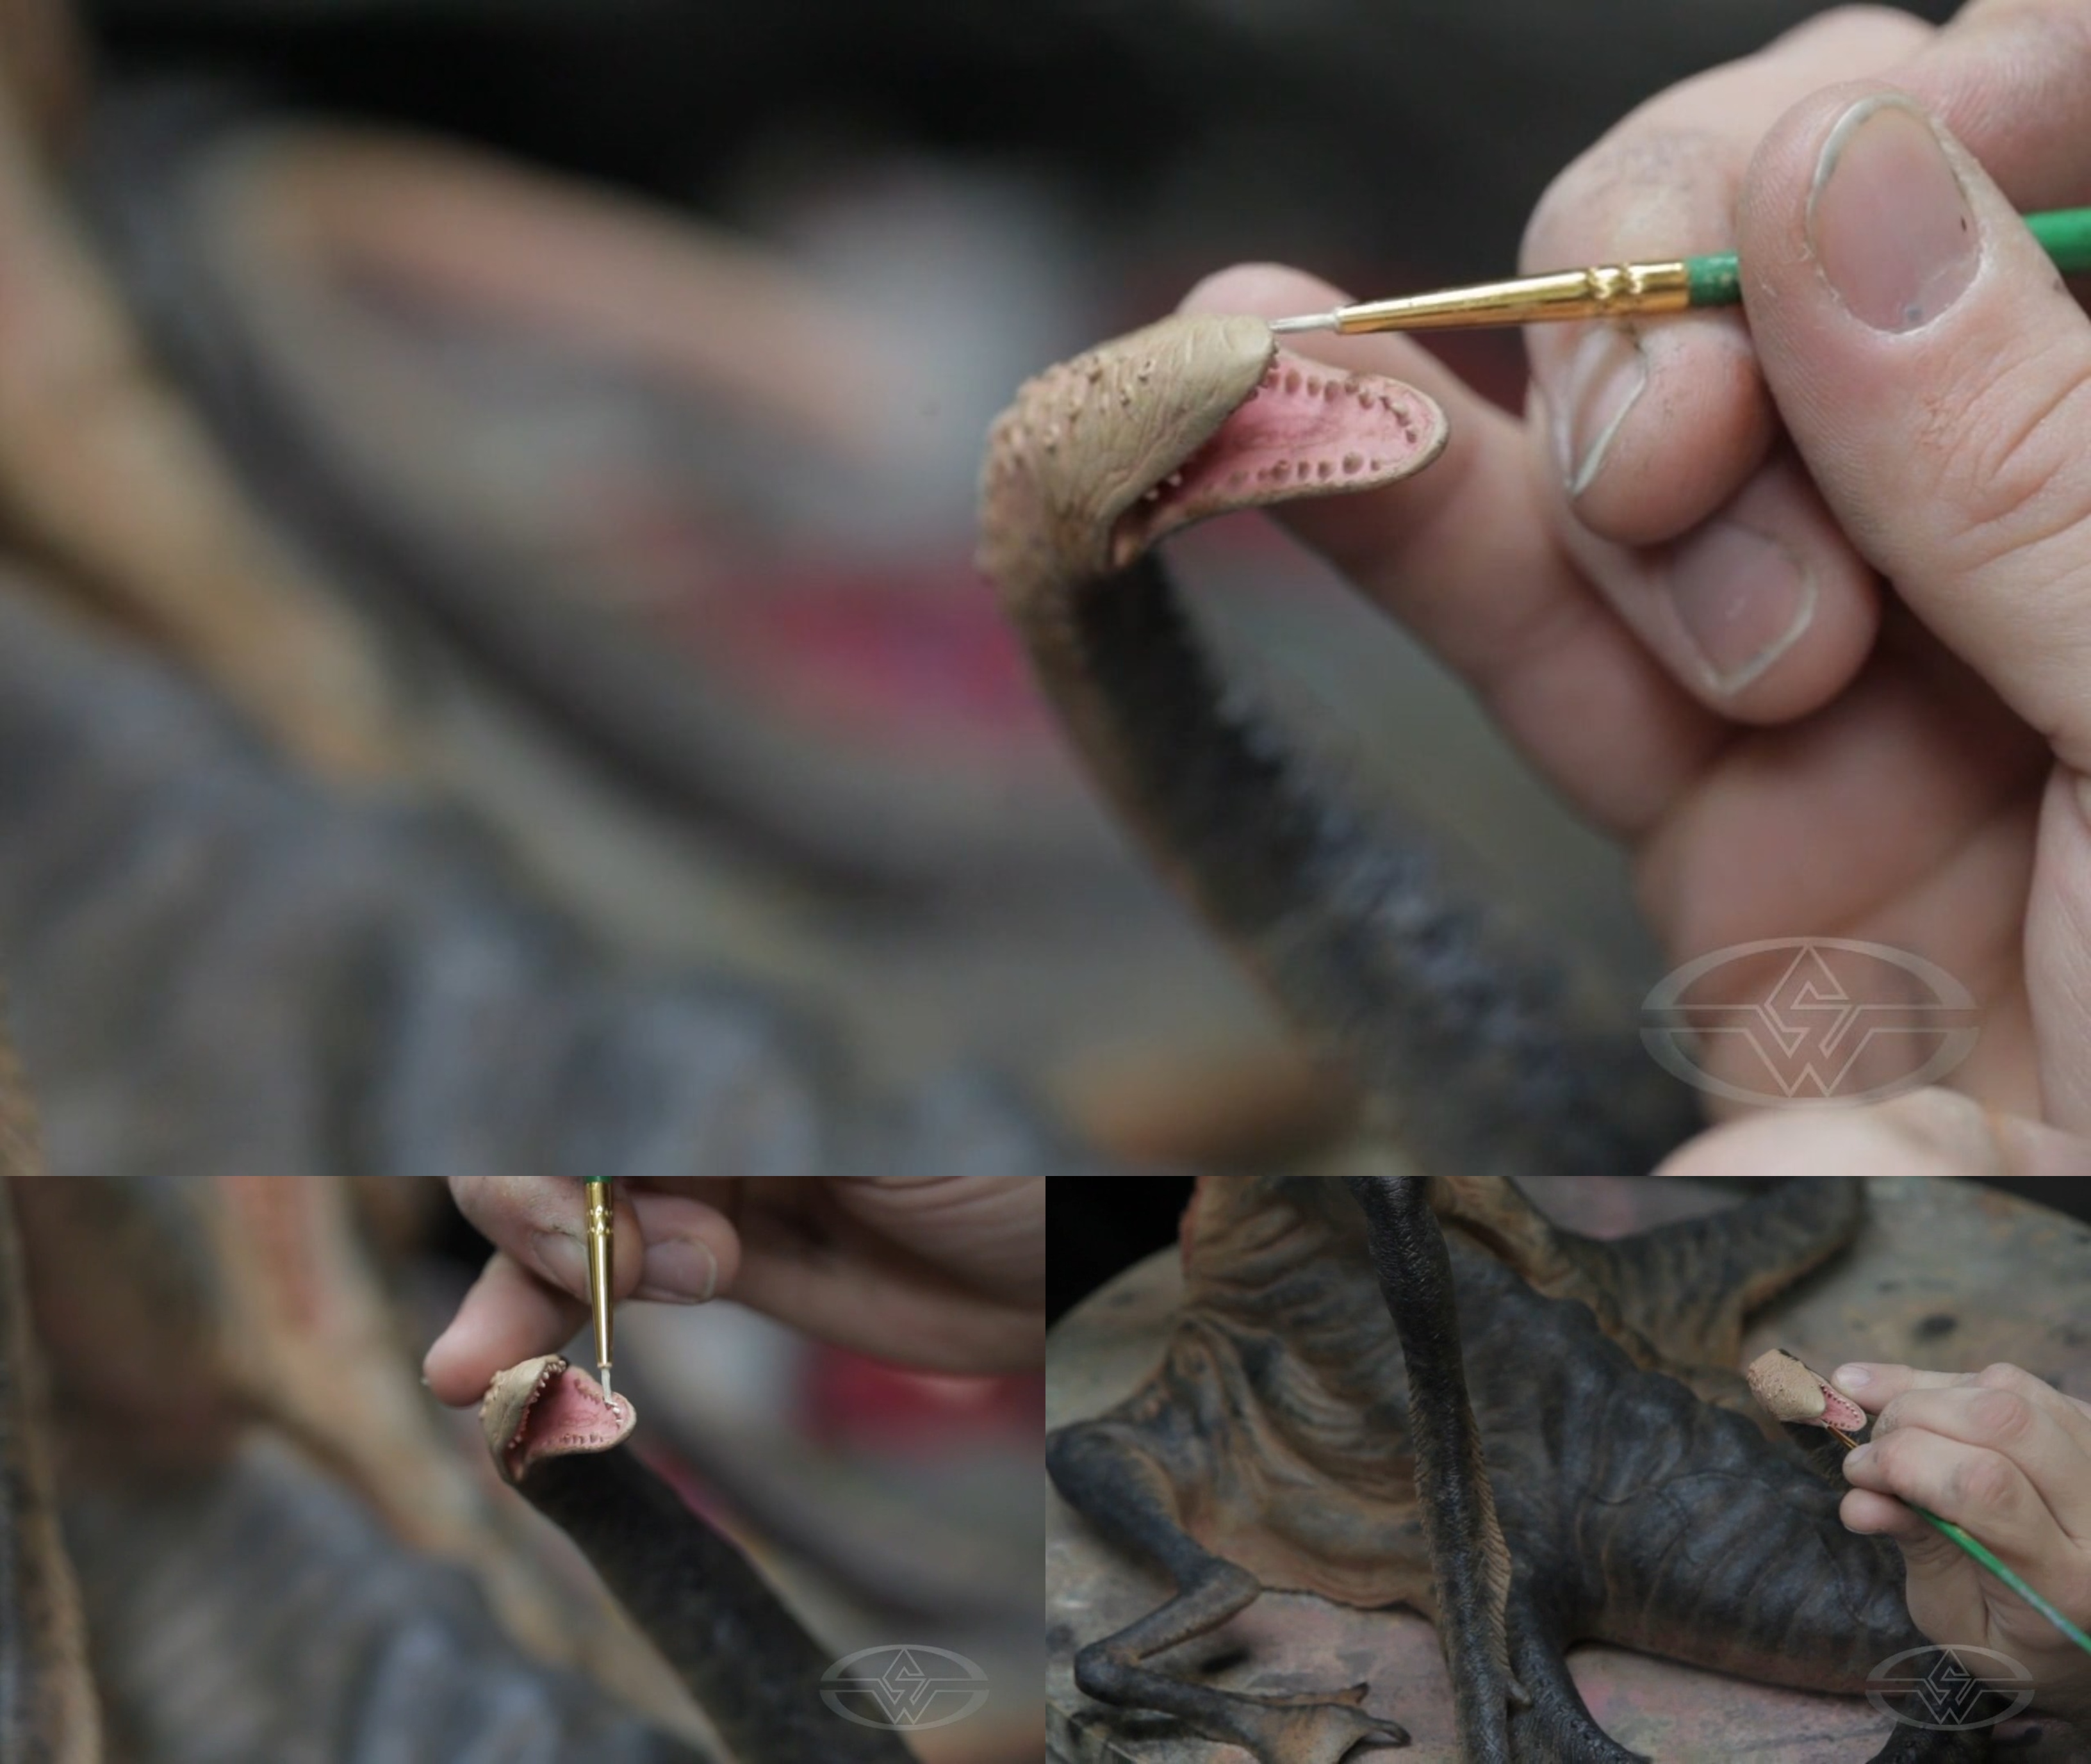 (This eel creature also undergoes a whitening treatment.)
Martin opts for an ever-so-slightly bigger brush to give the claws a black wash color. It's more watered-down than a pure pigment, jet black. The thinner paint allows the lighter tone to come through and looks more claw-like.
Start from the base of the claw to the top of the tip. If you’d like, you can go back and dry brush the highlights of the claws with shades of brown.
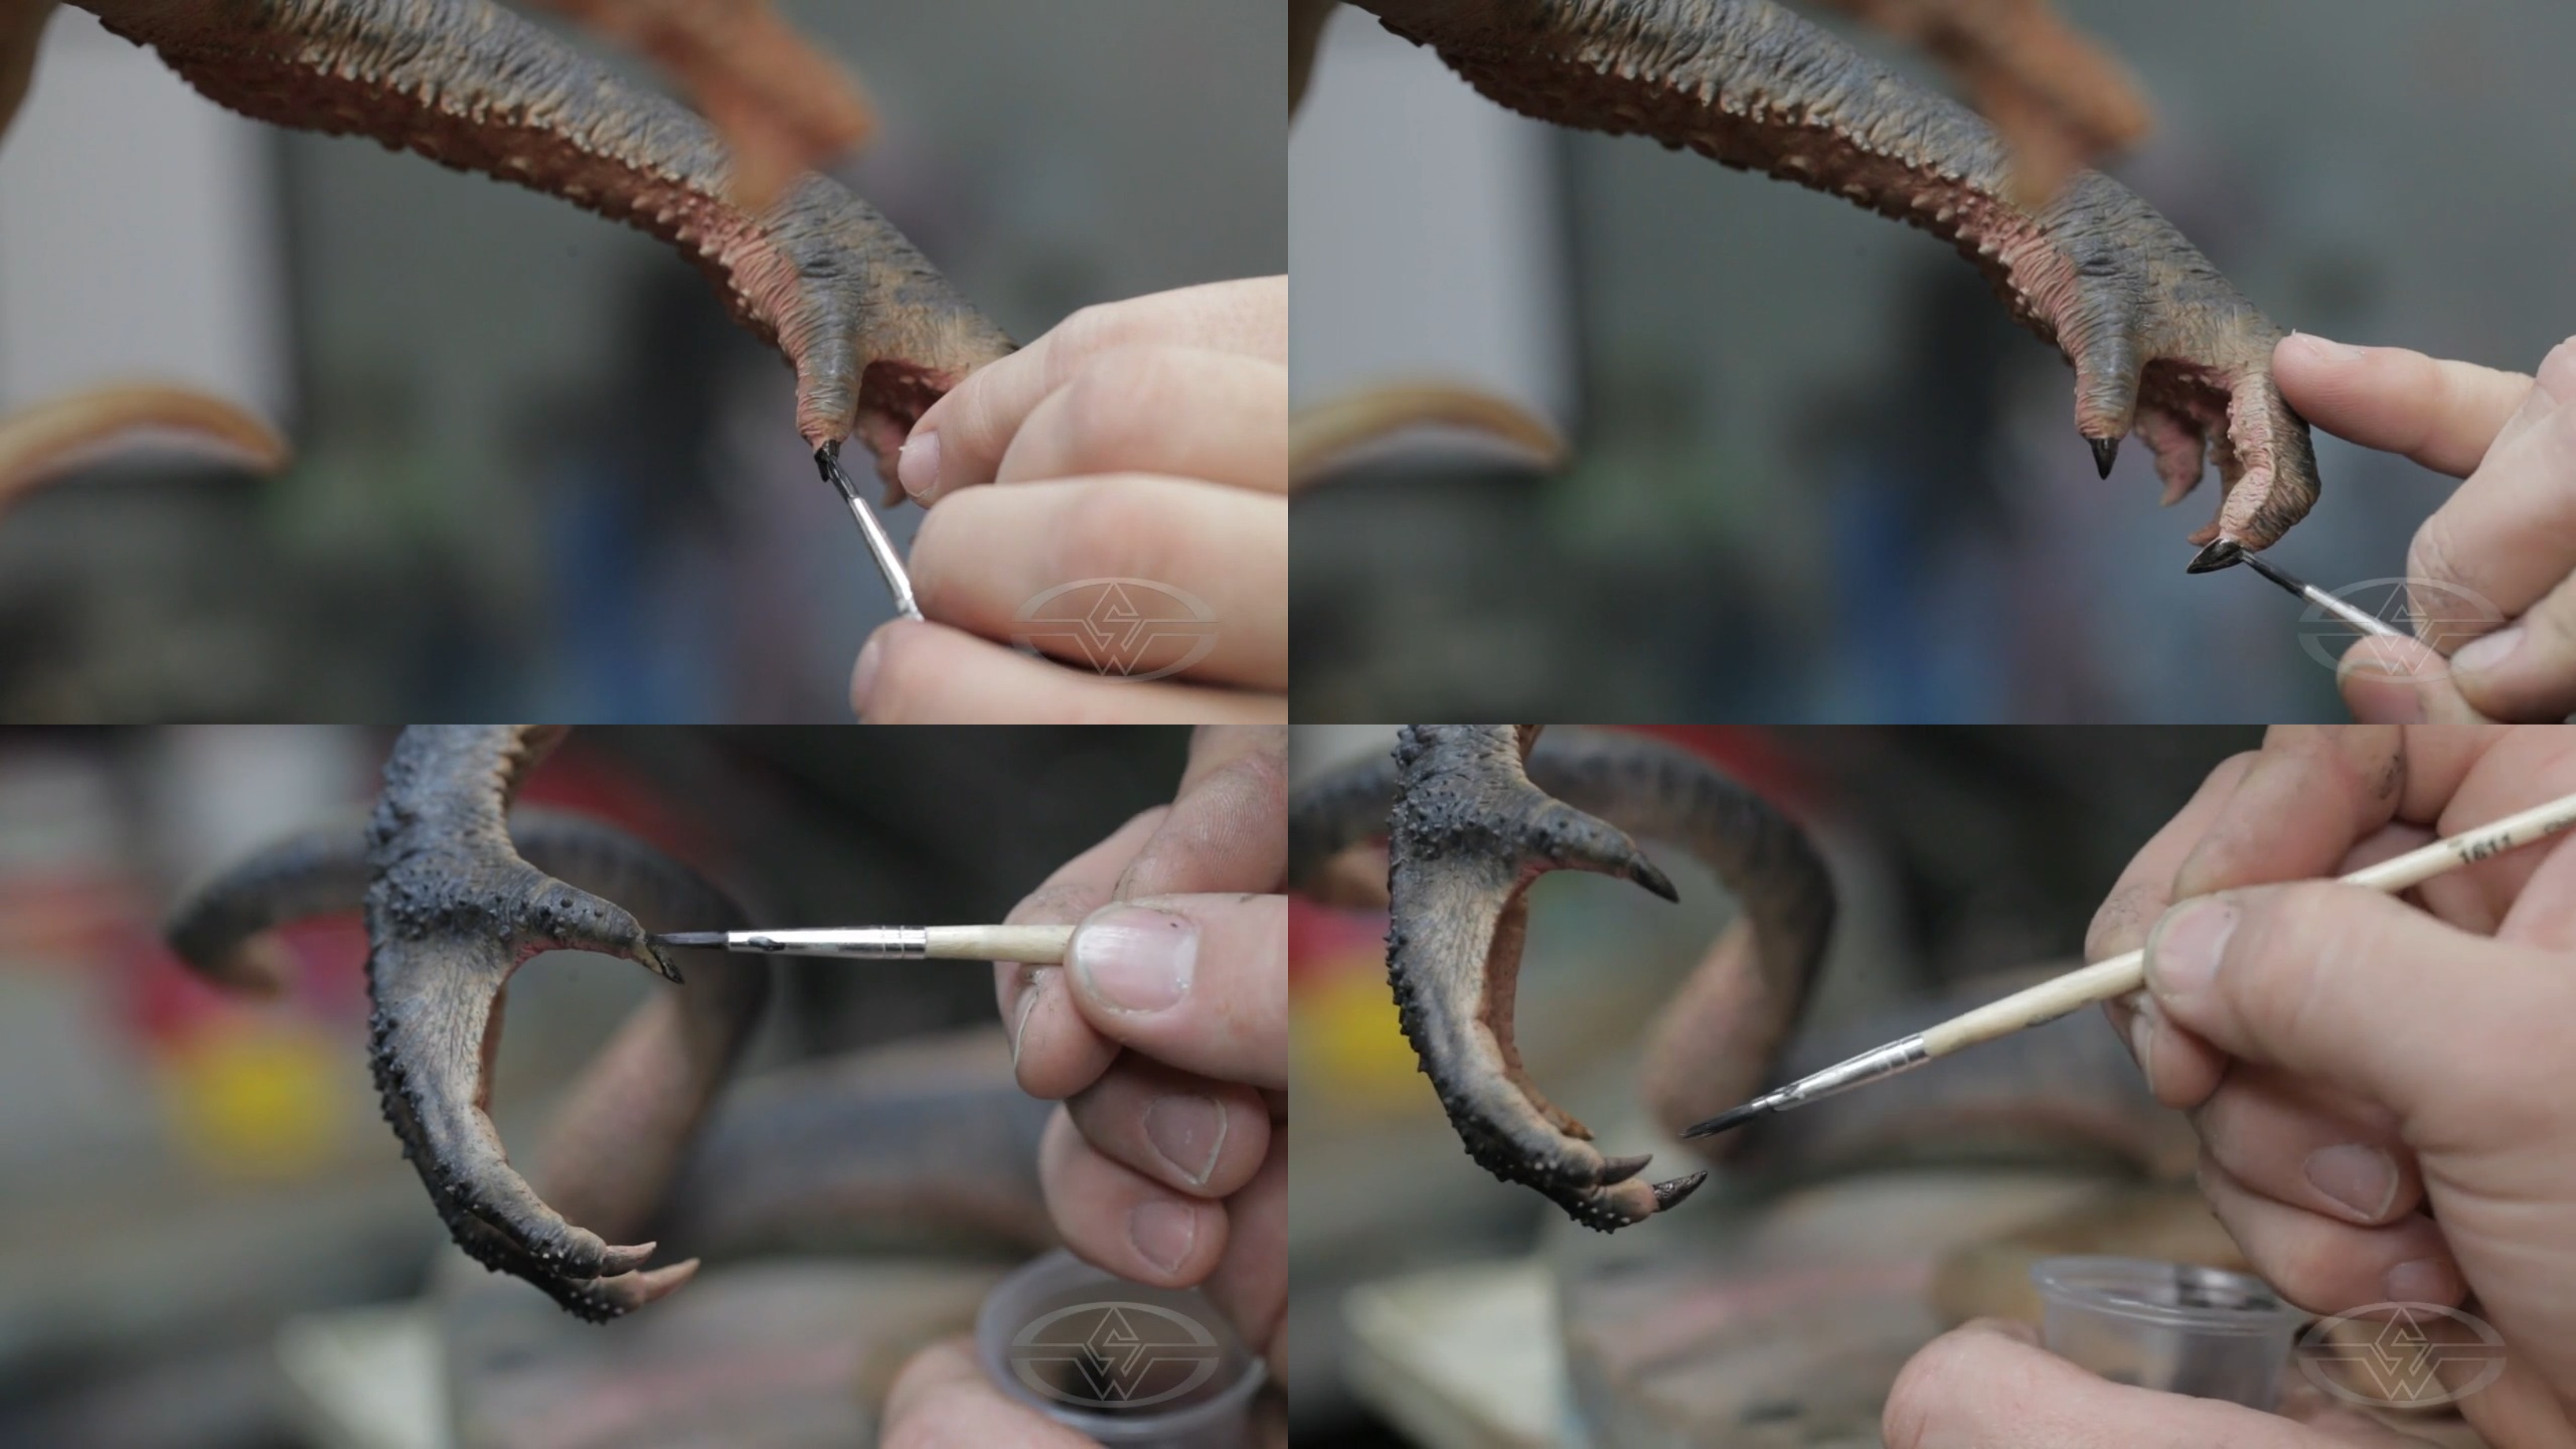 (Timothy Martin opts for a black wash over a pure black shade to paint the Leviathan's nails to give them a more realistic appearance.)
Applying a Red Wash to Eyes
Return to the various eyes on the piece to do a red wash and add the suggestion of a bloodshot look.
Dip your brush into the red wash, tap on the eyes all throughout, and let the paint settle.
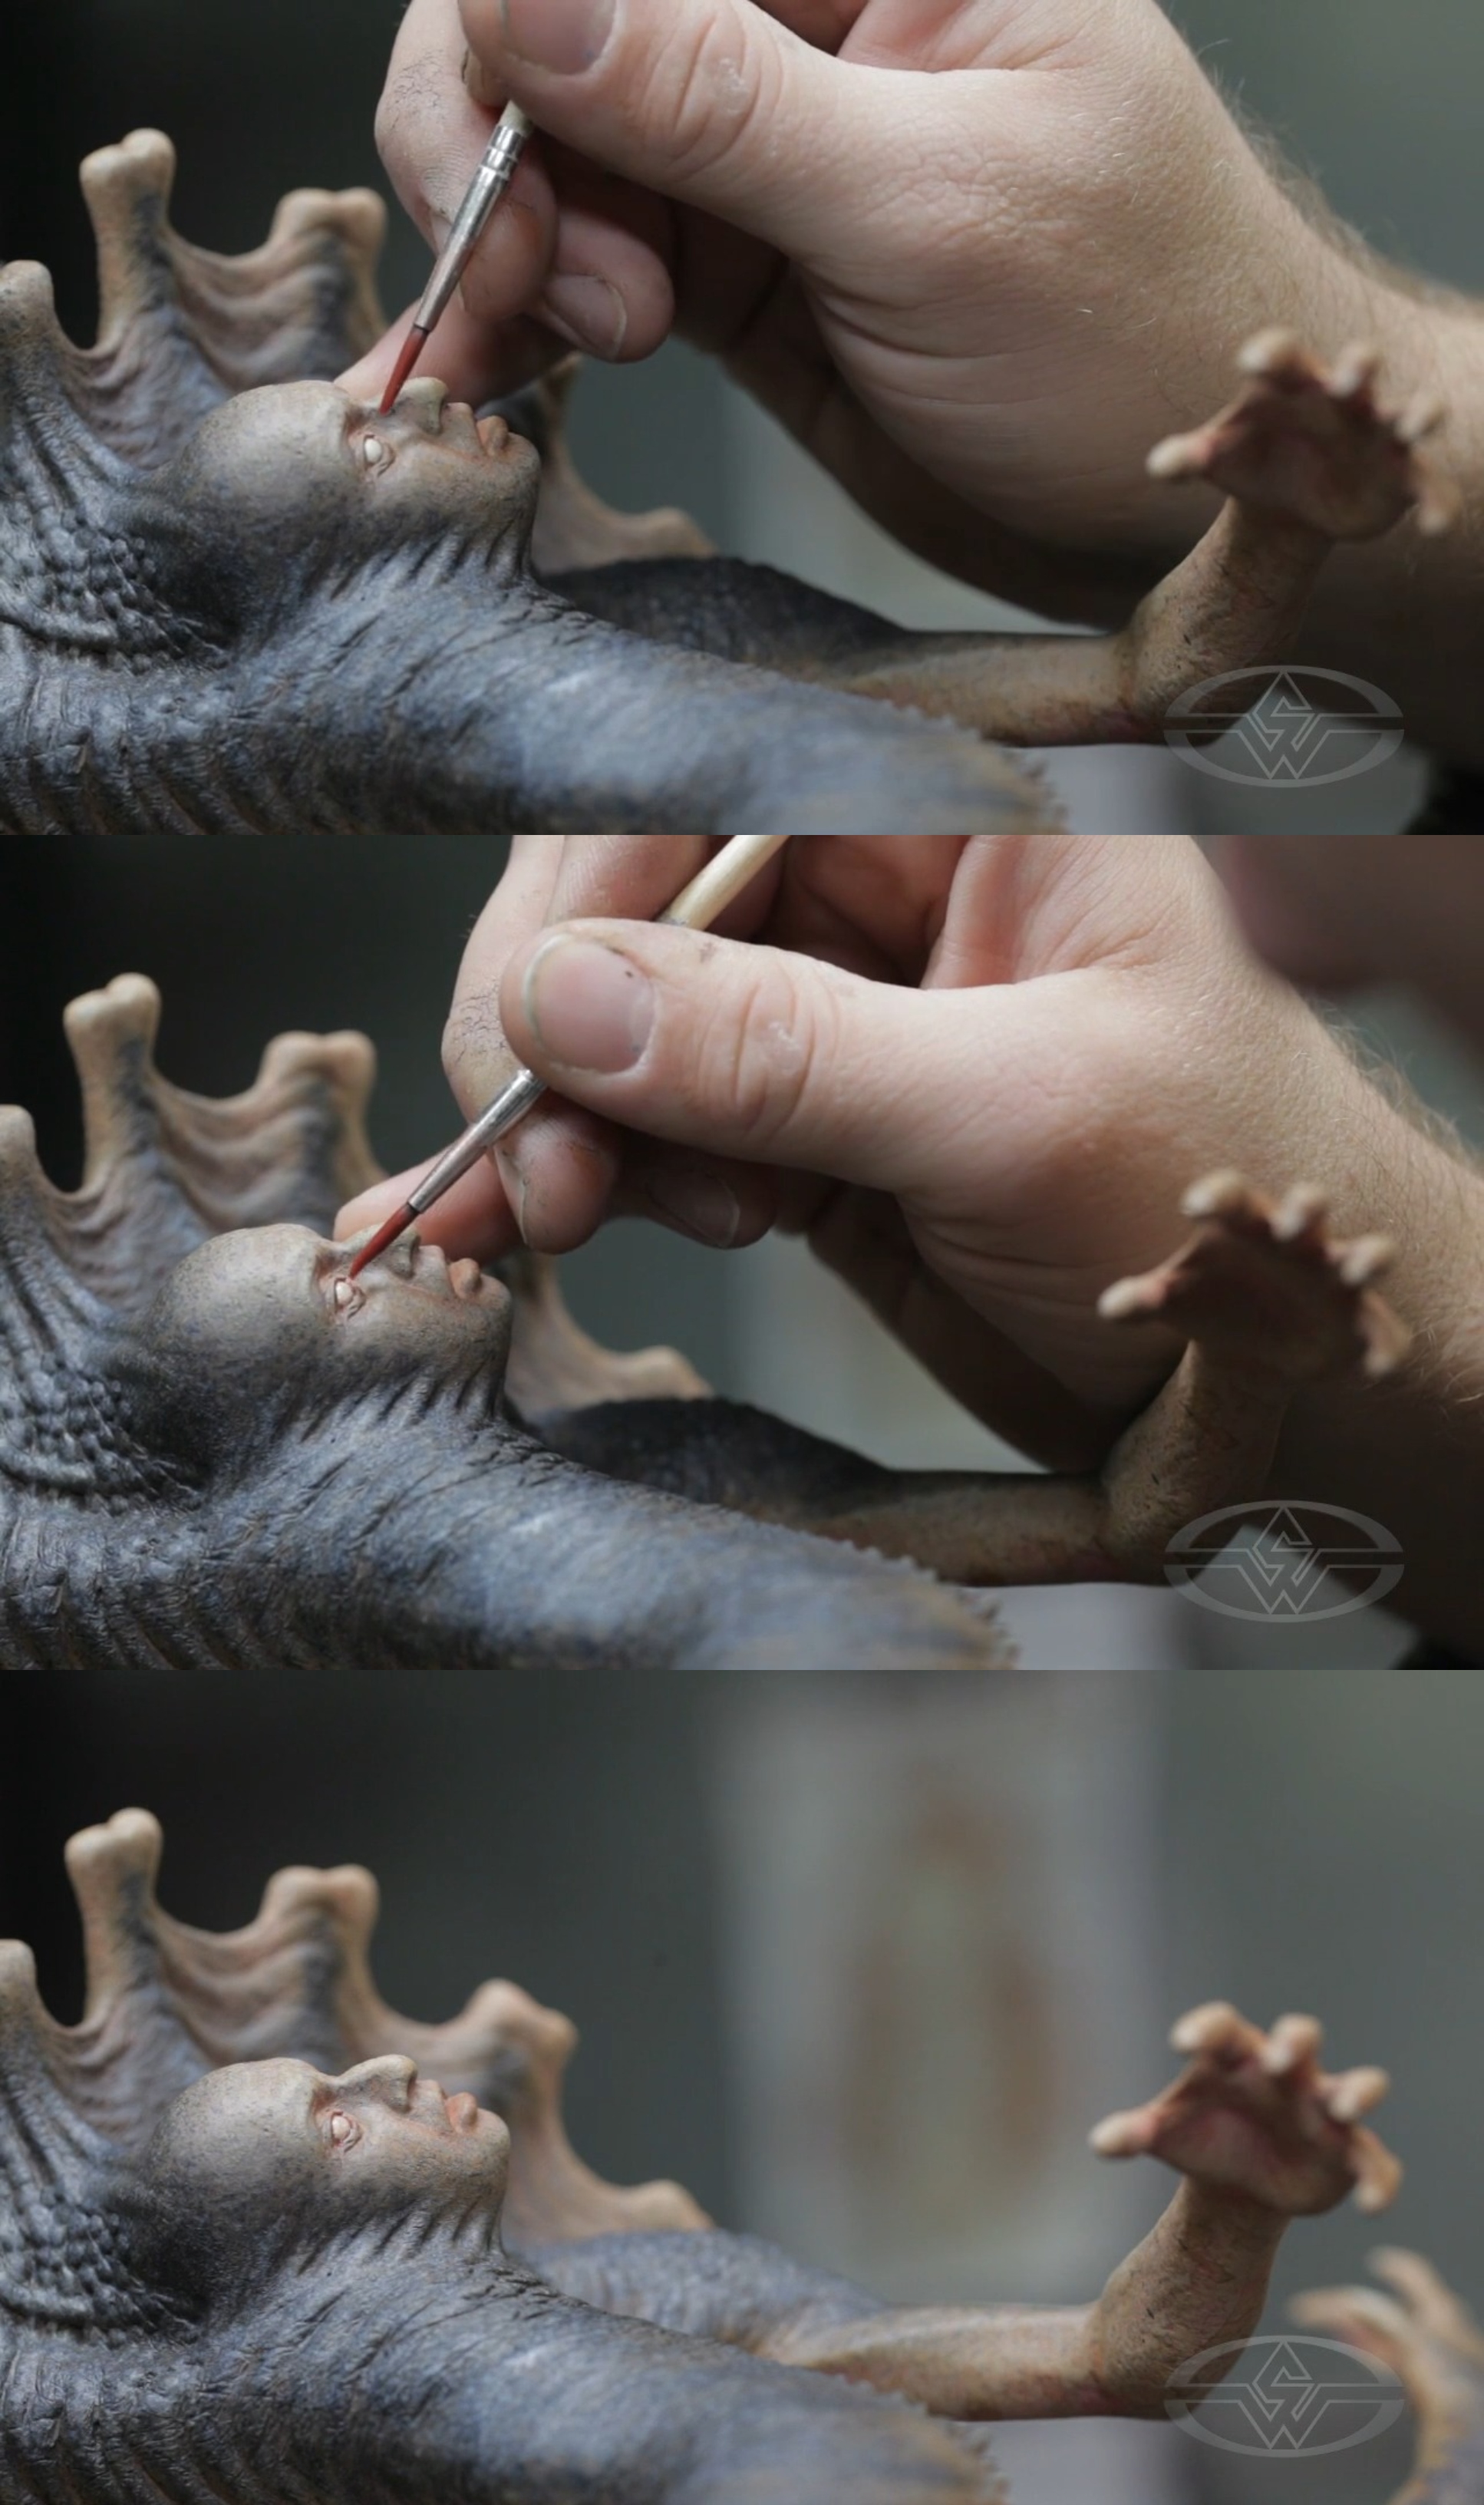 (Tapping on the eyes with a red wash, Timothy Martin adds a bloodshot effect, enhancing the horror of the Leviathan.)
Repeat this process with the Leviathan eyes. Lightly tap all over the eyeballs with the red wash. Avoid scrubbing the eyes to prevent removing the white paint you’ve applied.
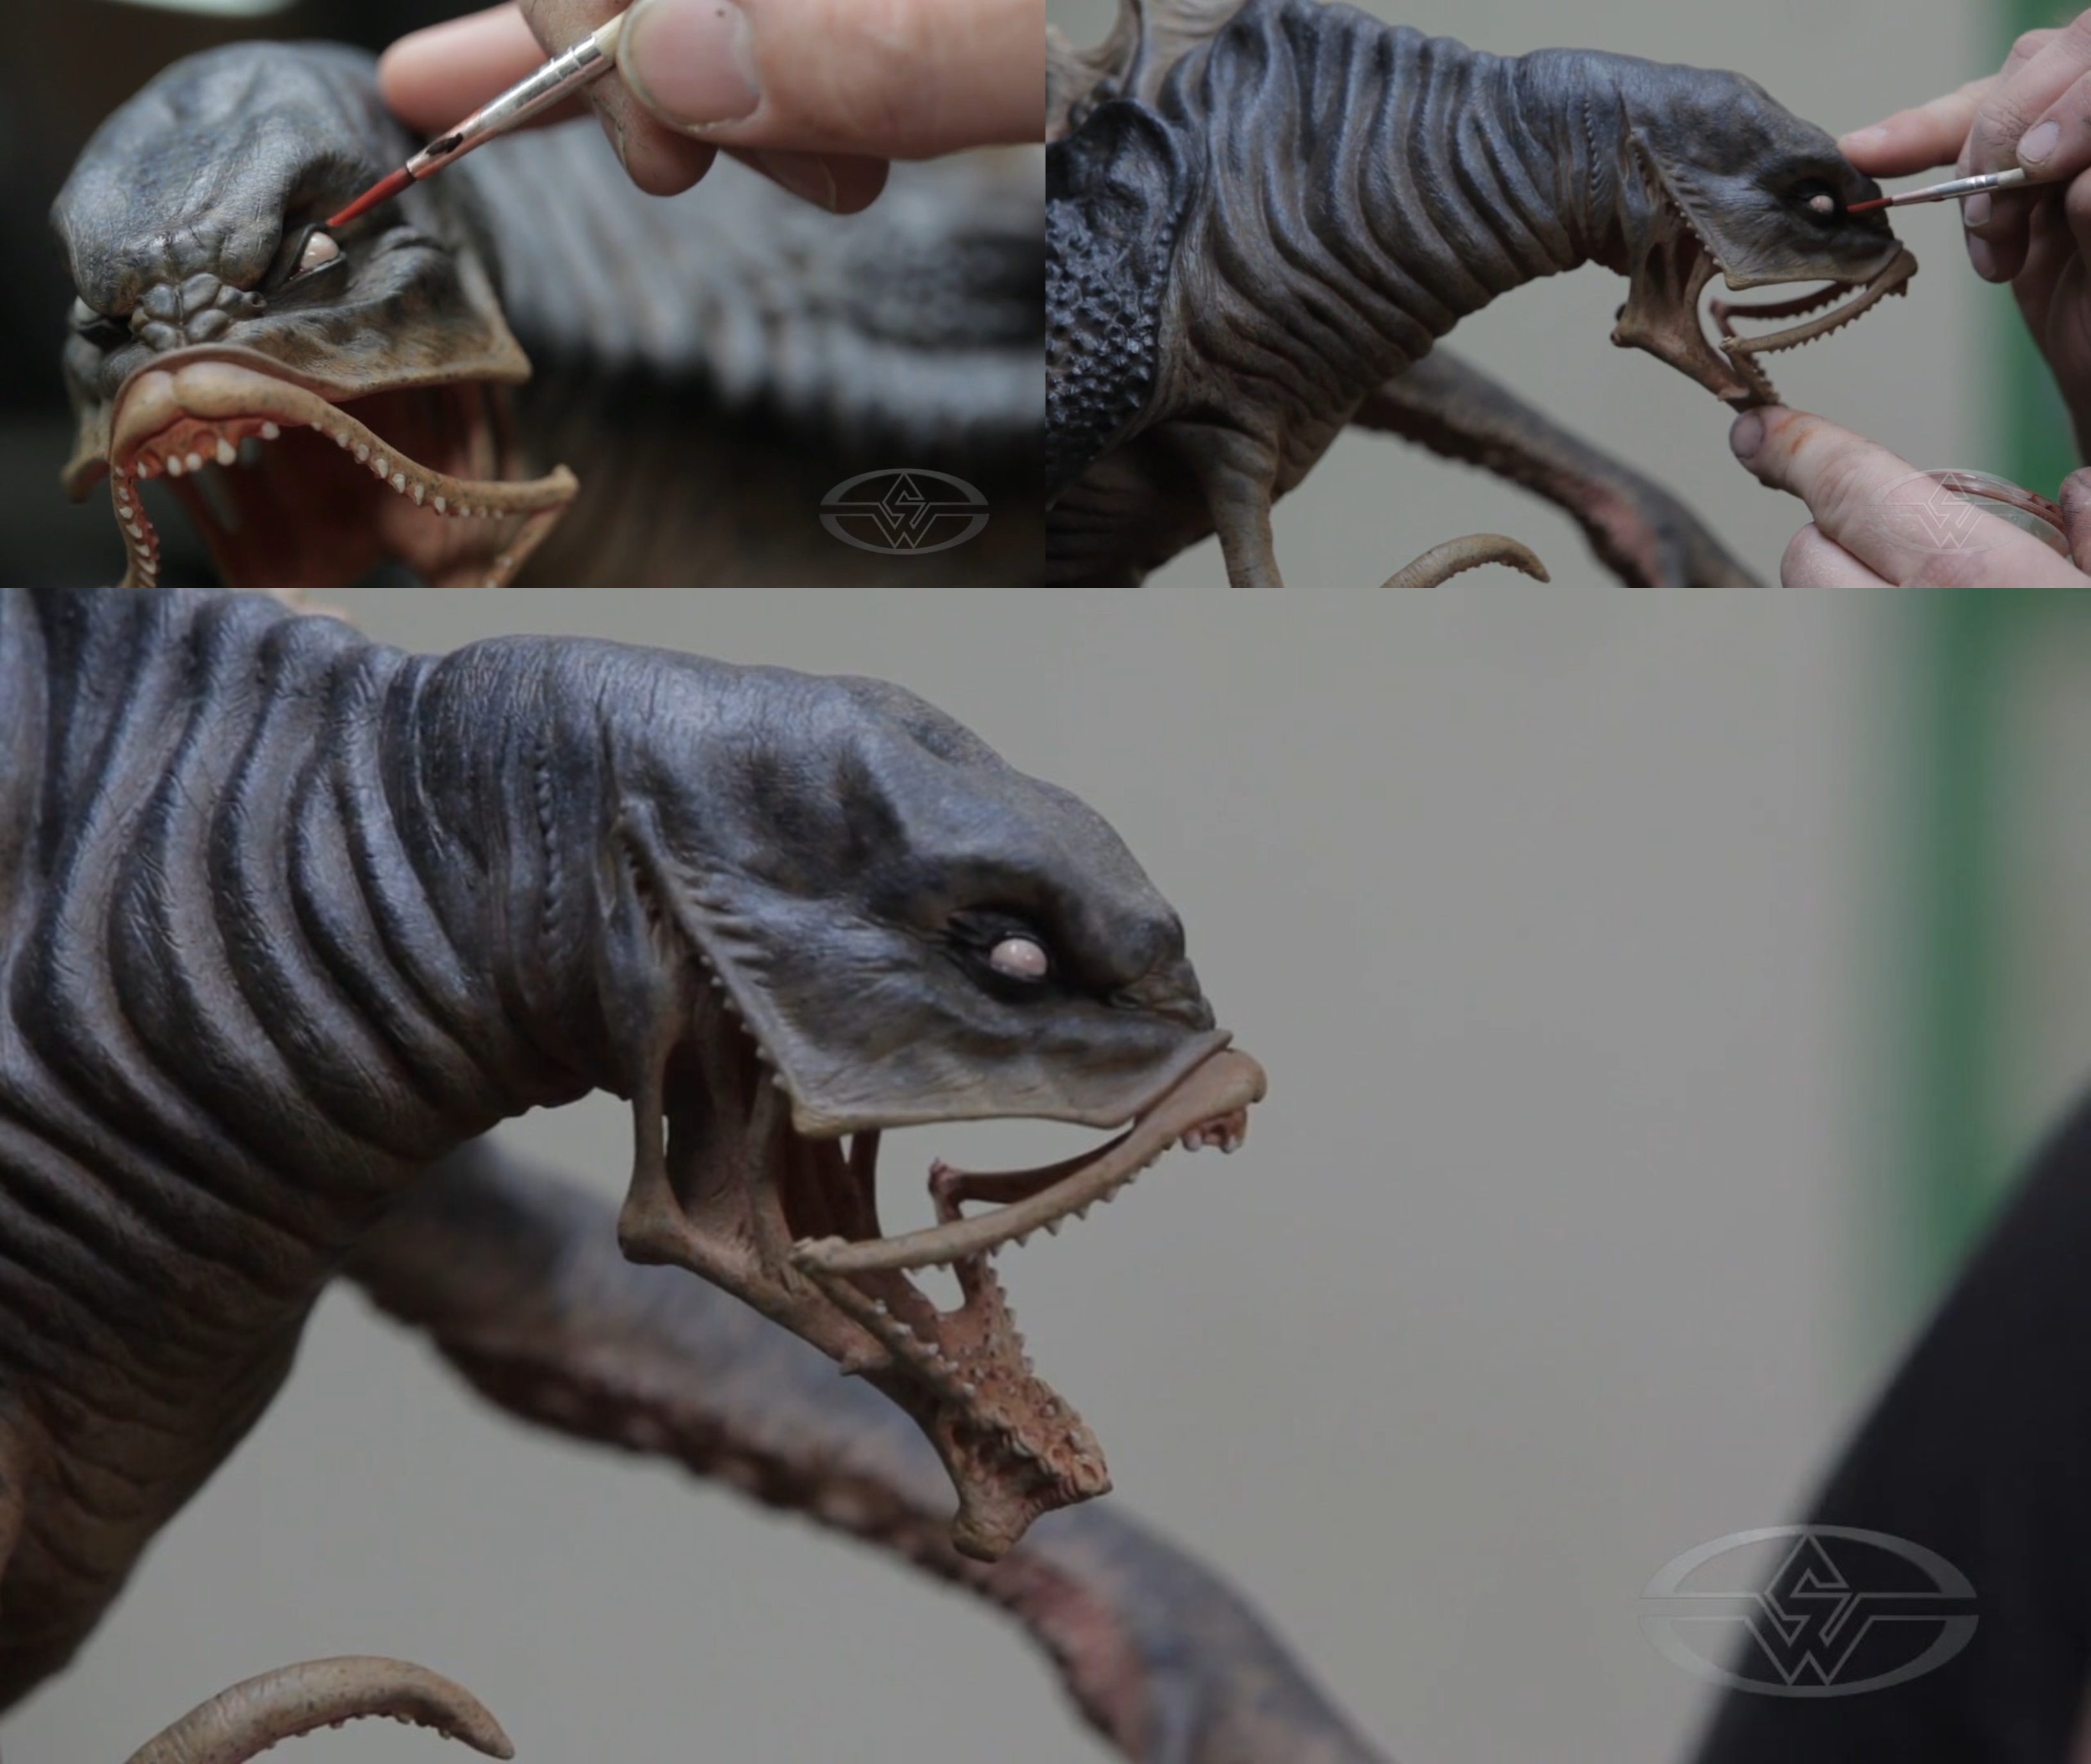 (Timothy Martin uses red wash over the white for a subtle, life-like effect in the Leviathan's eyes.)
Airbrushing Creature Eyes
It’s time to break out the airbrush. The goal is to create a set of hazy, milky eyes for the Leviathan.
Load your airbrush with black paint, and use a low-pressure setting to airbrush a pupil on each eye. Spray slowly and carefully, making sure to hold everything as still as possible for a meticulous application.
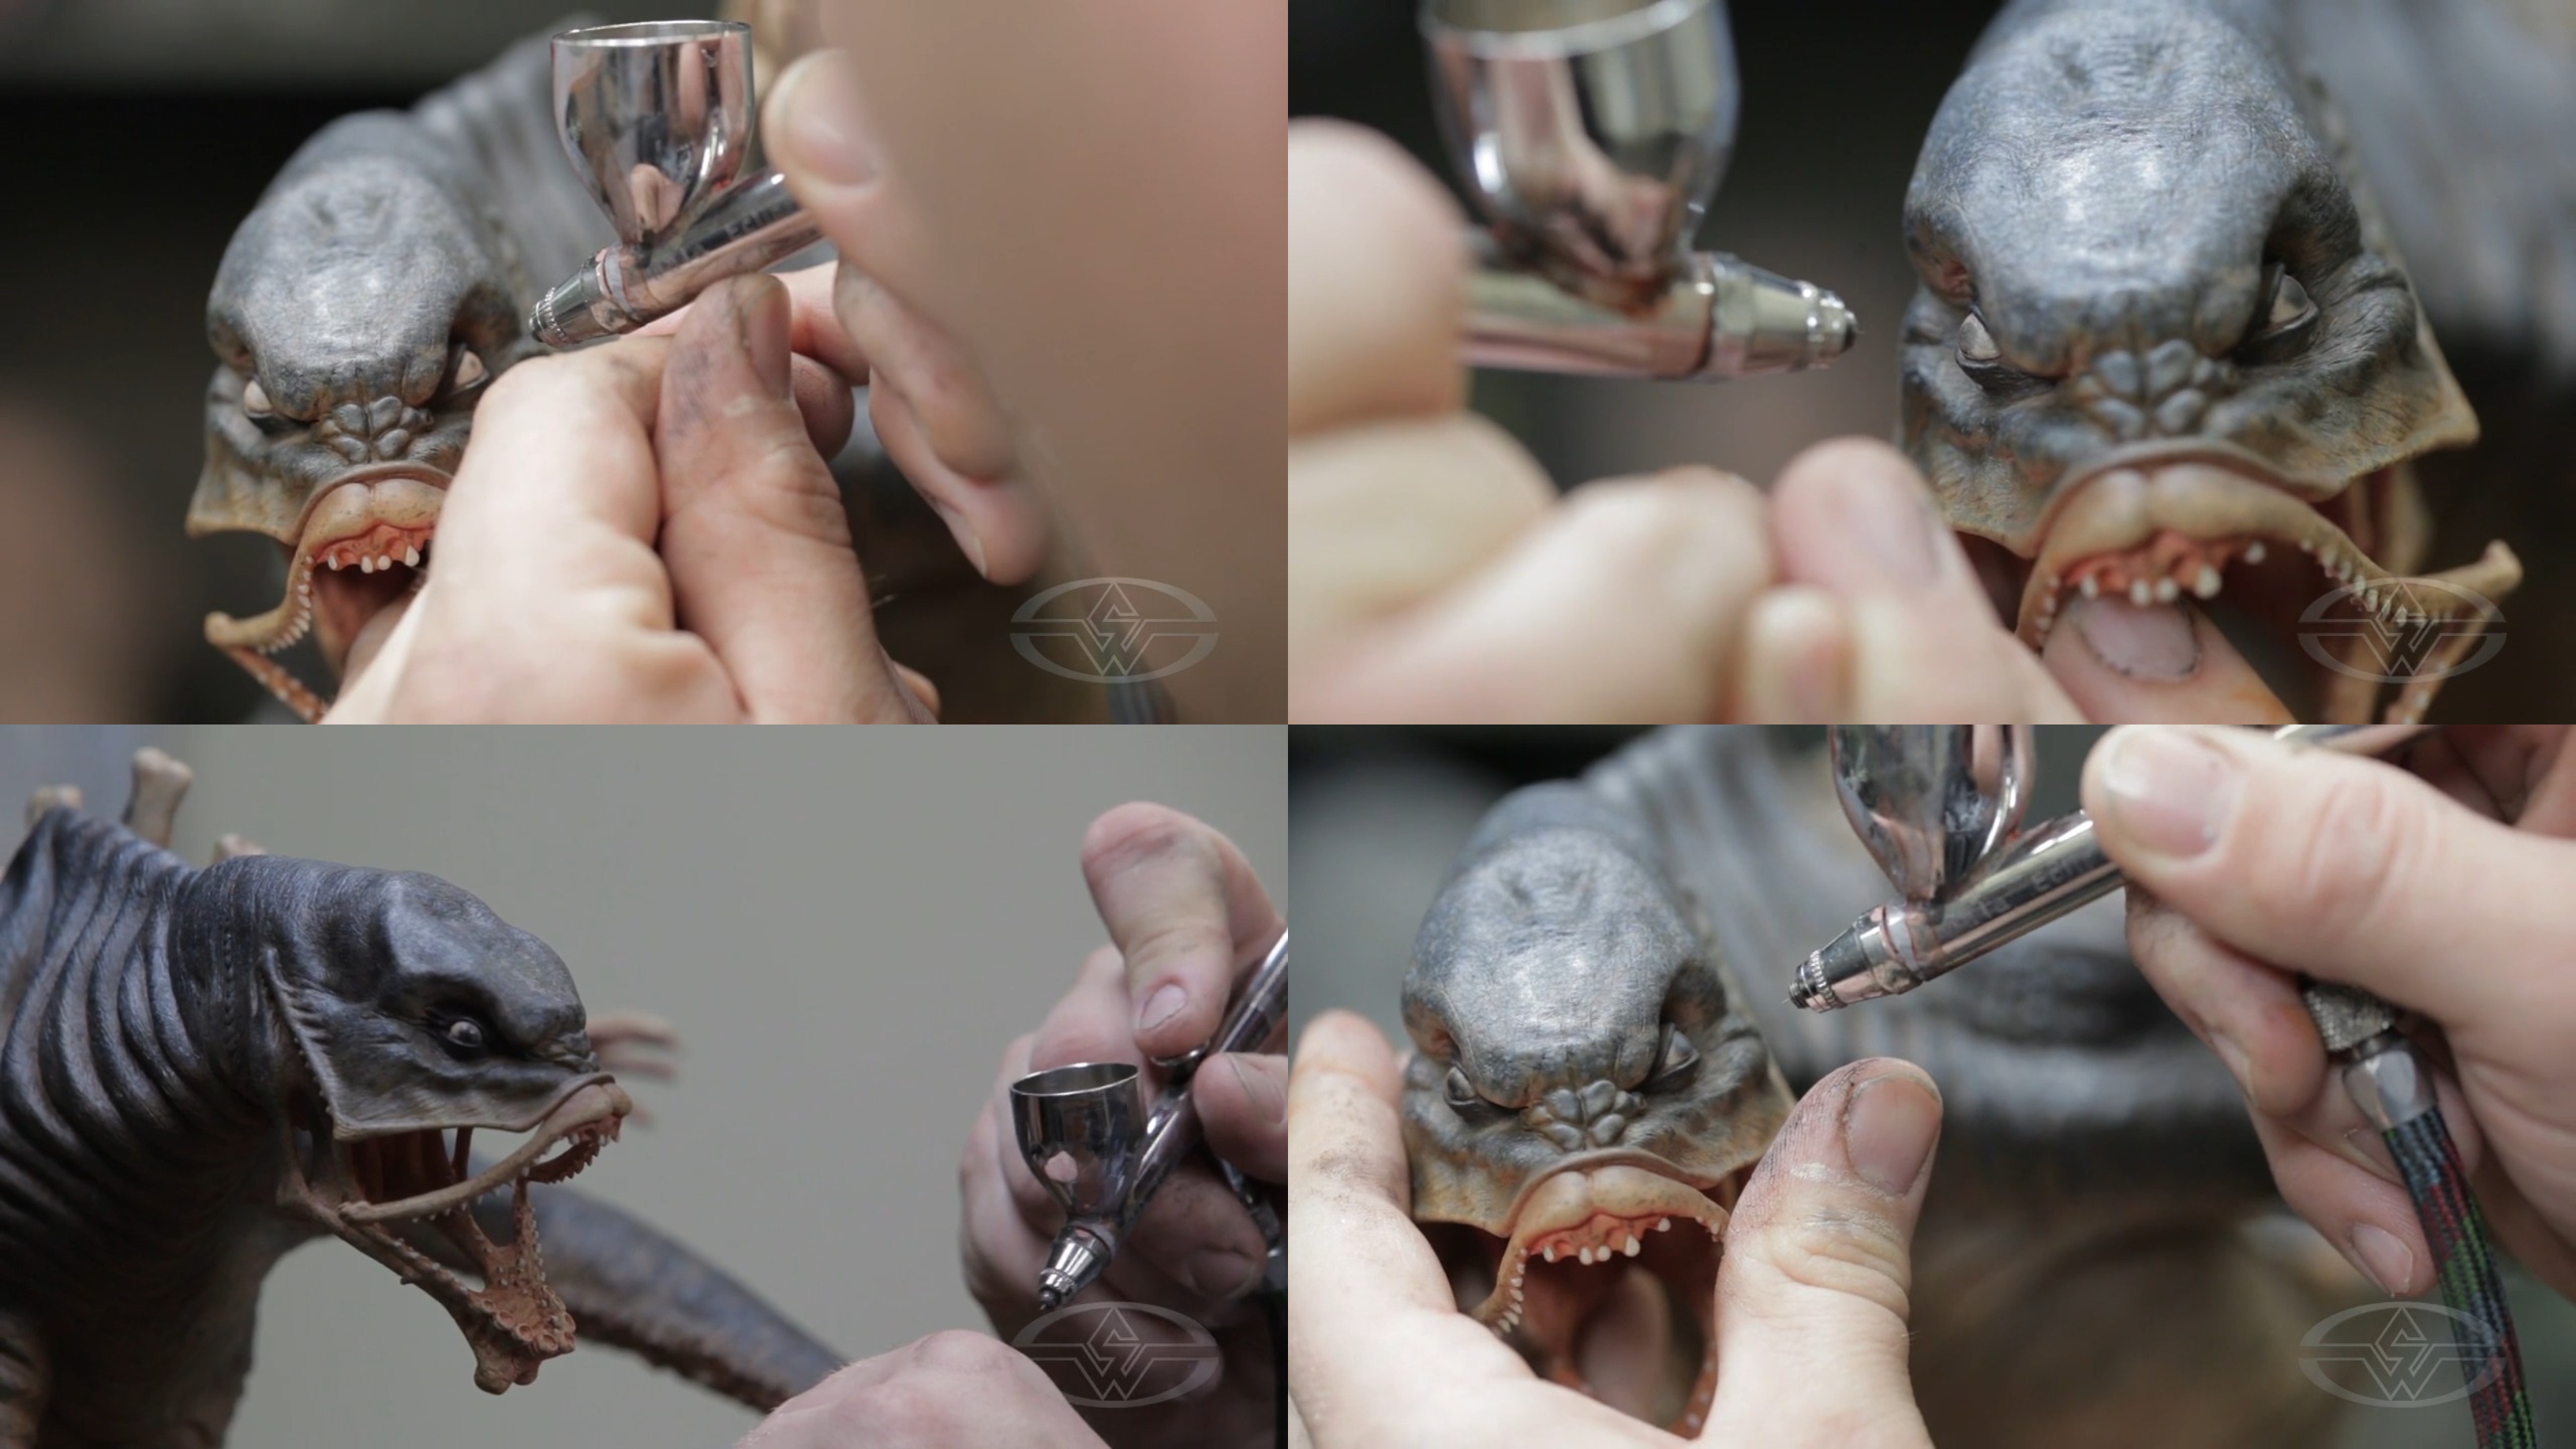 (Timothy Martin gives the Leviathan a menacing set of pupils with a low-pressure airbrush setting and black paint.)
Once you’re satisfied with how the pupils look, load your airbrush with thin white paint and lightly go over the pupils to create a pale, cloudy look. Don’t worry if you airbrush over the lids.
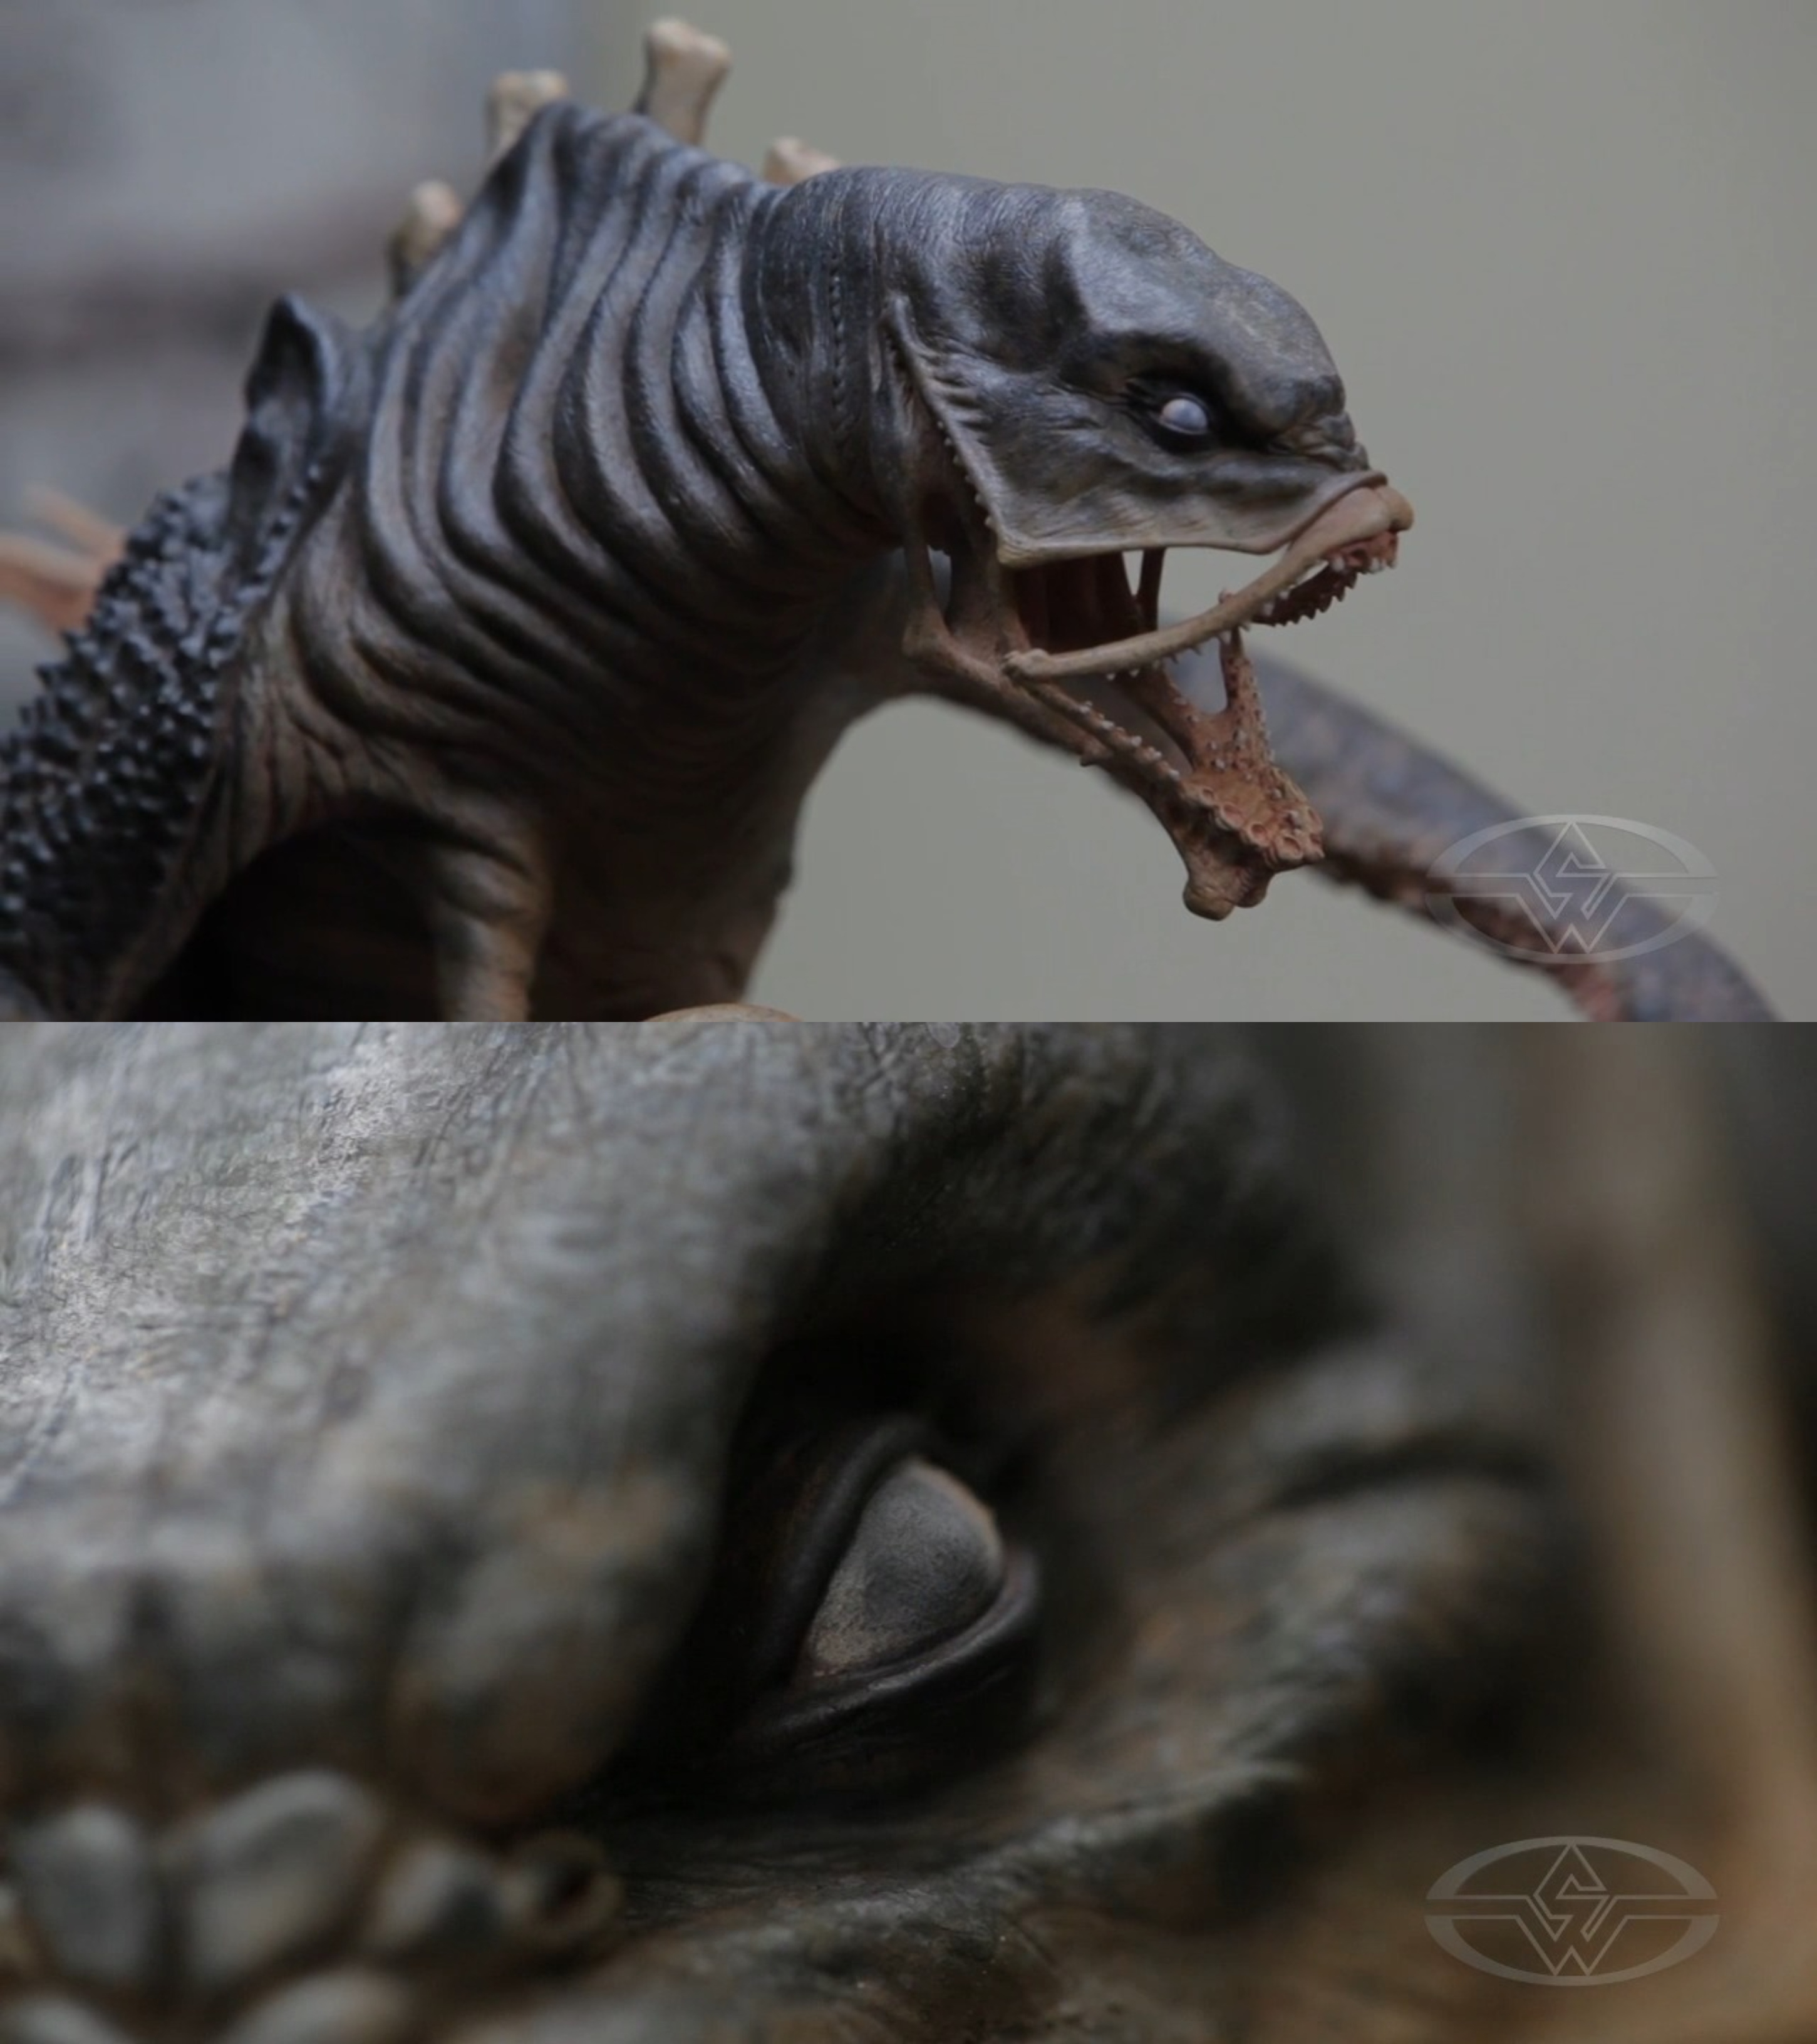 (To achieve the look Timothy Martin wants, he goes over the eyes with a light layer of thinned-out white airbrush paint.)
Top Layer - Repeating the Wash
Next, take your fine detail brush with the red wash again and go over the whites of the eyes and the lids to make them appear even more bloodshot and terrifying.
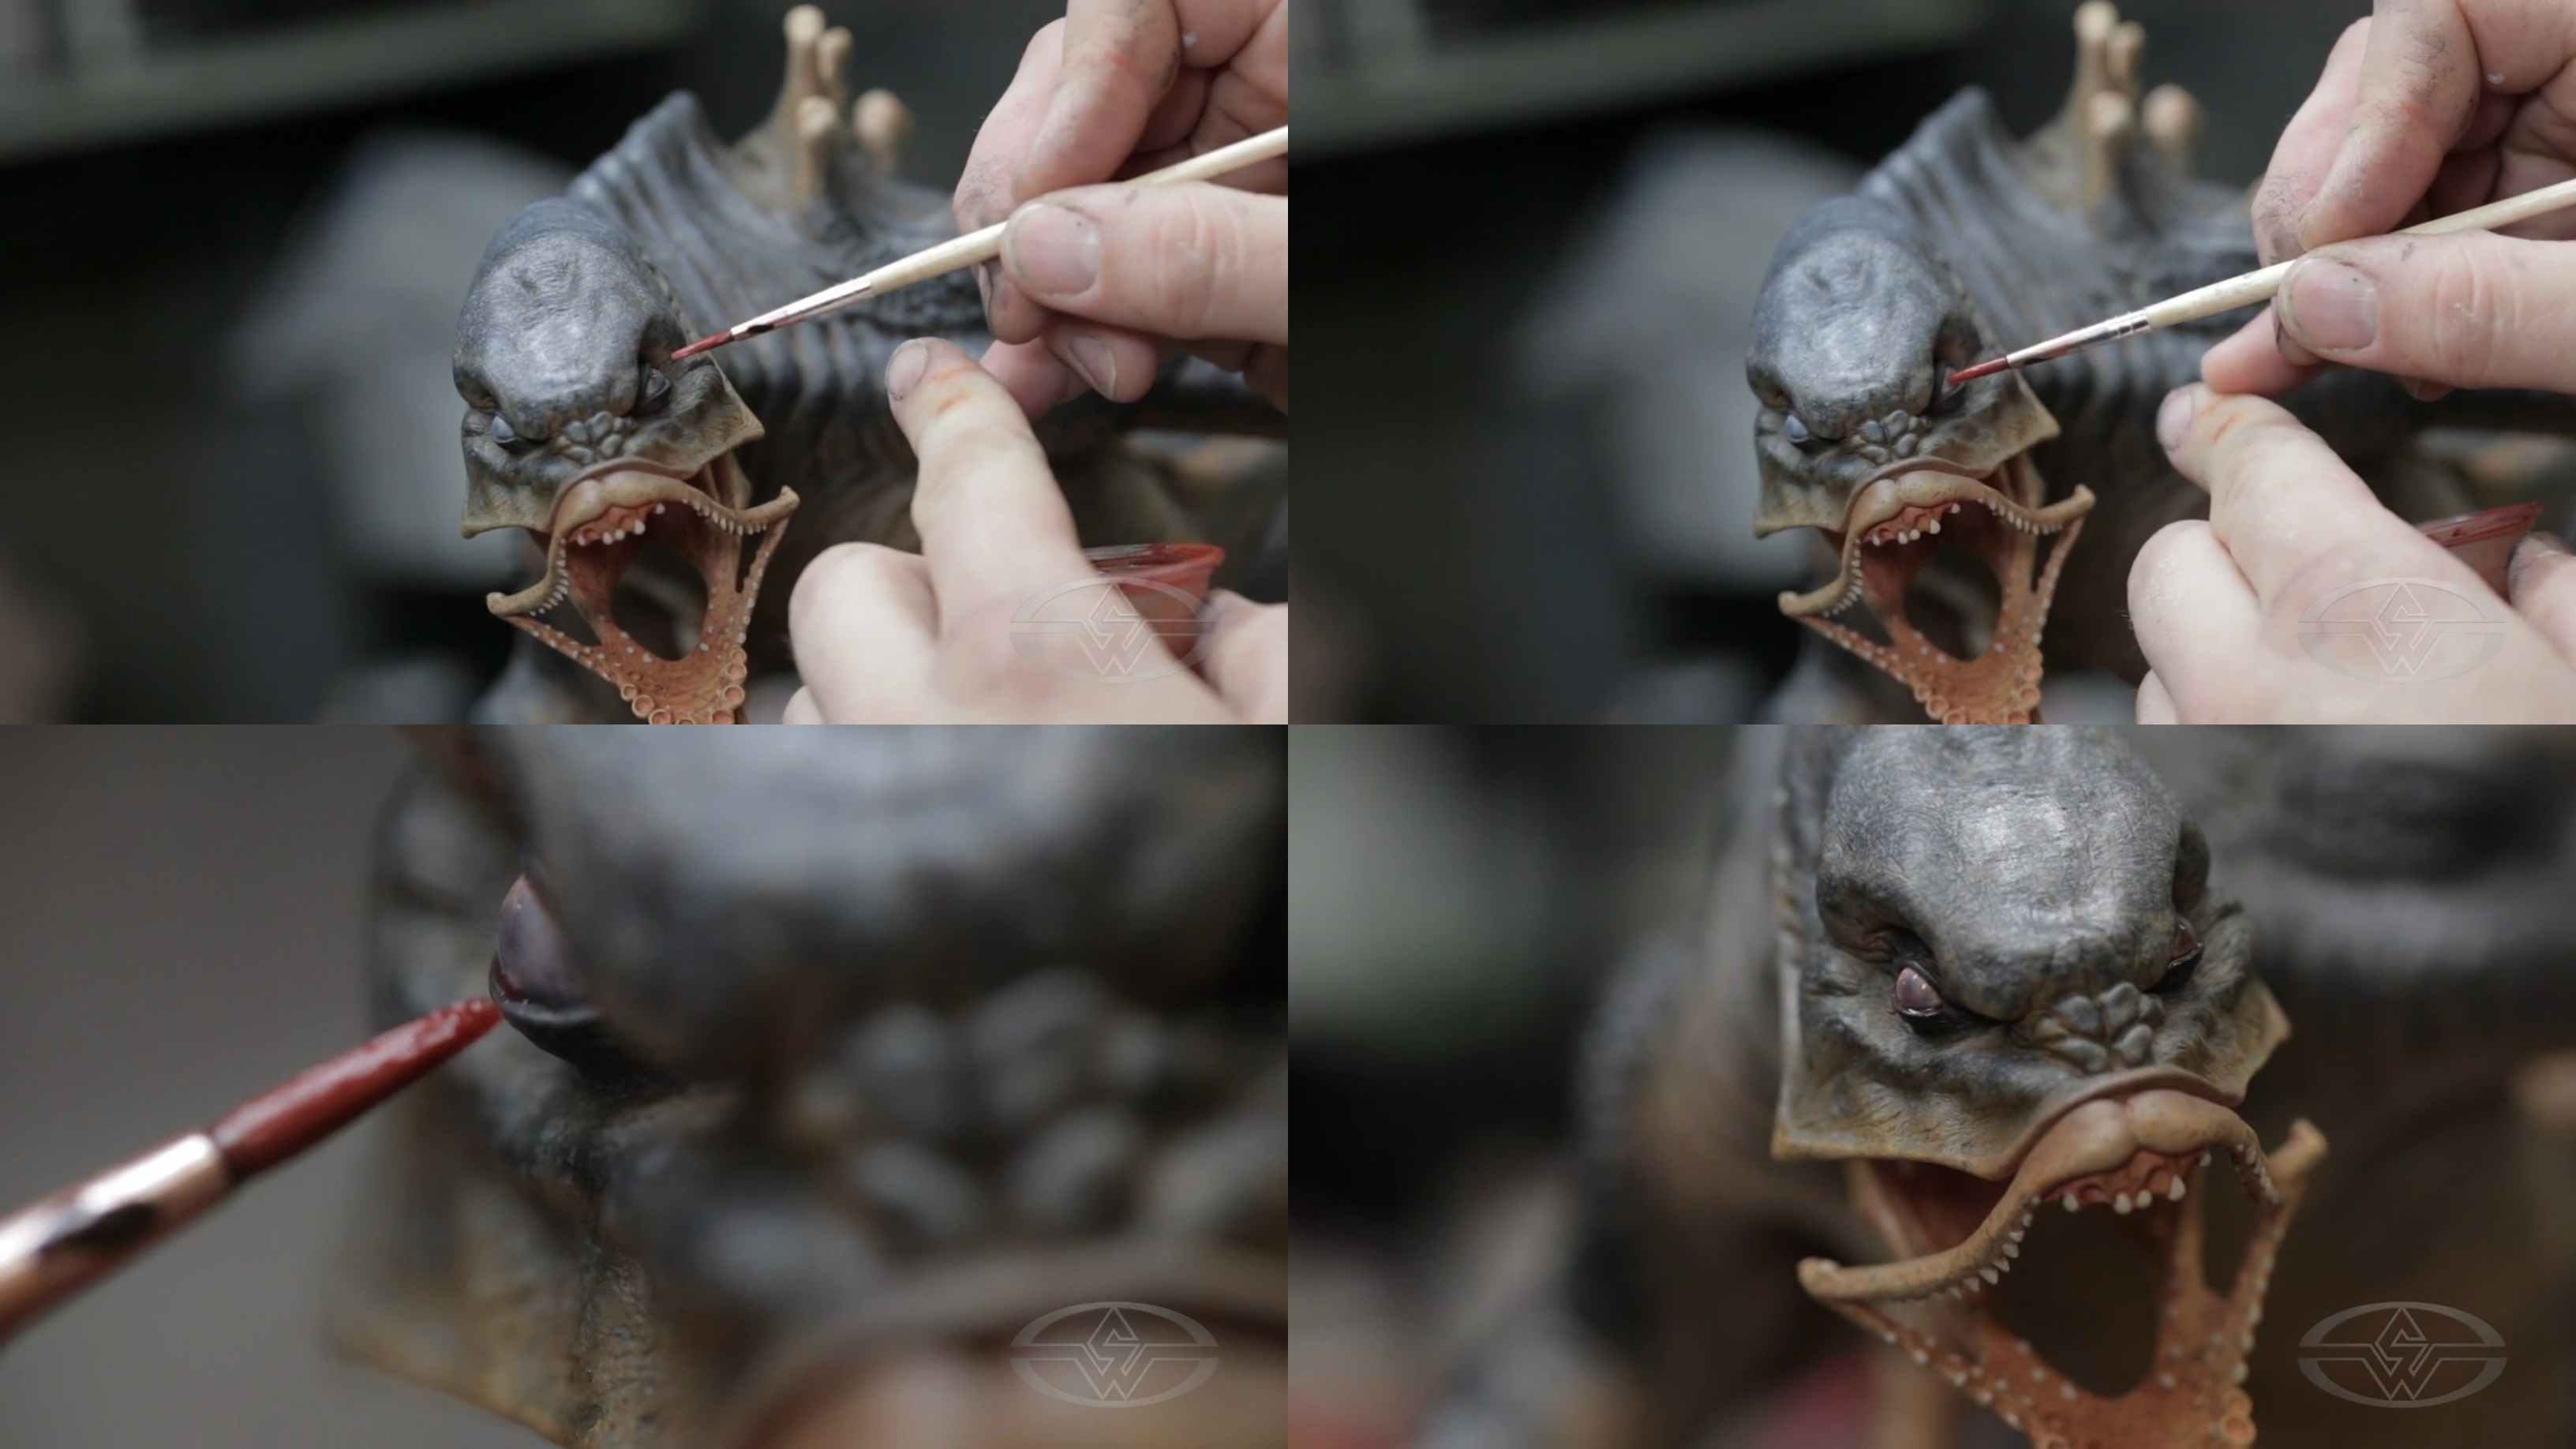 (Timothy Martin applies more red wash for the Leviathan's final bloodshot look.)
Allow the wash to dry and see if you’d prefer to leave the eyes as they are or apply more of the wash.
Painting Irises and Pupils on Human Eyes
Prepare to give your human character an iris and pupil. Since the character has blue eyes, use the Skin Illustrator NecroMania Liquids “On Ice” color for this step.
Martin chooses to make the eyes look rolled back into the head by very carefully placing the iris up toward the top of the lid.
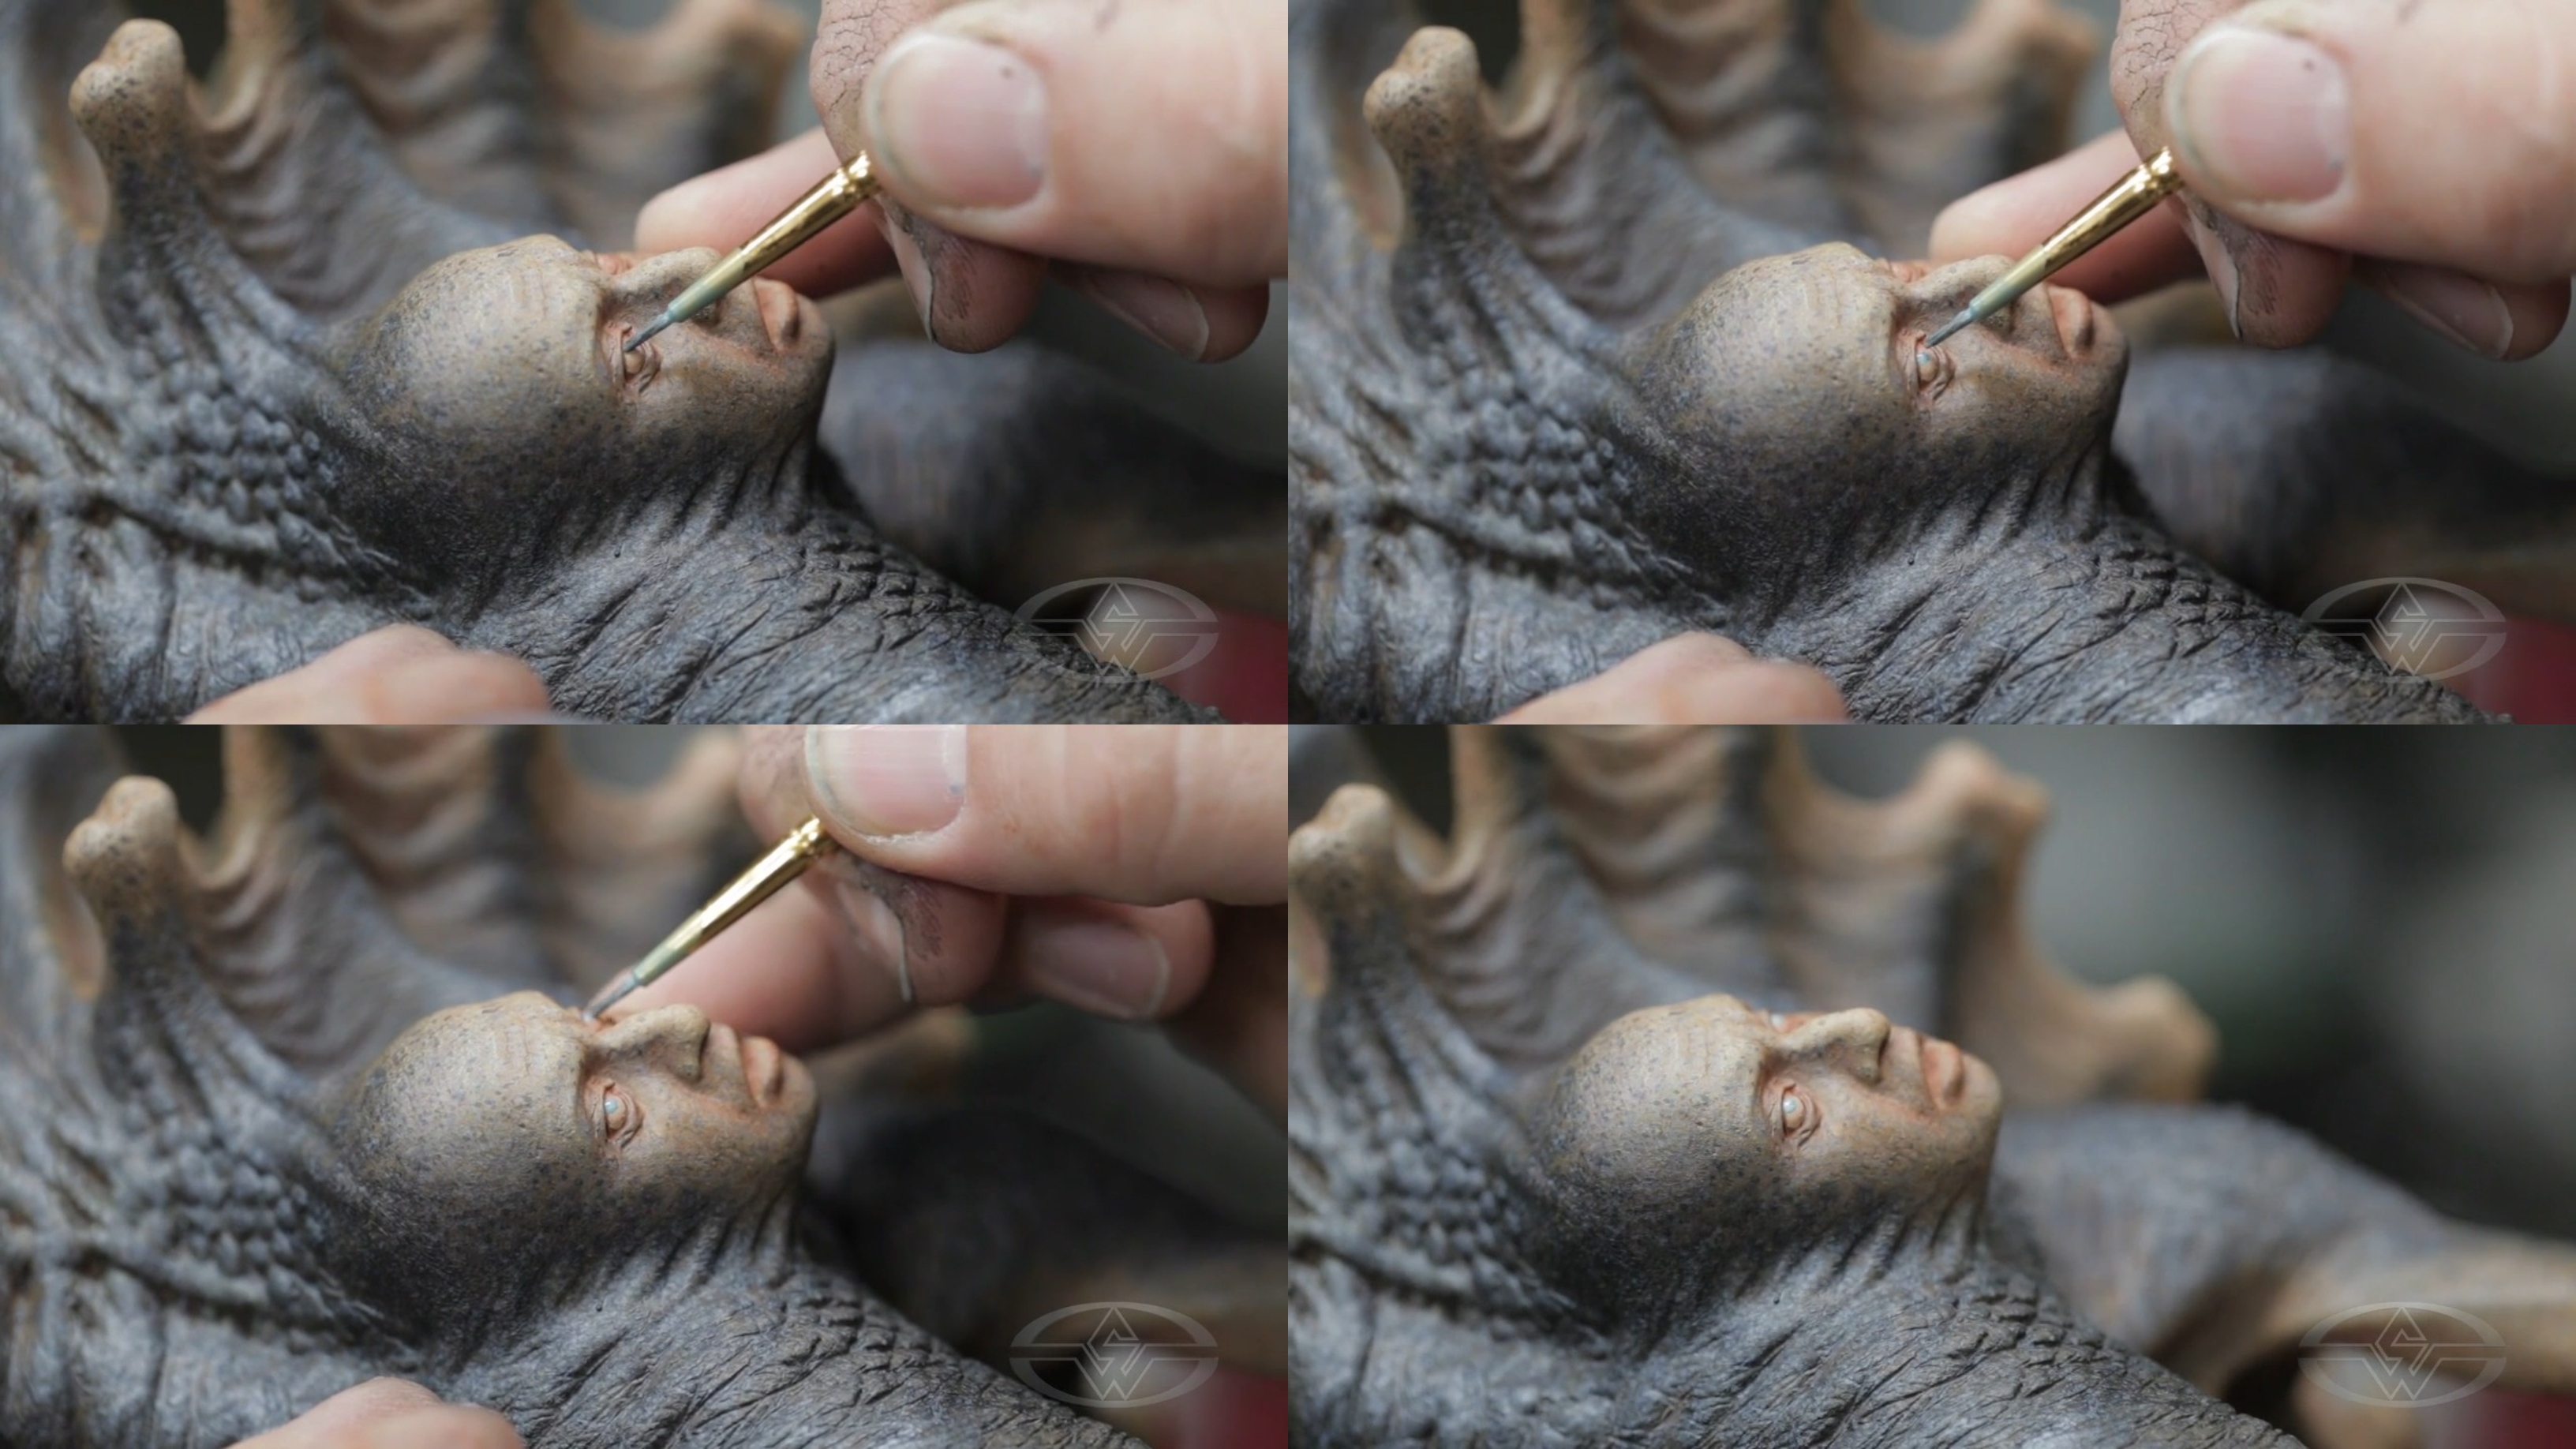 (Using an icy blue shade, Timothy Martin places the human's irises toward the top of the lid since he wants the eyes to look rolled back.)
For the final touch, take a black shade on the same brush to create the pupils.
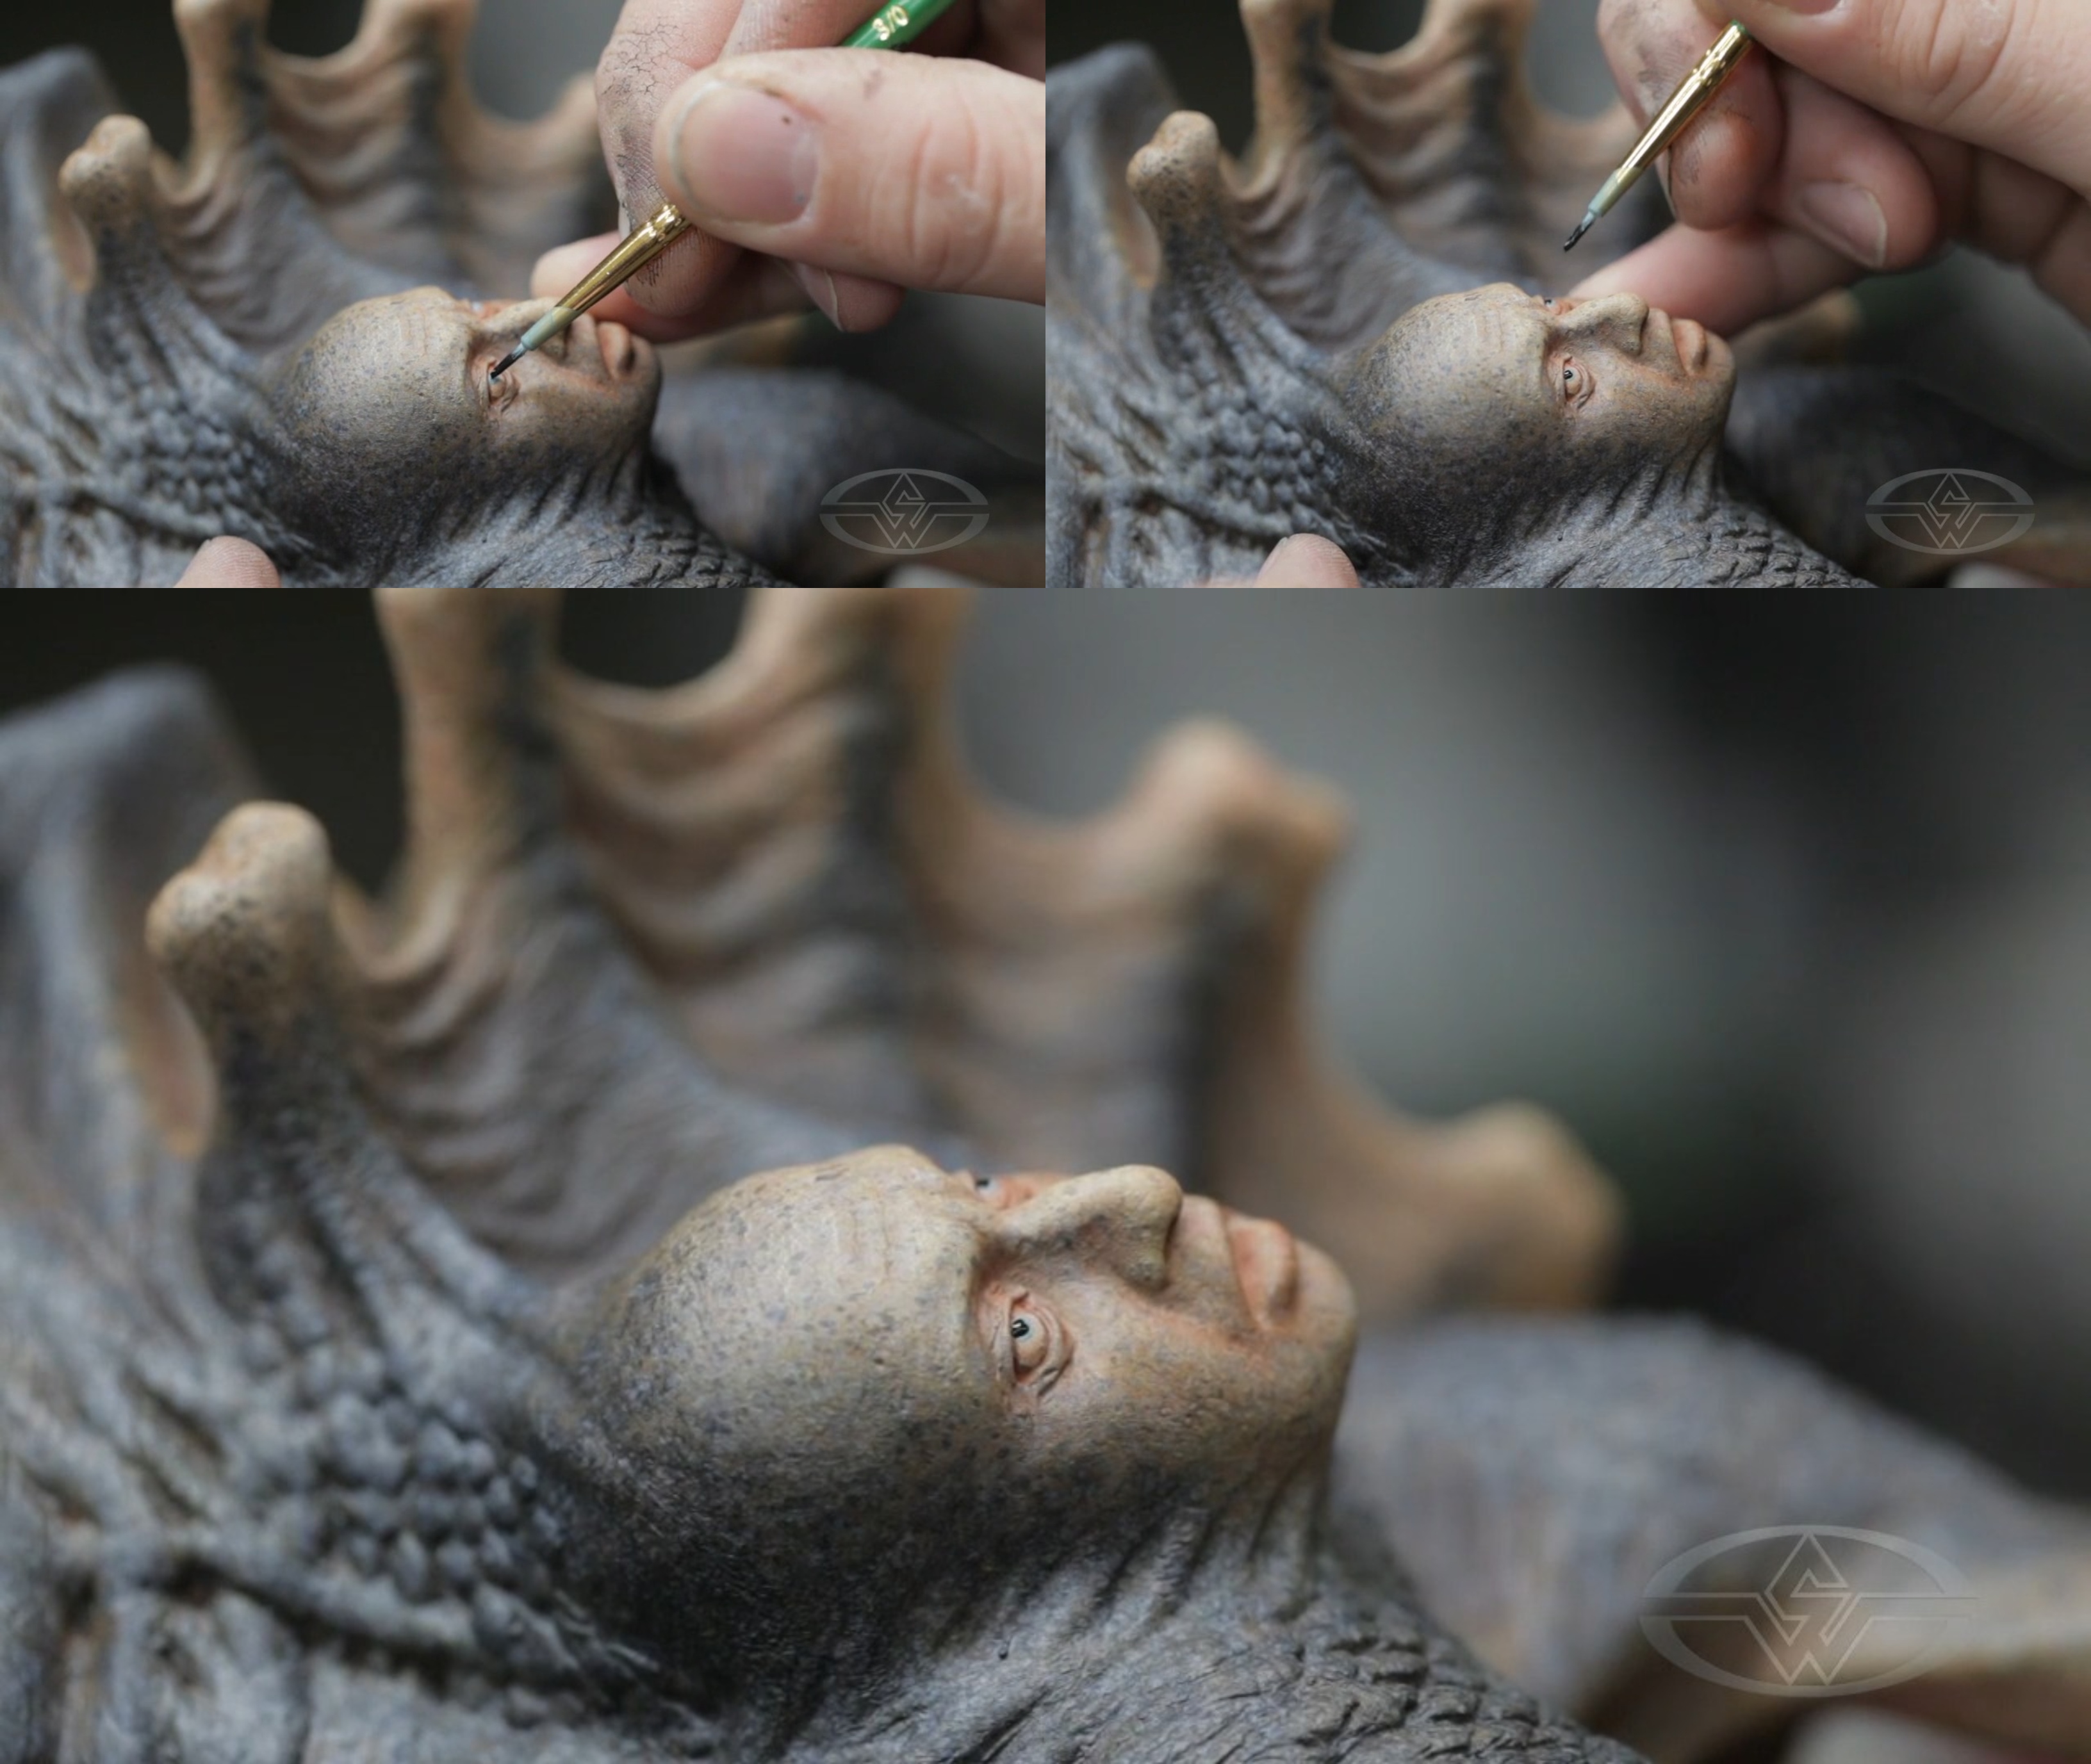 (Timothy Martin creates a pupil with a black shade to complete this character's windows to the soul.)
WATCH THE “MONSTER MAQUETTE ASSEMBLY, PAINTING AND FINISHING TECHNIQUES” COURSE WITH TIMOTHY MARTIN:
Monster Maquette Assembly, Painting and Finishing Techniques