
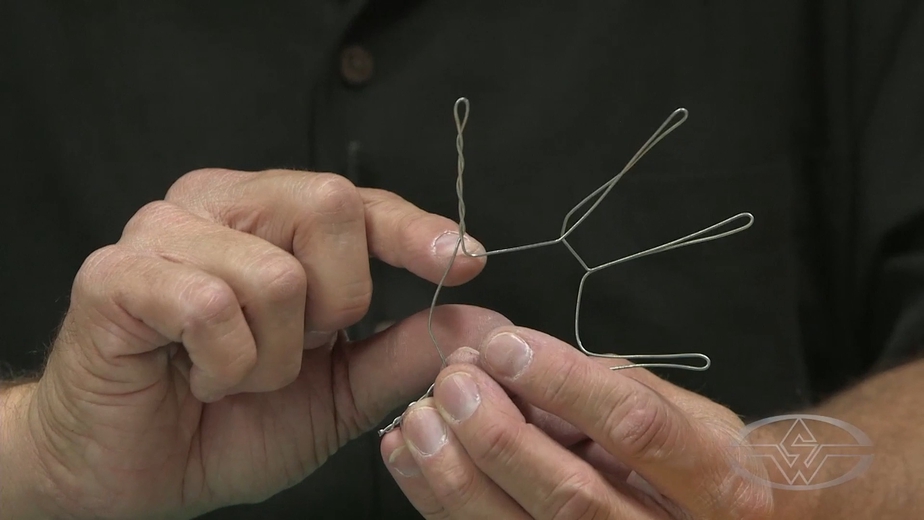
In this FREE excerpt from the Stan Winston School of Character Arts course, How to Build a Hand & Rod Puppet Part 1 - Understructure, world-renowned puppeteer and puppet builder BJ Guyer (The Muppets, Team America: World Police, Crank Yankers) gives a guiding hand on how to build a wire armature for hand and rod puppet hands with simple, easy-to-follow techniques and tips.
Making a hand armature not only makes it possible to move the fingers and ultimately operate a puppet’s arms, but it helps breathe life into your character through natural posing and movement, like gesturing or holding objects. The methods you learn here will help your puppet projects get off on the right foot — or in this case, hand!
Jump To Section
- Setting Up the Wire and Making Initial Bends
- Following the Puppet Hand Pattern Template
- Techniques to Twist the Wire Fingers for Your Puppet
- Making an Additional Hand Armature
- Tips for Claws and Nails on Puppet Hand Armatures
To watch the complete instructional video, click the player above!
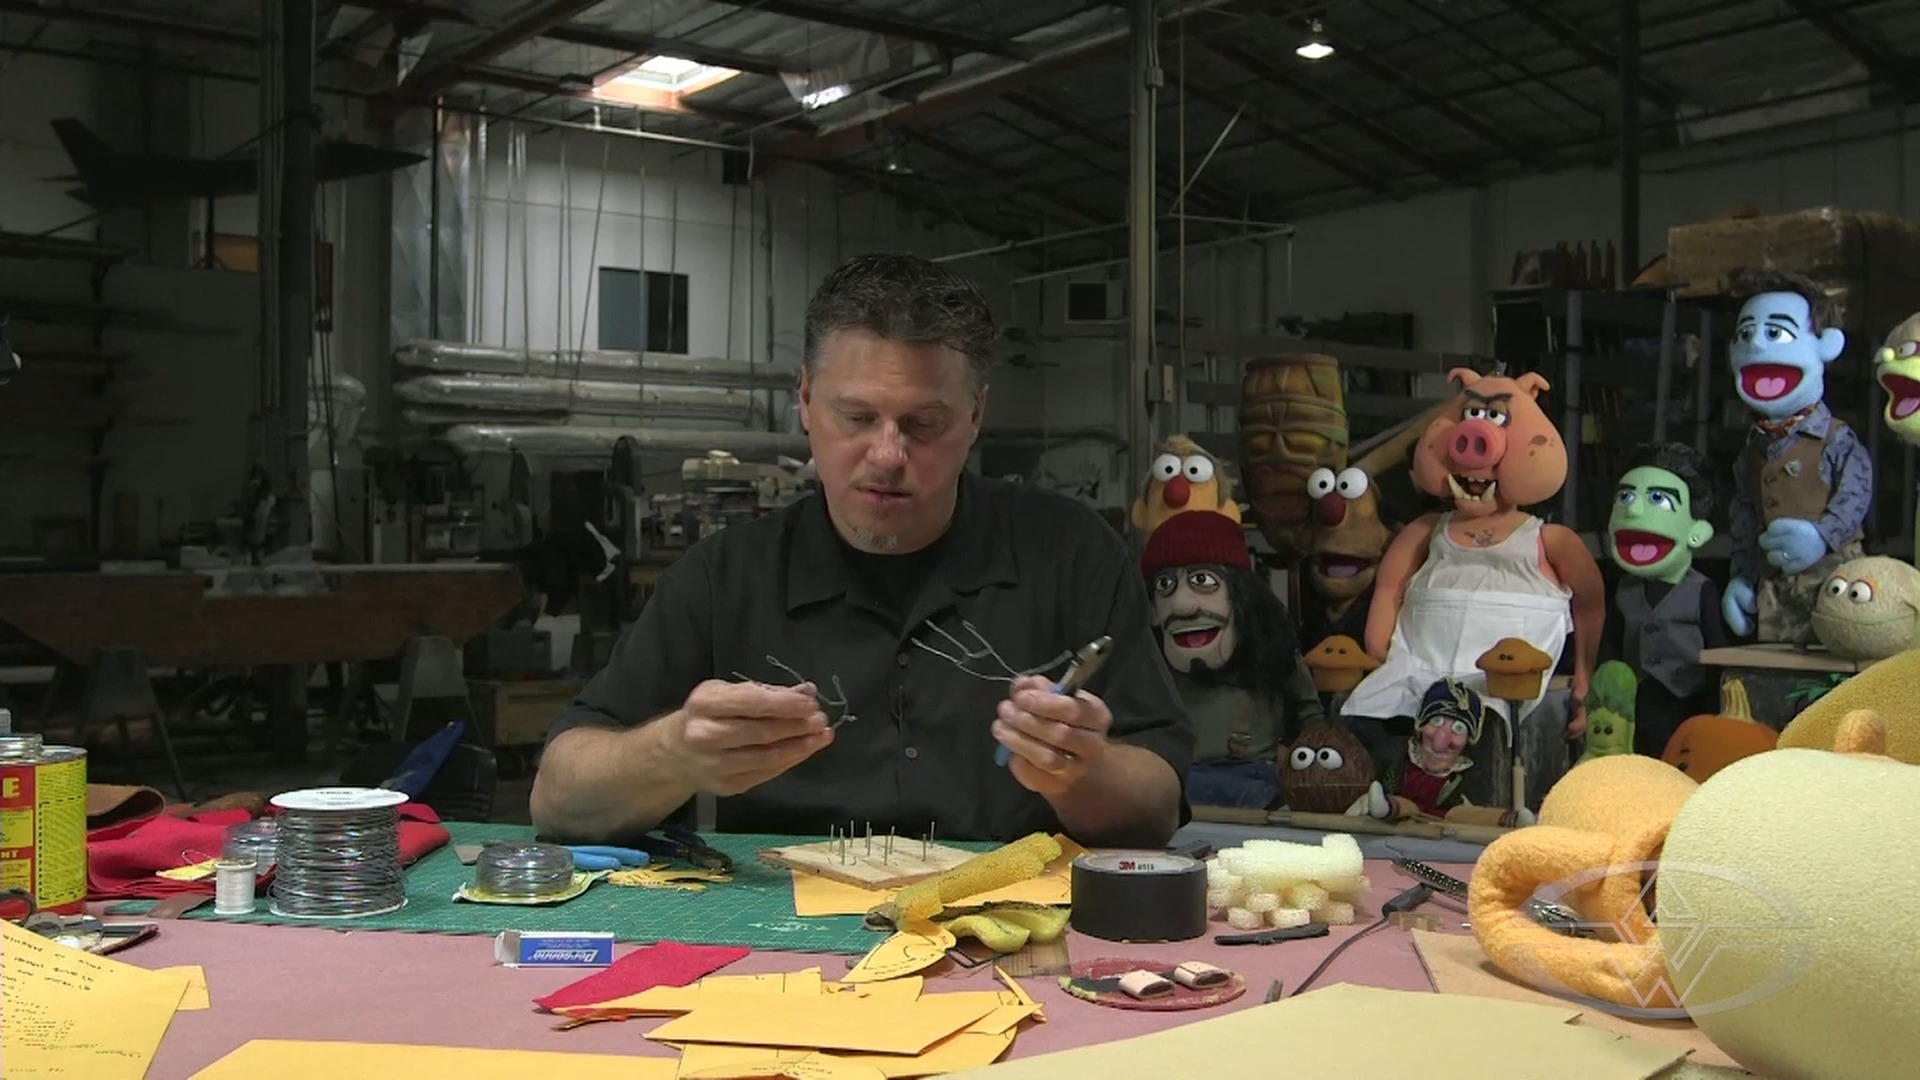
In this lesson, Guyer shares the best practices on how to build a hand armature for your puppet. The understructure of your hand and rod puppet is essentially its skeleton. Meaning, a proper design and build is key to a high-quality puppet that’s durable and easy to control so you too can create the illusion of a living character.
Setting Up the Wire and Making Initial Bends
The first step in building a hand armature for puppets is taking your 20-gauge wire and giving yourself more than enough length coming off the back so you have extra wire to twist and finish out your pattern with.
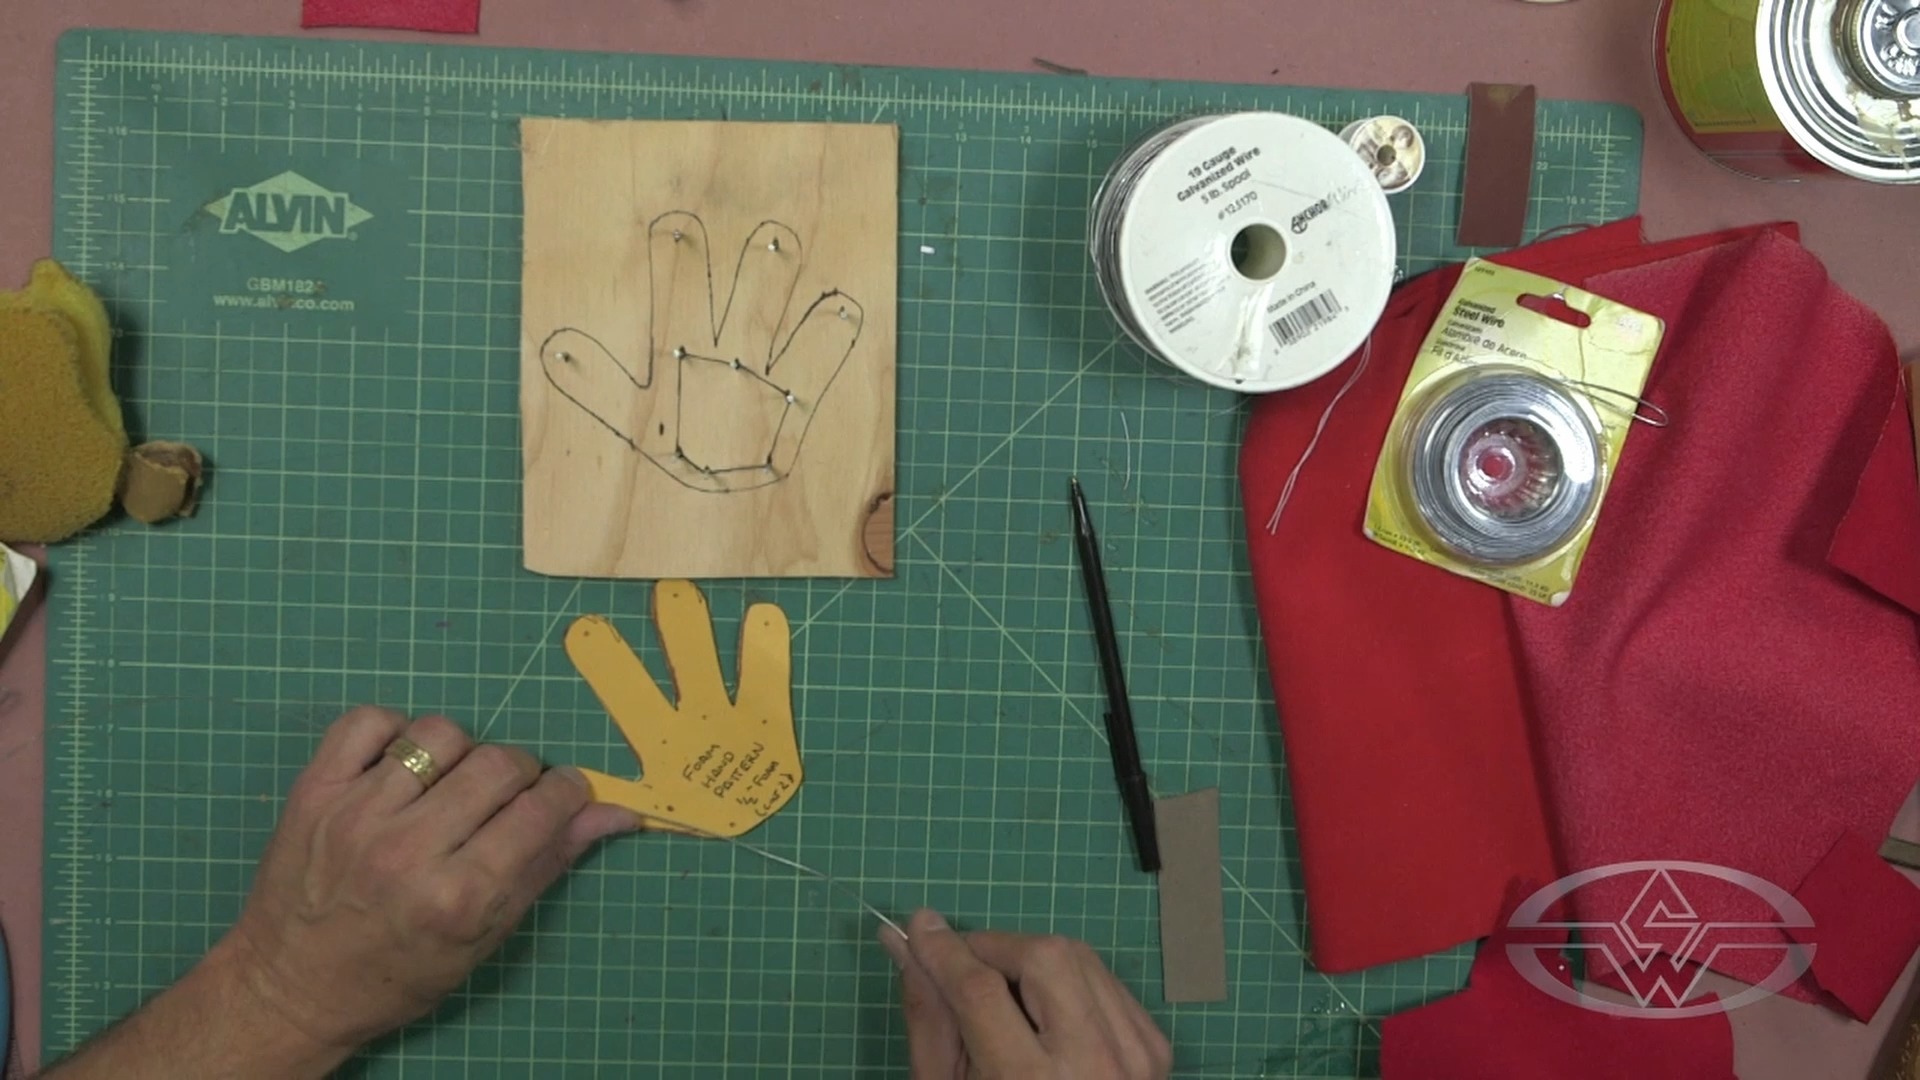 (BJ Guyer pulls out as much of the 20-gauge galvanized steel wire he believes he'll need to make his hand armature.)
As you prepare to make the first bend in your hand armature, use the pattern on your foam hand cutout for reference so you can closely follow all the points on the fingers to the best of your ability. This guide will come in handy throughout the entire process.
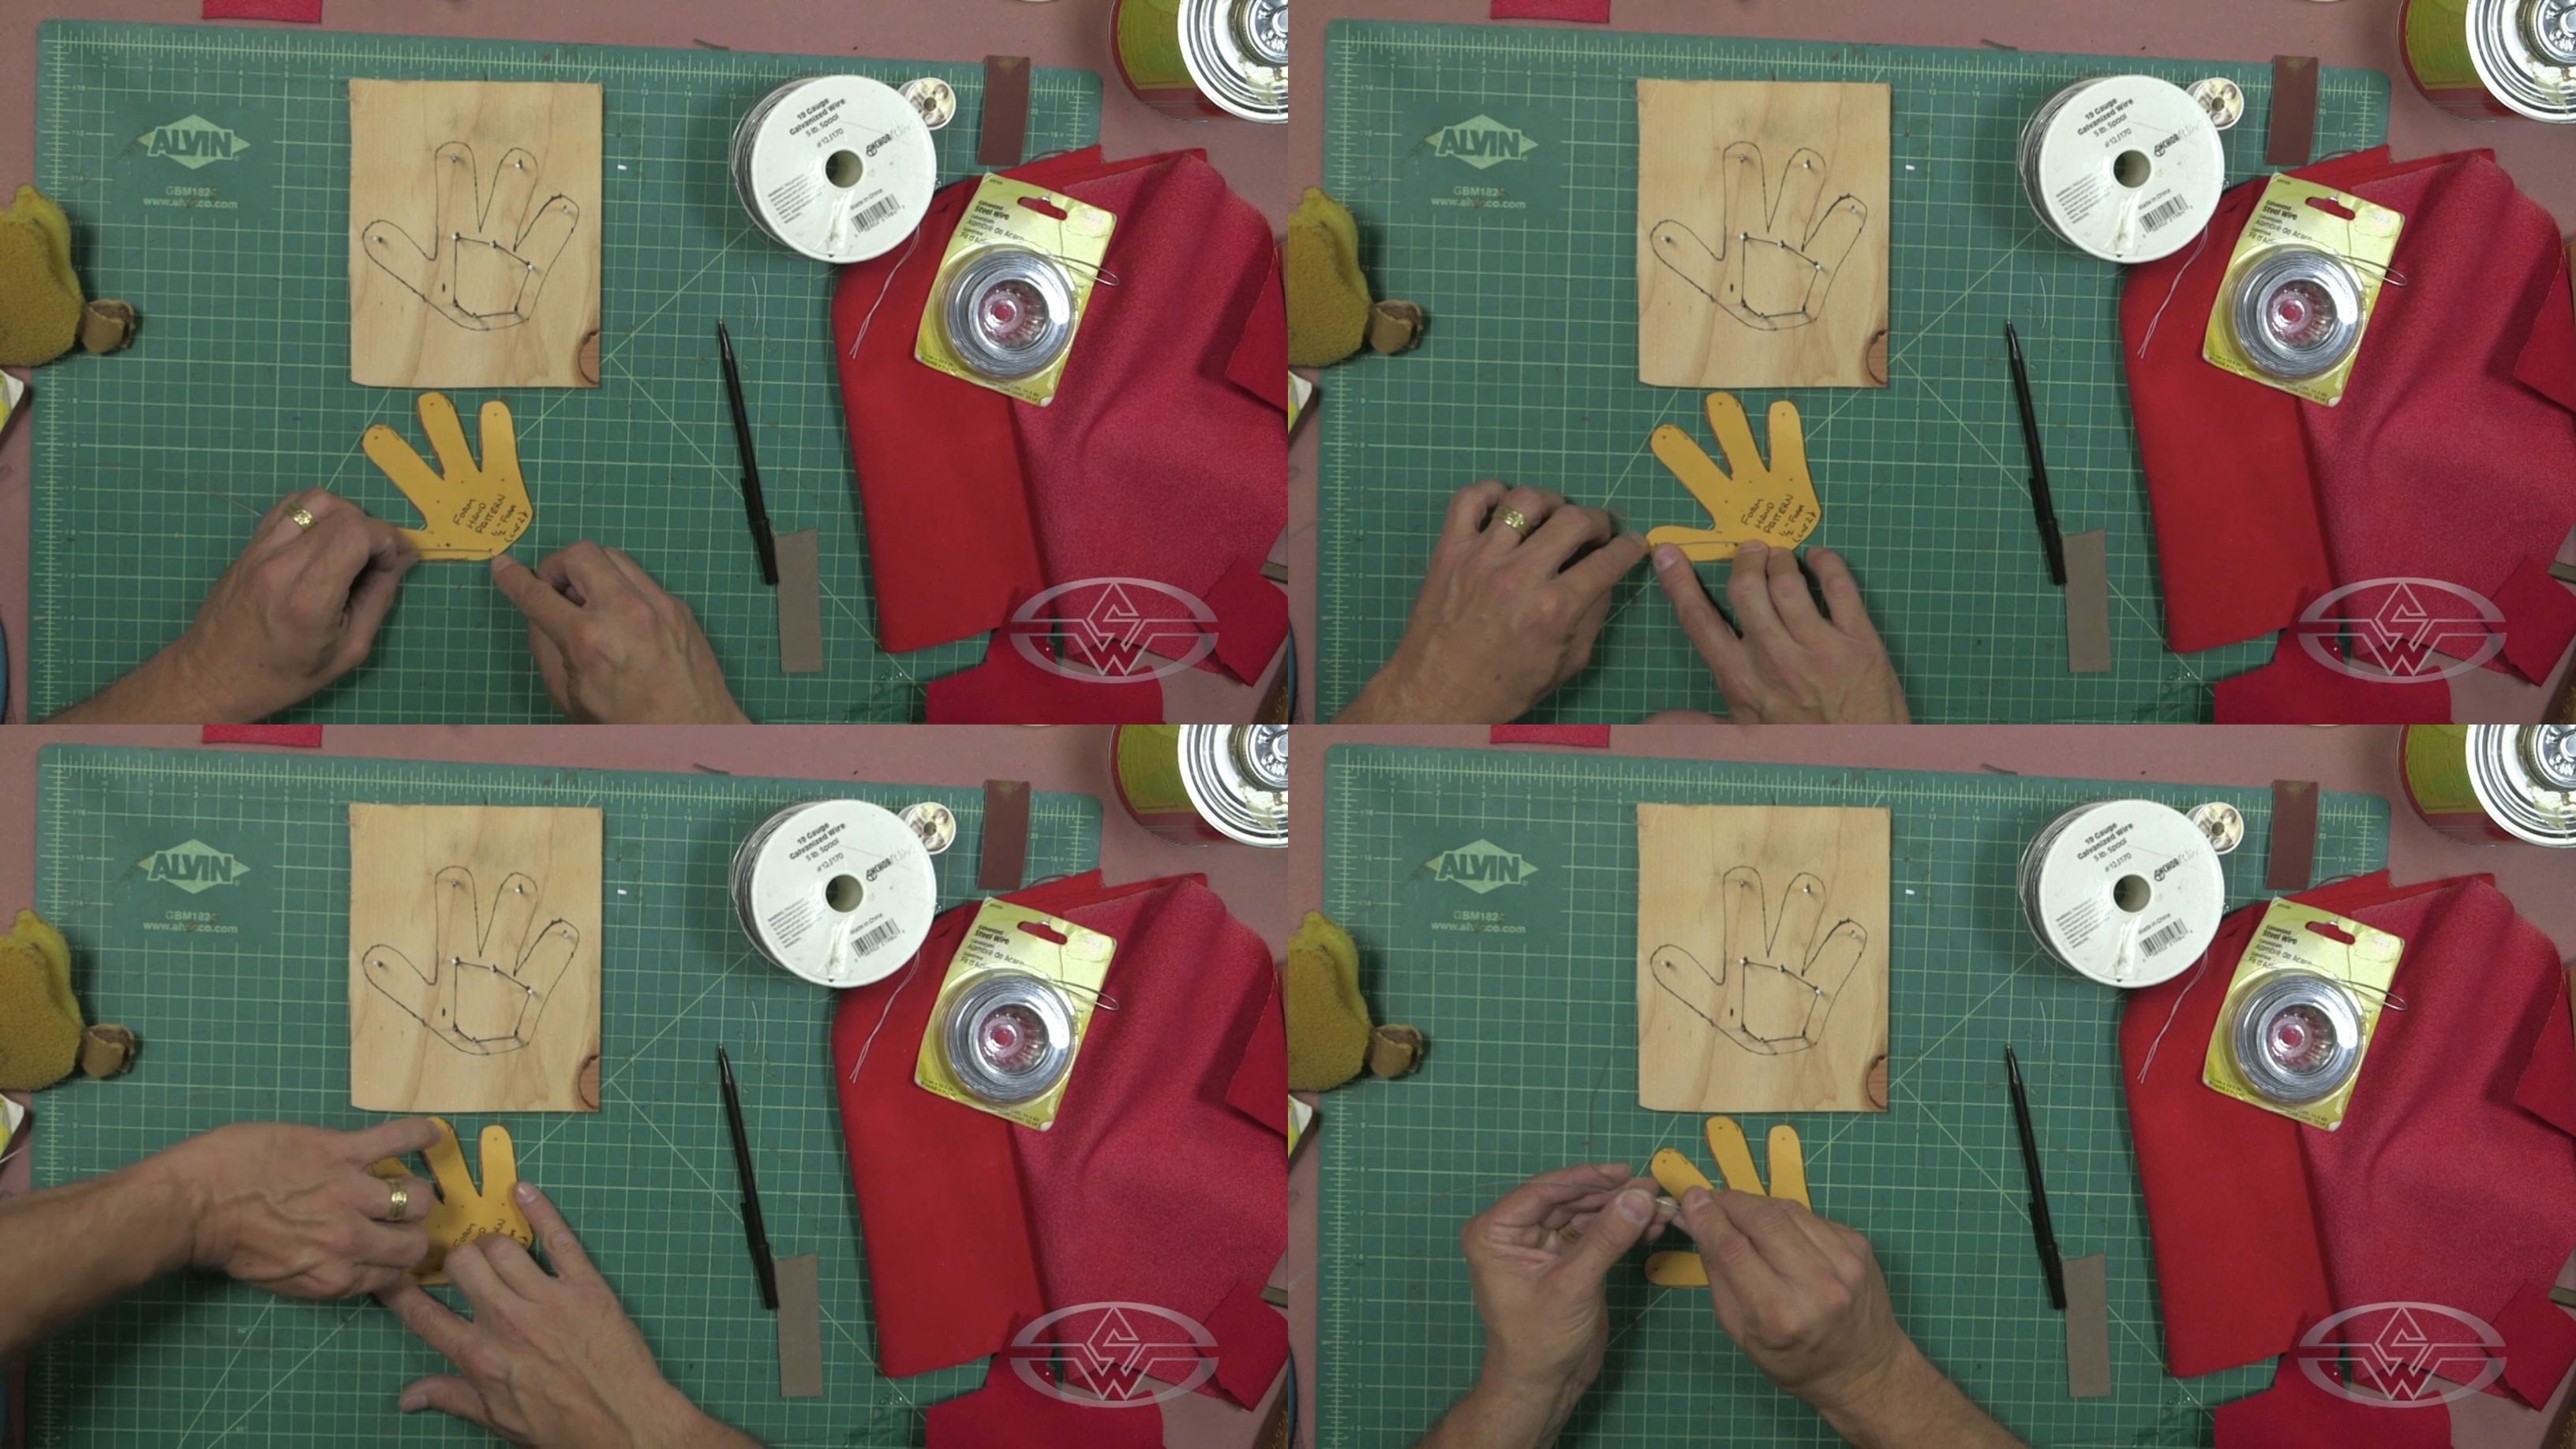 (After making a small bend in the wire, BJ Guyer pulls it away and uses his fingers to crimp it.)
Begin bending the wire into place with your hand. Once you get to the fingertip points, Guyer recommends starting the bend, pulling the wire away, and using your fingers to crimp it or use pliers to get a cleaner bend.
Following the Puppet Hand Pattern Template
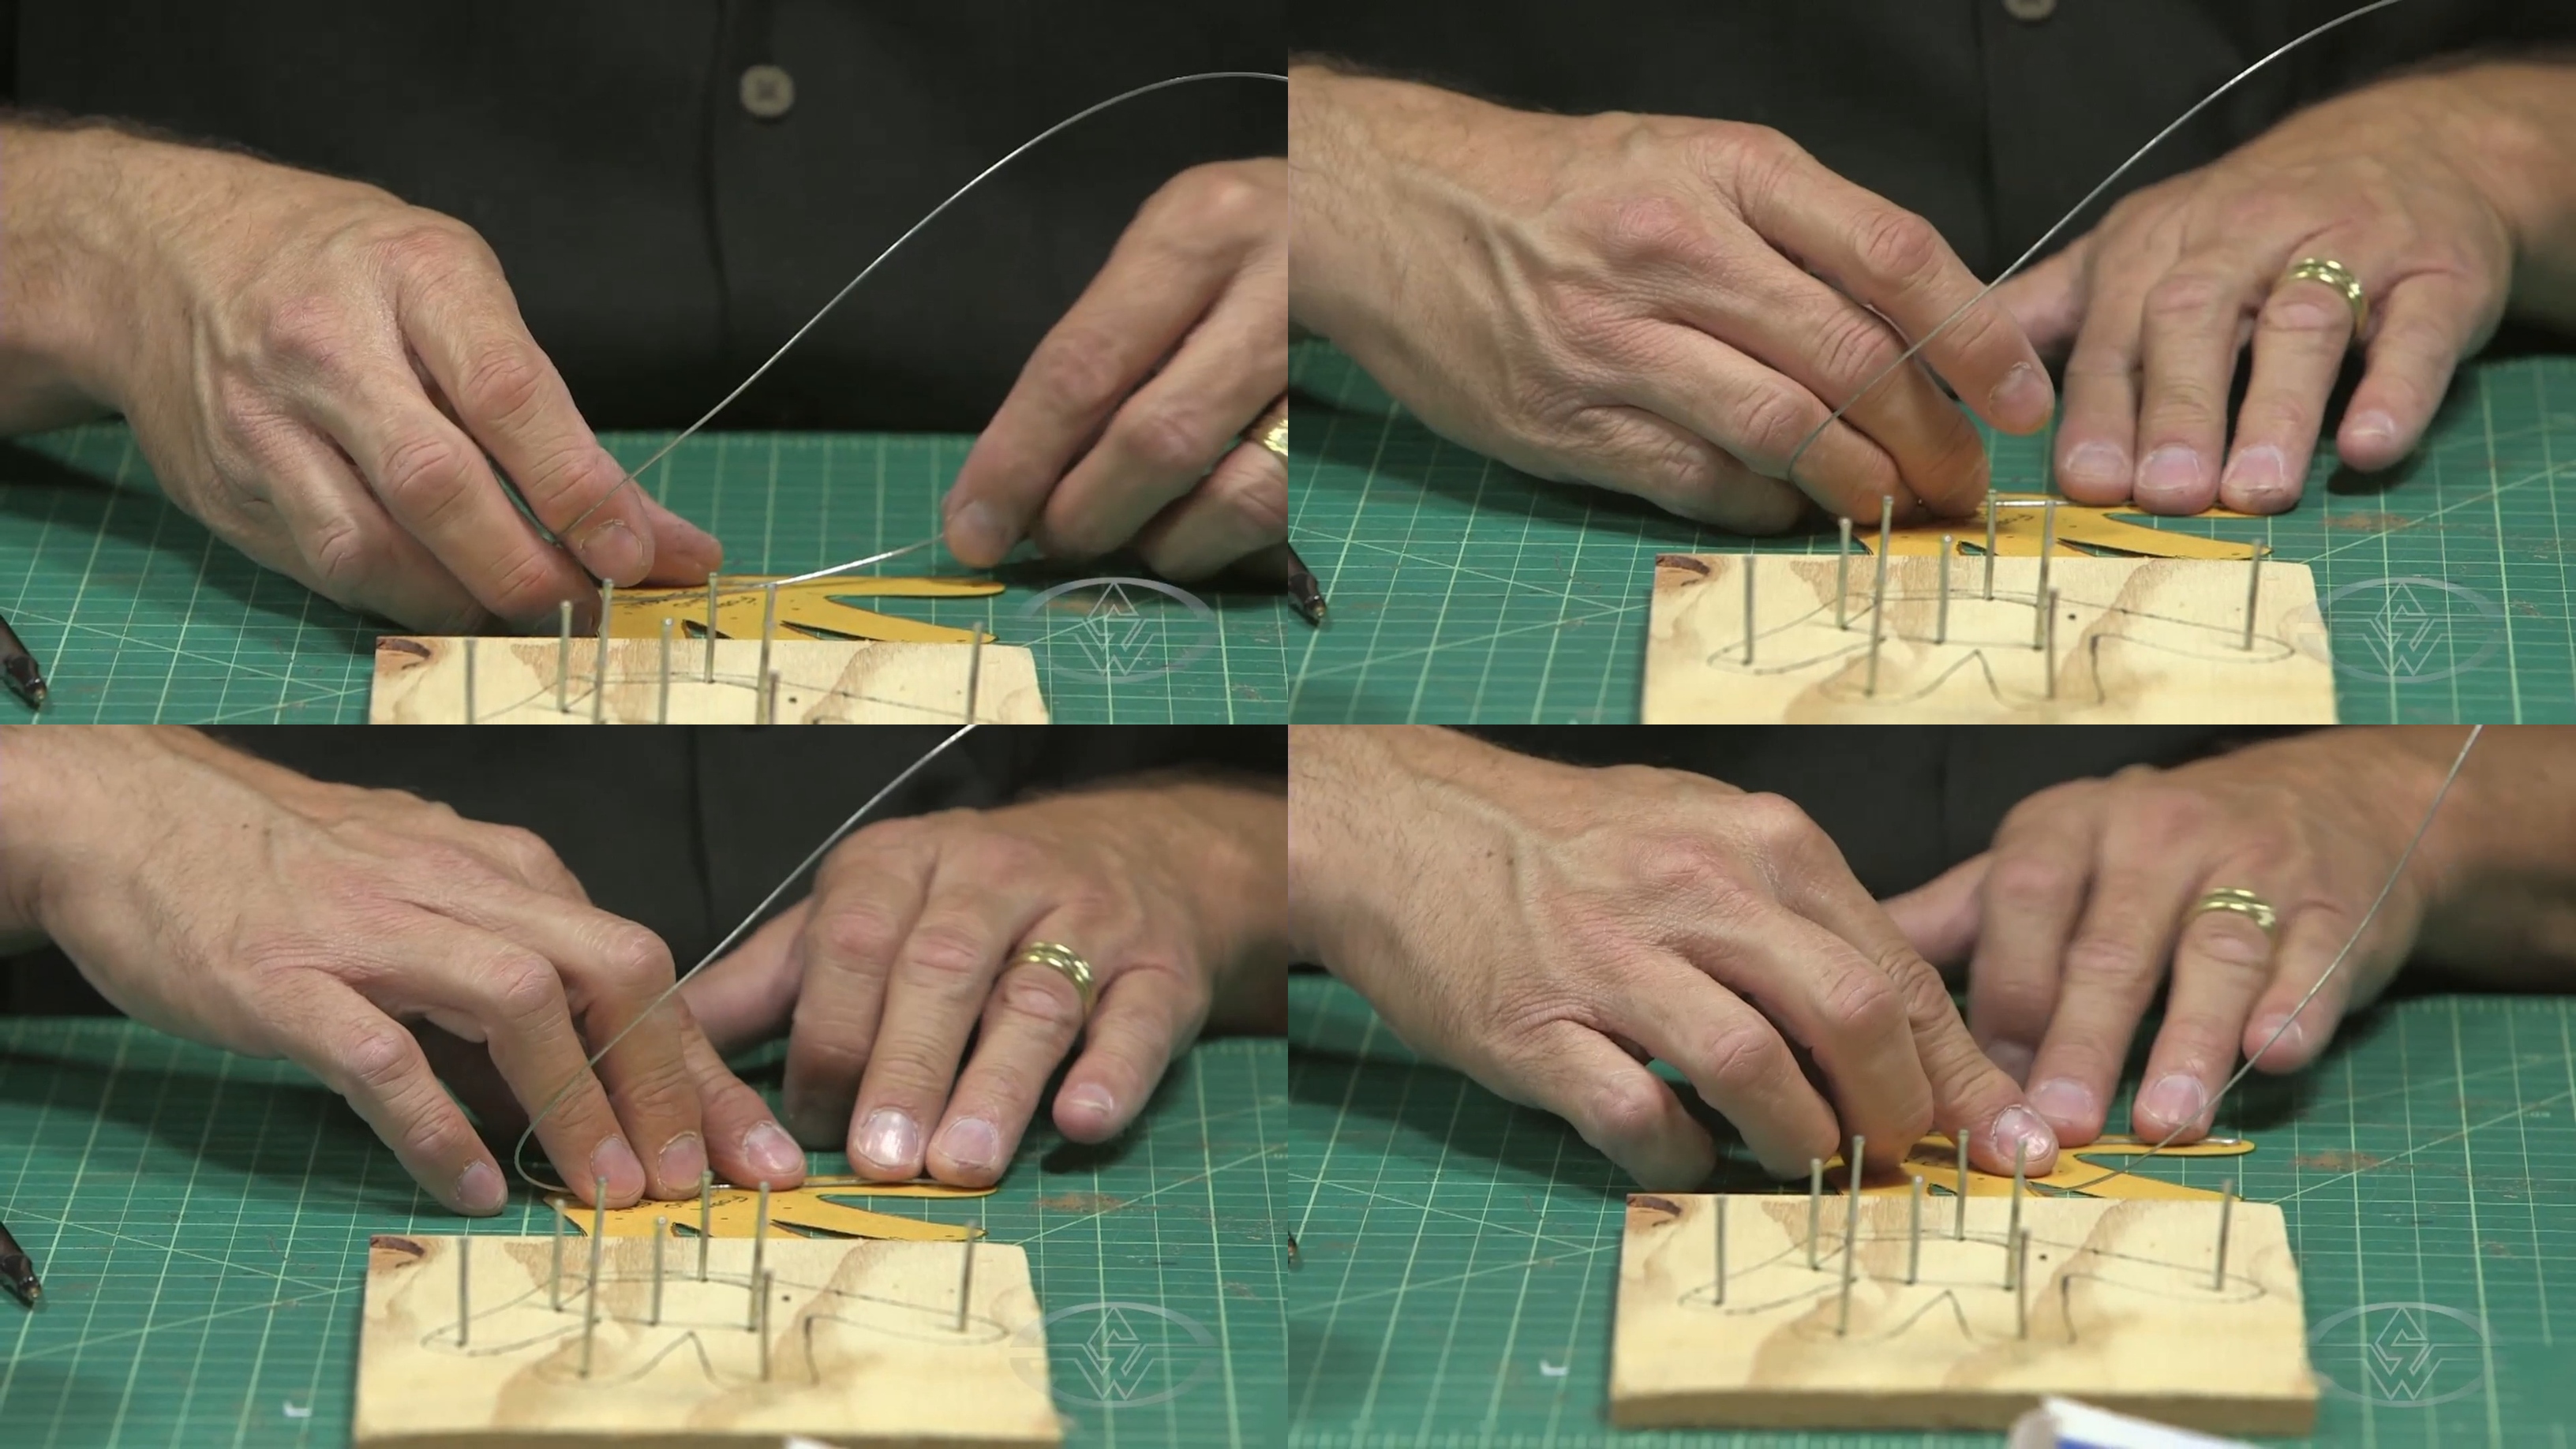 (BJ Guyer follows his foam hand pattern template to get the sizing of his puppet's wire fingers just right.)
Pro-tip: As you’re matching the wire length to the hand pattern, do whatever it is you need to make the process easier for yourself. This can include holding the wire down to the pattern with your fingers or putting some weights on the pattern to hold it down. You can also cut a piece of wire and take it off the spool if you think you can estimate how much wire you’ll need.
As you follow the pattern, try to stay as close to the marked points as possible. It’s OK if it’s not exact and if you go over or under a little. You can fix it along the way by pulling the wire back out, straightening it out, and bending it again.
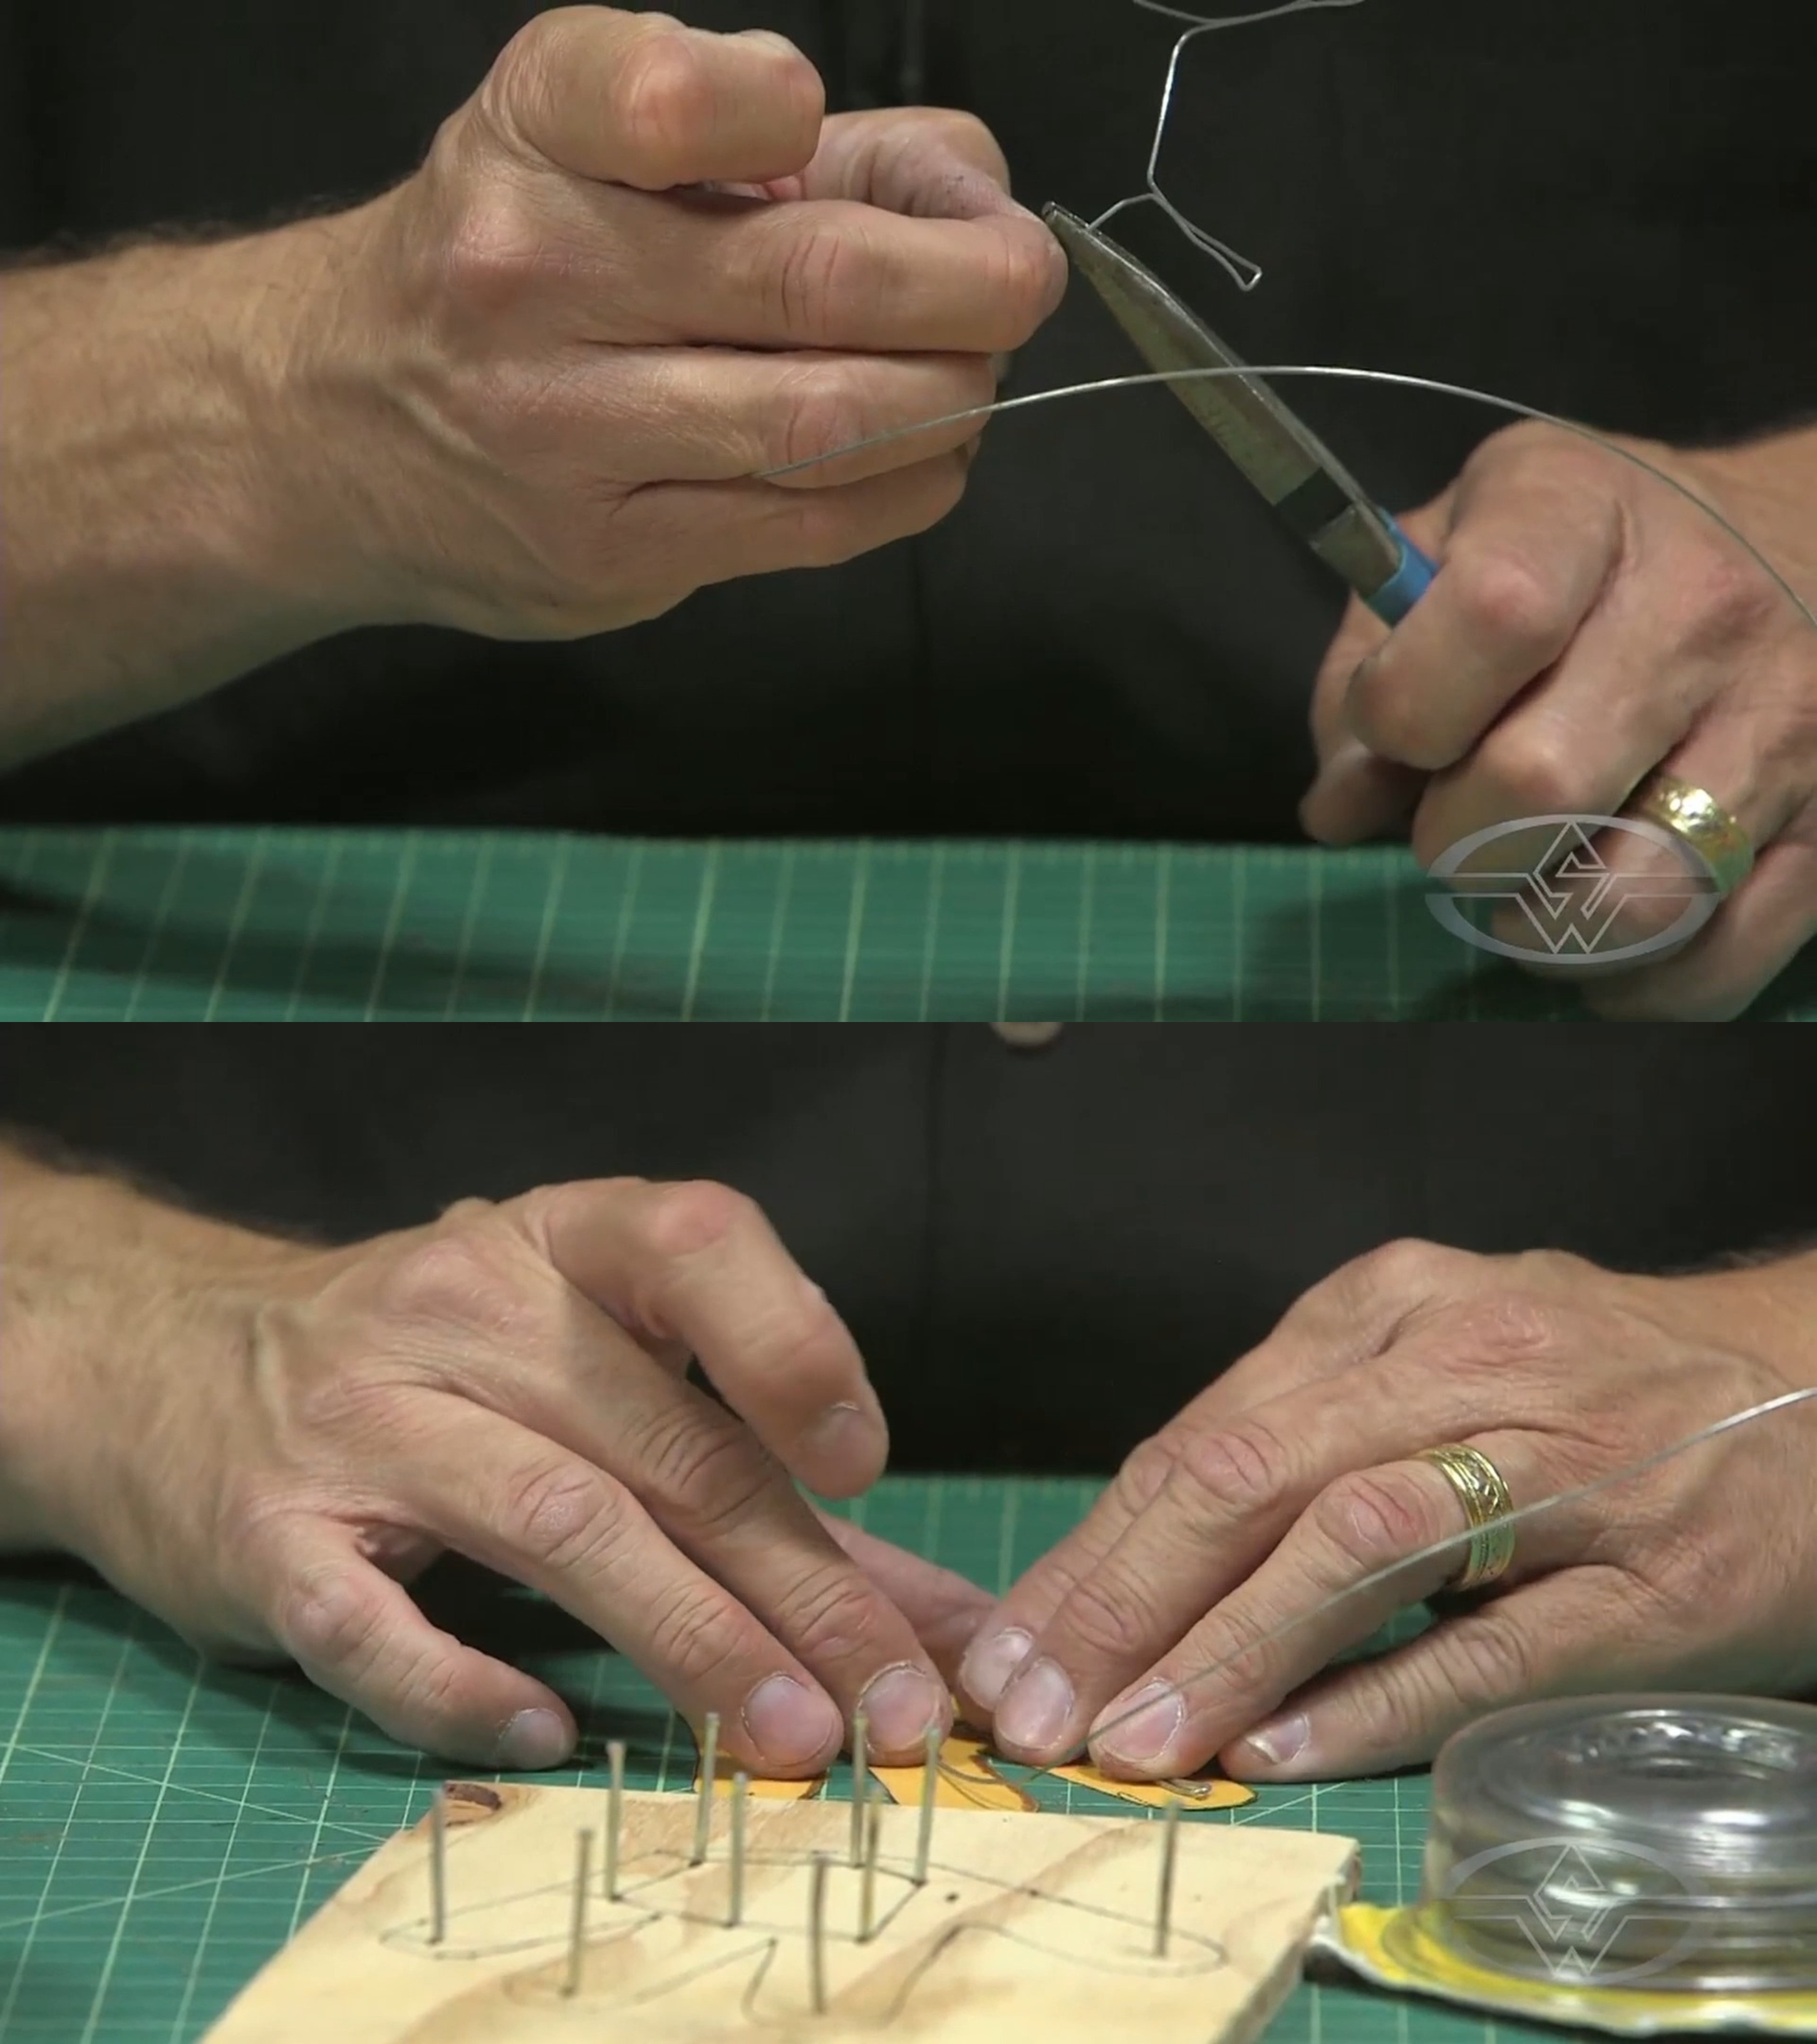 (BJ Guyer pulls out his pliers to get a cleaner bend.)
Continue working until all the points on your foam hand pattern are covered.
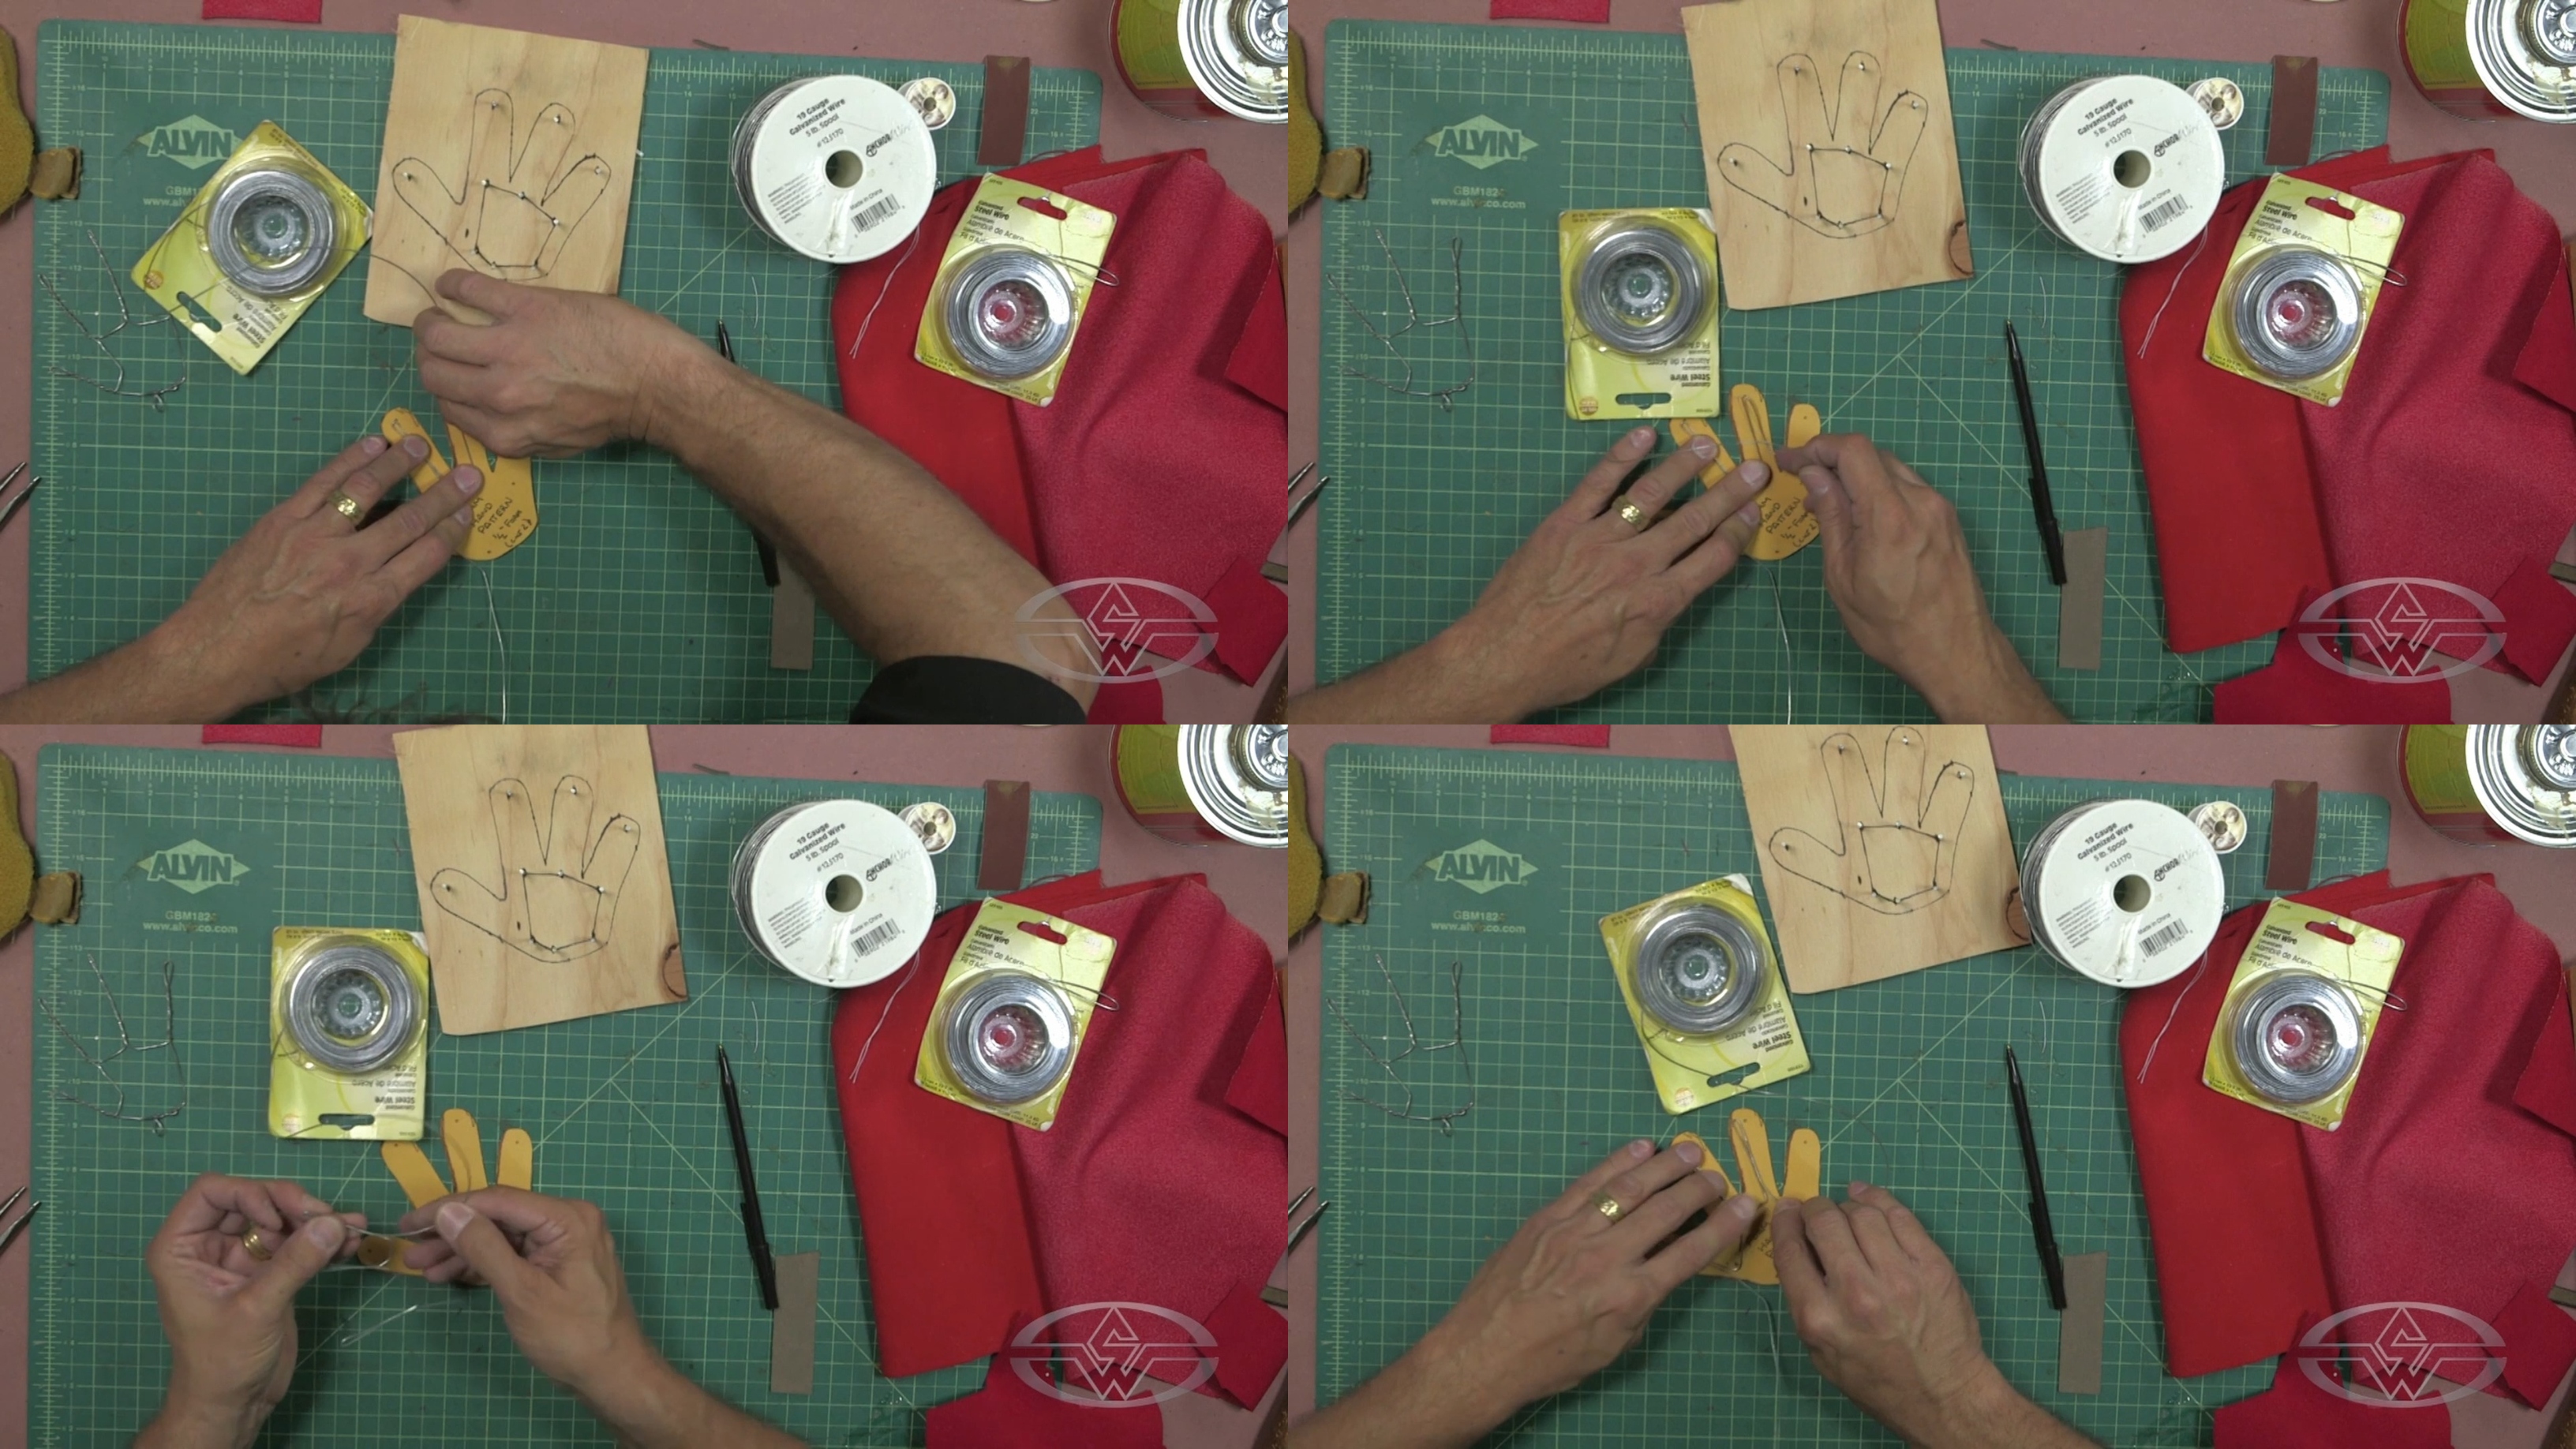 (BJ Guyer continues making his hand armature finger by finger.)
As you reach the point near the base of the palm, bring both sides of the wire together to complete the hand shape at the wrist.
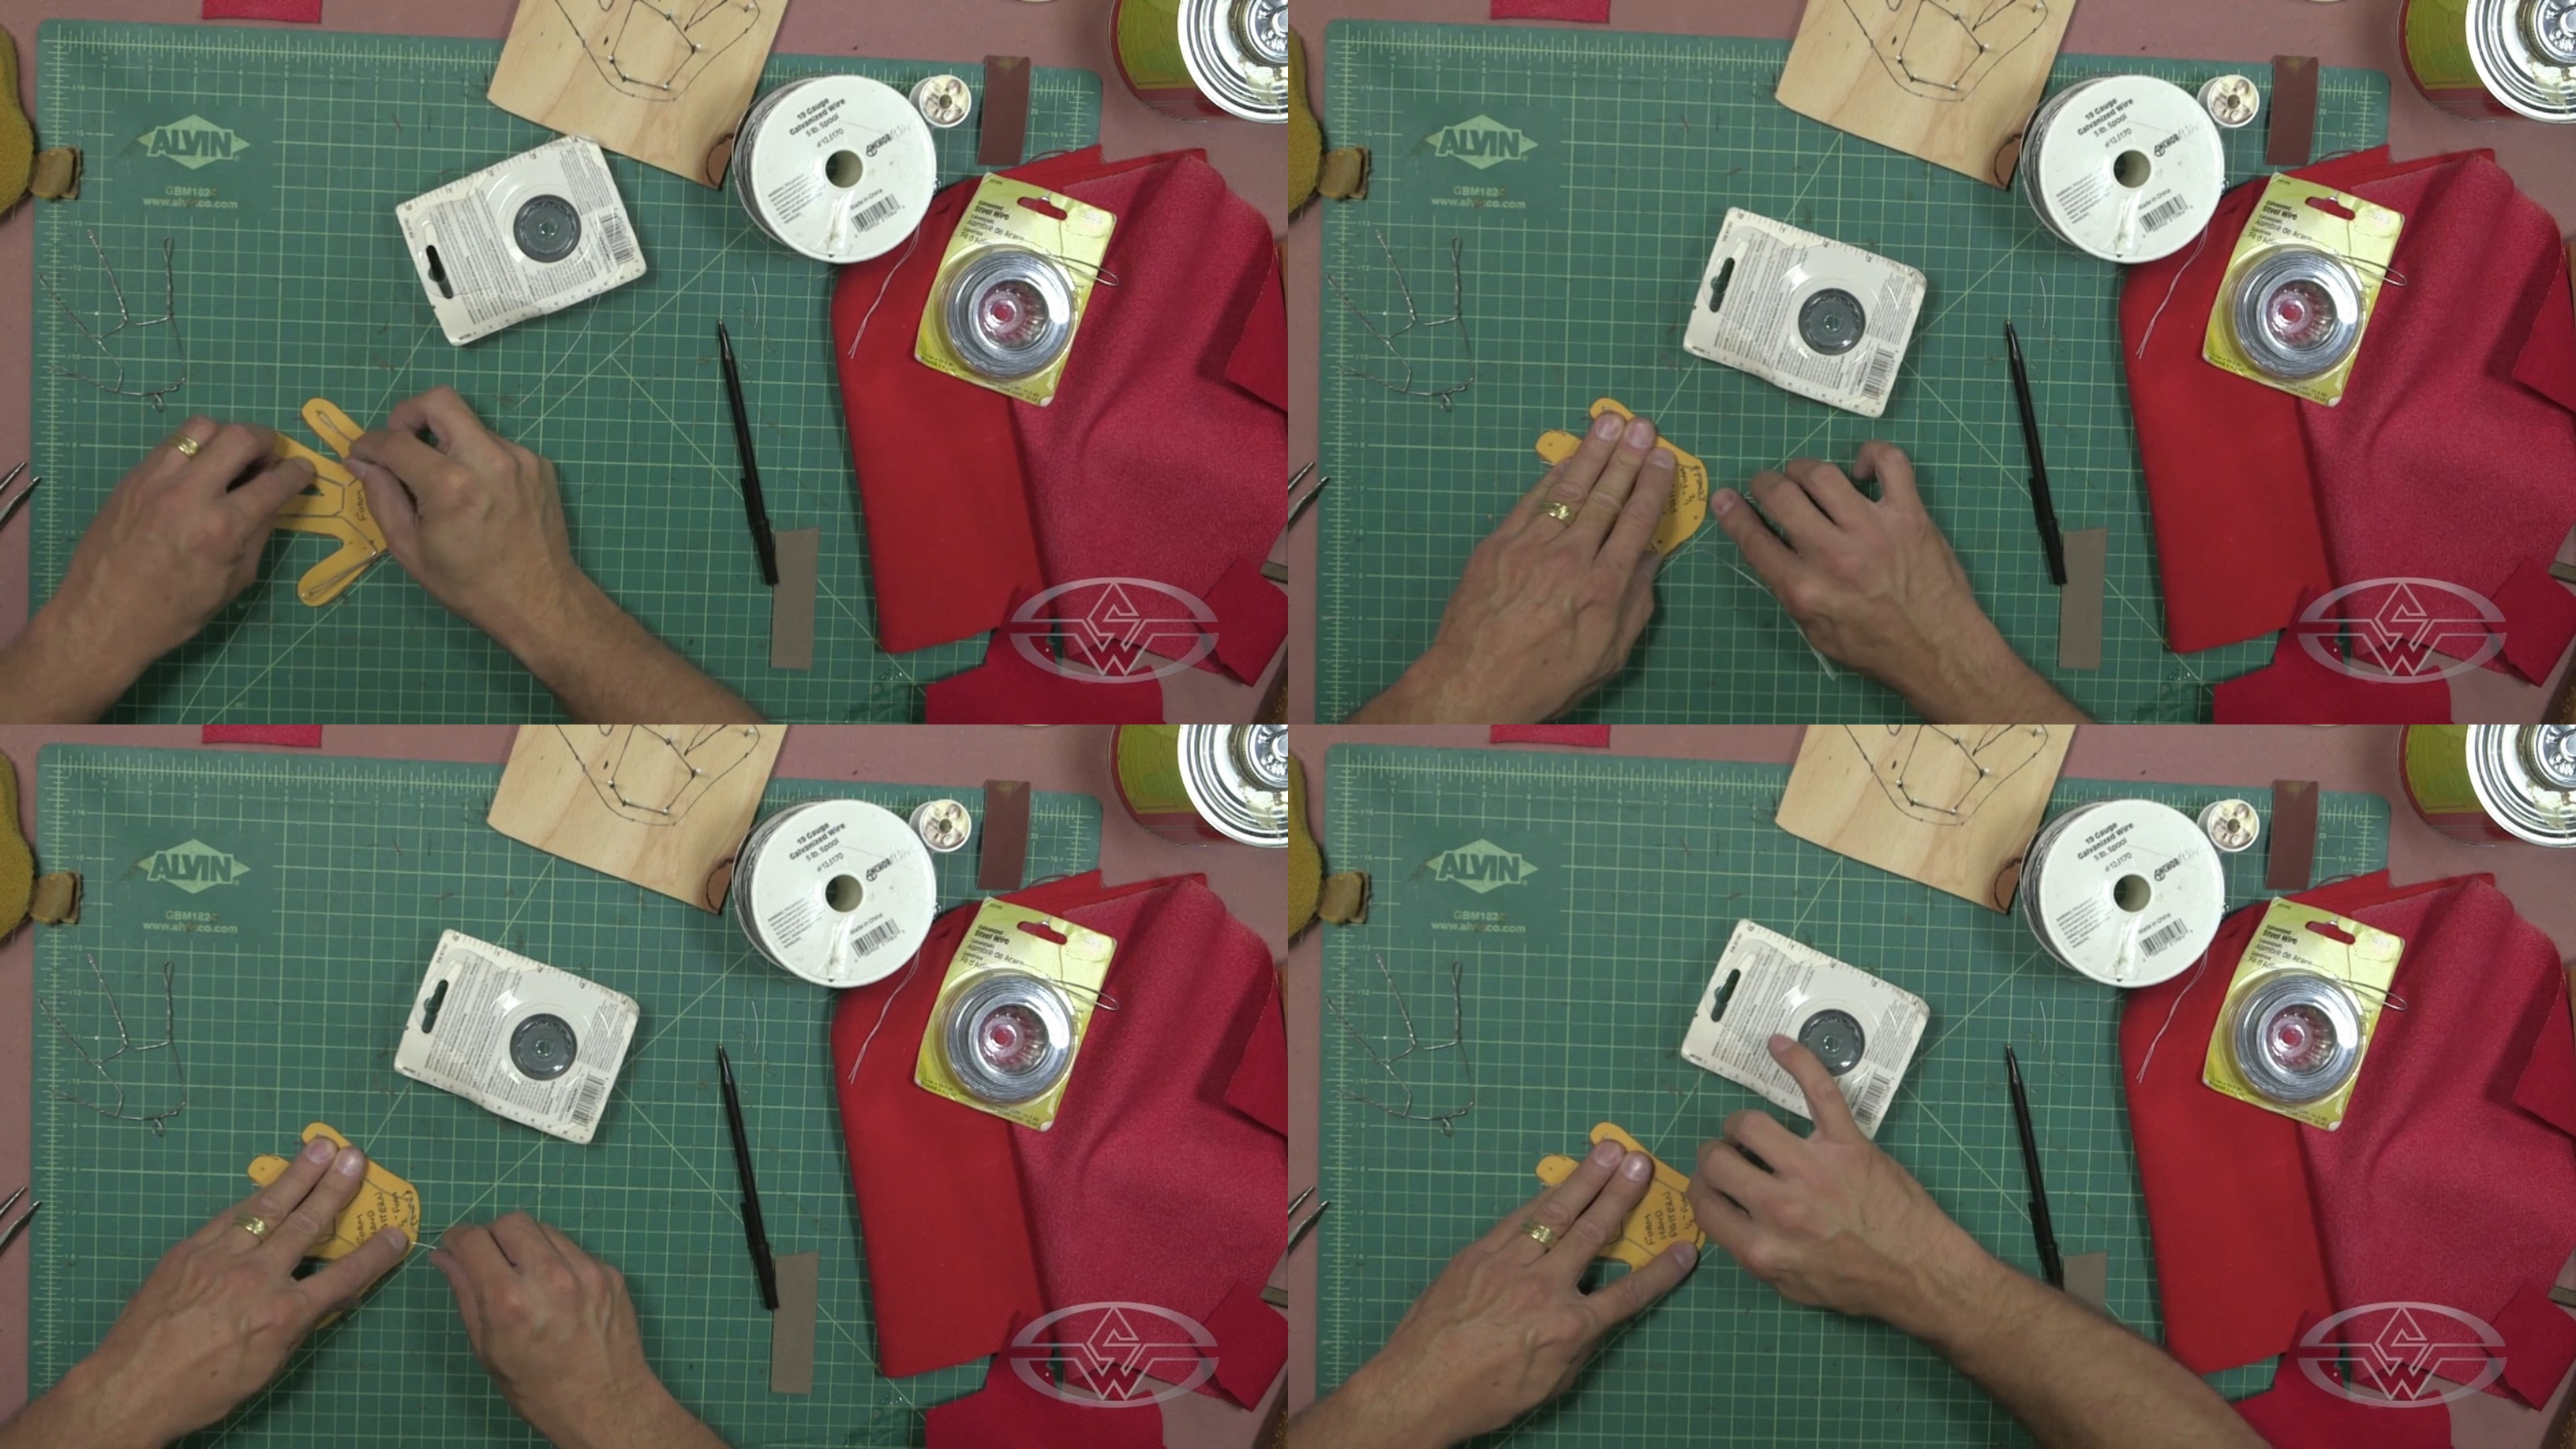 (BJ Guyer pulls the wire down to the wrist point at the base of the hand and bends it to meet the wire from the other side, twisting the wires together completes the hand shape.)
Then, grip the armature at the base with pliers and twist the wire using your fingers. Cut any unnecessary length at the bottom.
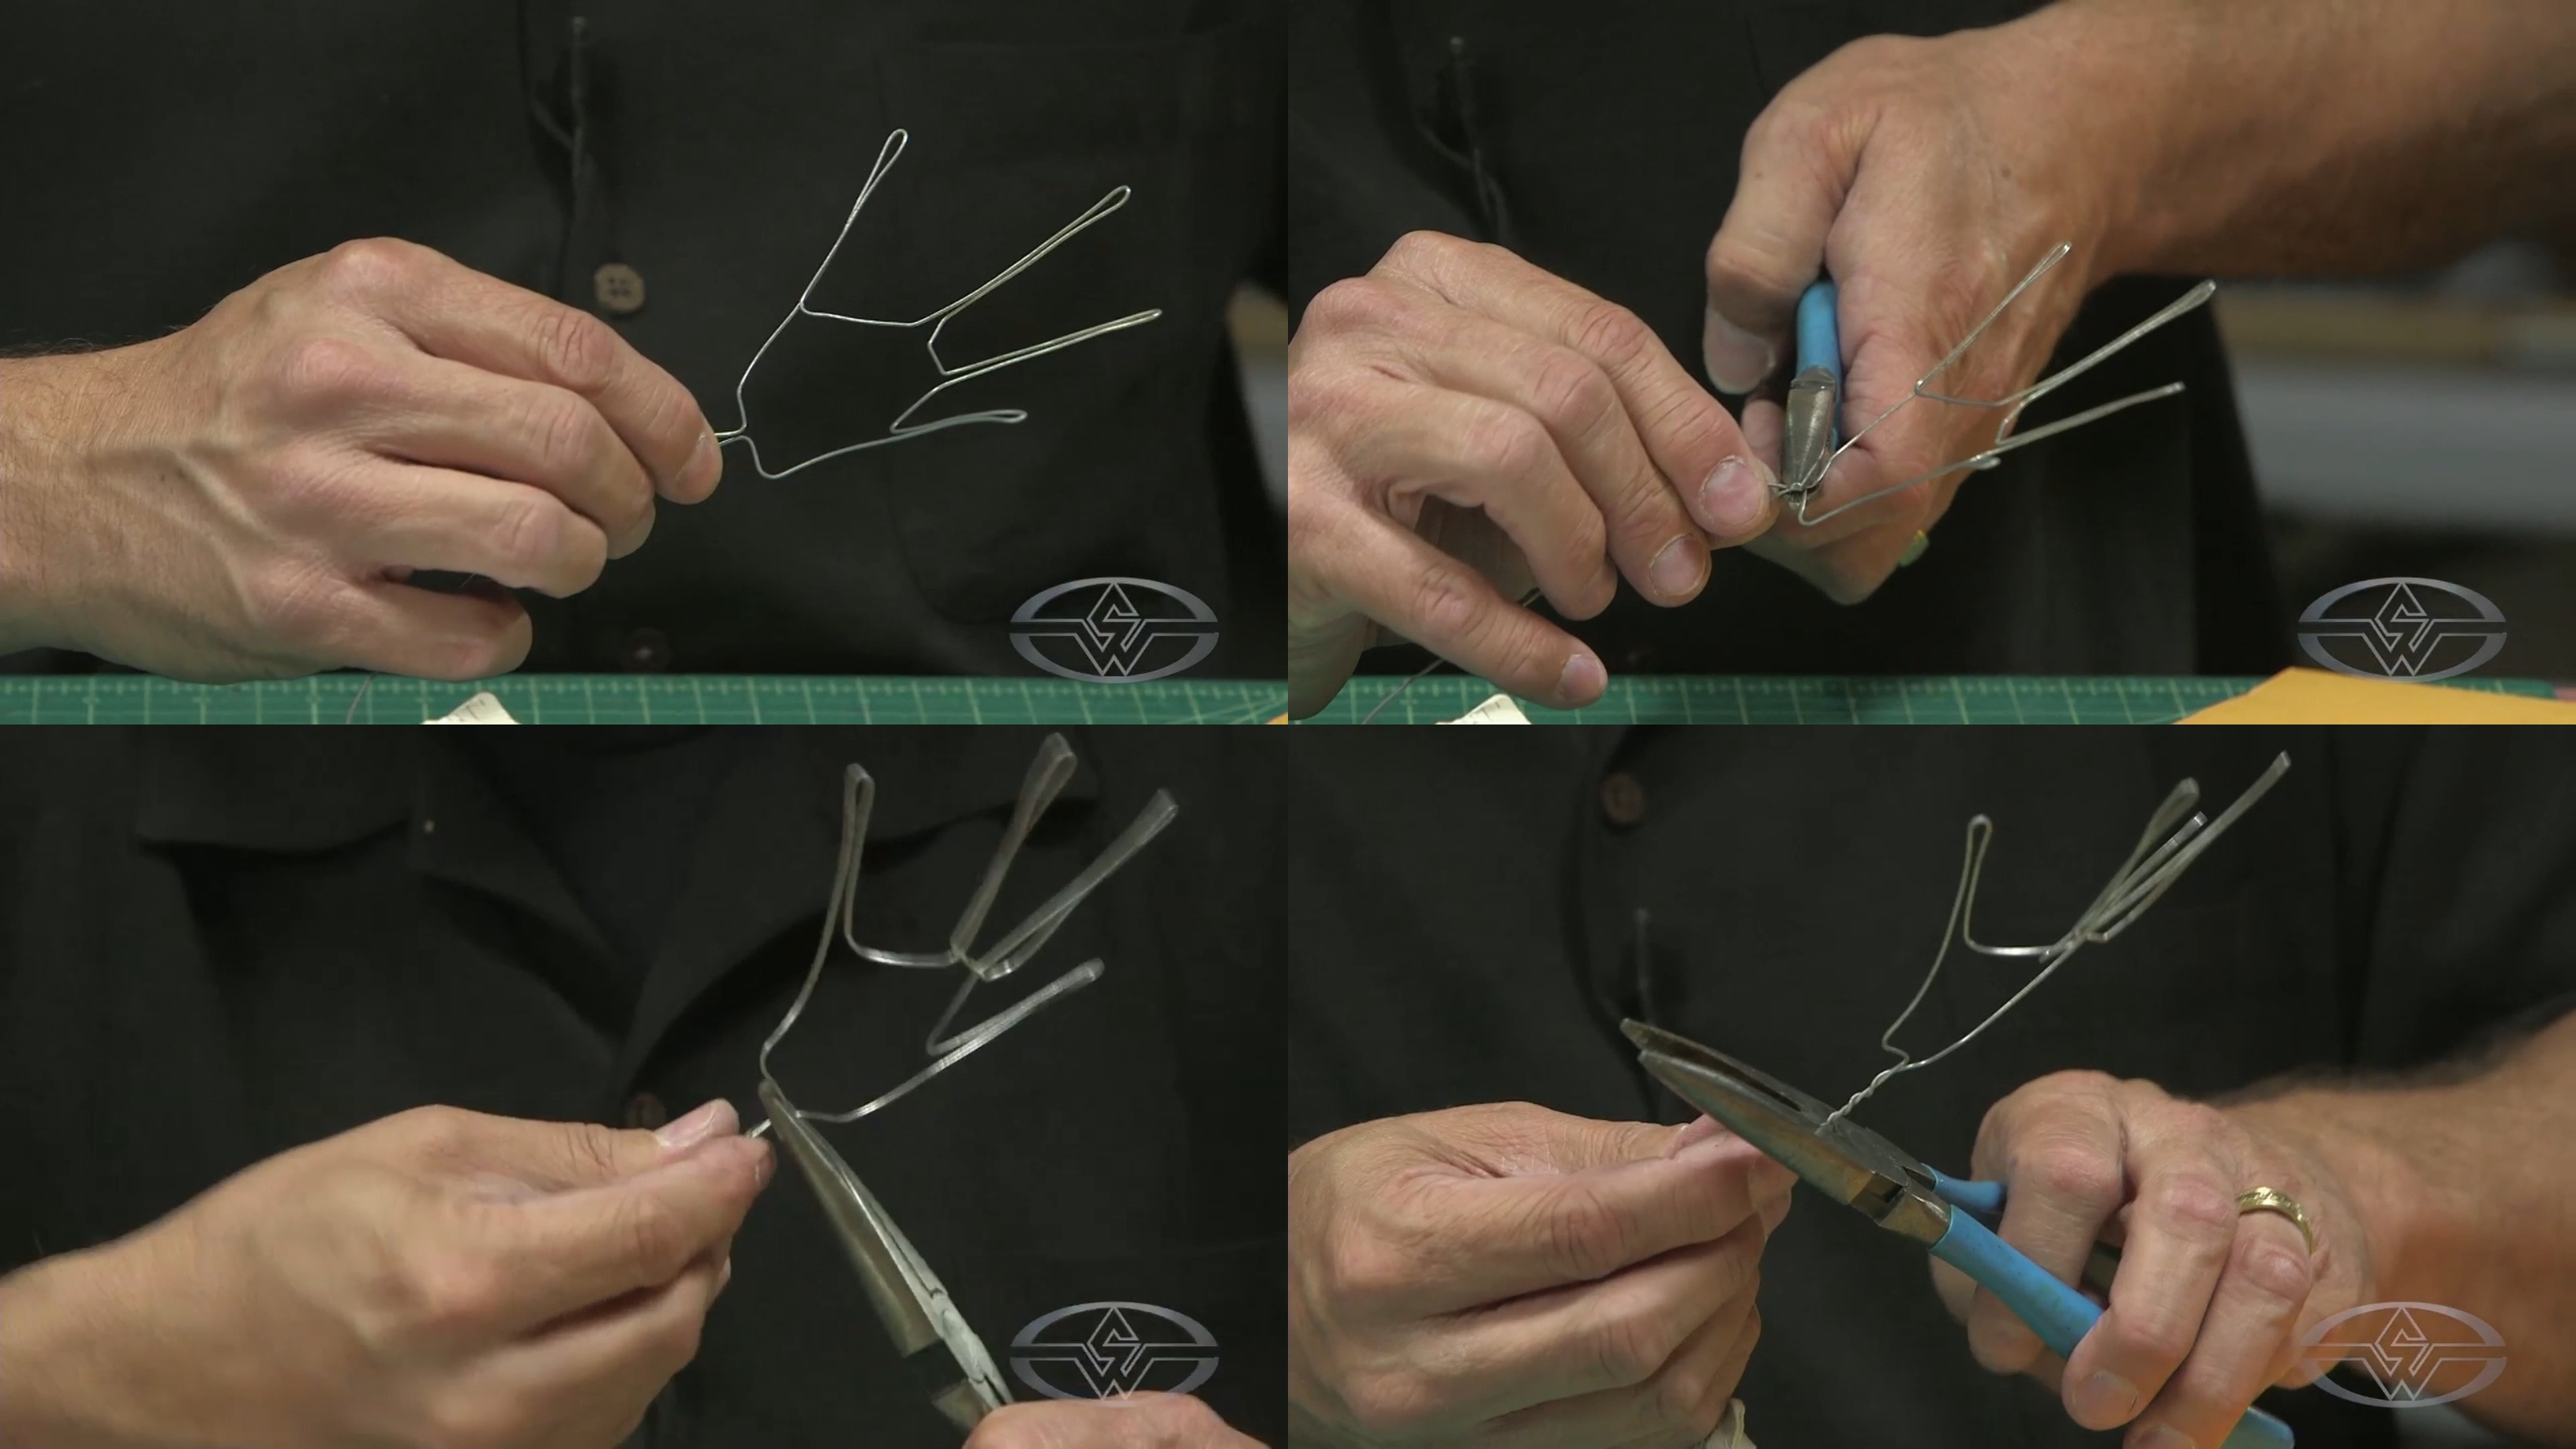 (BJ Guyer grabs the armature at the base with pliers and twists the wire using his fingers. Once he's done twisting, he cuts off extra length at the end of the wire.)
And there you have a basic frame for your hand!
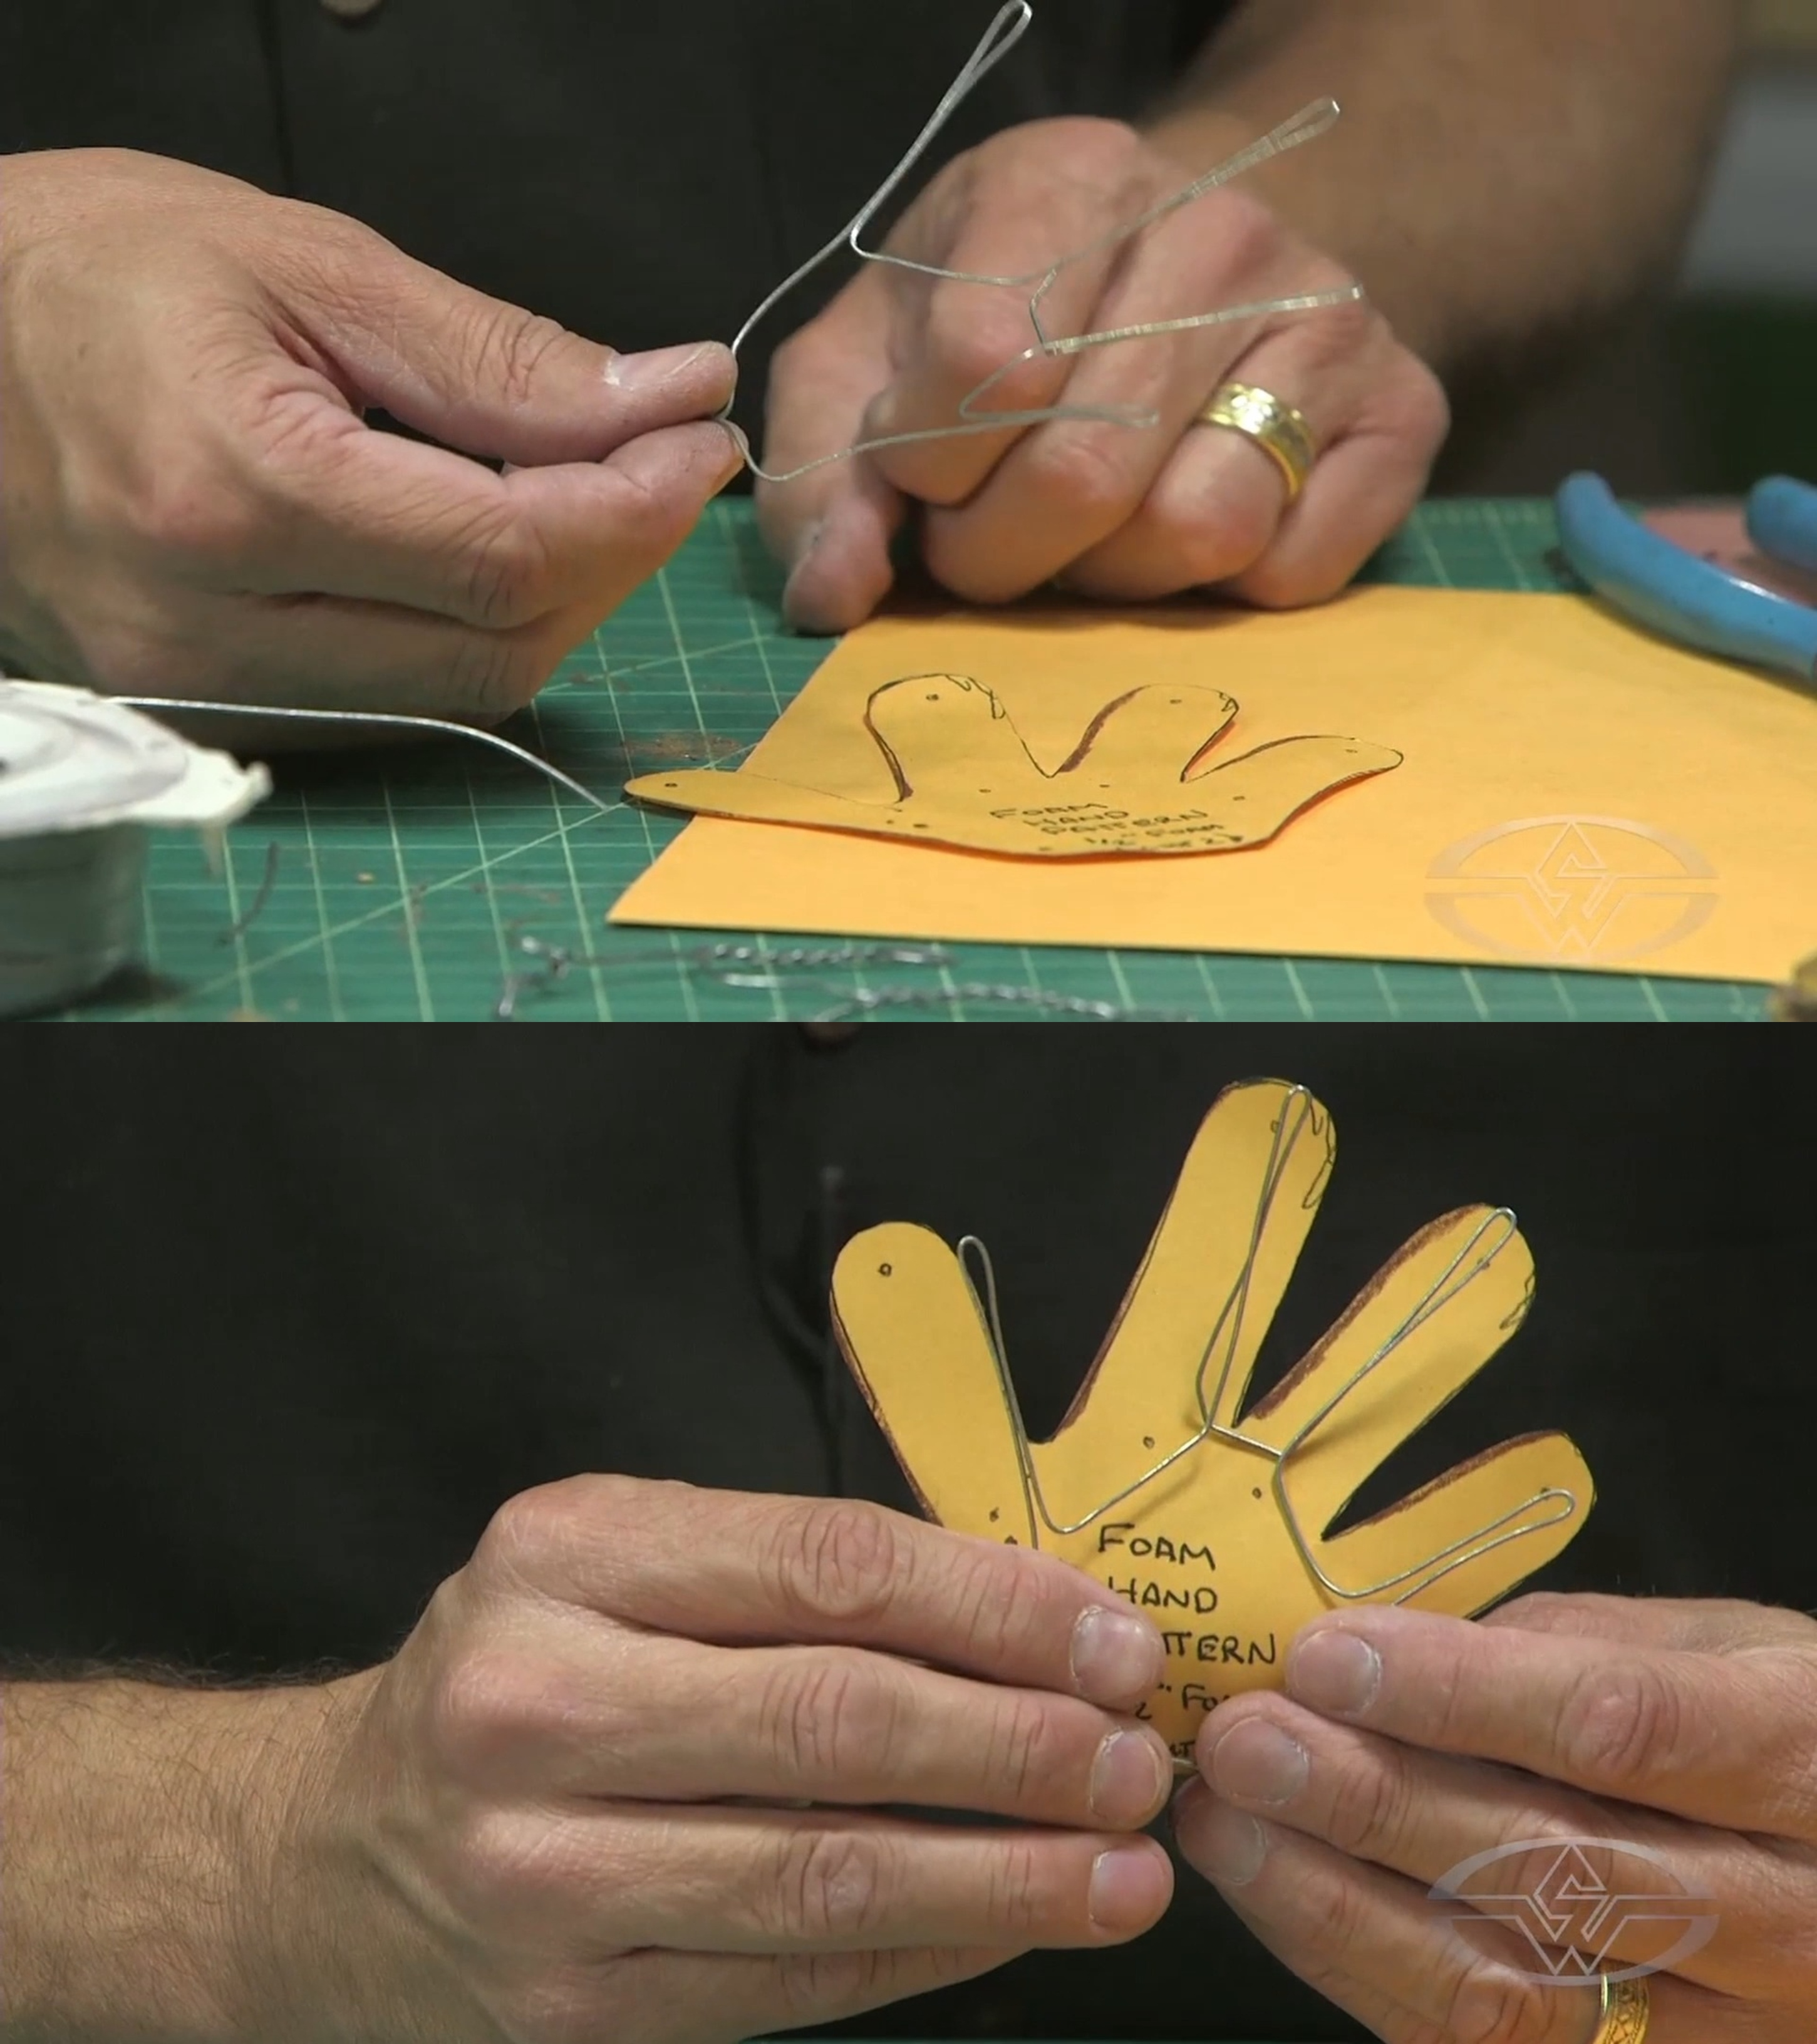 (BJ Guyer displays his hand armature holding it up against his foam hand pattern.)
Place your armature within the foam hand cutout to check that the bends line up with the point of each finger before moving on to the next step.
Techniques to Twist the Wire Fingers for Your Puppet
Now, it’s time to twist the bends to achieve completely twisted fingers with clean, open loops at the ends of the fingertips.
If you have two sets of pliers, you can use one set to grab the base of the finger to hold it secure and use the other set to twist the bend in the finger nearly down to the base. Depending on the length of your fingers, about five half-turns will give the twisted finger form you’re looking for.
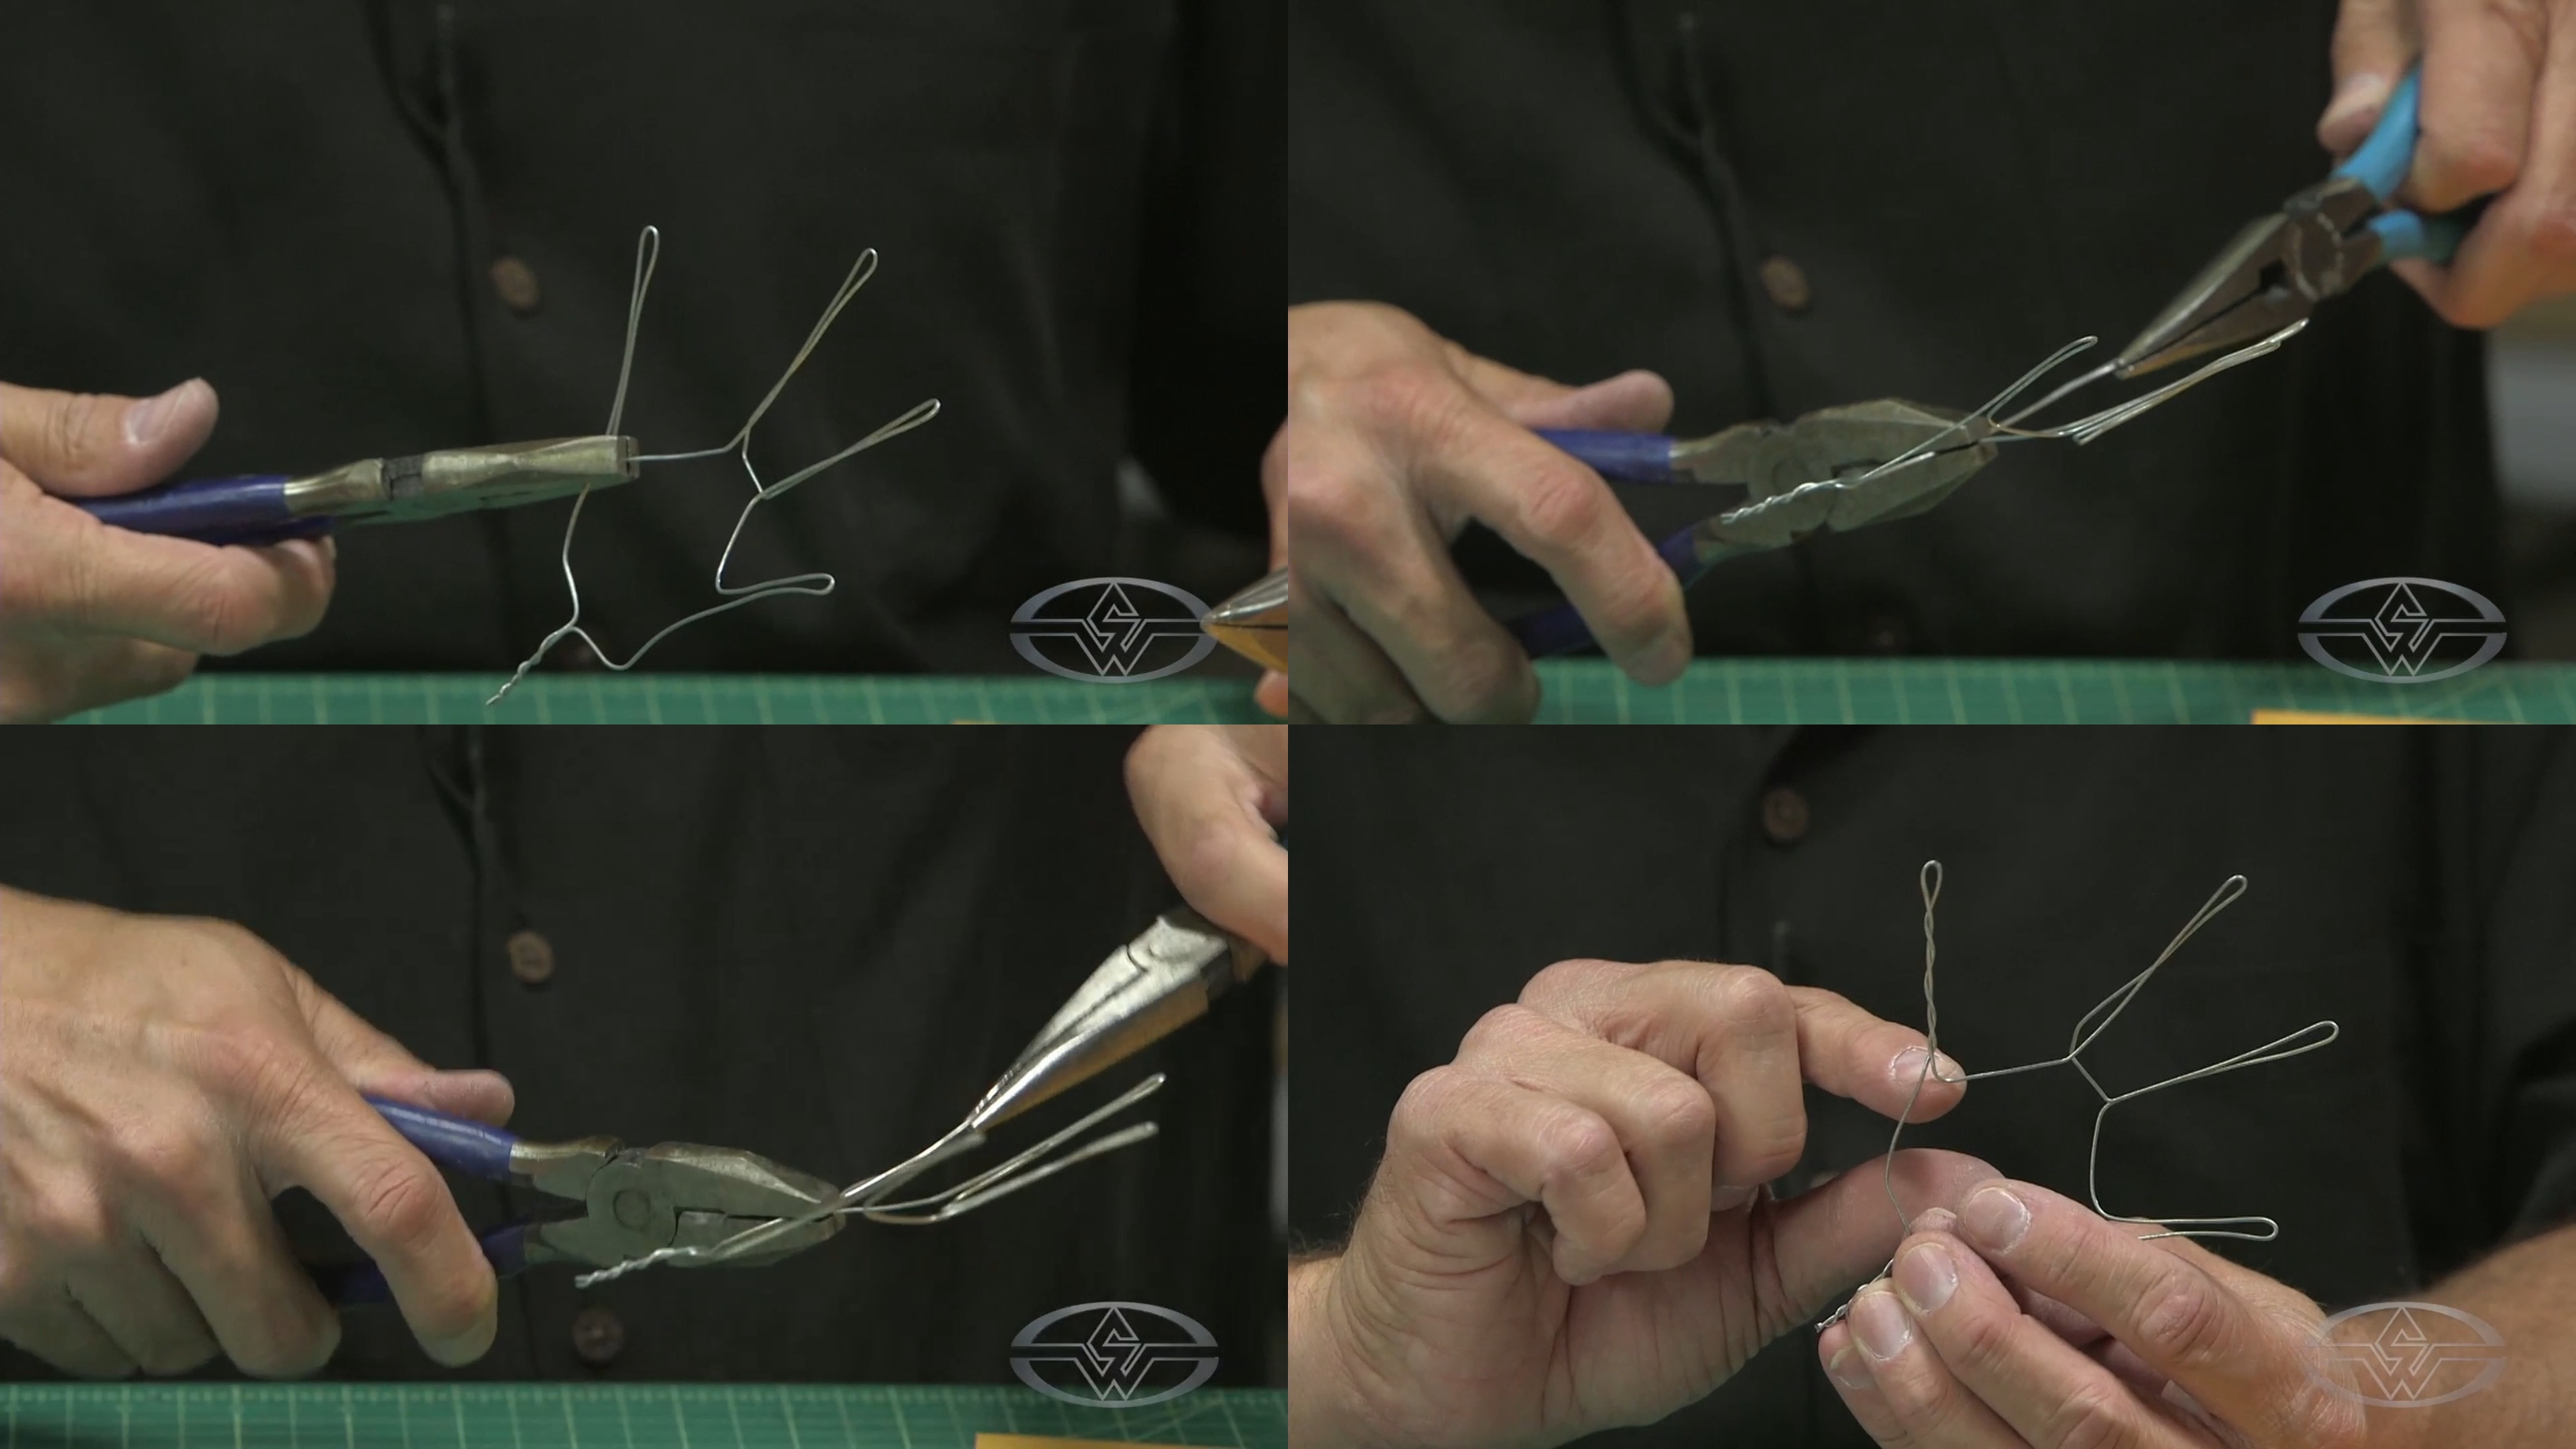 (BJ Guyer uses one set of pliers to hold the base of the finger and the other pliers to make a series of half-turns, creating a fully twisted finger.)
If you have only one set of pliers, you can twist the finger using a safety pin or a piece of metal rod.
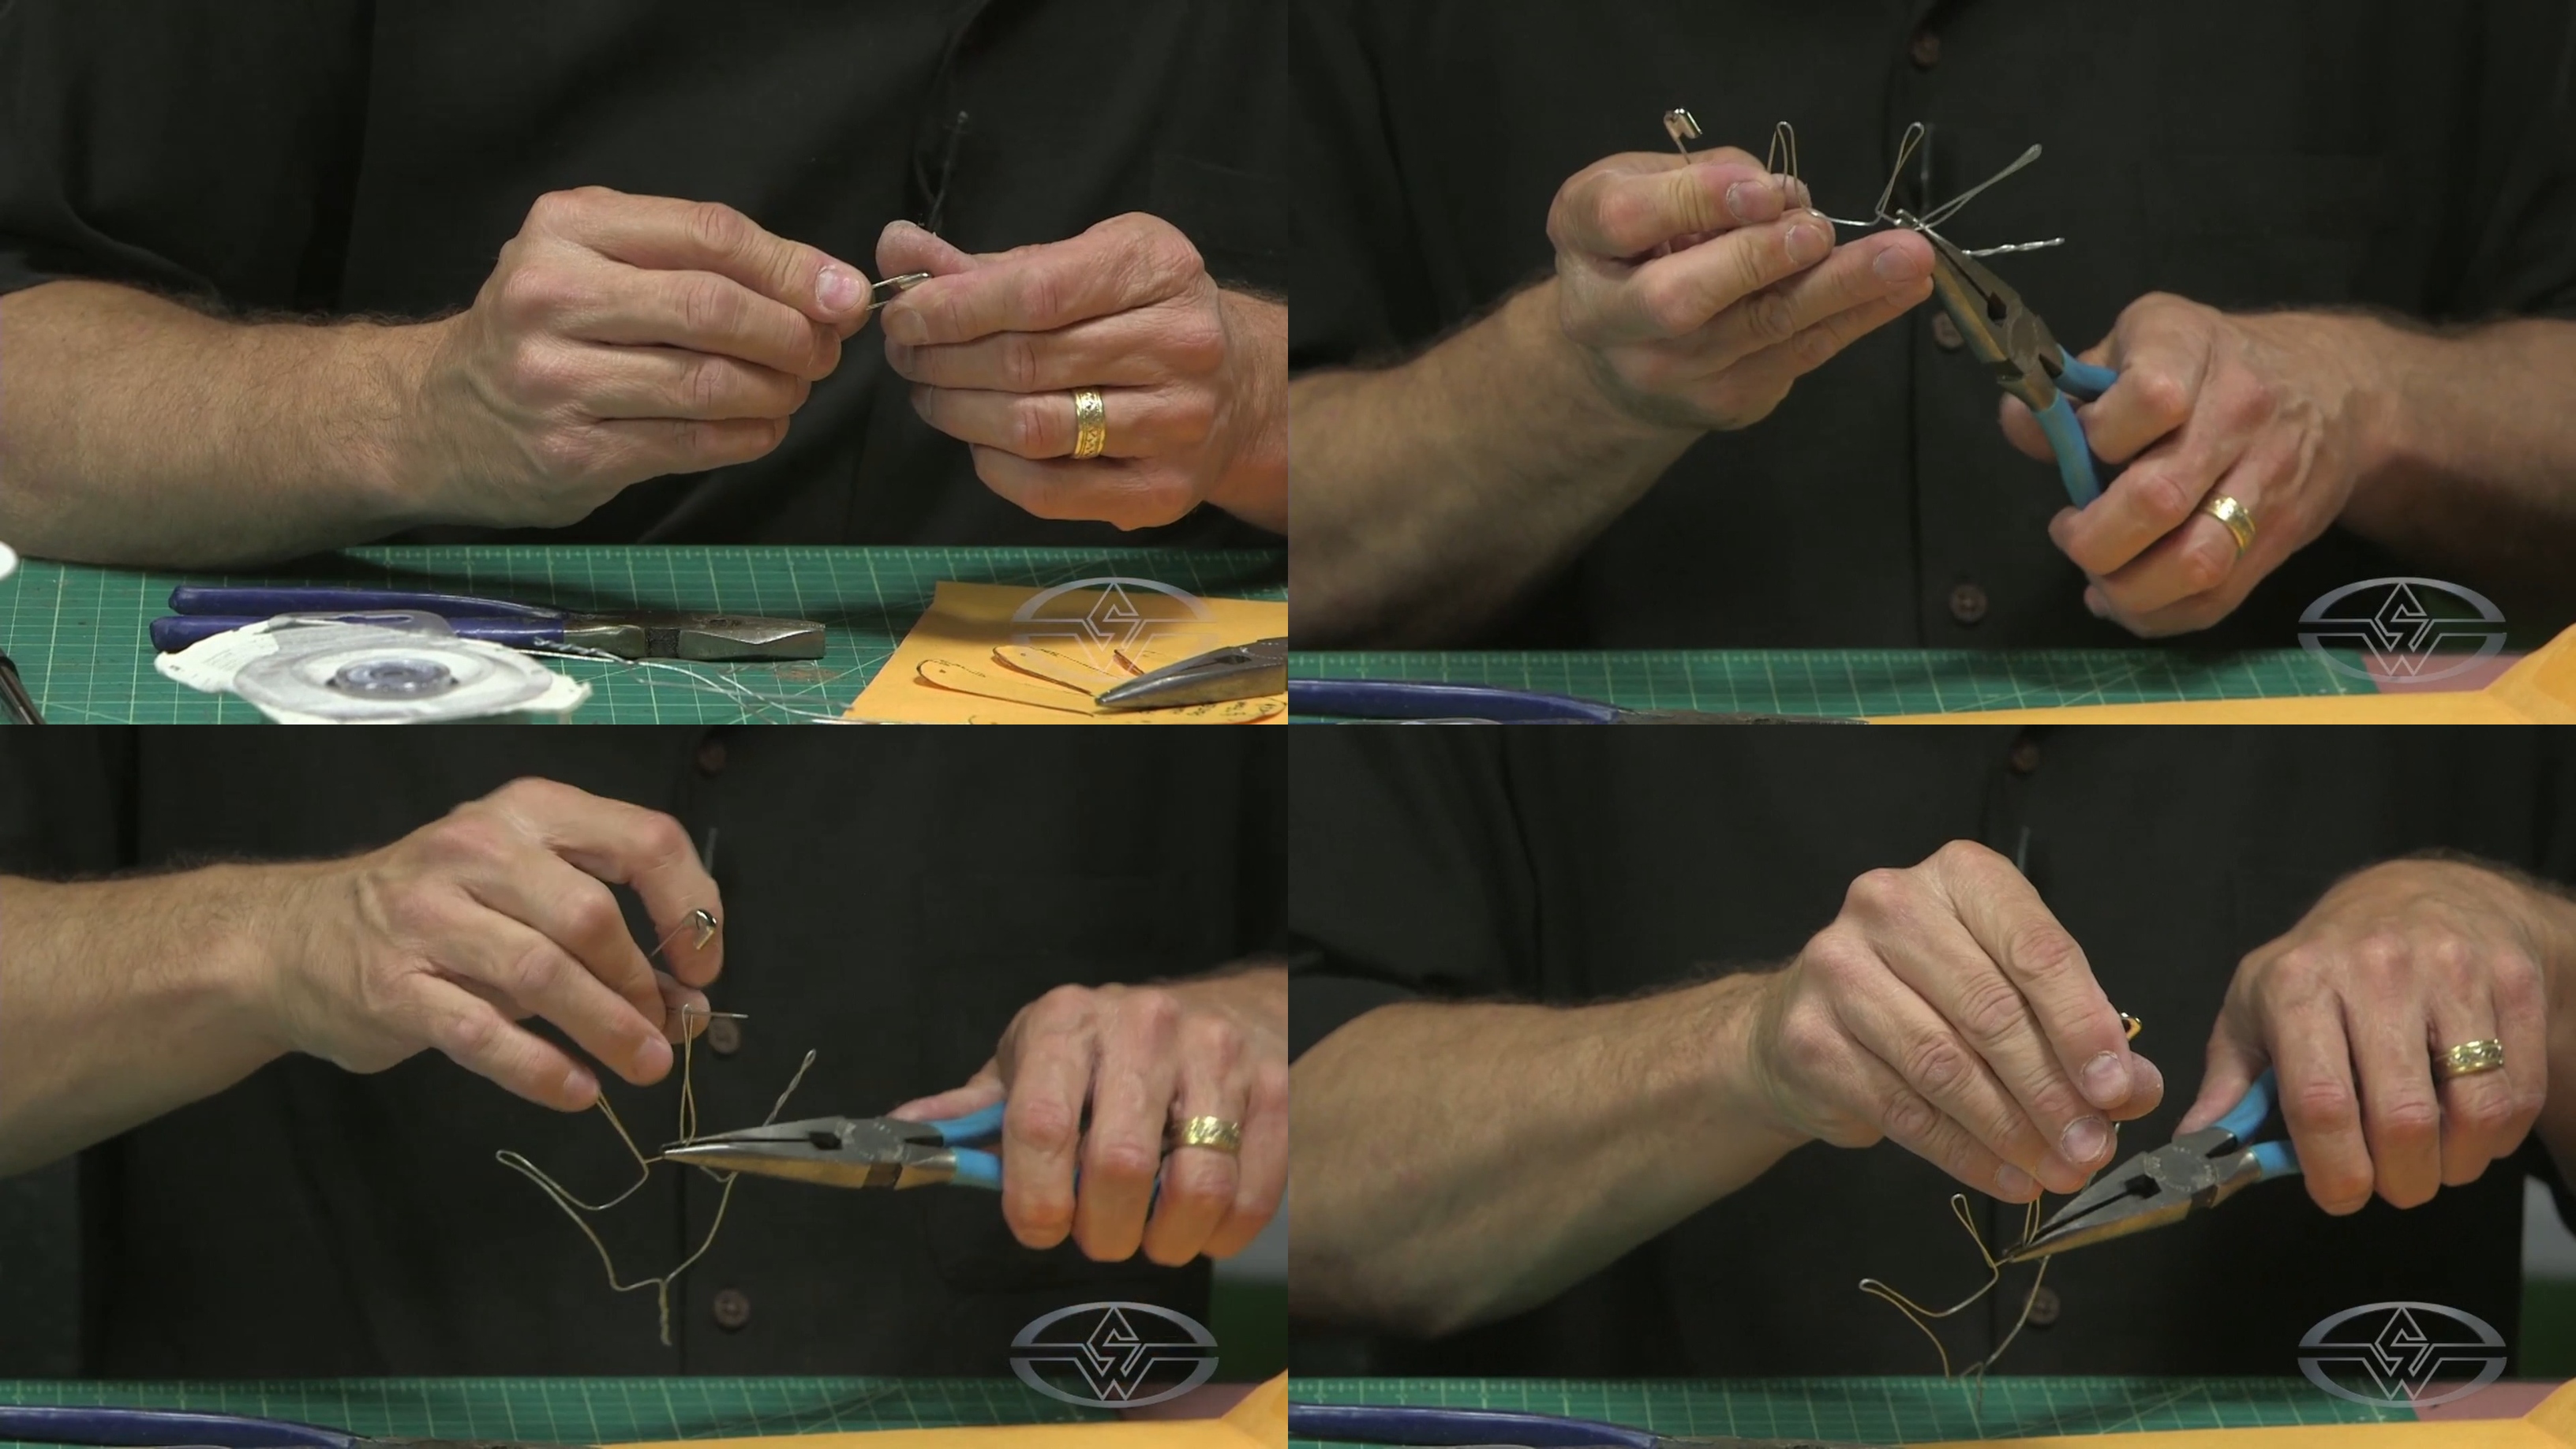 (BJ Guyer demonstrates how to use pliers and a safety pin to twist the wire fingers.)
To do so, use pliers to grip the base. Then, use a safety pin or a metal rod to use as a key in between the wire bend. Next, twist each bend about 5–7 times until the finger is completely twisted.
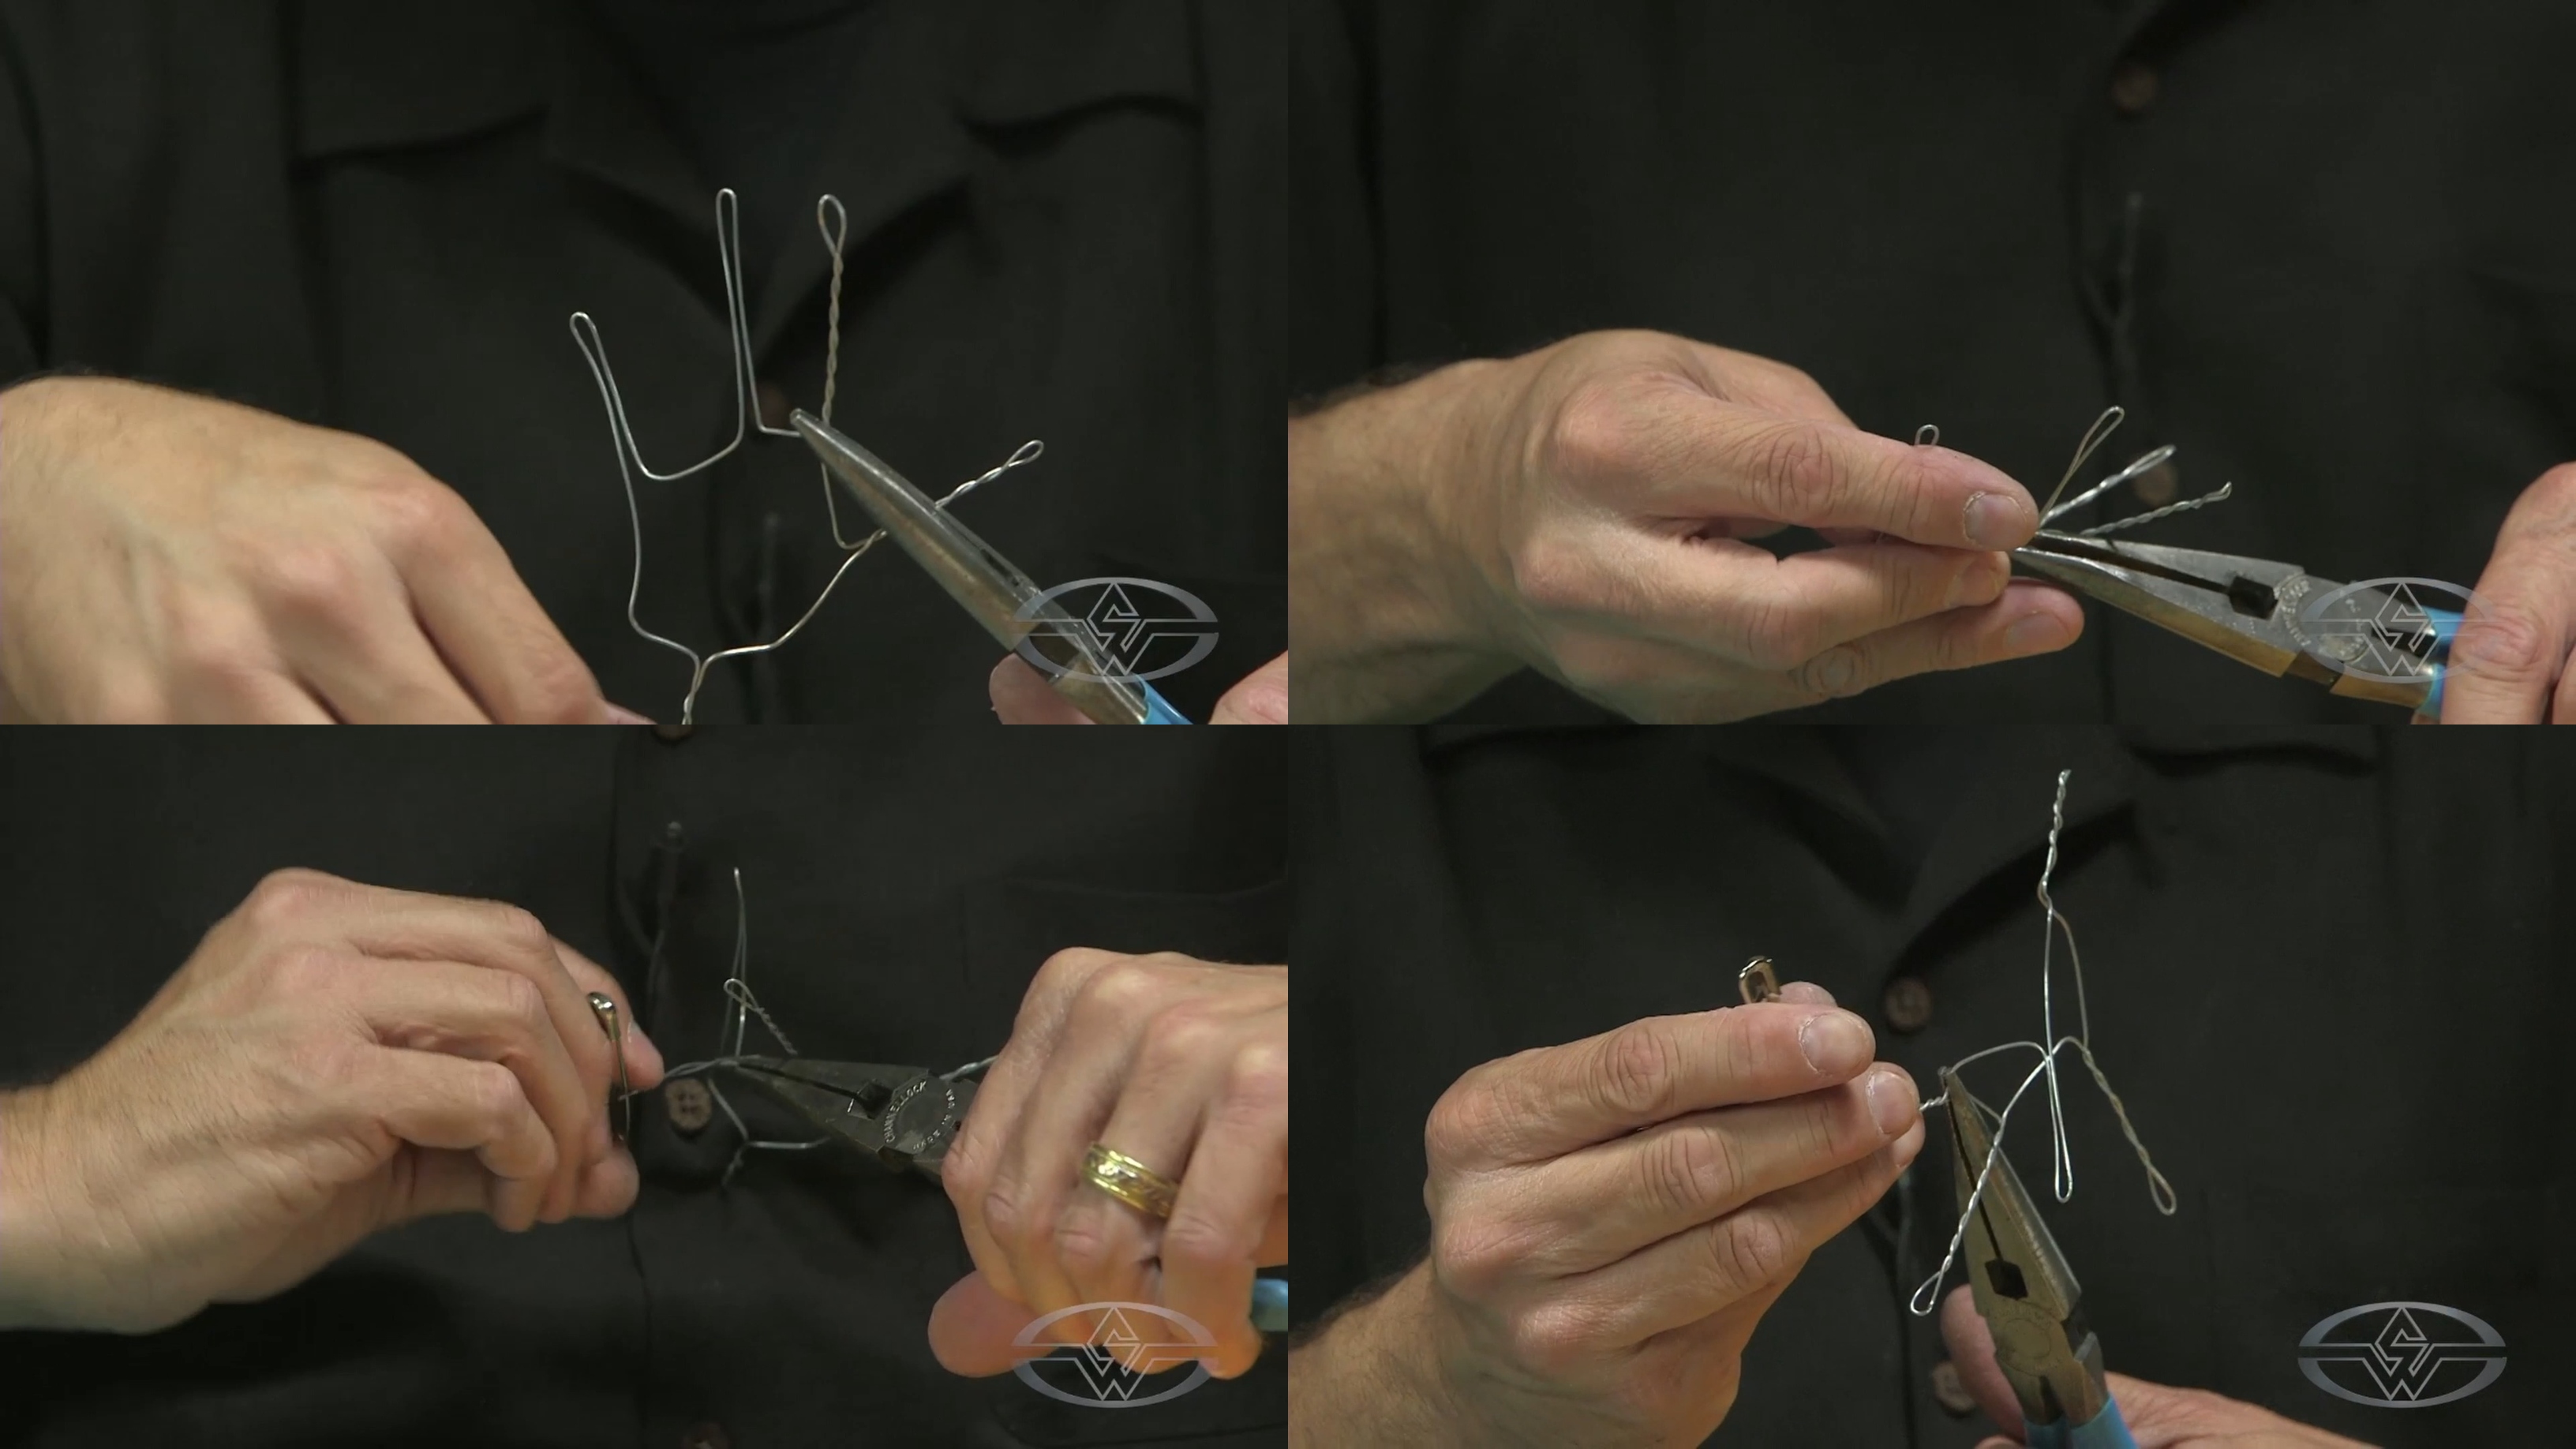 (BJ Guyer continues twisting each finger with his pliers and safety pin.)
Repeat the process for all fingers.
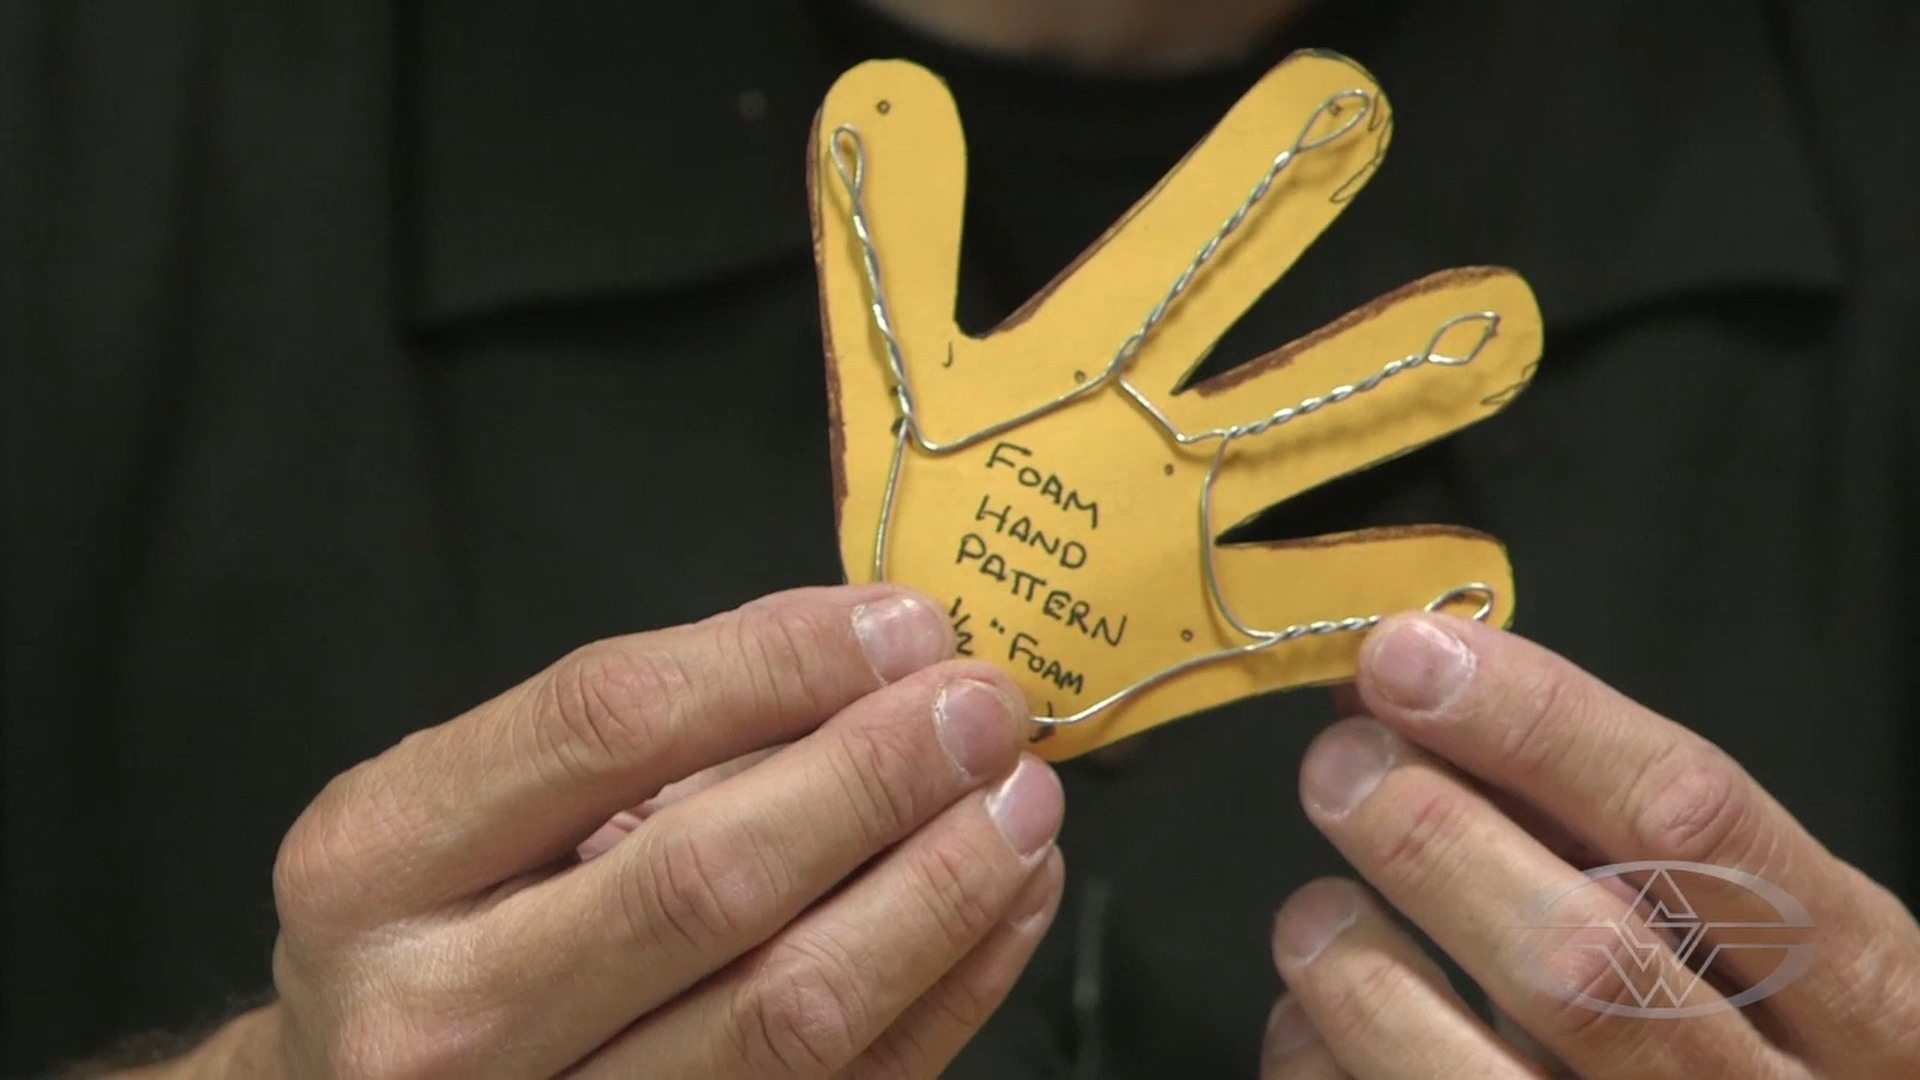 (BJ Guyer holds his hand armature with completely twisted fingers and open-looped fingertips up against his hand pattern.)
You can clean up the ends of the fingers if you want to crimp them or flatten them out as you go or once you’re done.
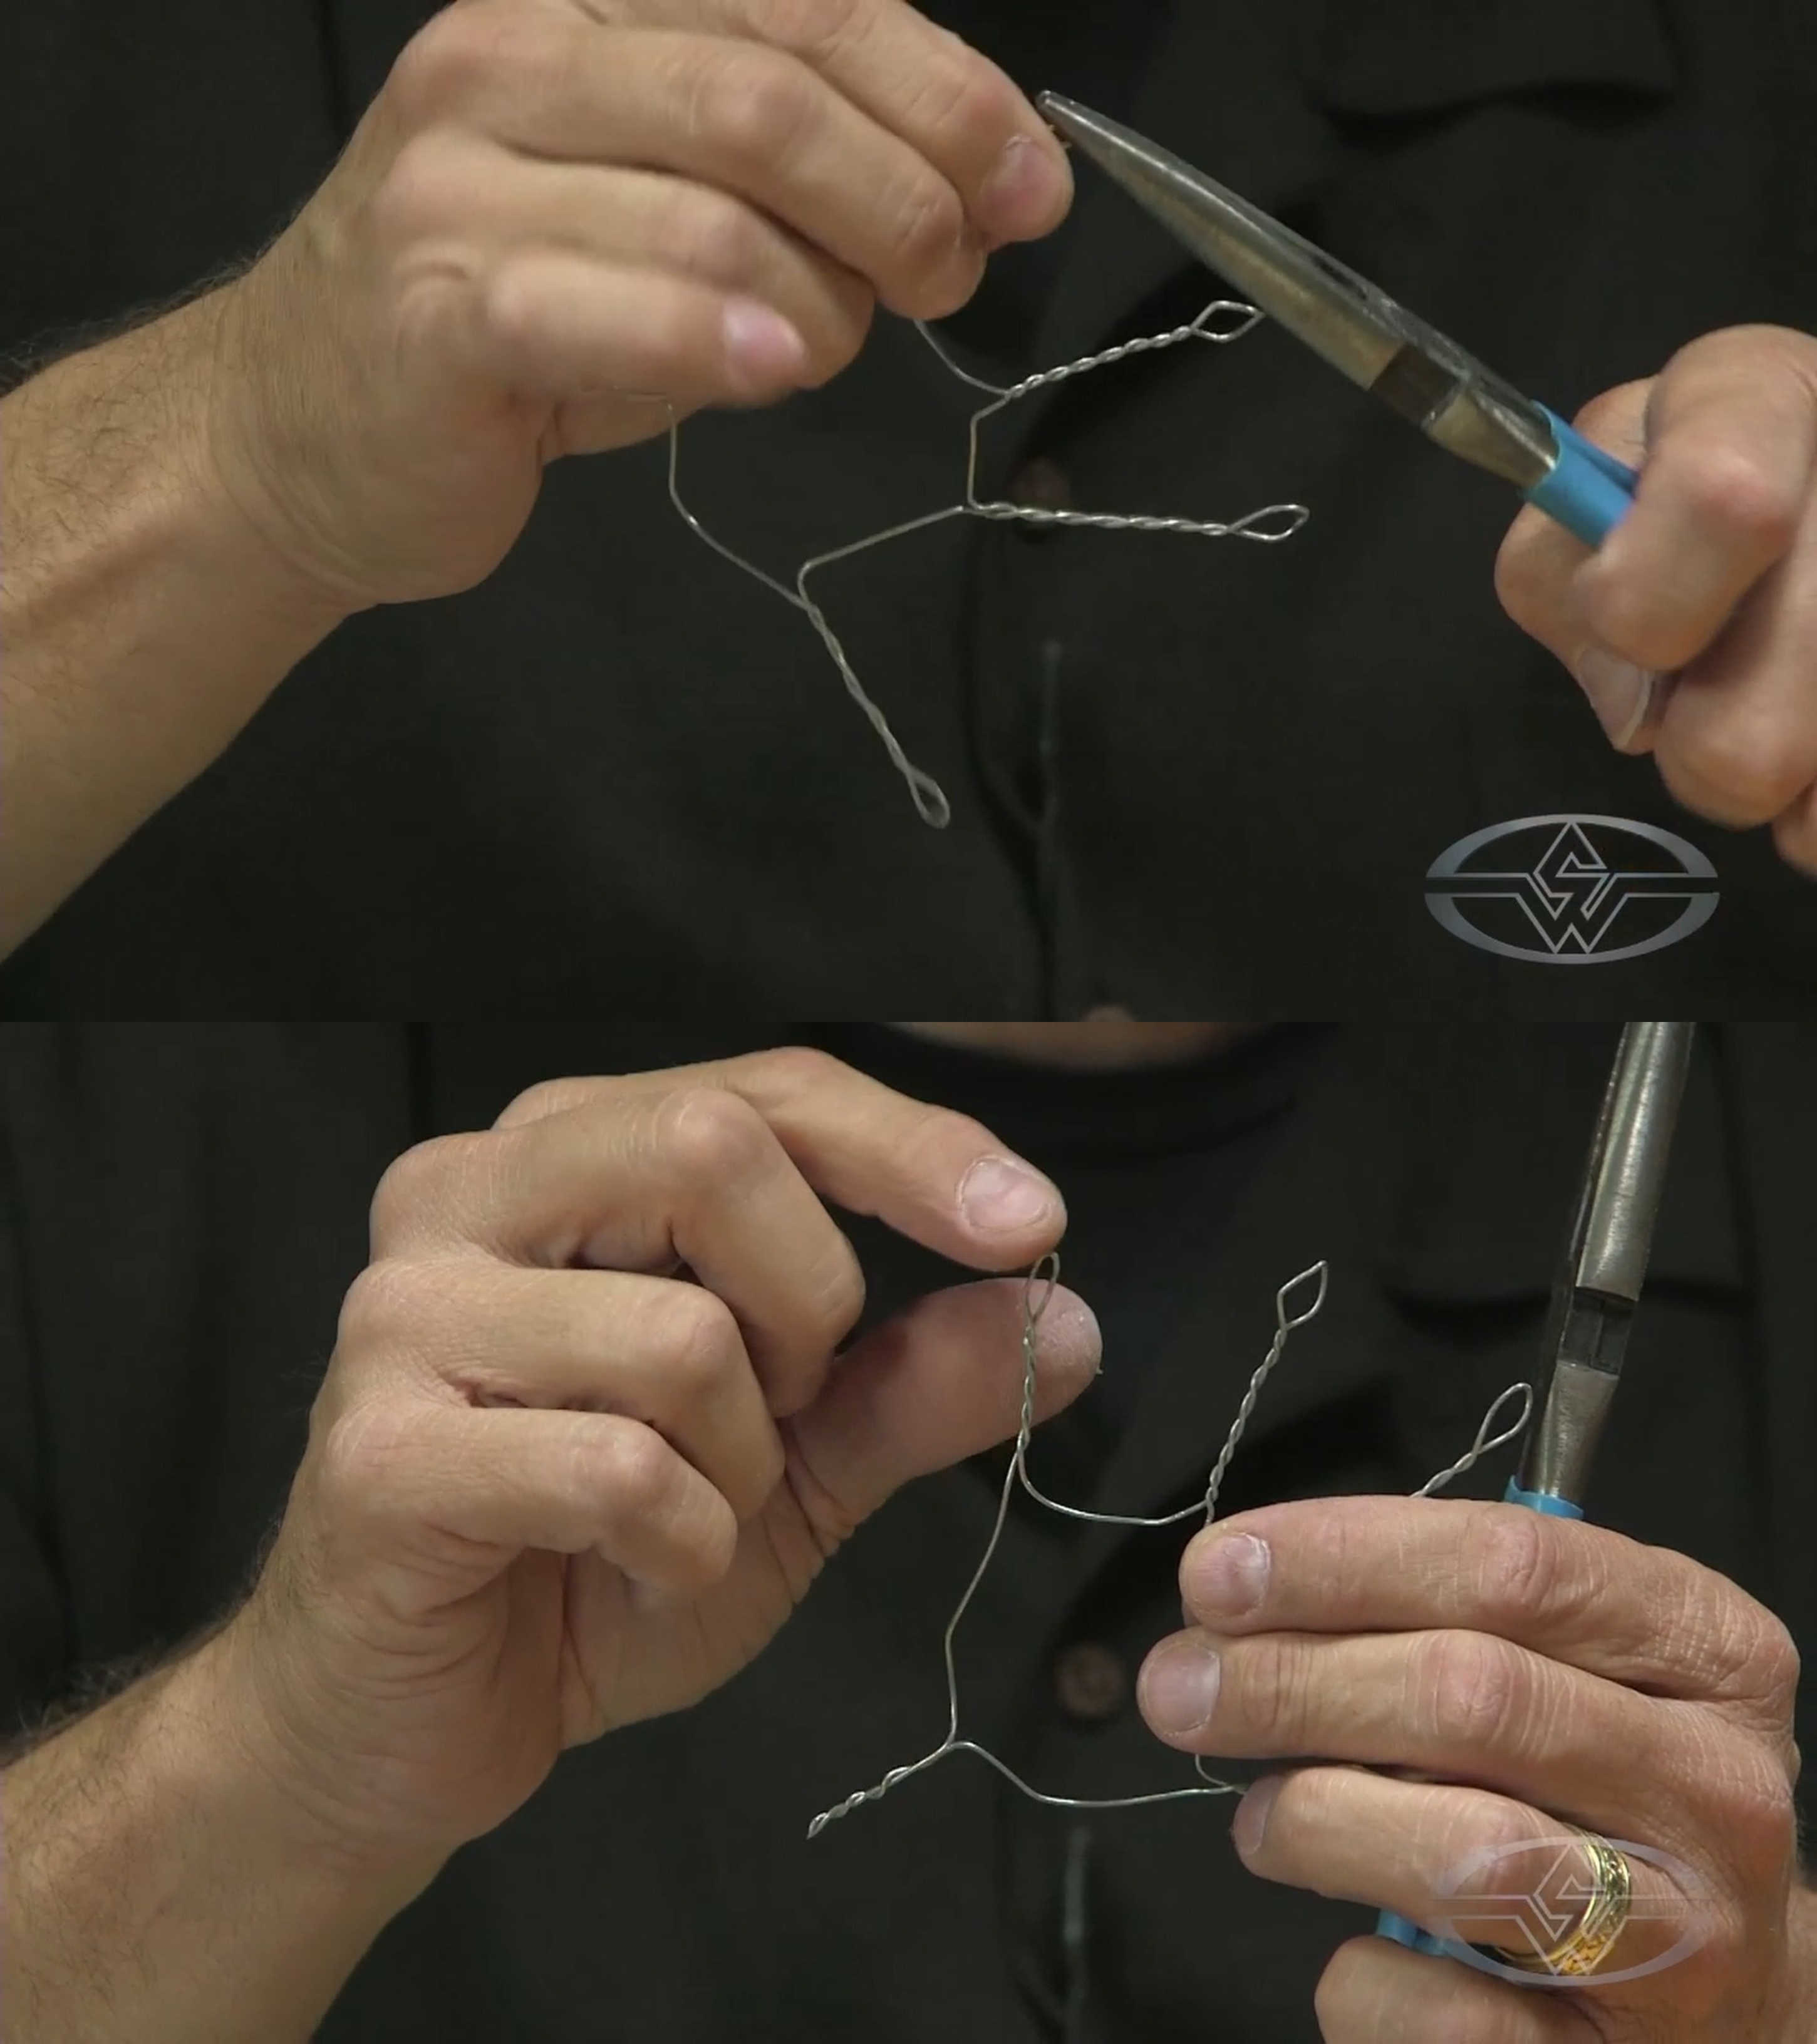 (BJ Guyer cleans up some of the loops on his wire armature.)
It’s best to avoid pinching the looped ends too tightly since this can lead to them pushing through the foam and out of the end of the fingertip of the puppet. An open loop is ideal for you to hold onto while bending the fingers and ensures that the fabric or foam isn’t compromised down the line.
Making an Additional Hand Armature
After you’ve finished making one hand armature, you’ll need to build one more to complete your puppet’s pair of hands. Simply set up your wire and follow the hand pattern template again. If you have the time to make a jig, it can be helpful in quickly making another hand, especially if you need to make multiple hands in a short amount of time.
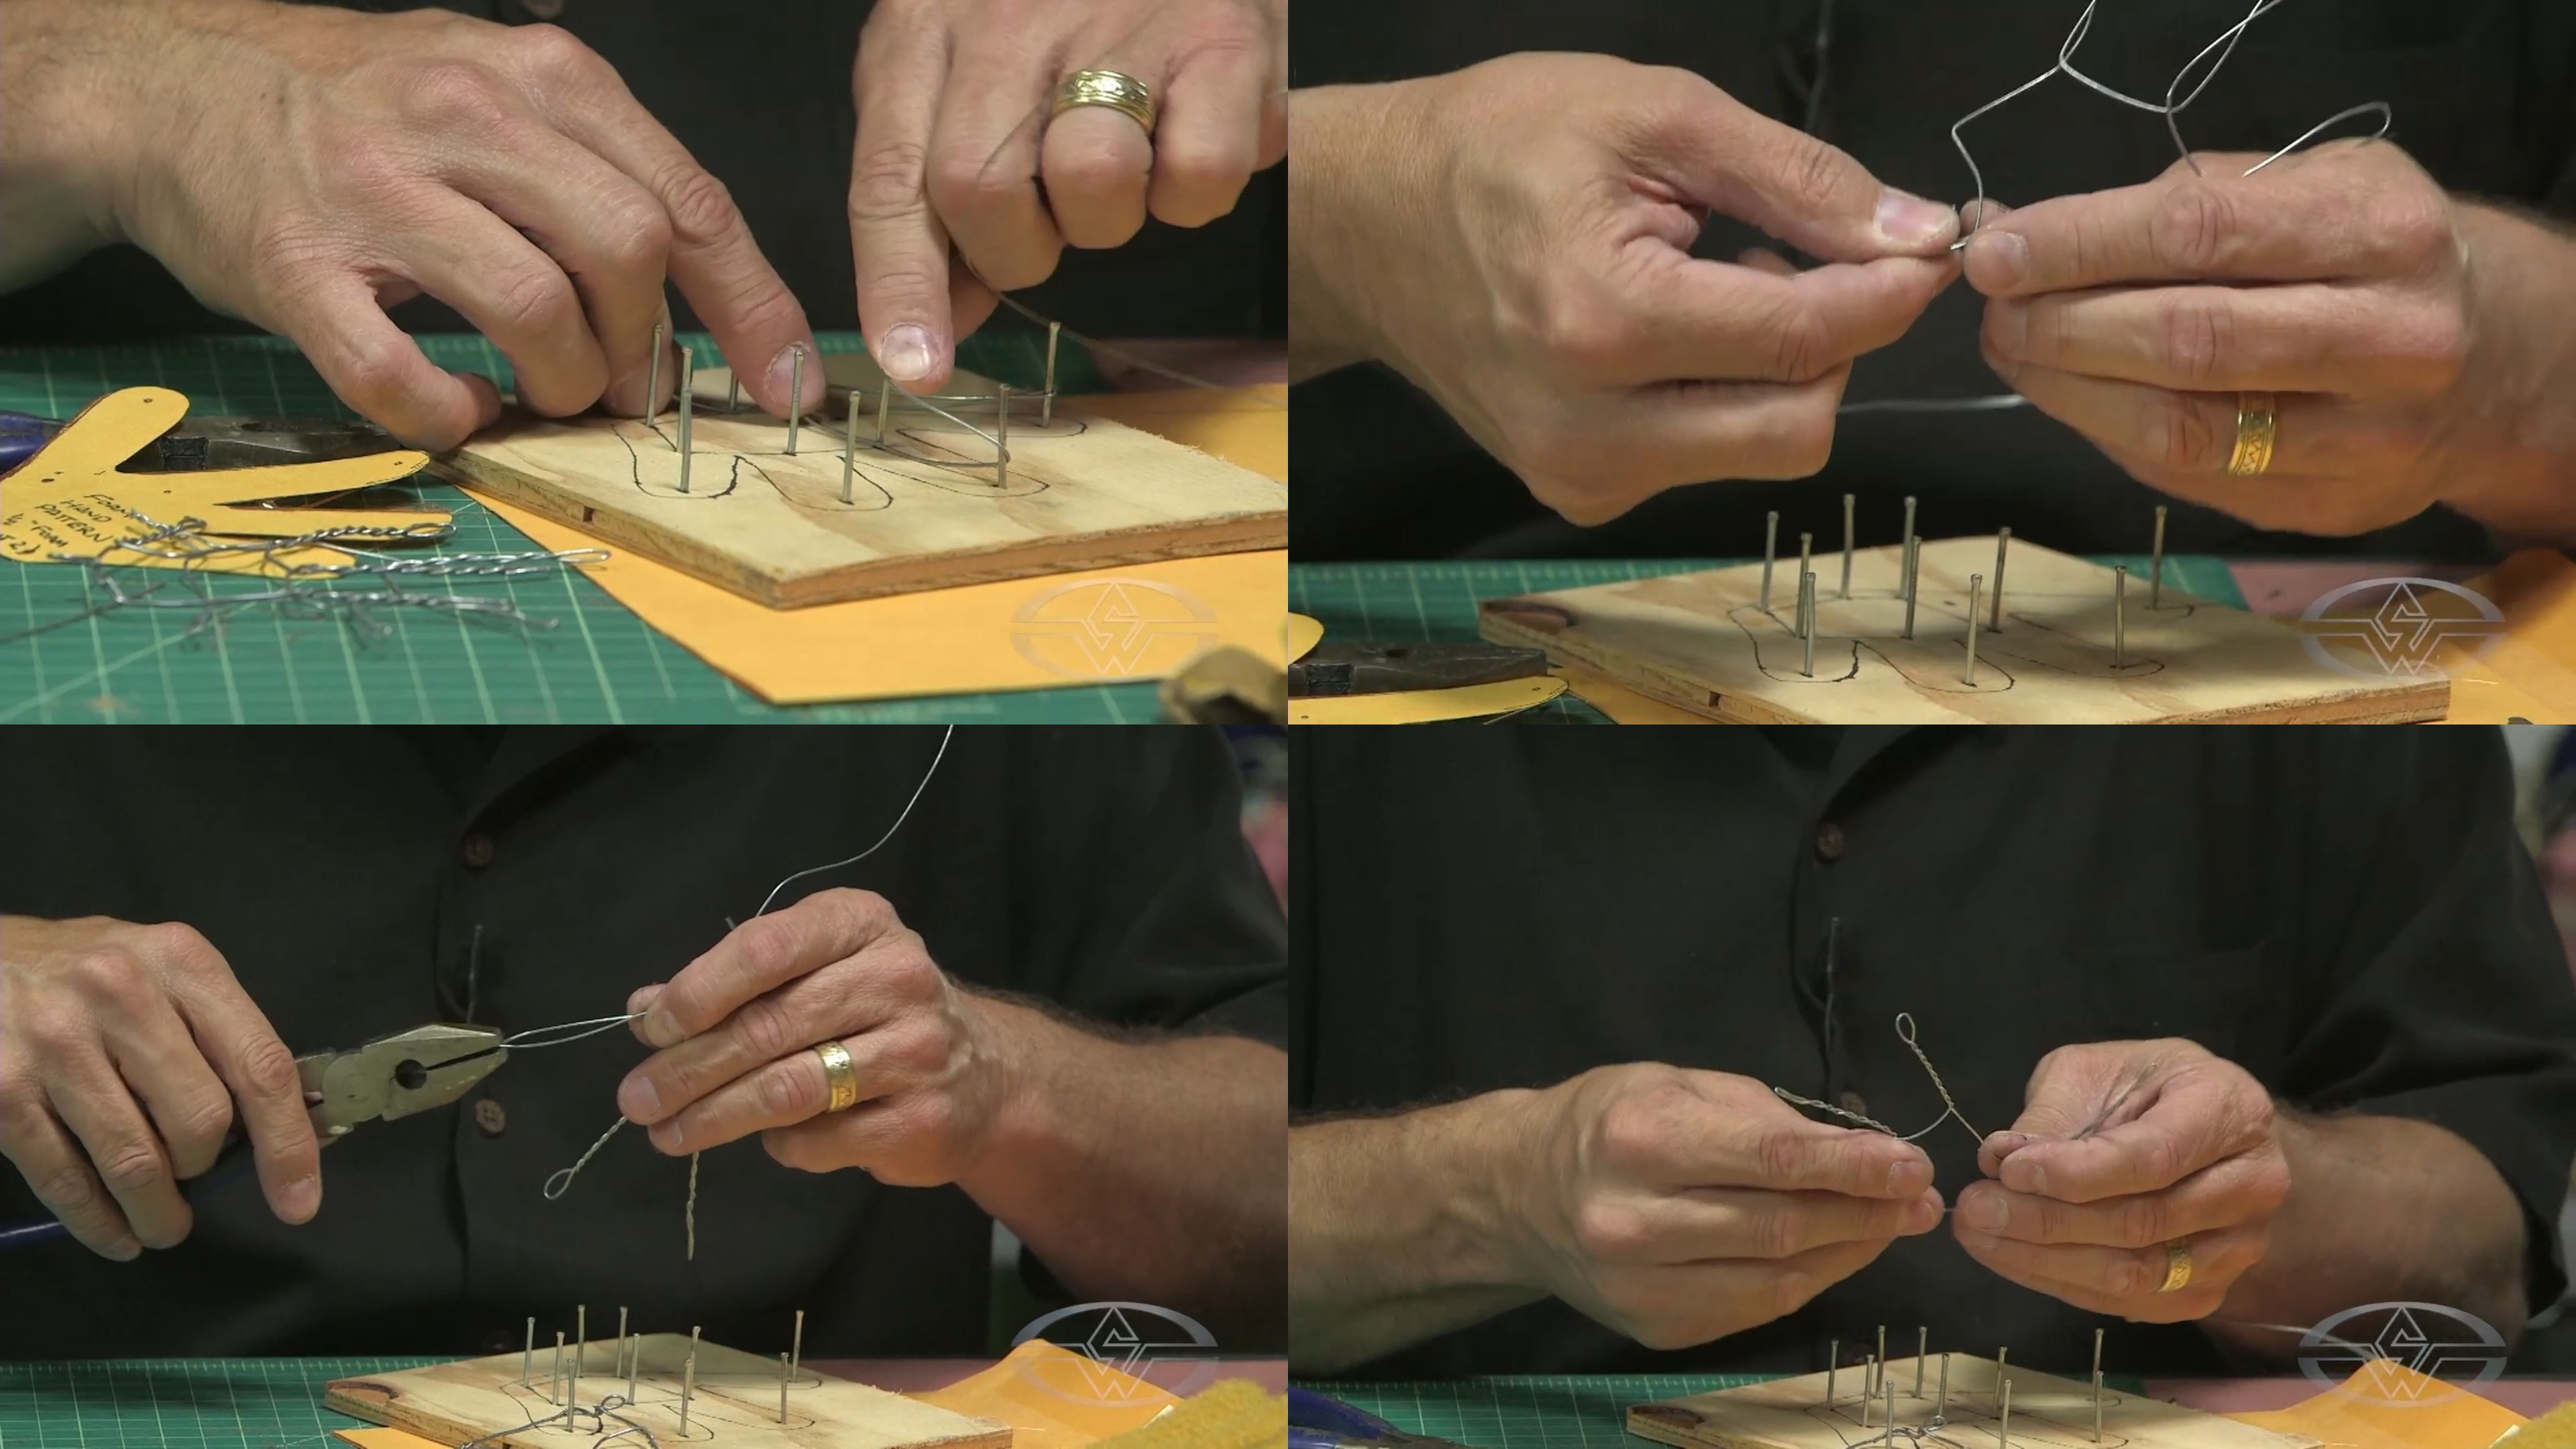 (BJ Guyer builds a second hand armature on his jig in a jiffy.)
No matter whether you twist using pliers, a safety pin, or your fingers, try to keep your hands as identical to each other with the finger length and palm size matching up.
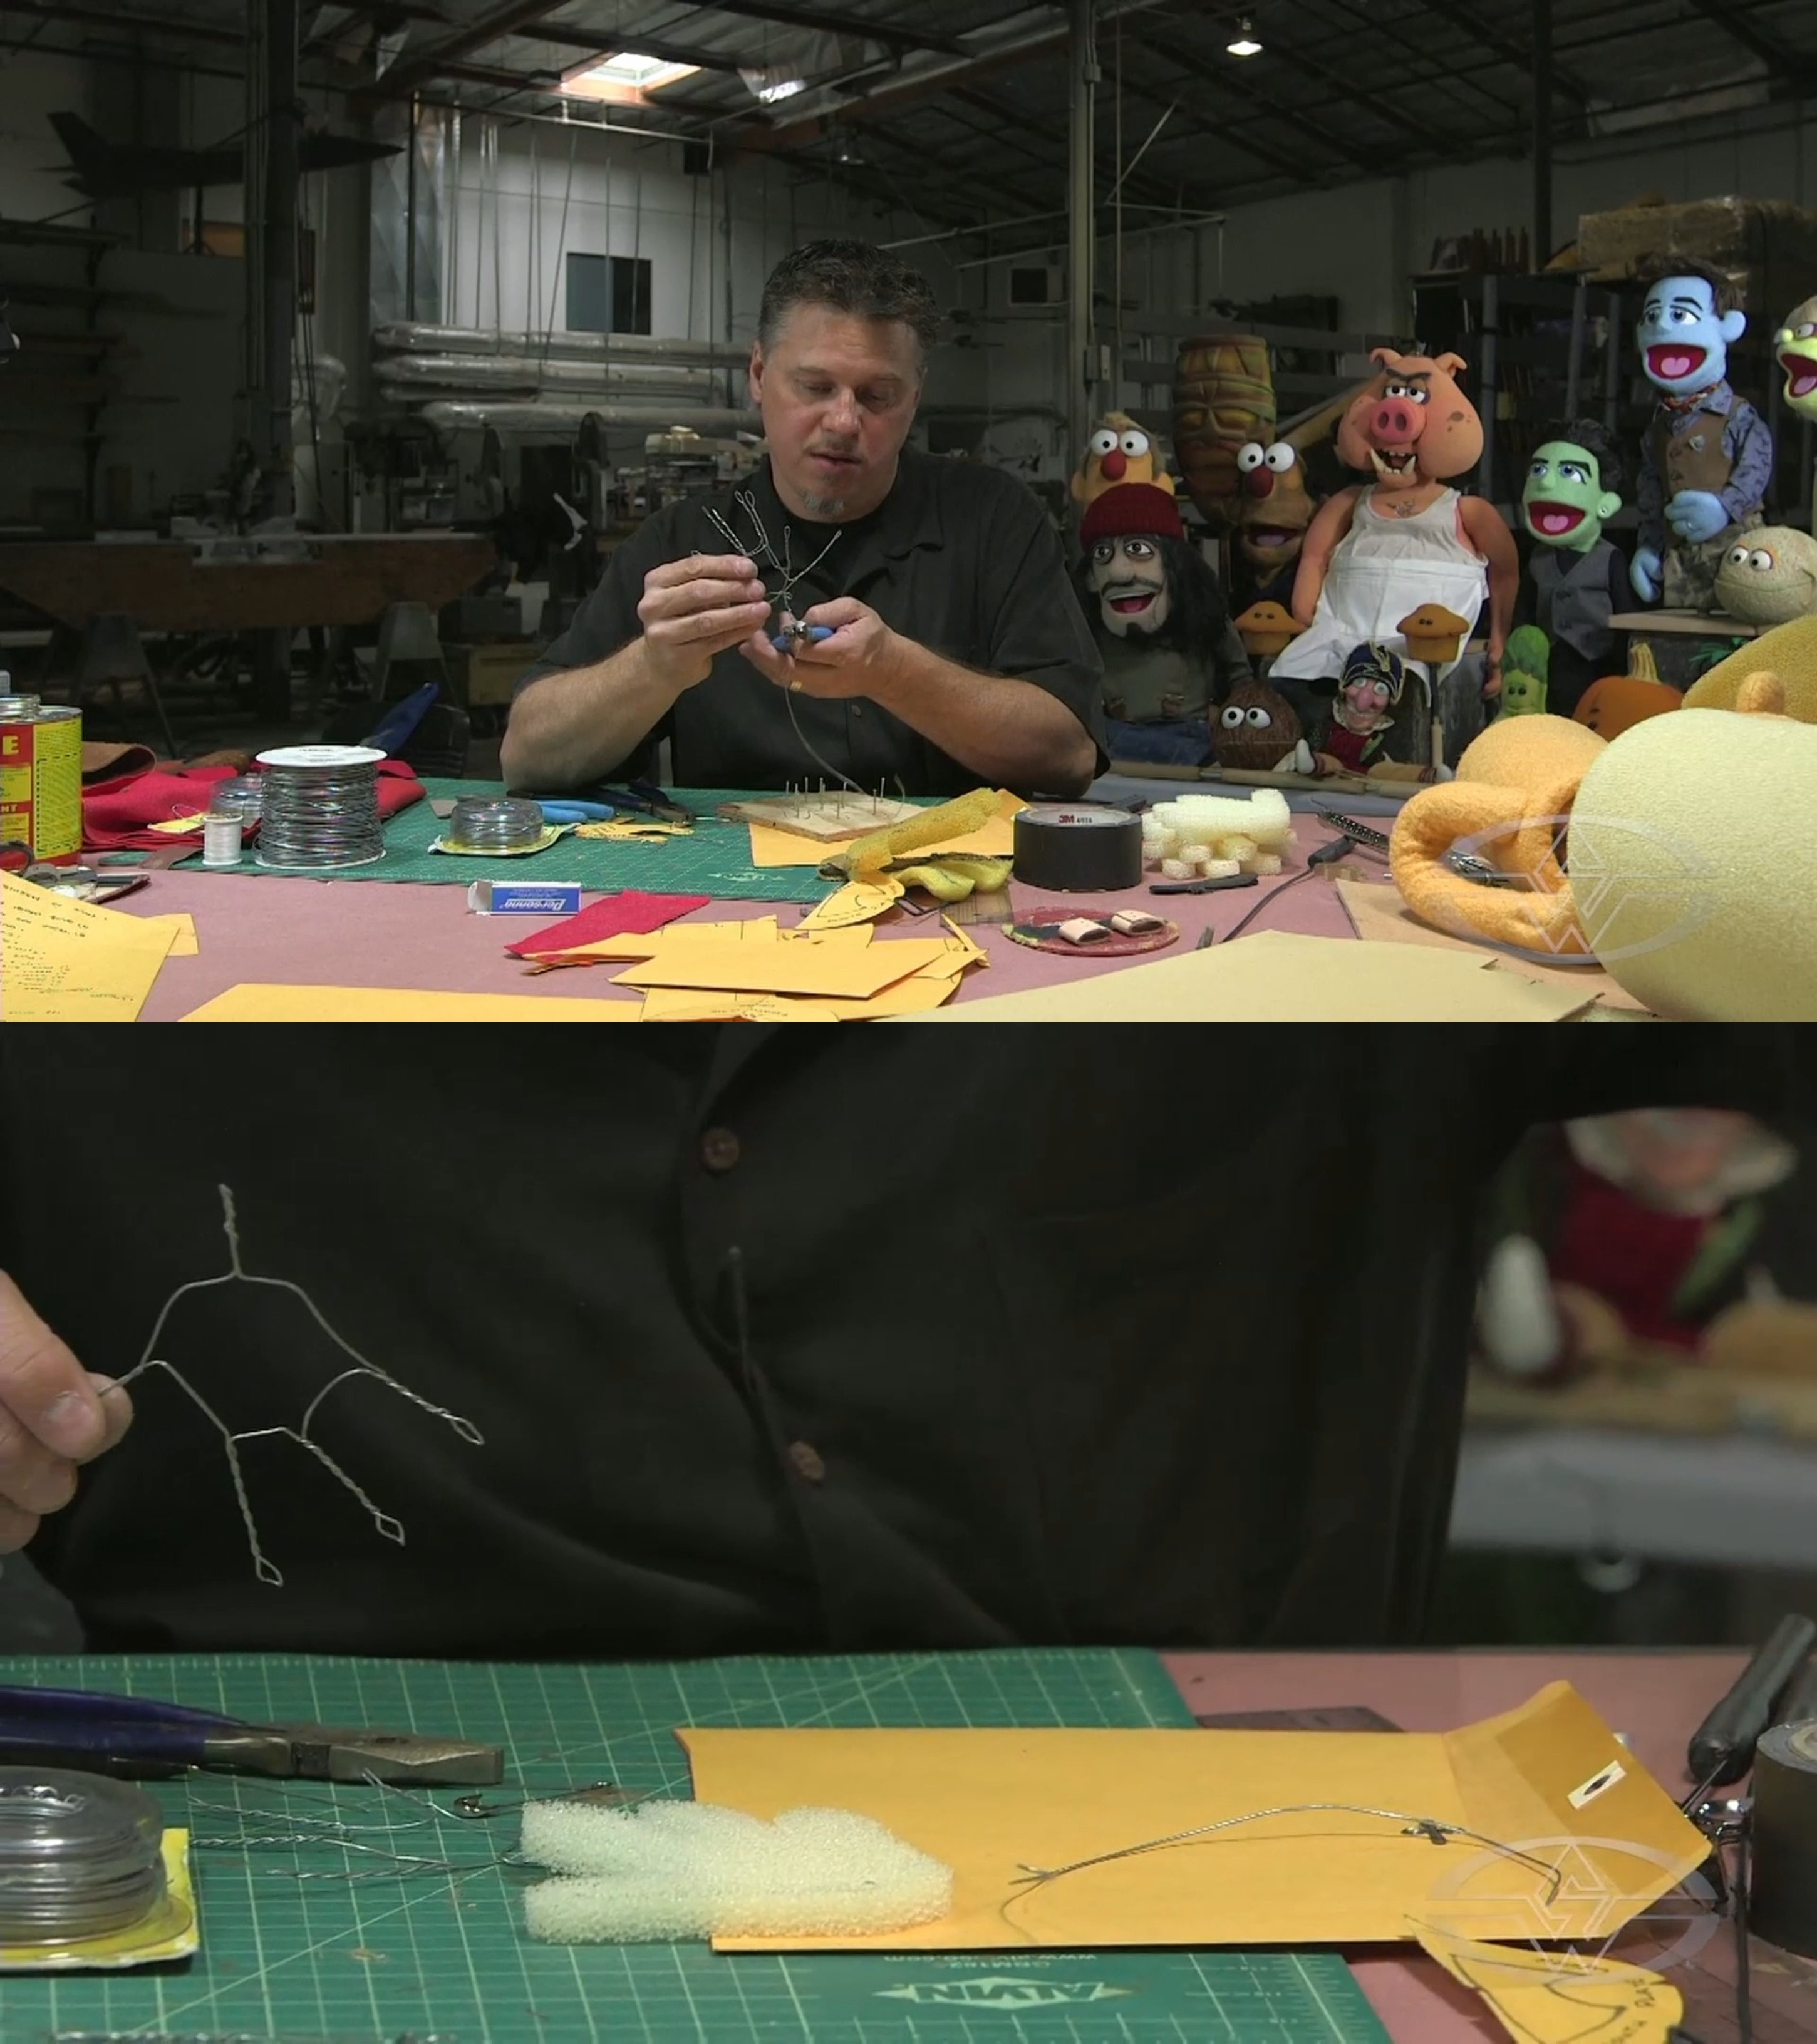 (BJ Guyer makes the final cut on his wire to reveal a pair of hands for his puppet.)
Now, your puppet officially has a pair of hands!
Tips for Claws and Nails on Puppet Hand Armatures
Want to give your puppet character claws or attach nails to their hands later?
This can be done by extending the ends of the fingertips on the wire armature. When working on your pattern piece, mark your points farther out to make them longer so that they point out and you give yourself enough length to work with, Guyer says. You can model them in ProPoxy and glue them on to the ends of the fingertips, a good structural point for the nail to attach to.
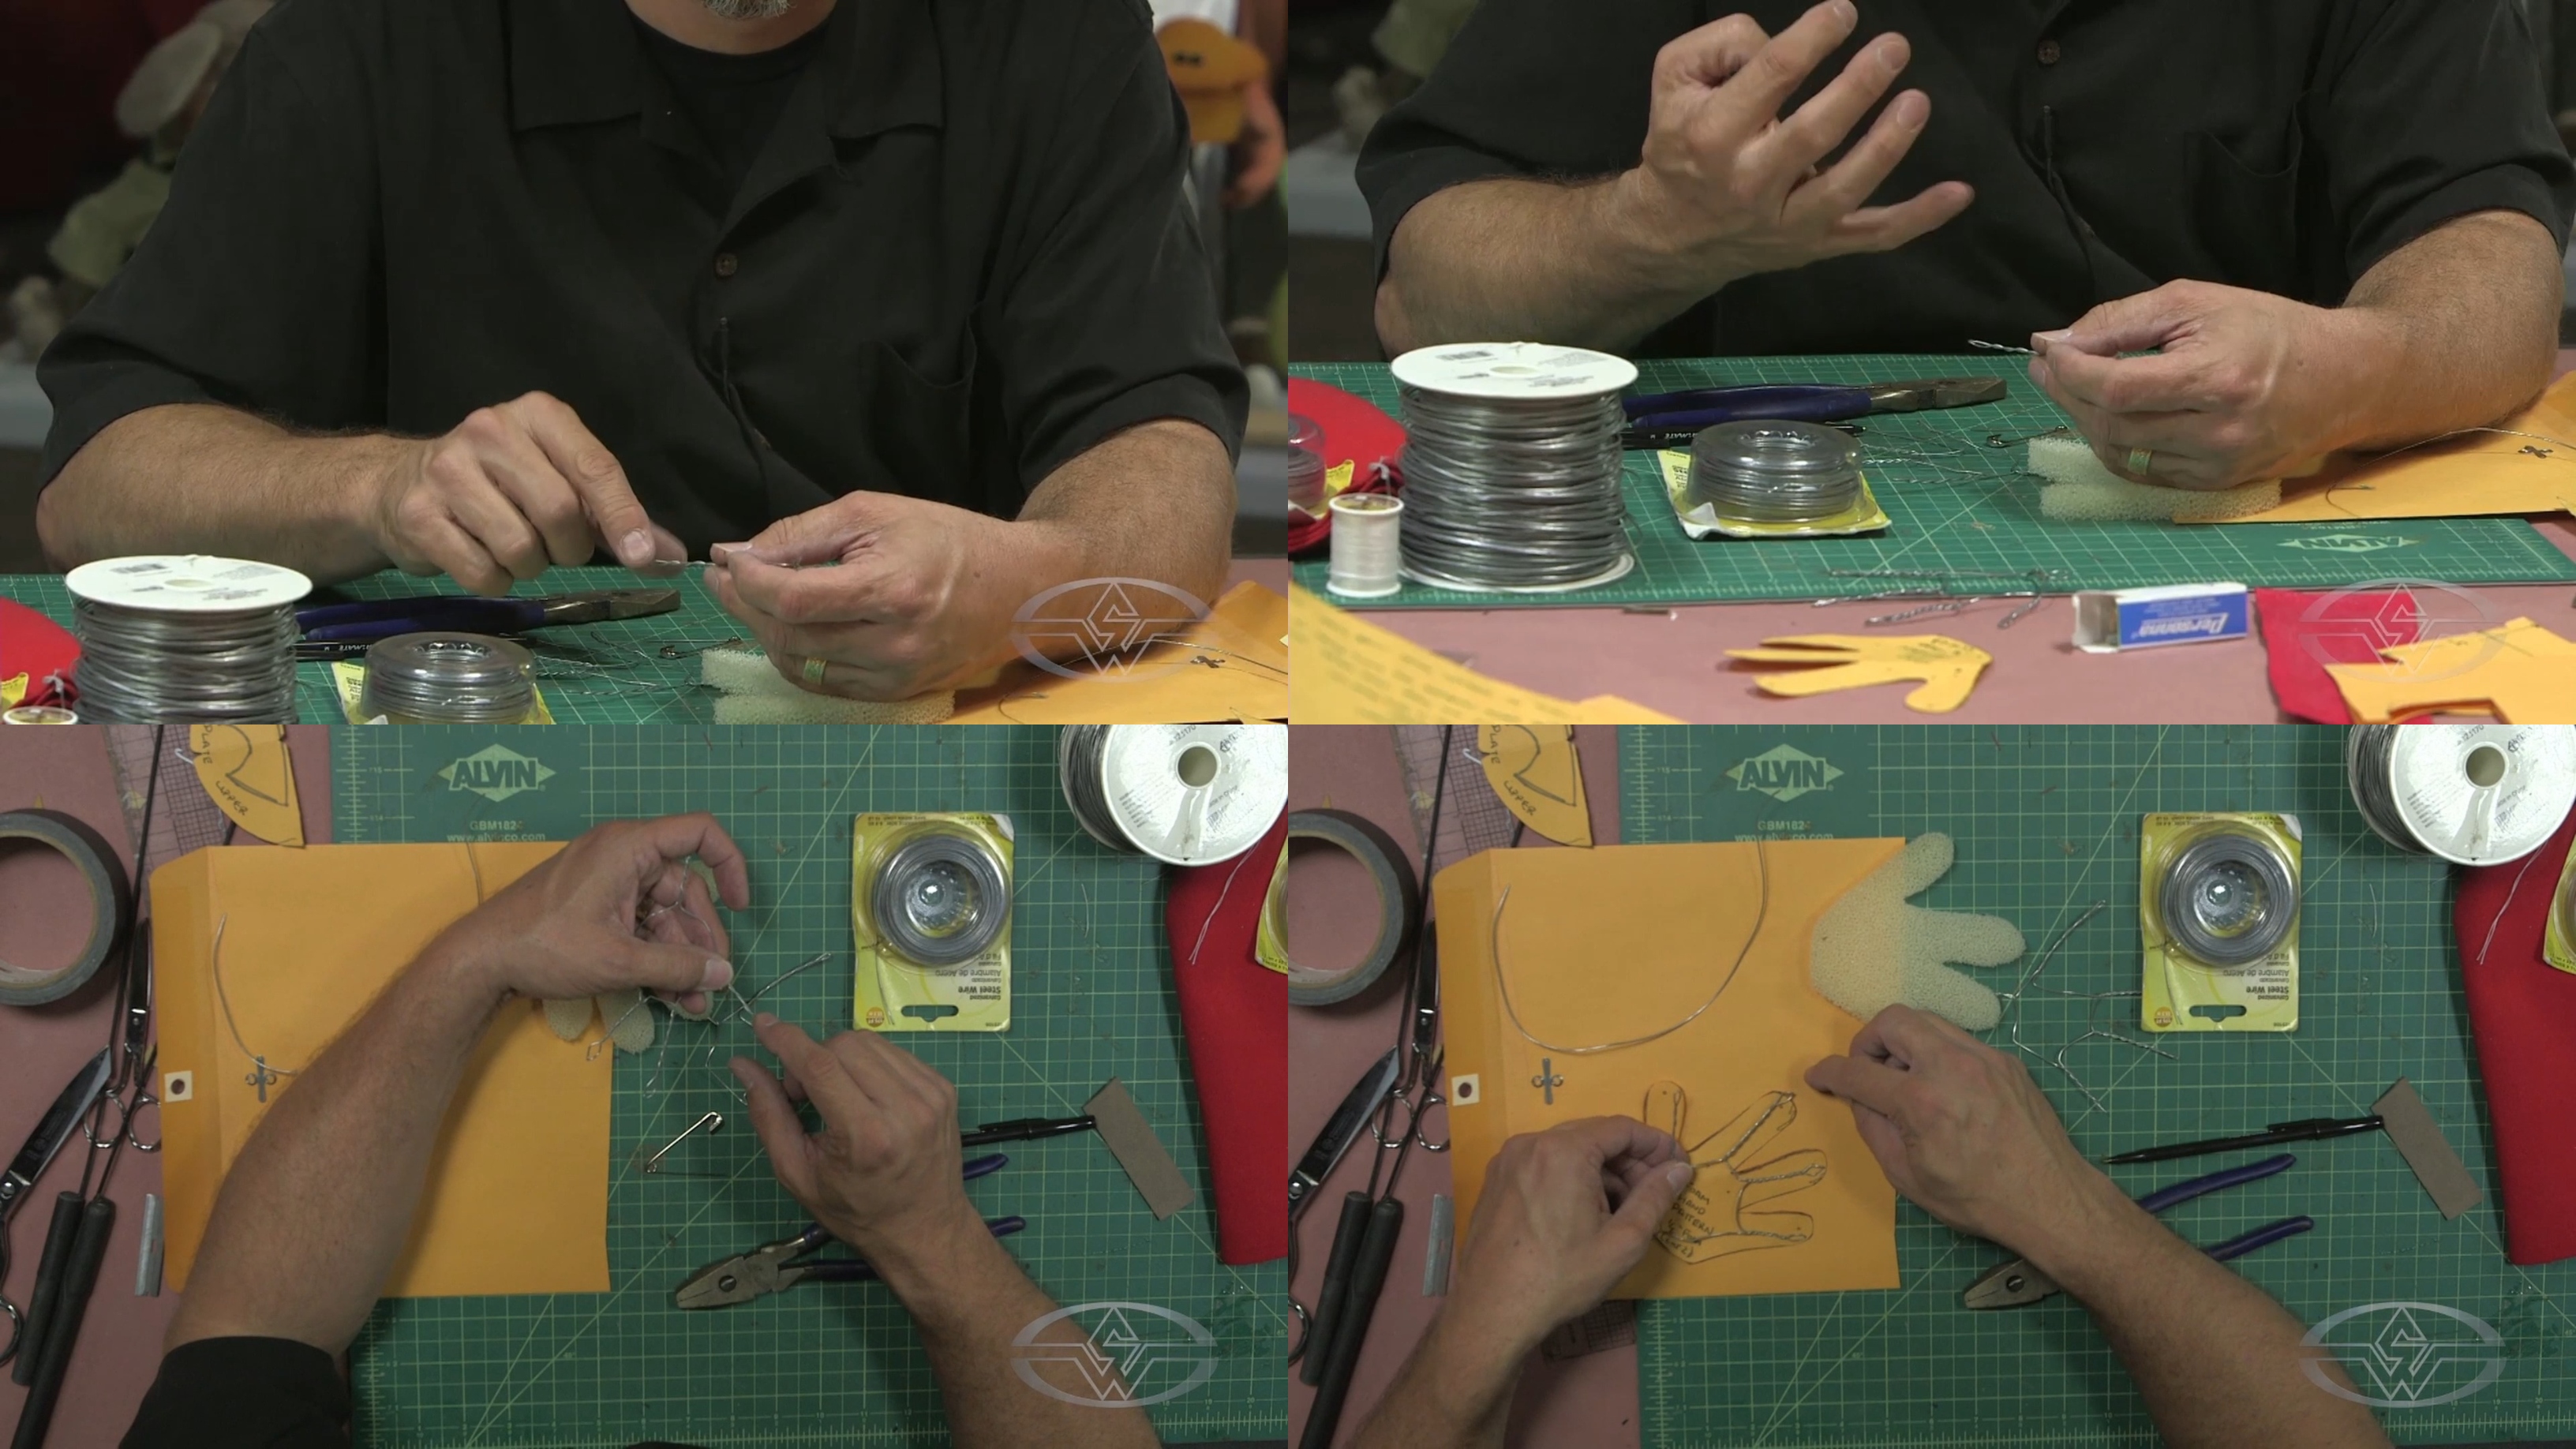 (BJ Guyer shows how to mark points farther out on your pattern piece if you want to extend the ends of the fingertips.)
If you're making regular fingernails, Guyer recommends not attaching them to the armature at all. Instead, add them on the outside of the fleece and use double-stick tape or hot glue to secure them on the back of the finger on the fabric itself.
Attaching nails to the wire will be sturdier if you have claws, but something to be mindful of is that wire will eventually need to be replaced due to the constant bending, manipulating, and opening and closing of the hands.
For example, if you ProPoxy claws onto your armature, the point right behind the nail will eventually bend and snap the nail off. If that happens, it’ll require replacement with a new hand armature.
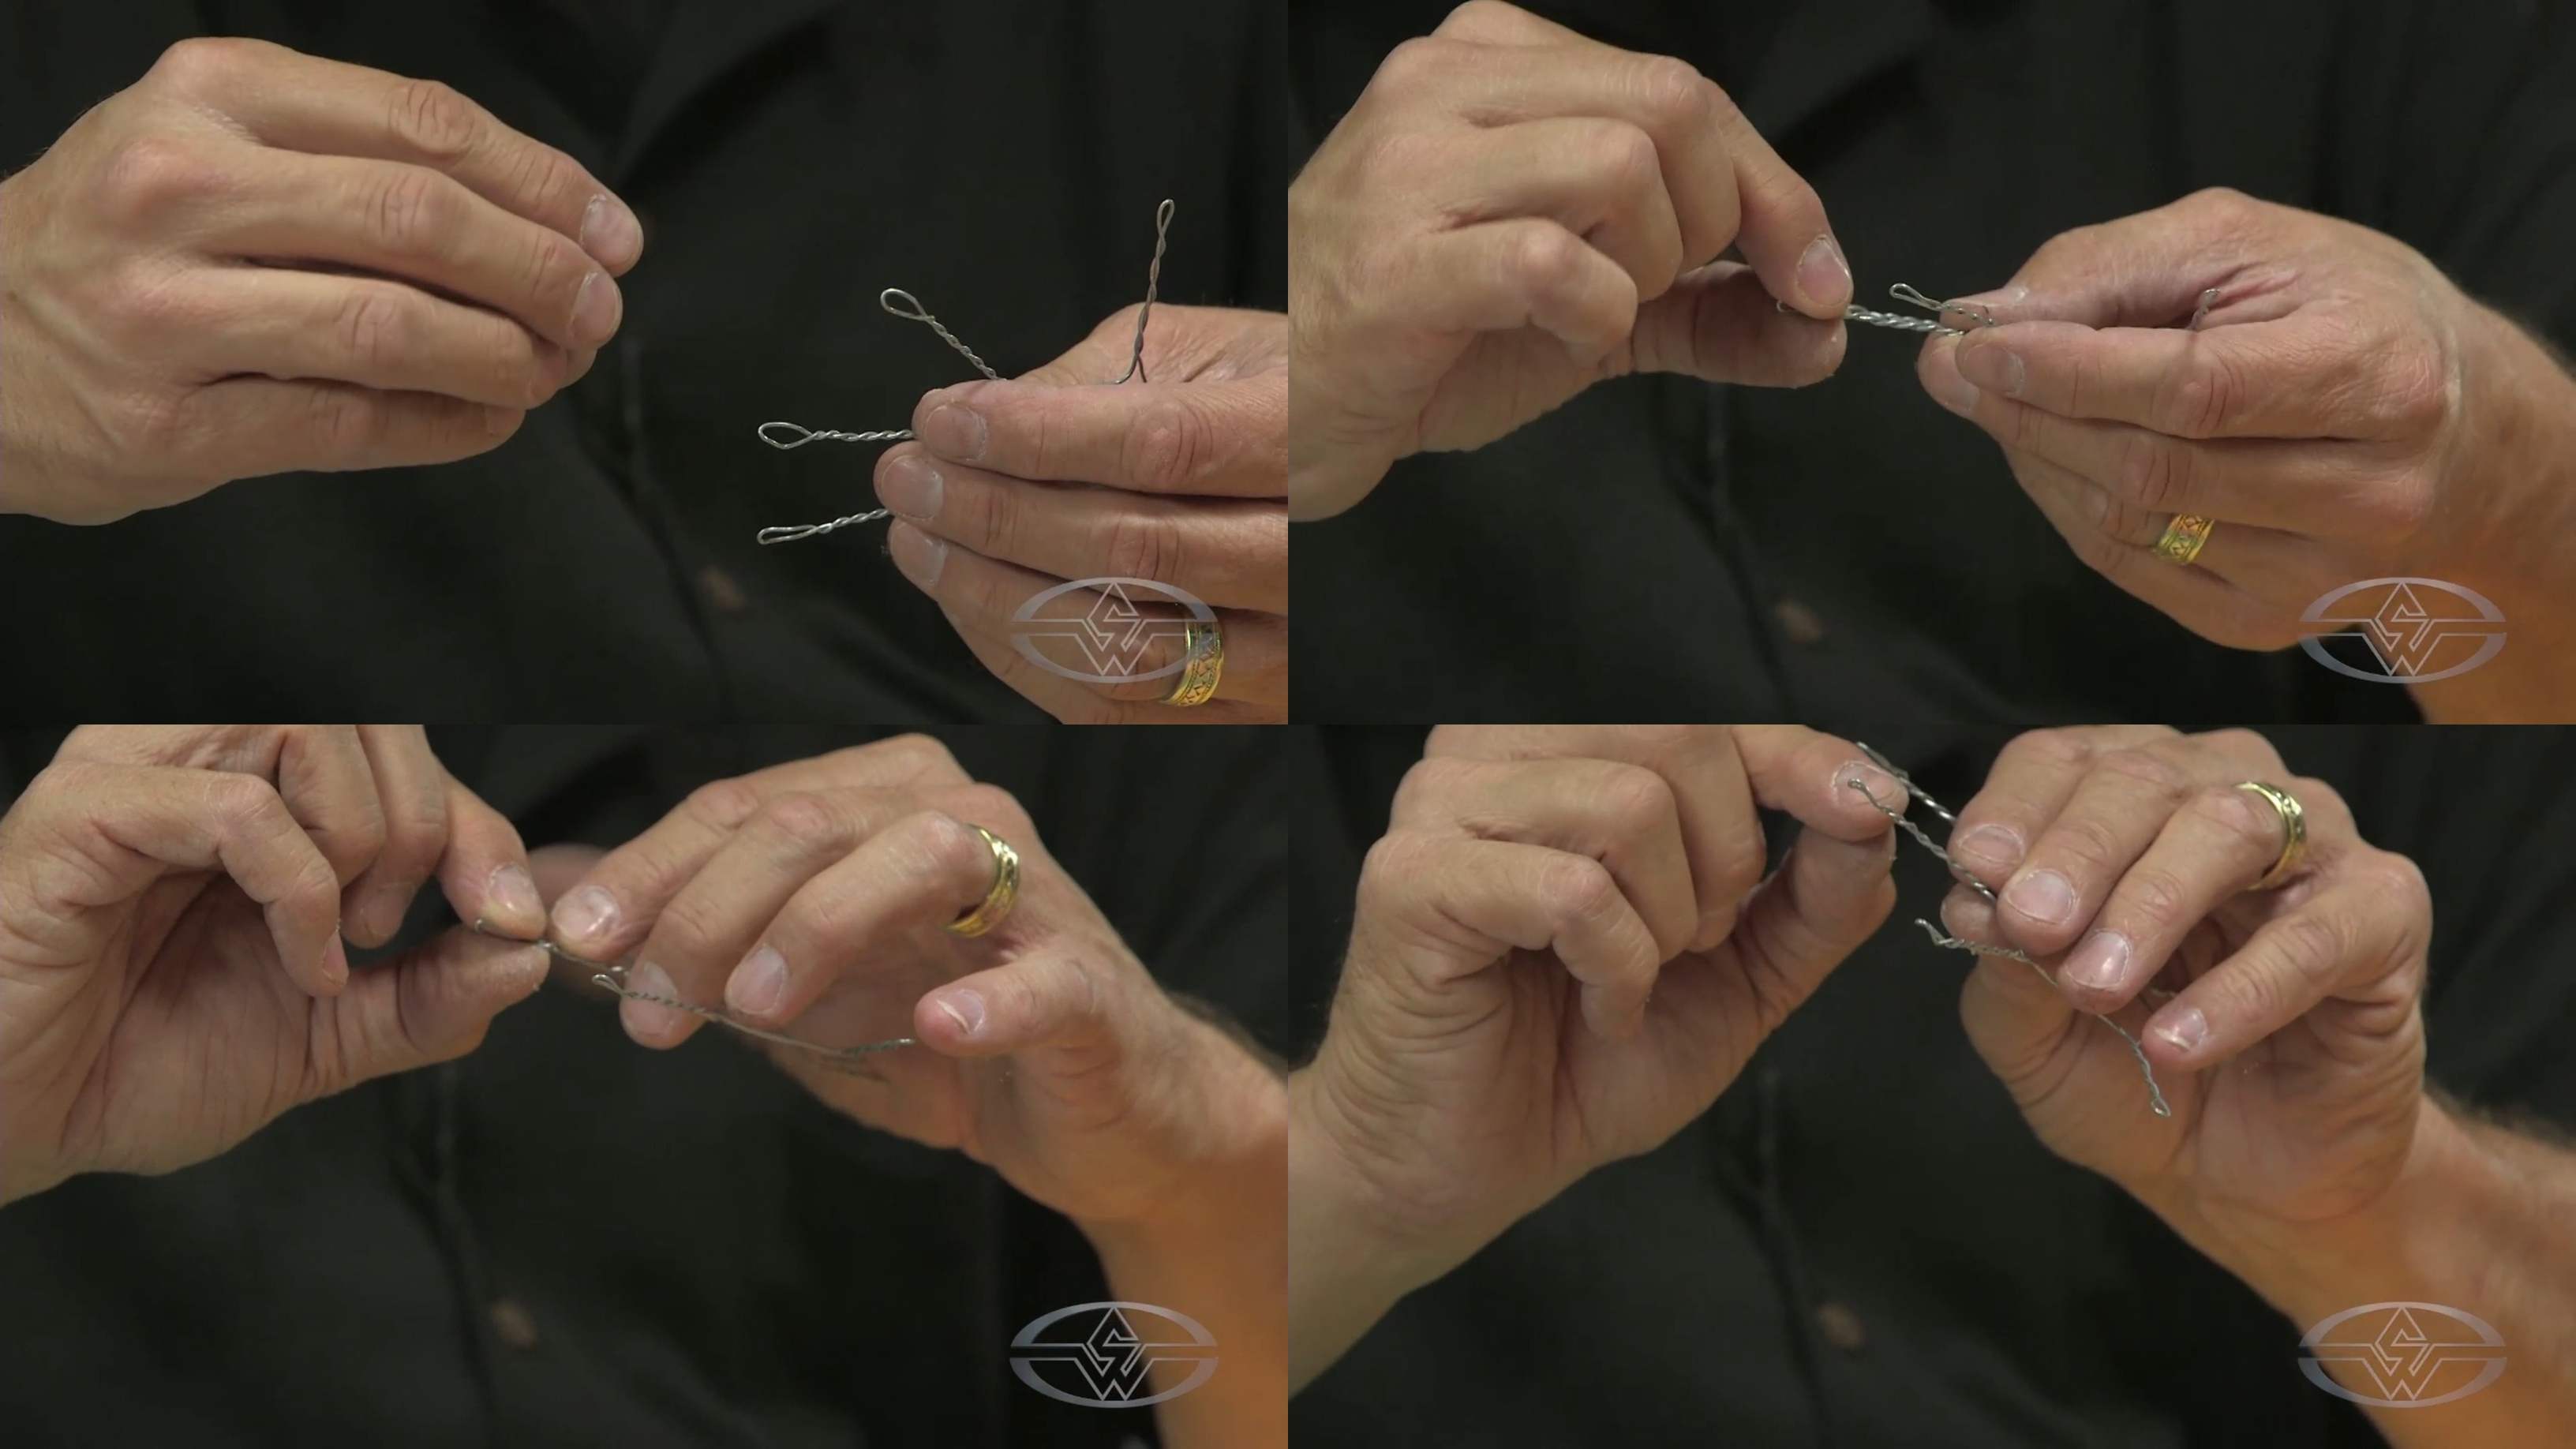 (BJ Guyer explains how adding nails on the ends of the fingers can weaken the armature over time, but for extensions, like ProPoxy claws, connecting to the armature will be more stable.)
Pro-tip: Always keep your patterns or your jig nearby. When building a puppet, Guyer always builds one extra of everything. That way, he has replacement parts to fix most of the puppet’s understructure. Taking an extra few minutes to make these — along with two complete sets of hands with claws or fingers if you wanted to change them out — in advance can save you a lot of time in the future.
WATCH THE “HOW TO BUILD A HAND & ROD PUPPET” COURSE WITH BJ GUYER:
How to Build a Hand & Rod Puppet Part 1 - Understructure
How to Build a Hand & Rod Puppet Part 2 - Fabrication
How to Build a Hand & Rod Puppet Part 3 - Final Assembly & Building Character