

In this FREE excerpt from the 3-part series Stan Winston School of Character Arts course, VFX for Miniatures Part 1: Keying, Tracking & Rotoscoping, director and VFX artist Setareh Samandari (Vertical, Dark Asset) shares must-know photogrammetry techniques and how you can use 2D images of an object to generate a highly detailed and accurate 3D model for your VFX projects!
Jump To Section
- Taking and Importing Photos for 3D Models in RealityCapture
- Processing and Adjusting Your 3D Scene
- Creating Your RealityCapture 3D Model
- Calculating and Adding Texture in RealityCapture
- Exporting and Rendering Your 3D Model
To watch the complete instructional video, click the player above!
RealityCapture, also known as RealityScan, is a software developed by Epic Games that creates 3D models from photos and scans. In this lesson, Samandari takes you step-by-step through the process of creating a 3D model in RealityCapture and discusses the importance of creating a CG model, along with the advantages of blending practical elements and digital elements. Using photogrammetry allows you to pull from the best of both worlds, integrating your VFX shots.
Taking and Importing Photos for 3D Models in RealityCapture
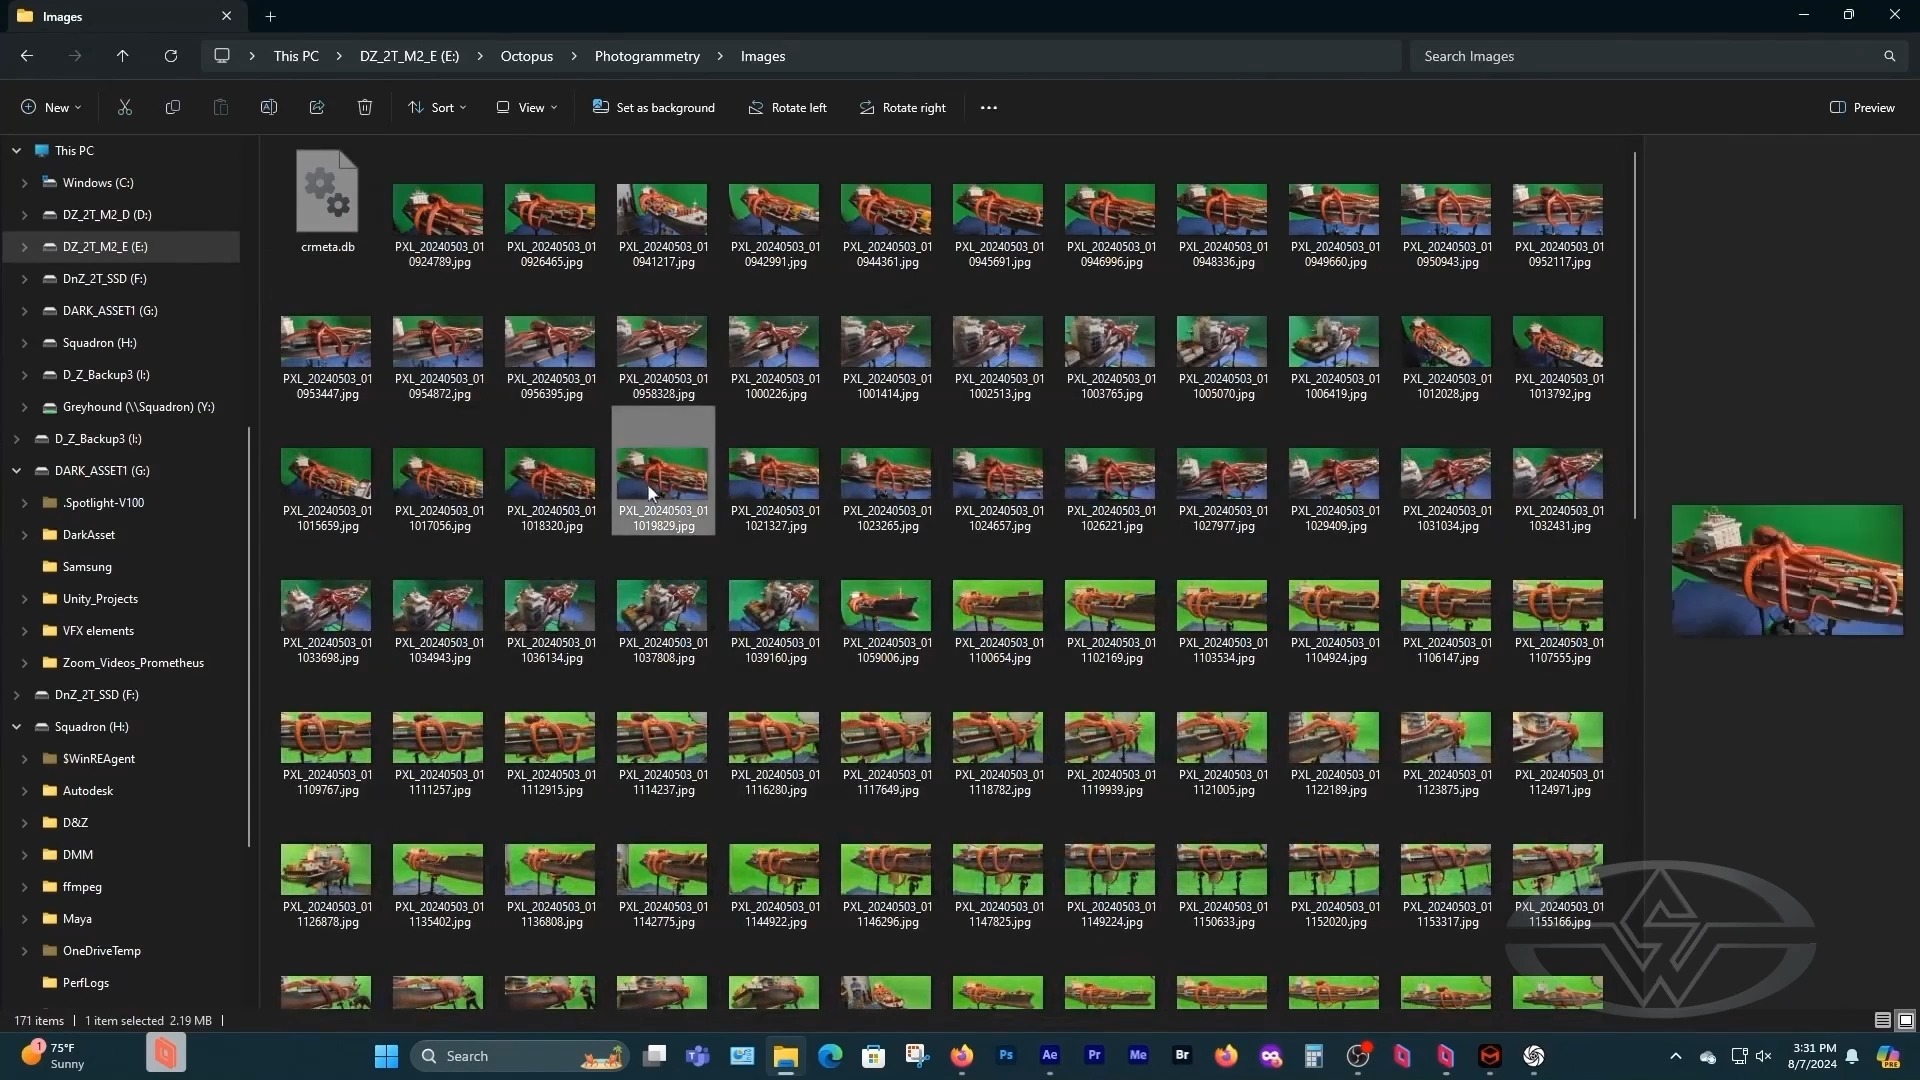 (Some of the many images that Setareh Samandari will use to make a model in RealityCapture.)
Photogrammetry involves taking multiple pictures of your subject from all angles and importing them into a digital application, like RealityCapture, that stitches them together to generate a 3D model. In this example, the model is a container ship that will ultimately be used in a digitally rendered ocean scene. The digital model allows a hold-out, or mask, in the Maya scene so that when the tracked camera shots match up, the final shot will show the practical miniature integrated into a digital ocean.
Samandari explains, “We want to put this digital ship where it’s aligned with the actual shot in Maya because we’re going to create the ocean in Maya." The compositing of the ship and the CG ocean will have to happen in After Effects, but the CG model of the ship is needed in Maya to create the hold out for where the ship will sit in the Maya generated ocean.
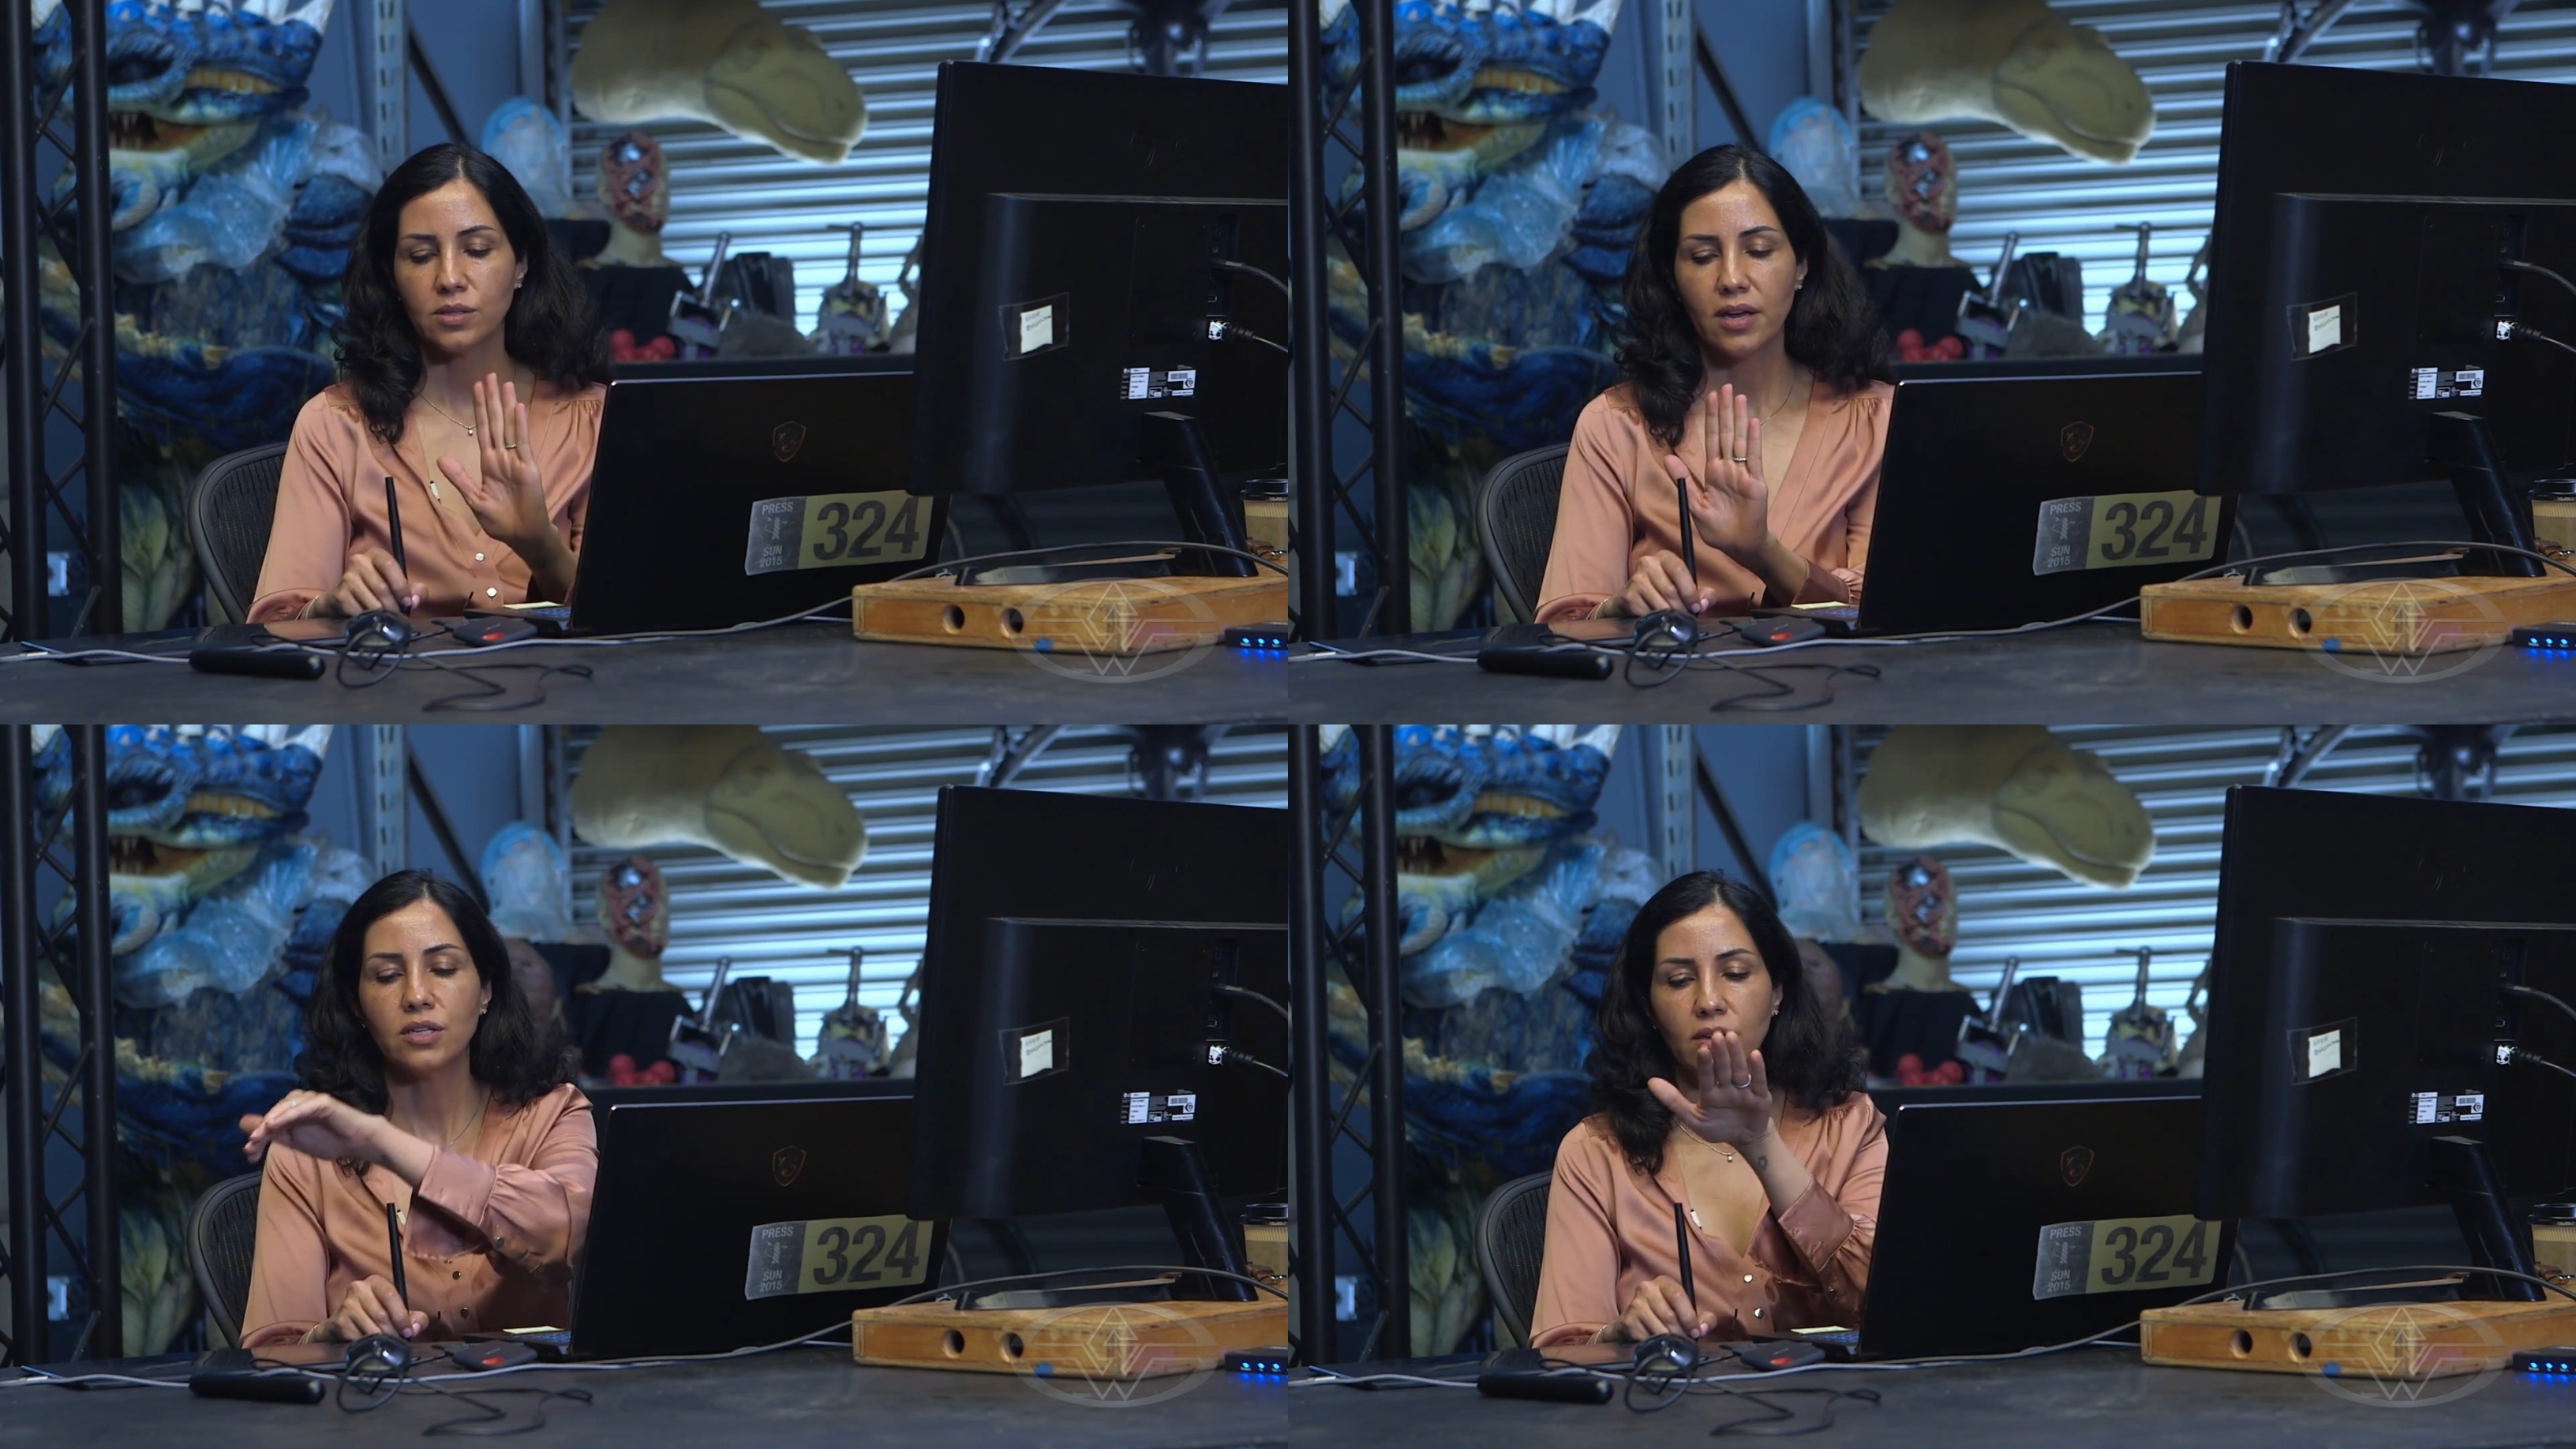 (Setareh Samandari demonstrates how to take high-quality pictures at various angles to use on RealityCapture.)
Once you have your physical model that you want to turn into a digital model, you start by taking photos around the entire circumference of the model at roughly every 10 degrees. For best results it is recommended to film from both high and low angles.
Pro-tip: When moving around your model, make sure that your camera is completely static when taking photos to make sure they’re blur-free and sharp.
For most models, a circle of shots from a high angle and a second circle of shots from a low angle will give enough information to generate a good CG model.
Once you have all your photos for your model, the next step is to import them in RealityCapture.
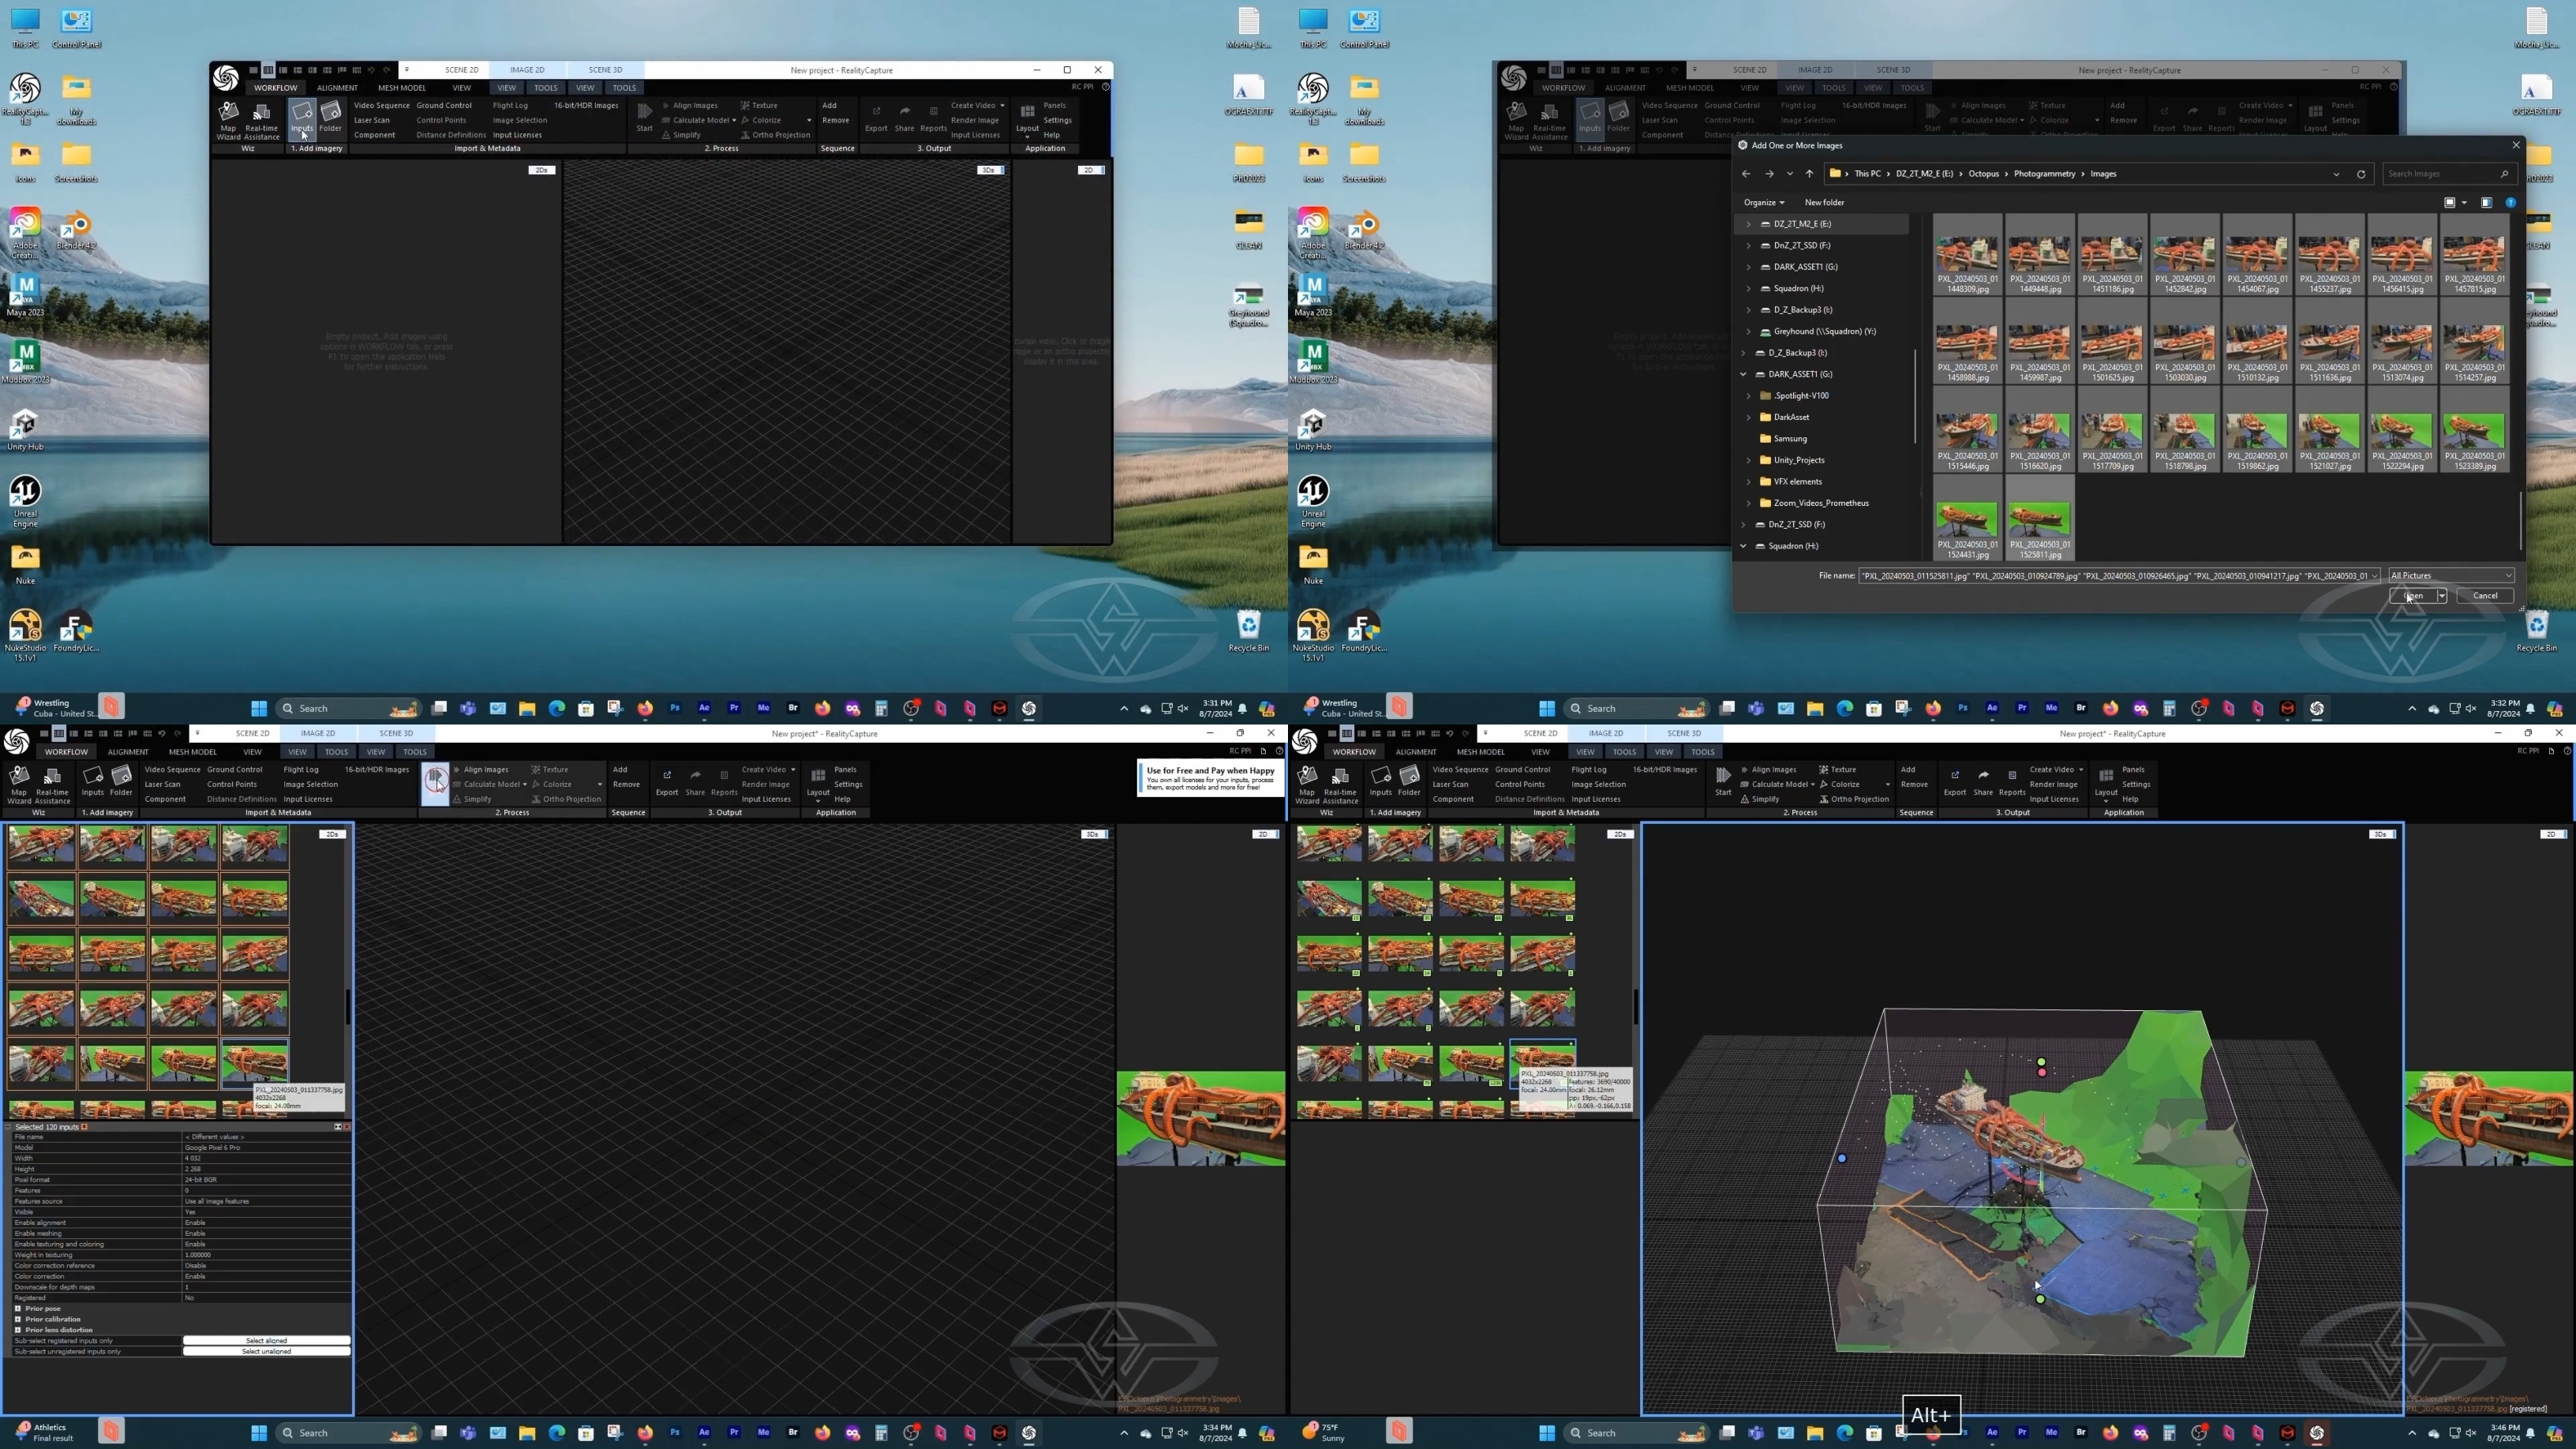 (Setareh Samandari imports all the photos of the container ship and selects which ones she'll use to create the CG model.)
Select which photos you’d like to use for your model, as using every high-resolution image can lead to slower processing and an undesirably large, heavy scene. As long as your angles overlap sufficiently, a smaller selection may help keep your render time down without losing fidelity, resulting in a simpler, lighter file to solve.
Press “Shift+Select” for only the photos you’d like to use. If it turns out that you're not happy with the detail of your CG model, you can always go back and select more.
Processing and Adjusting Your 3D Scene
Now, it’s time to watch your photos merge and come to life! (Well, sort of.)
Click “Start” for RealityCapture to begin virtually creating the scene. As exciting as this is, make sure to give the program a few moments to solve your model.
Once your model is solved, look it over to see what you have to work with.
To do this, click “Alt” and drag the cursor to review your model at different points.
You’ll notice small, colored points on your model. These are the bounding box of the CG model you've created. Click on them to adjust the dimensions of the box so that only the parts of the scene you want to keep are selected--namely, your model. This is important because you don’t want any excess when you need to solve your Maya scene. Background shapes such as the stage set, the matte screens and the ship rigging are not necessary to your CG model.
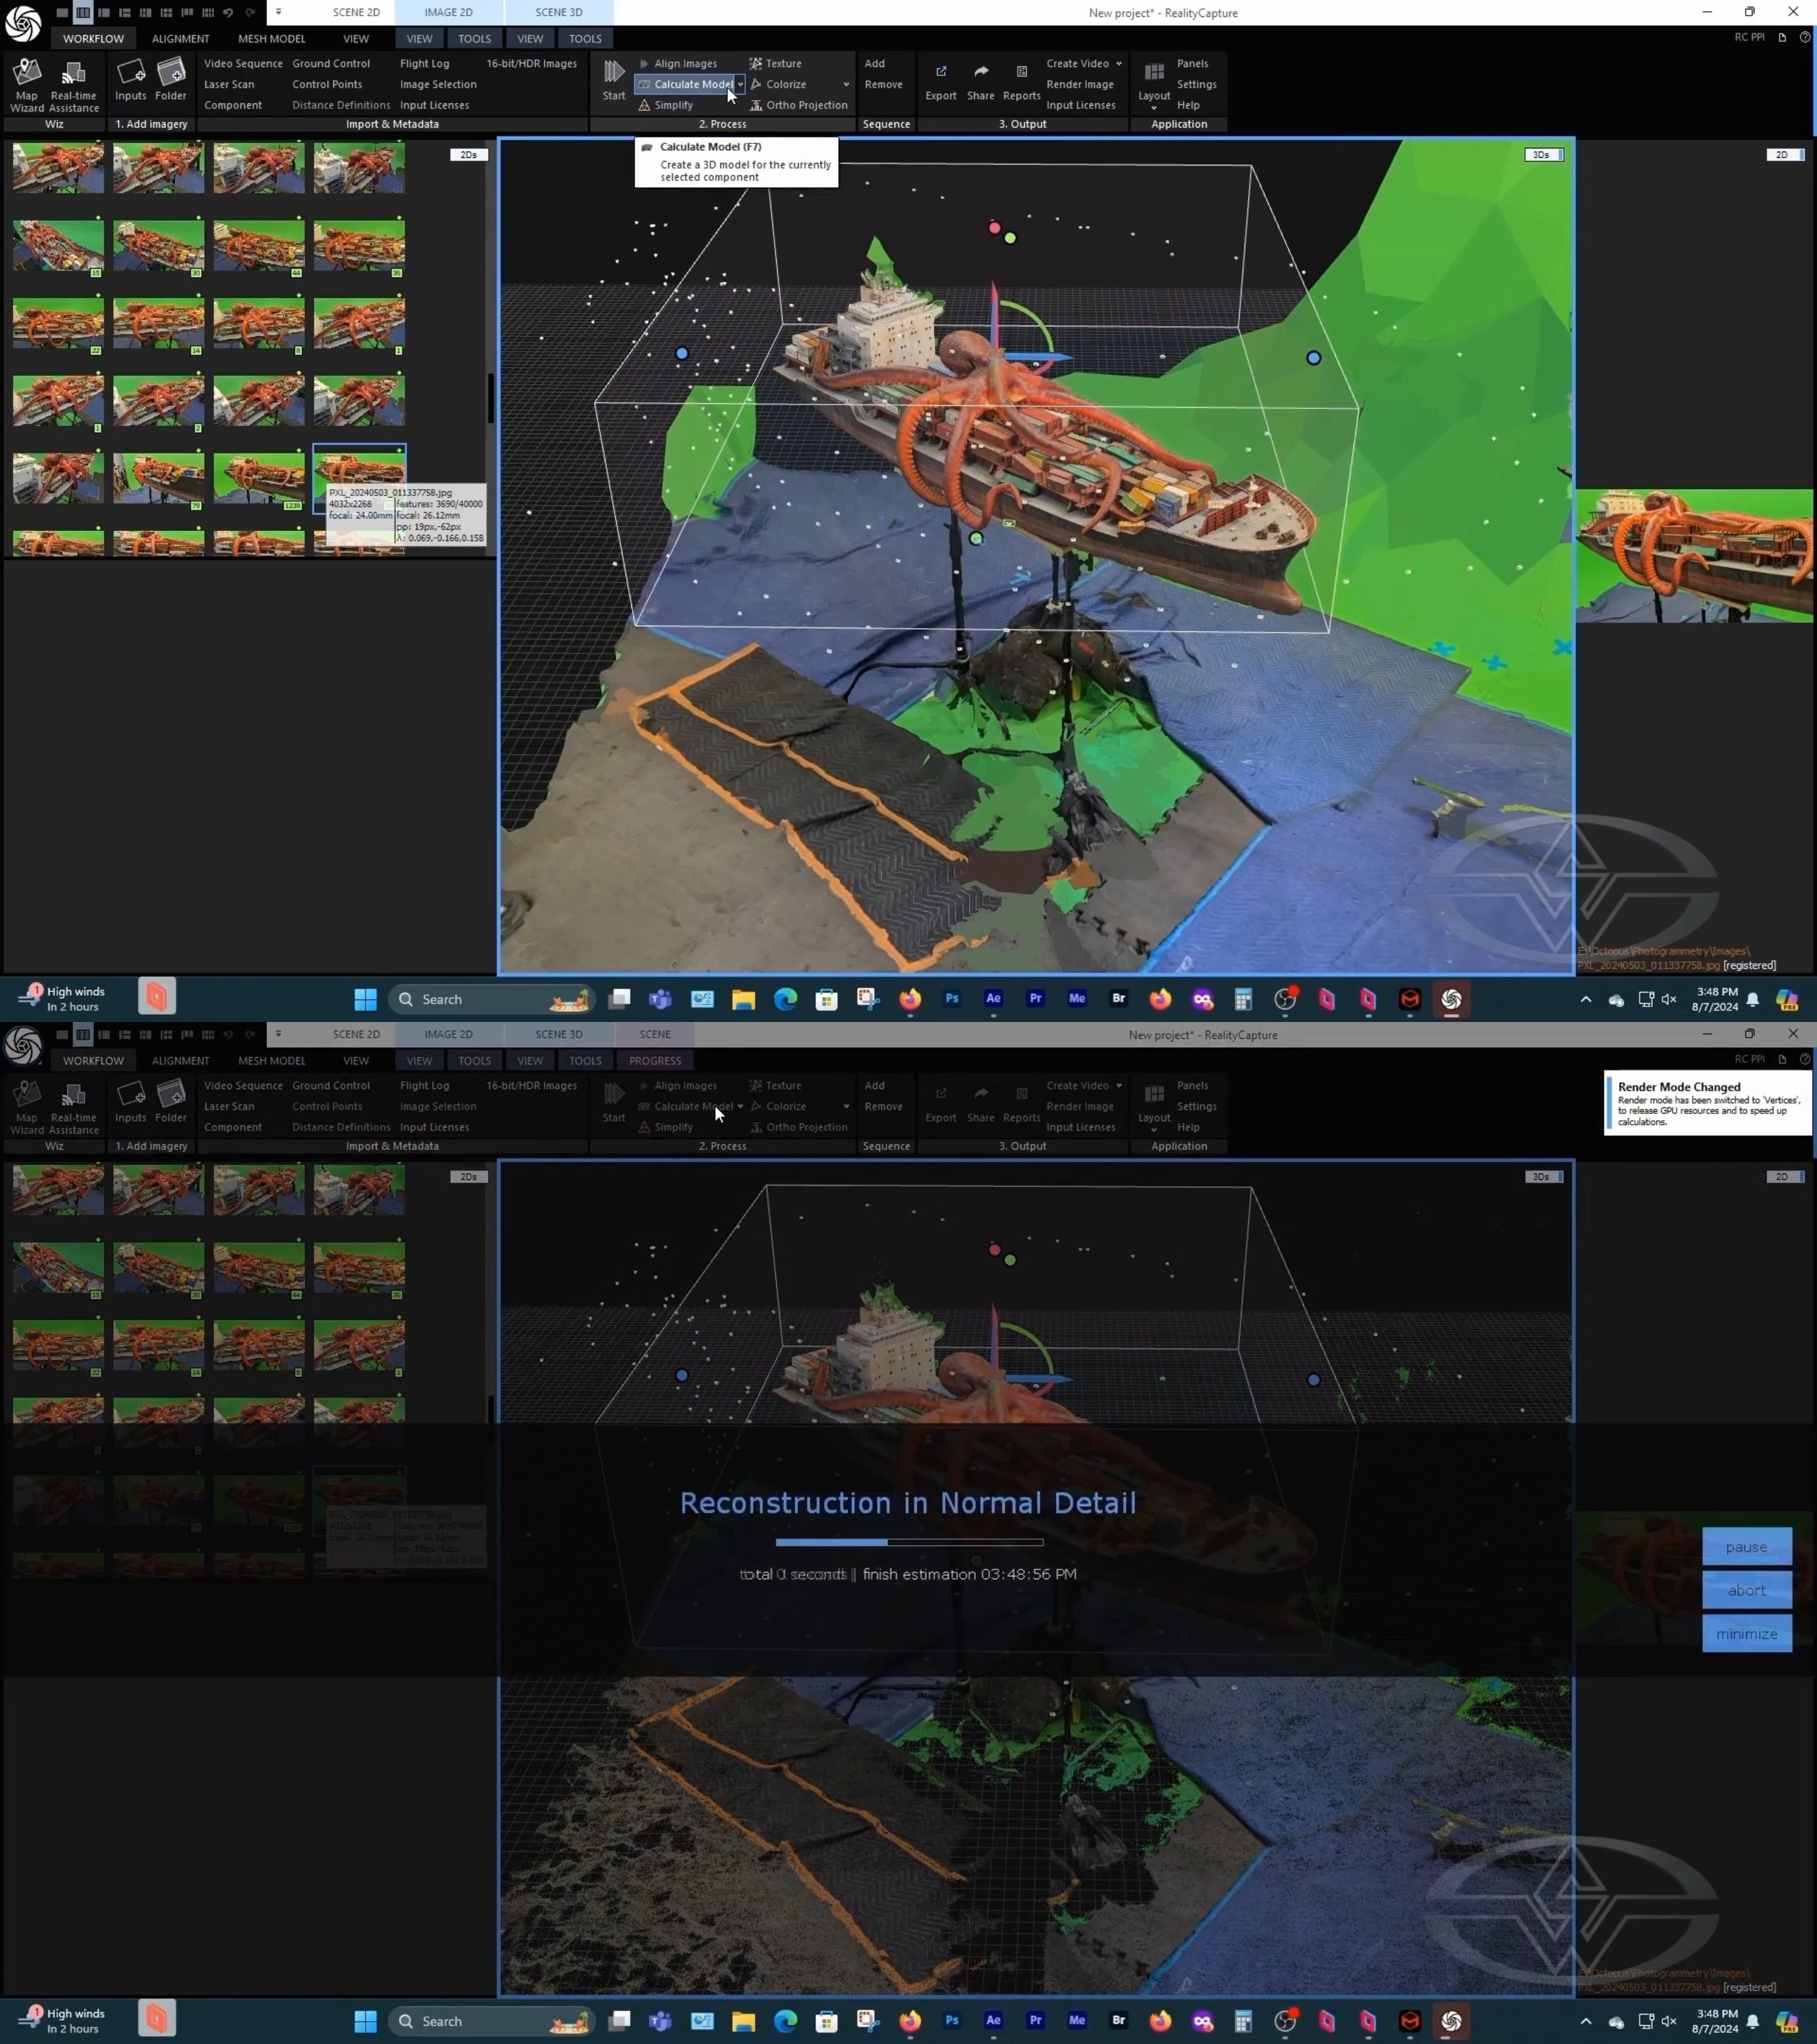 (Setareh Samandari constrains and reshapes the scene by cropping excessive background before creating a 3D model of it.)
Spend some time simplifying the mesh model to keep it as clean as possible before exporting. For this step, Samandari focuses on cropping the area to focus on capturing the ship without any unnecessary background elements.
Creating Your RealityCapture 3D Model
Next, click on “Calculate Model” (F7). This will create a 3D model of your selected component.
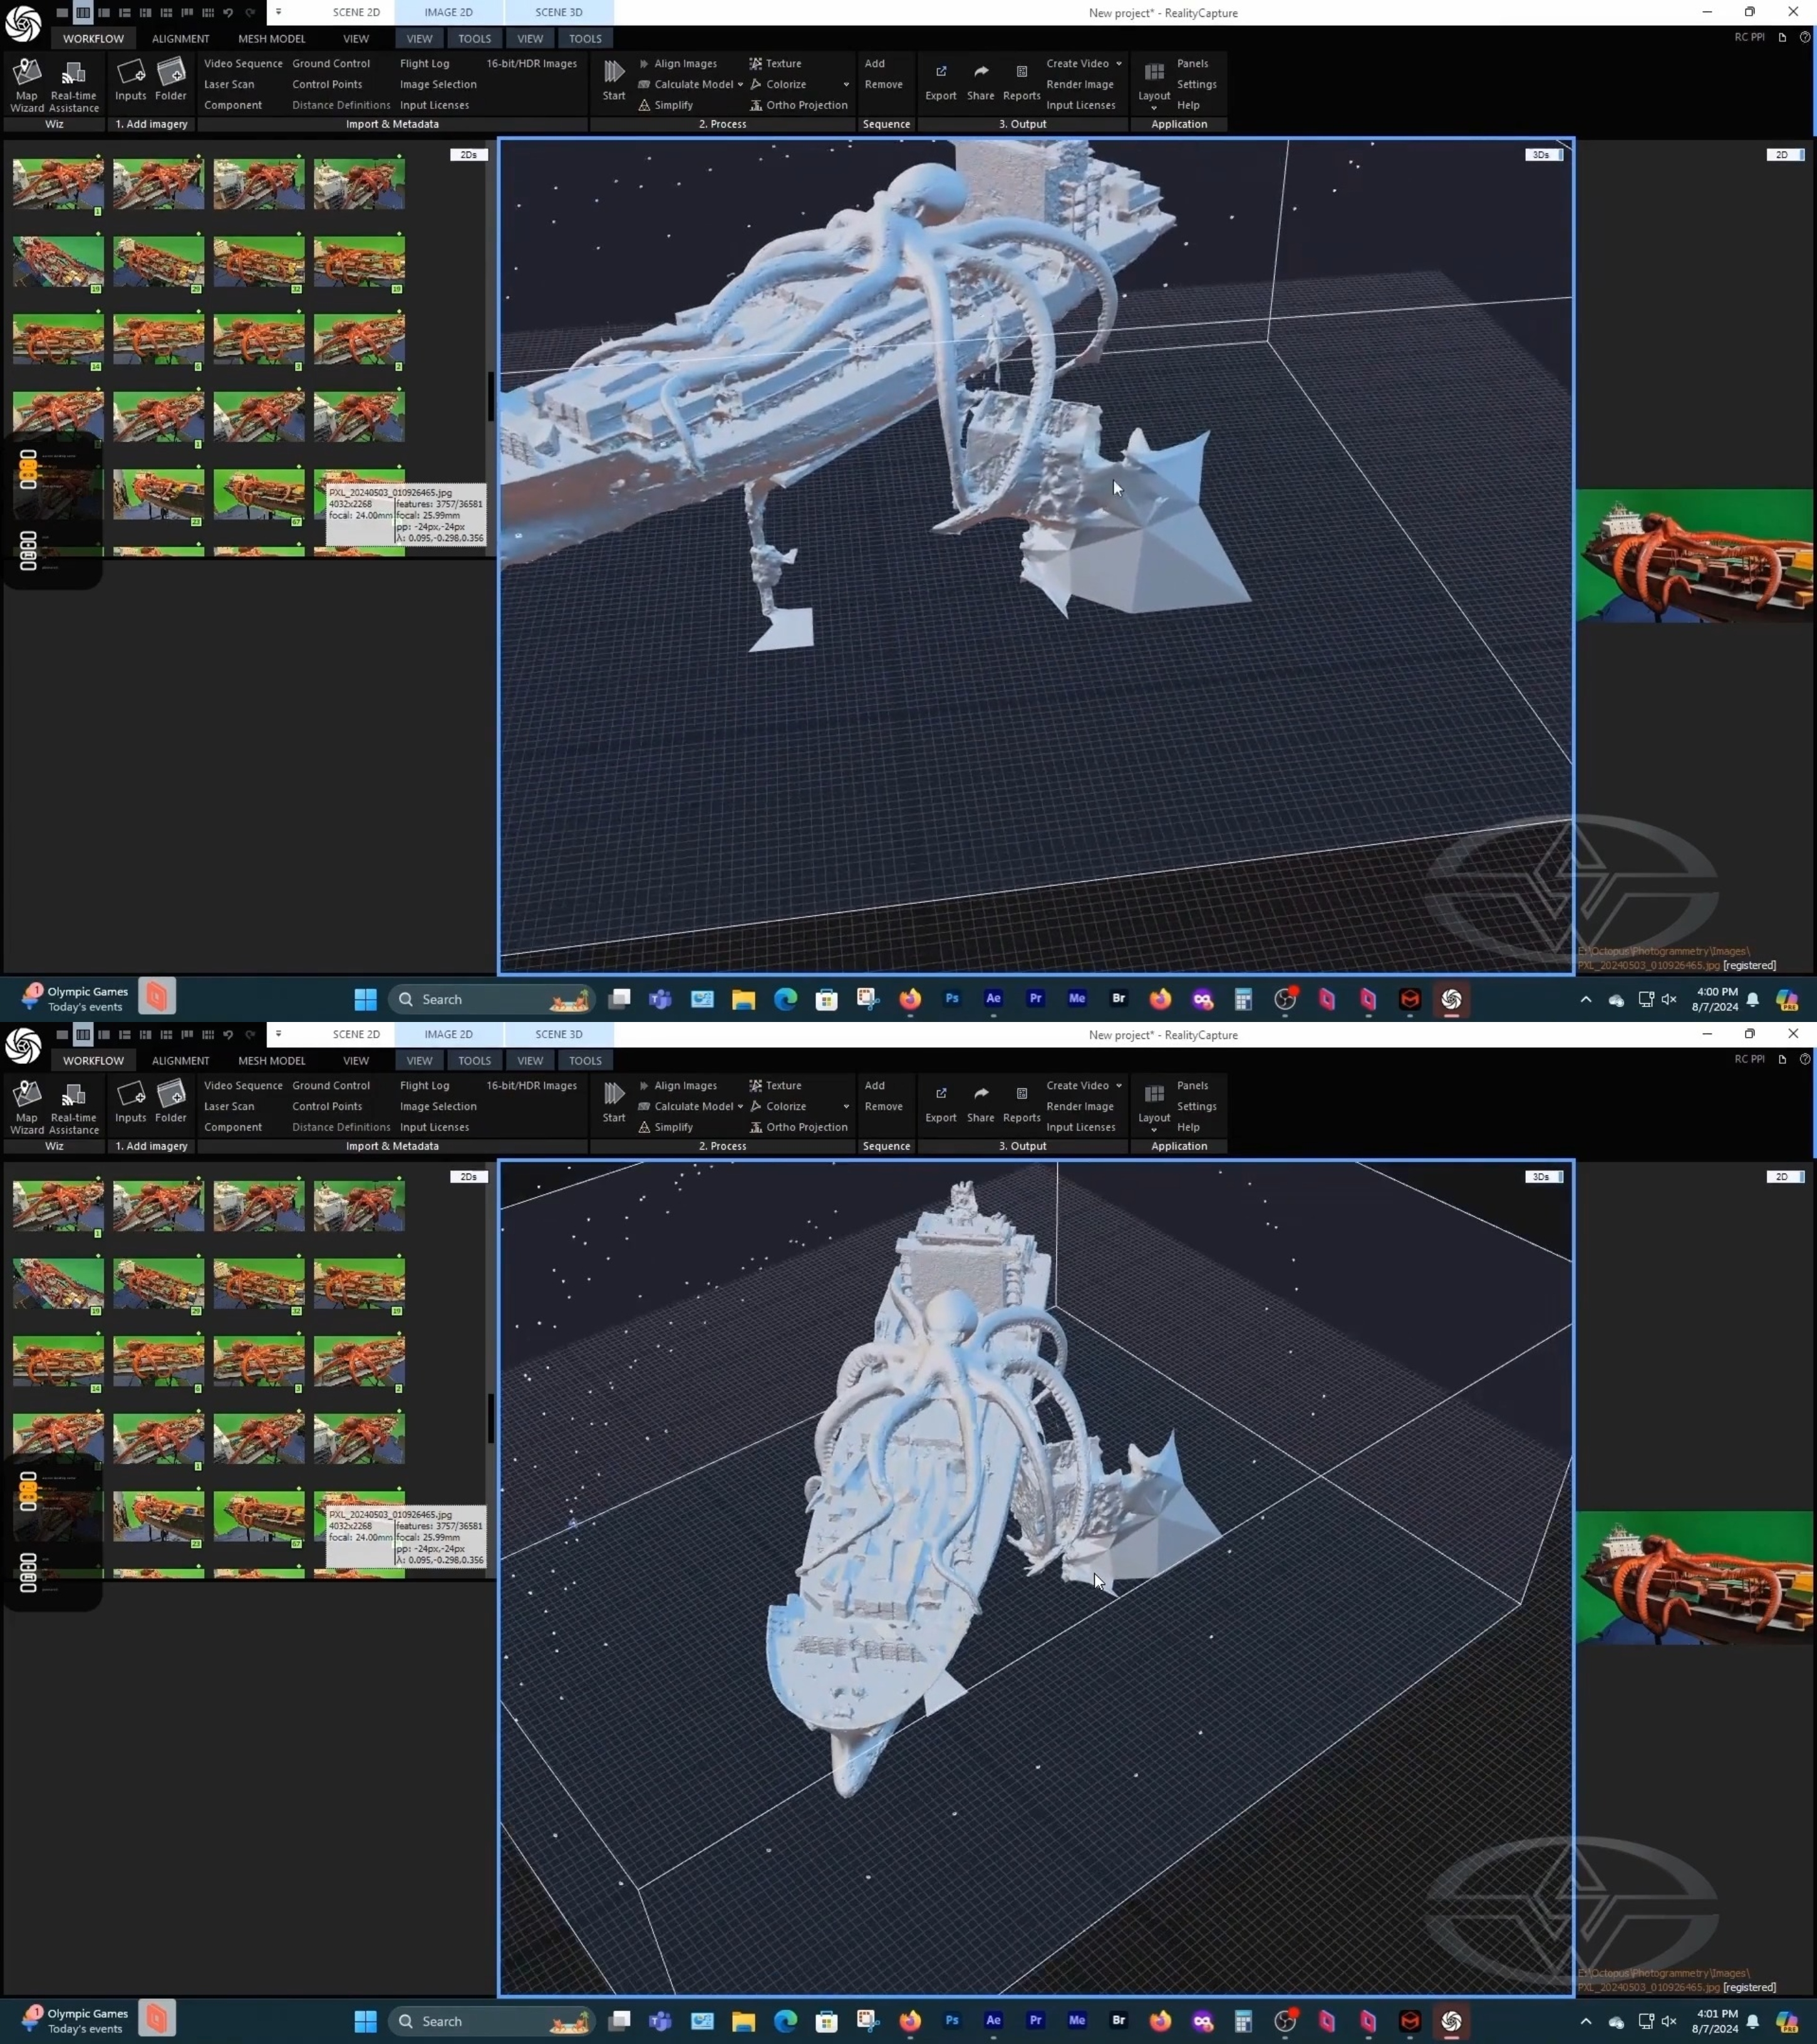 (Setareh Samandari's calculated model. Any unwanted elements, like the polygonal object next to the ship, can be removed later on.)
Below are some additional photogrammetry tips from Samandari:
-
For photogrammetry, you want to avoid high-contrast shadows. When filming your model outside, an overcast day is best. Full sunshine can cause deep shadows in your photos which makes them harder to solve. Lighting indoors, the same general rules apply--diffuse general light is preferable to harsh single-source lighting and will result in photos that are easier for the software to model.
-
When you’re solving your model and waiting for the reconstruction to happen and you see multiple dots form in the background, that’s a good sign since these indicate that a CG model is processing and the mesh is all there. If you don’t see many dots, or nothing seems to be forming, that could be a sign that not enough photos were used. If this happens, add more photos and resolve the model again.
-
If once the model is solved and it isn’t to your liking, you can always go back again and realign your images.
When the model is finished, zoom in to review how it looks. As long as the structures and shapes you want and expect are there, additional extraneous digital elements that you don’t want, can always be removed later in Maya.
Calculating and Adding Texture in RealityCapture
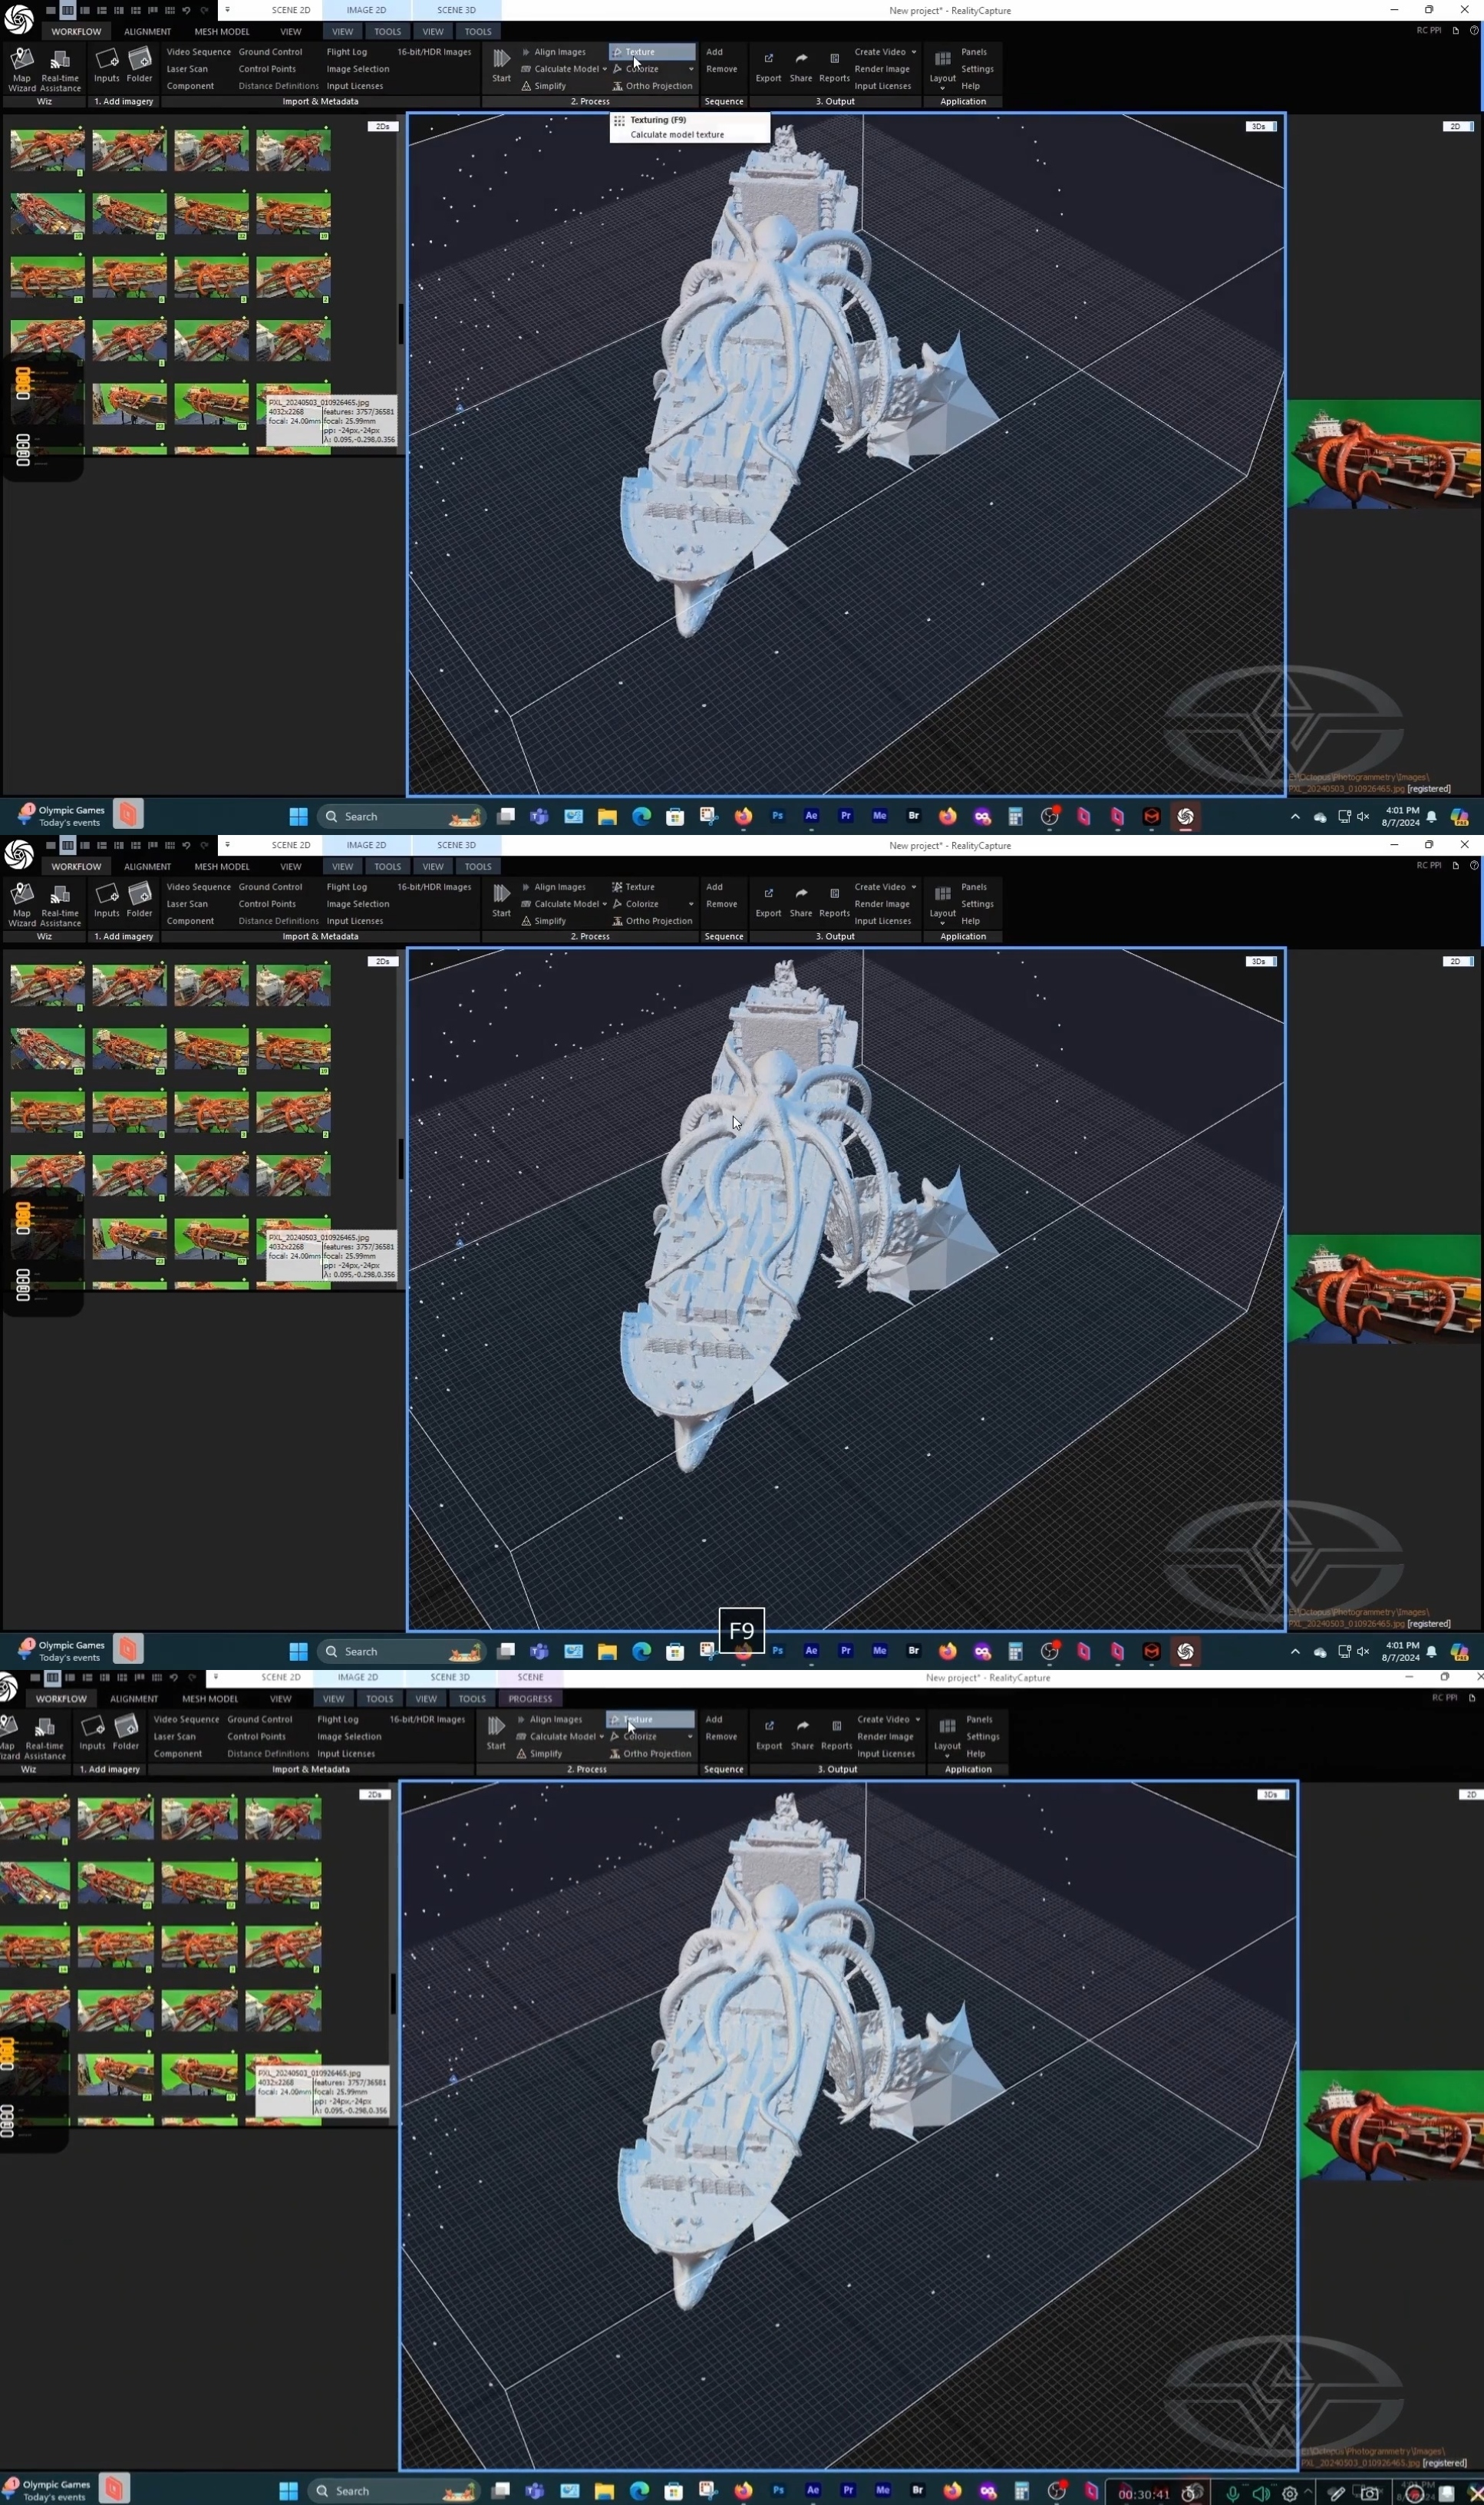 (Setareh Samandari clicks on “Texturing (F9)” to check the texture of her model.)
Your solved model likely has some texture, but you want to use the Texturing function (F9) to make sure that your model has all the texture you want.
To check your texture,
-
Place your cursor over “Texture.”
-
Press “Texturing (F9).”
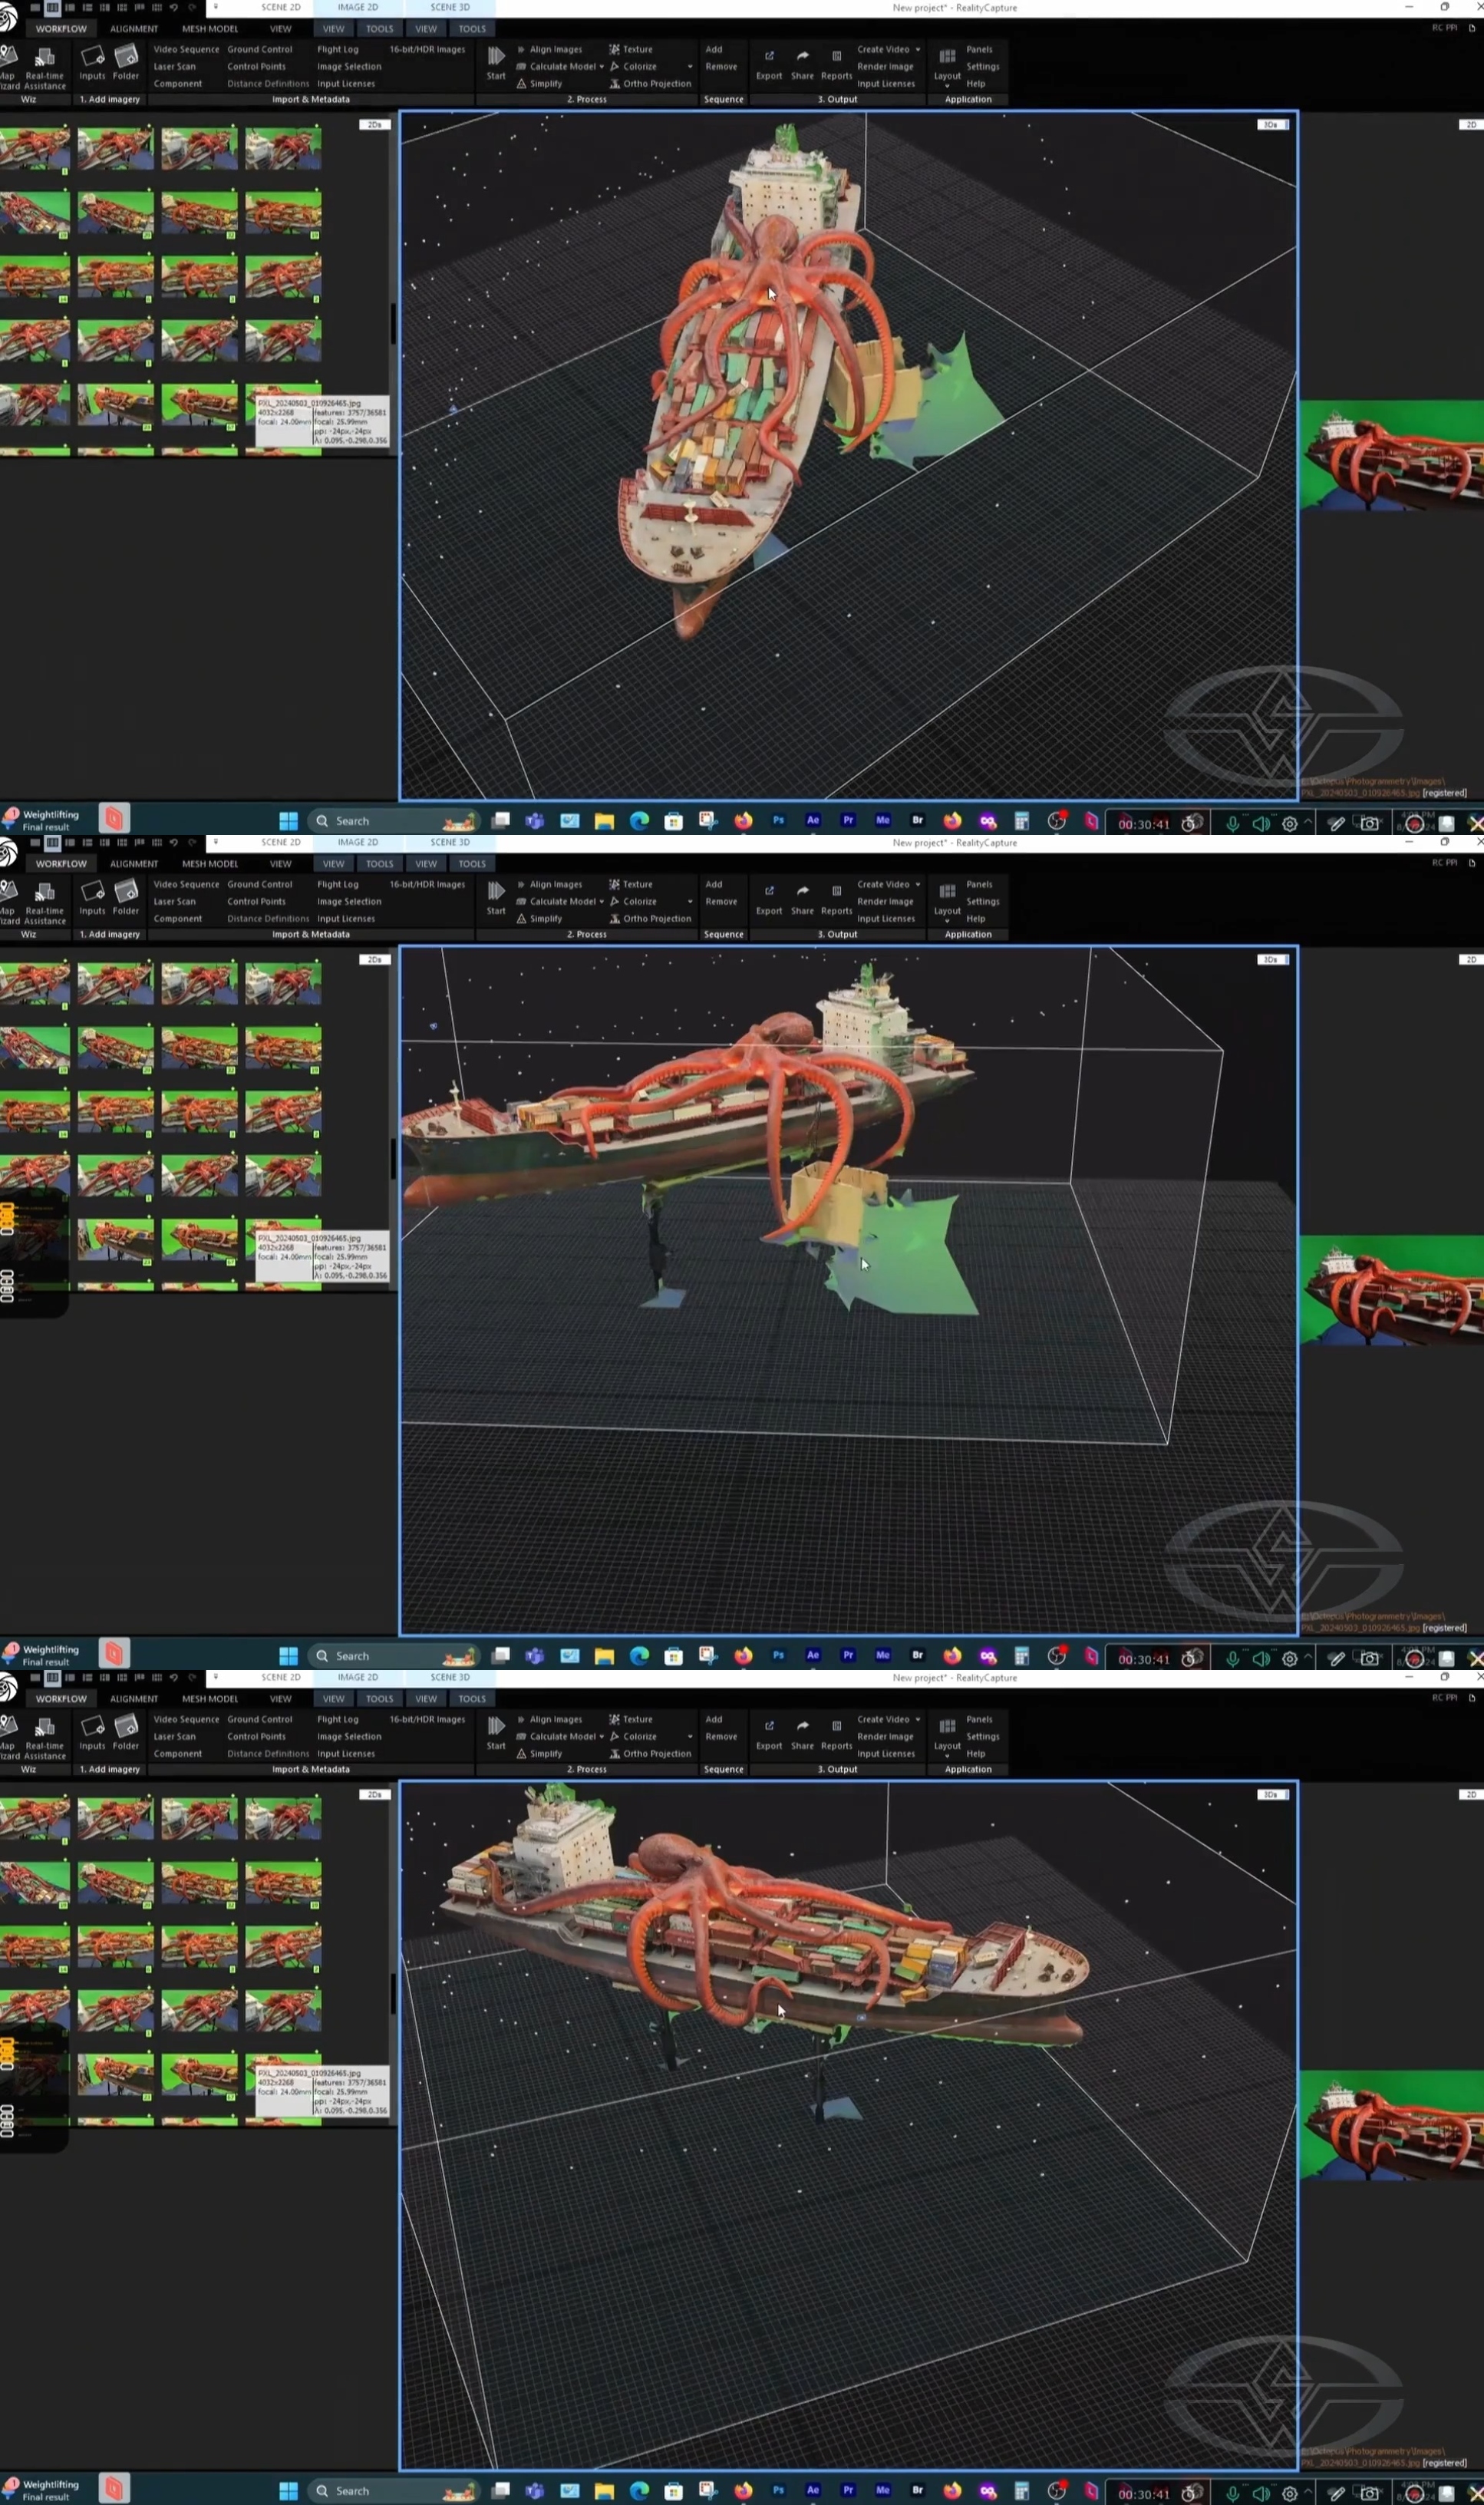 (Setareh Samandari's 3D model with texture added.)
If you find that texture is lacking, it's easy to add! Simply click “Texture” to begin texturing your model in RealityCapture. The software will look at all the photos and pick the best angles and lighting from them to then add them as a texture on top of your model.
You can pick additional photos and repeat the process until you get the model you want.
Be sure to zoom in to get a closer look and view it from all angles. And remember, anything you don’t want in this render can be removed in Maya!
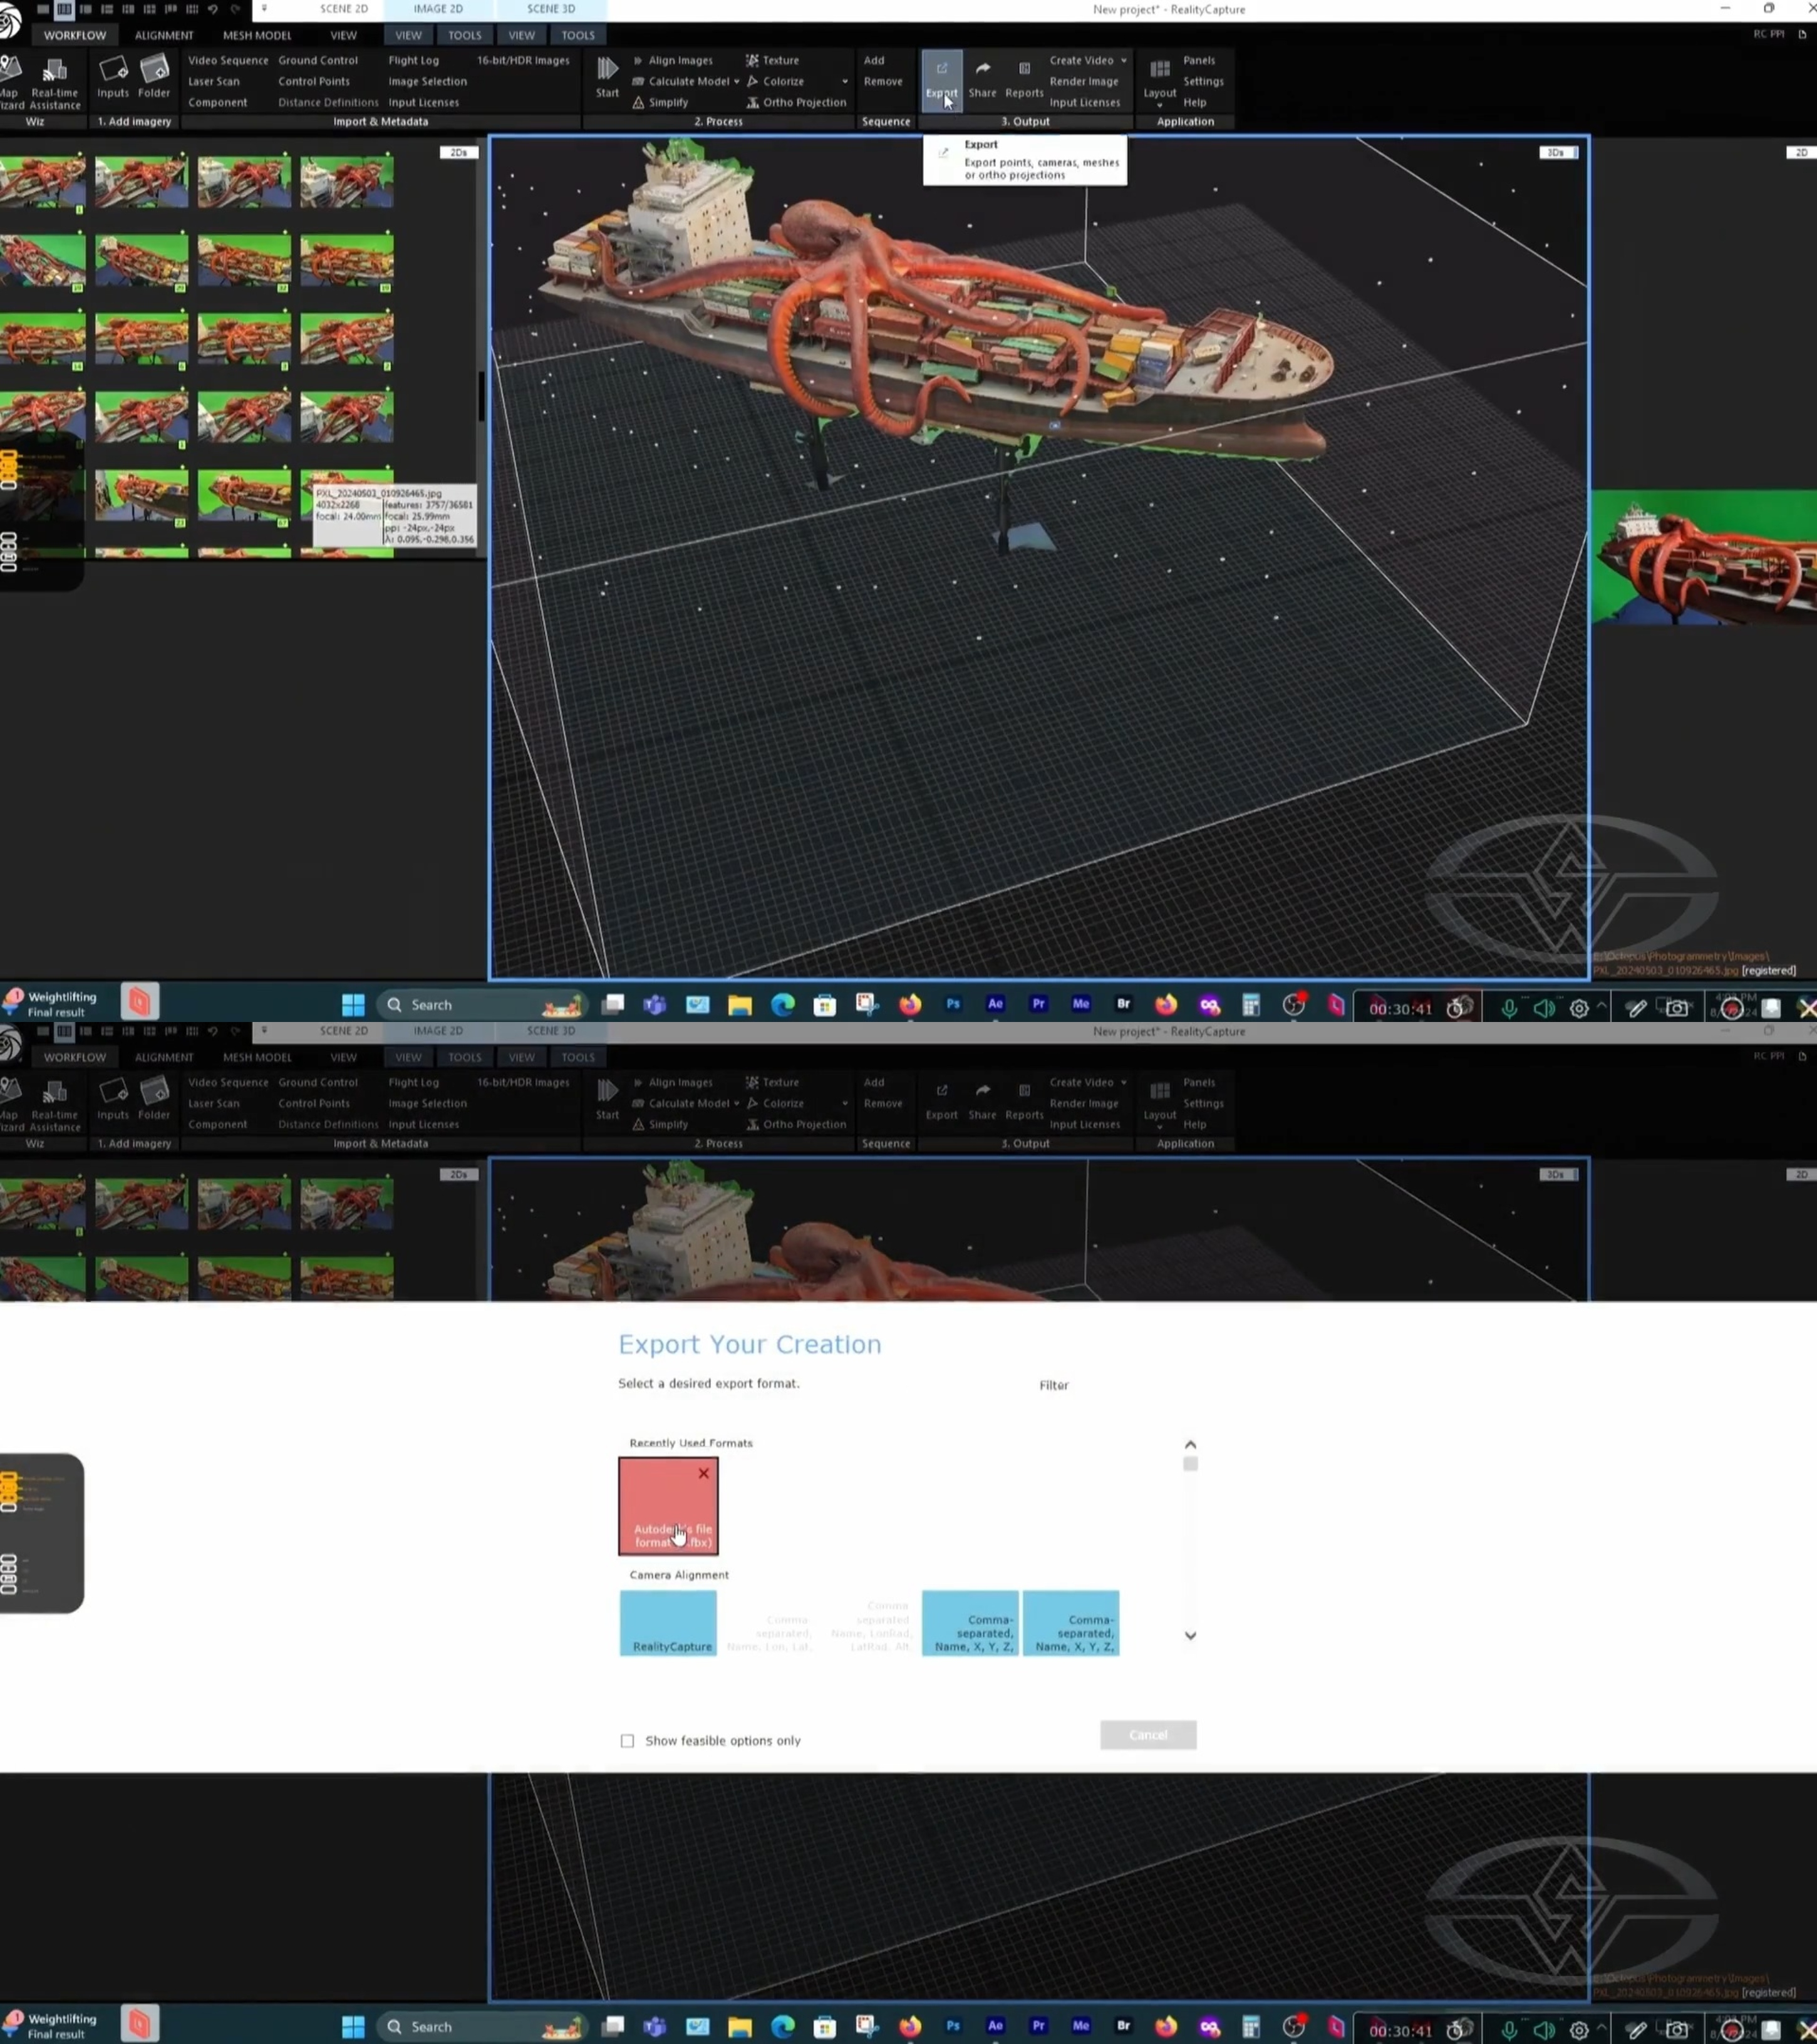 (Setareh Samandari exports her 3D model in RealityCapture.)
Exporting and Rendering Your 3D Model
Once you’re happy with how your 3D model turned out, export your creation.
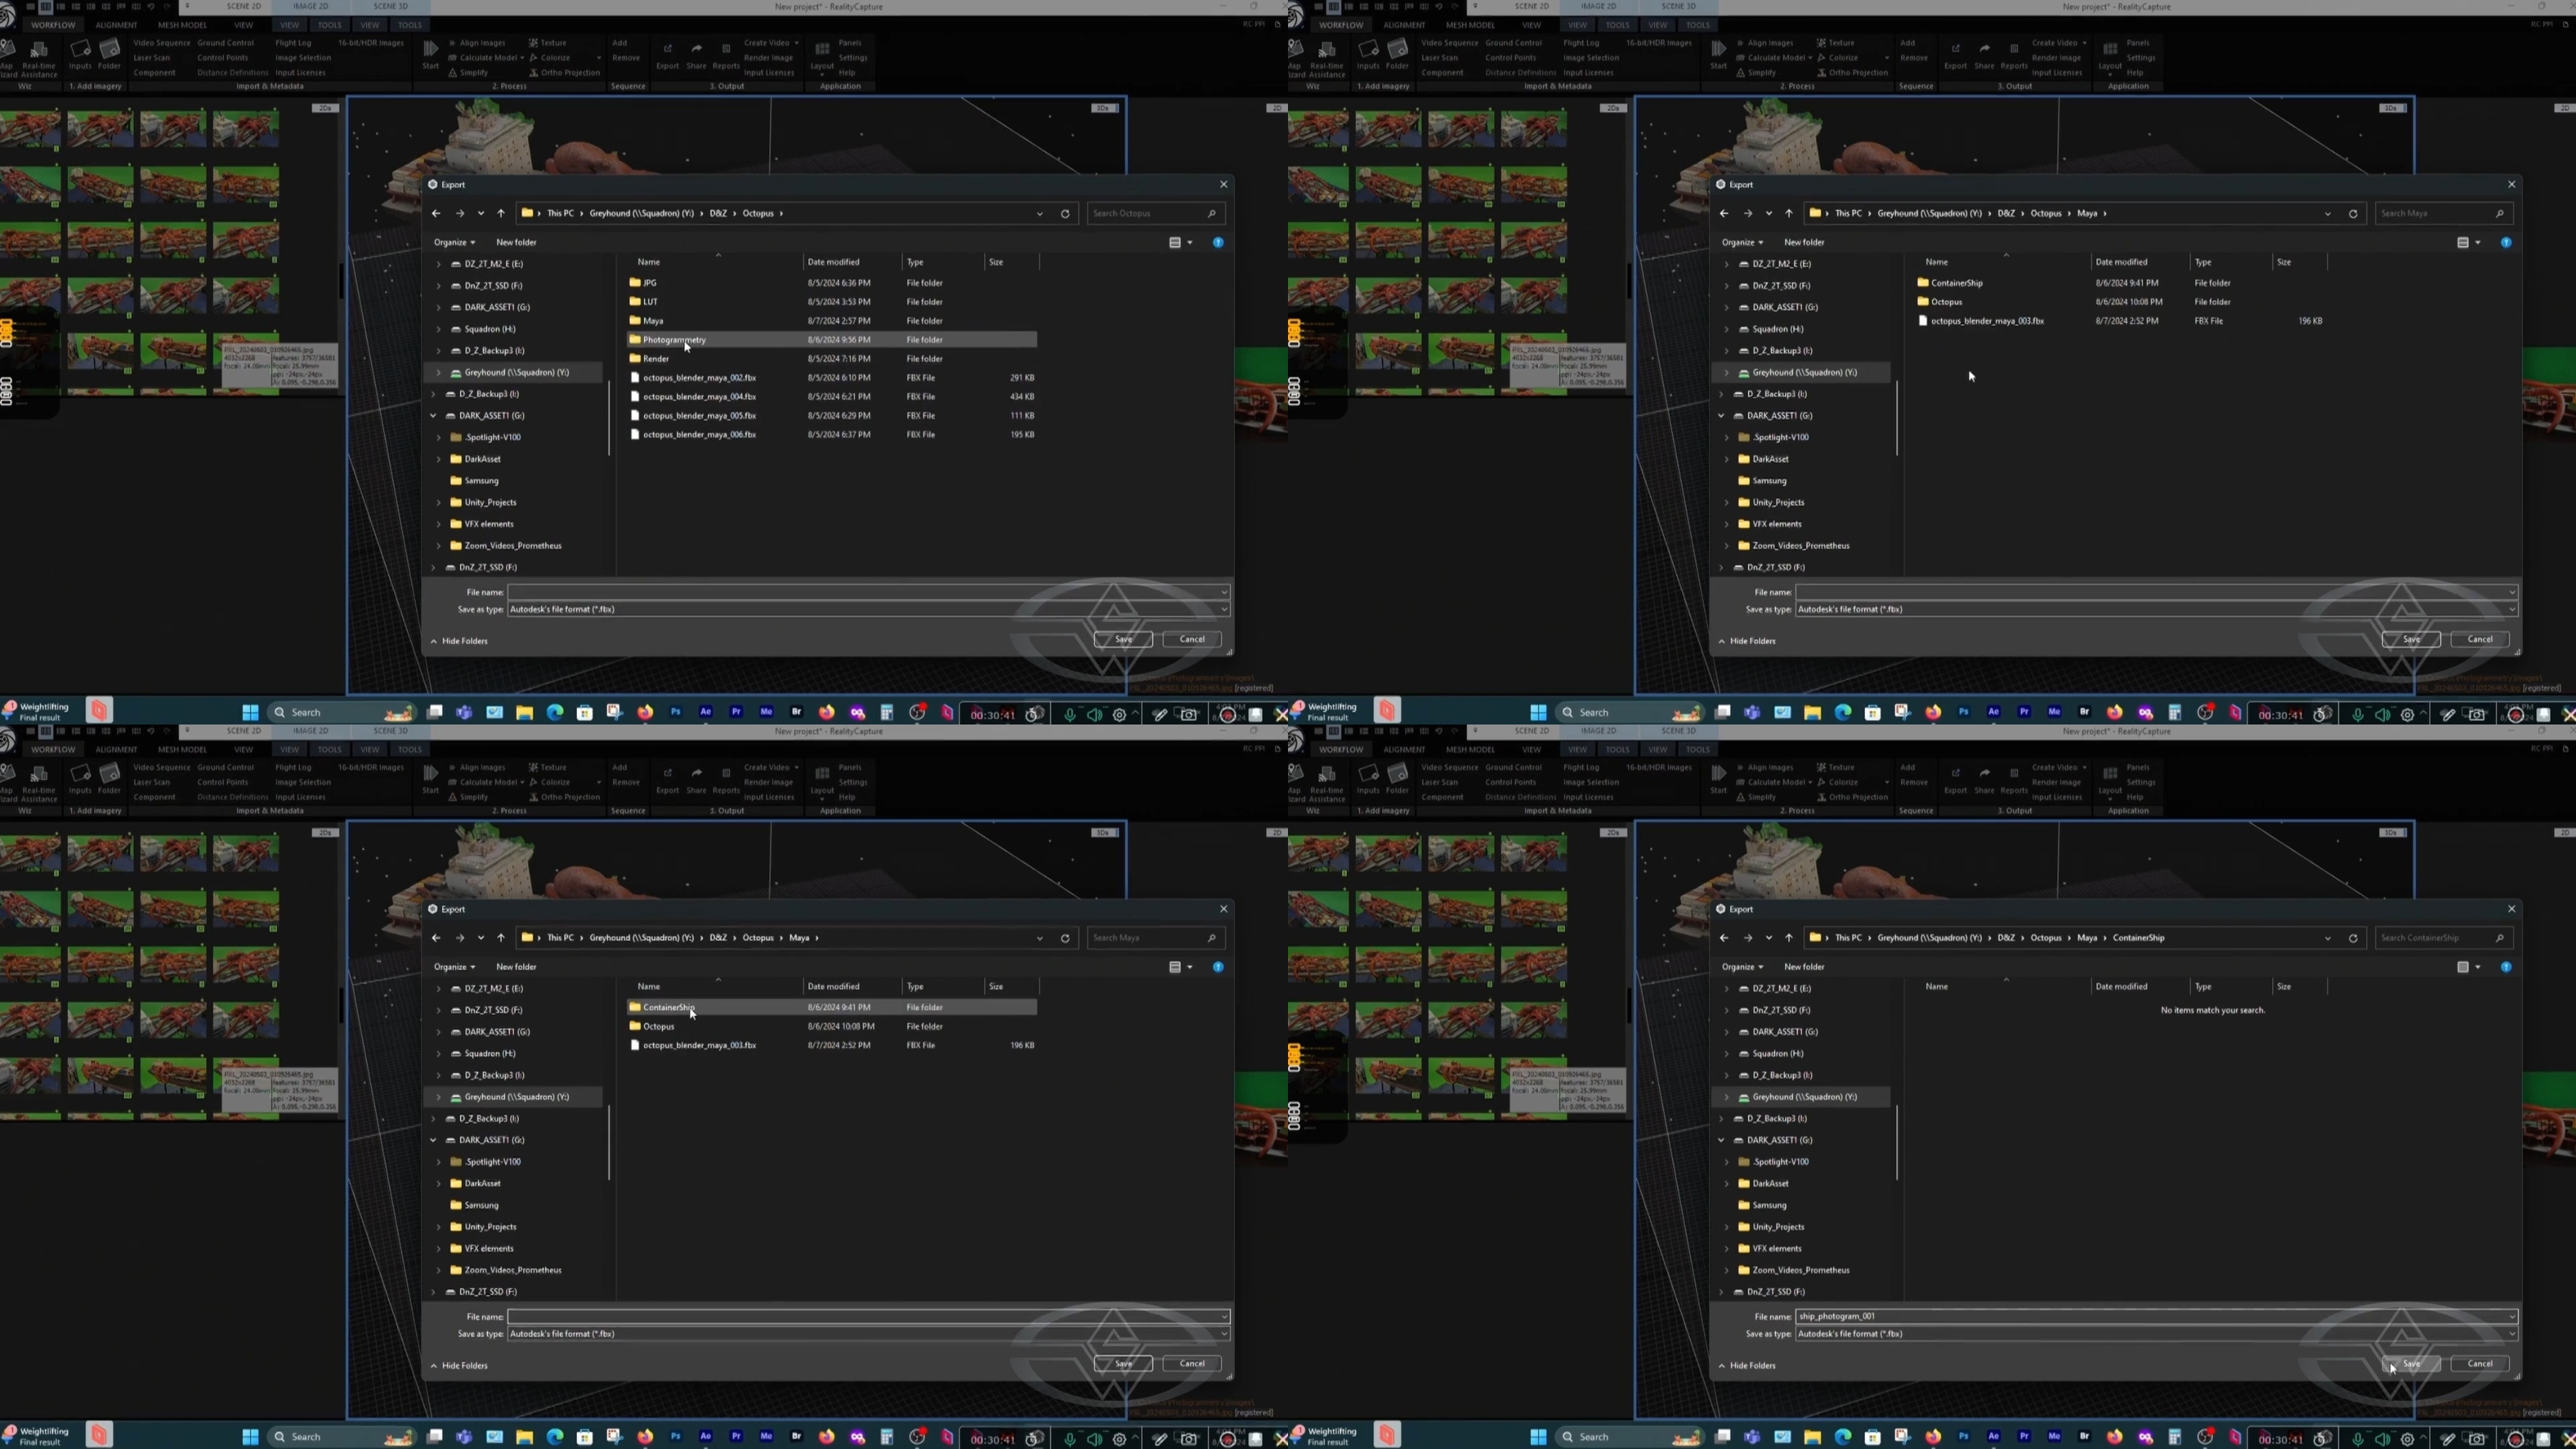 (A look at Setareh Samandari's file organization chart.)
Samandari saves it as an Autodesk FBX file format. Sometimes specific studios or vendors have pre-established naming conventions for files and folders that enable easy location of files. If you choose to use your own names, you should still name your folders and files so that you have an easy time going back to them if necessary. It is good practice to create a folder ahead of time for your Maya photogrammetry. This allows for an easier saving process overall, so you're not making new folders during the saving process.
Each model saved within a folder can be iterated with a number (such as 001, 002 etc.) so that you always know what your latest model is.
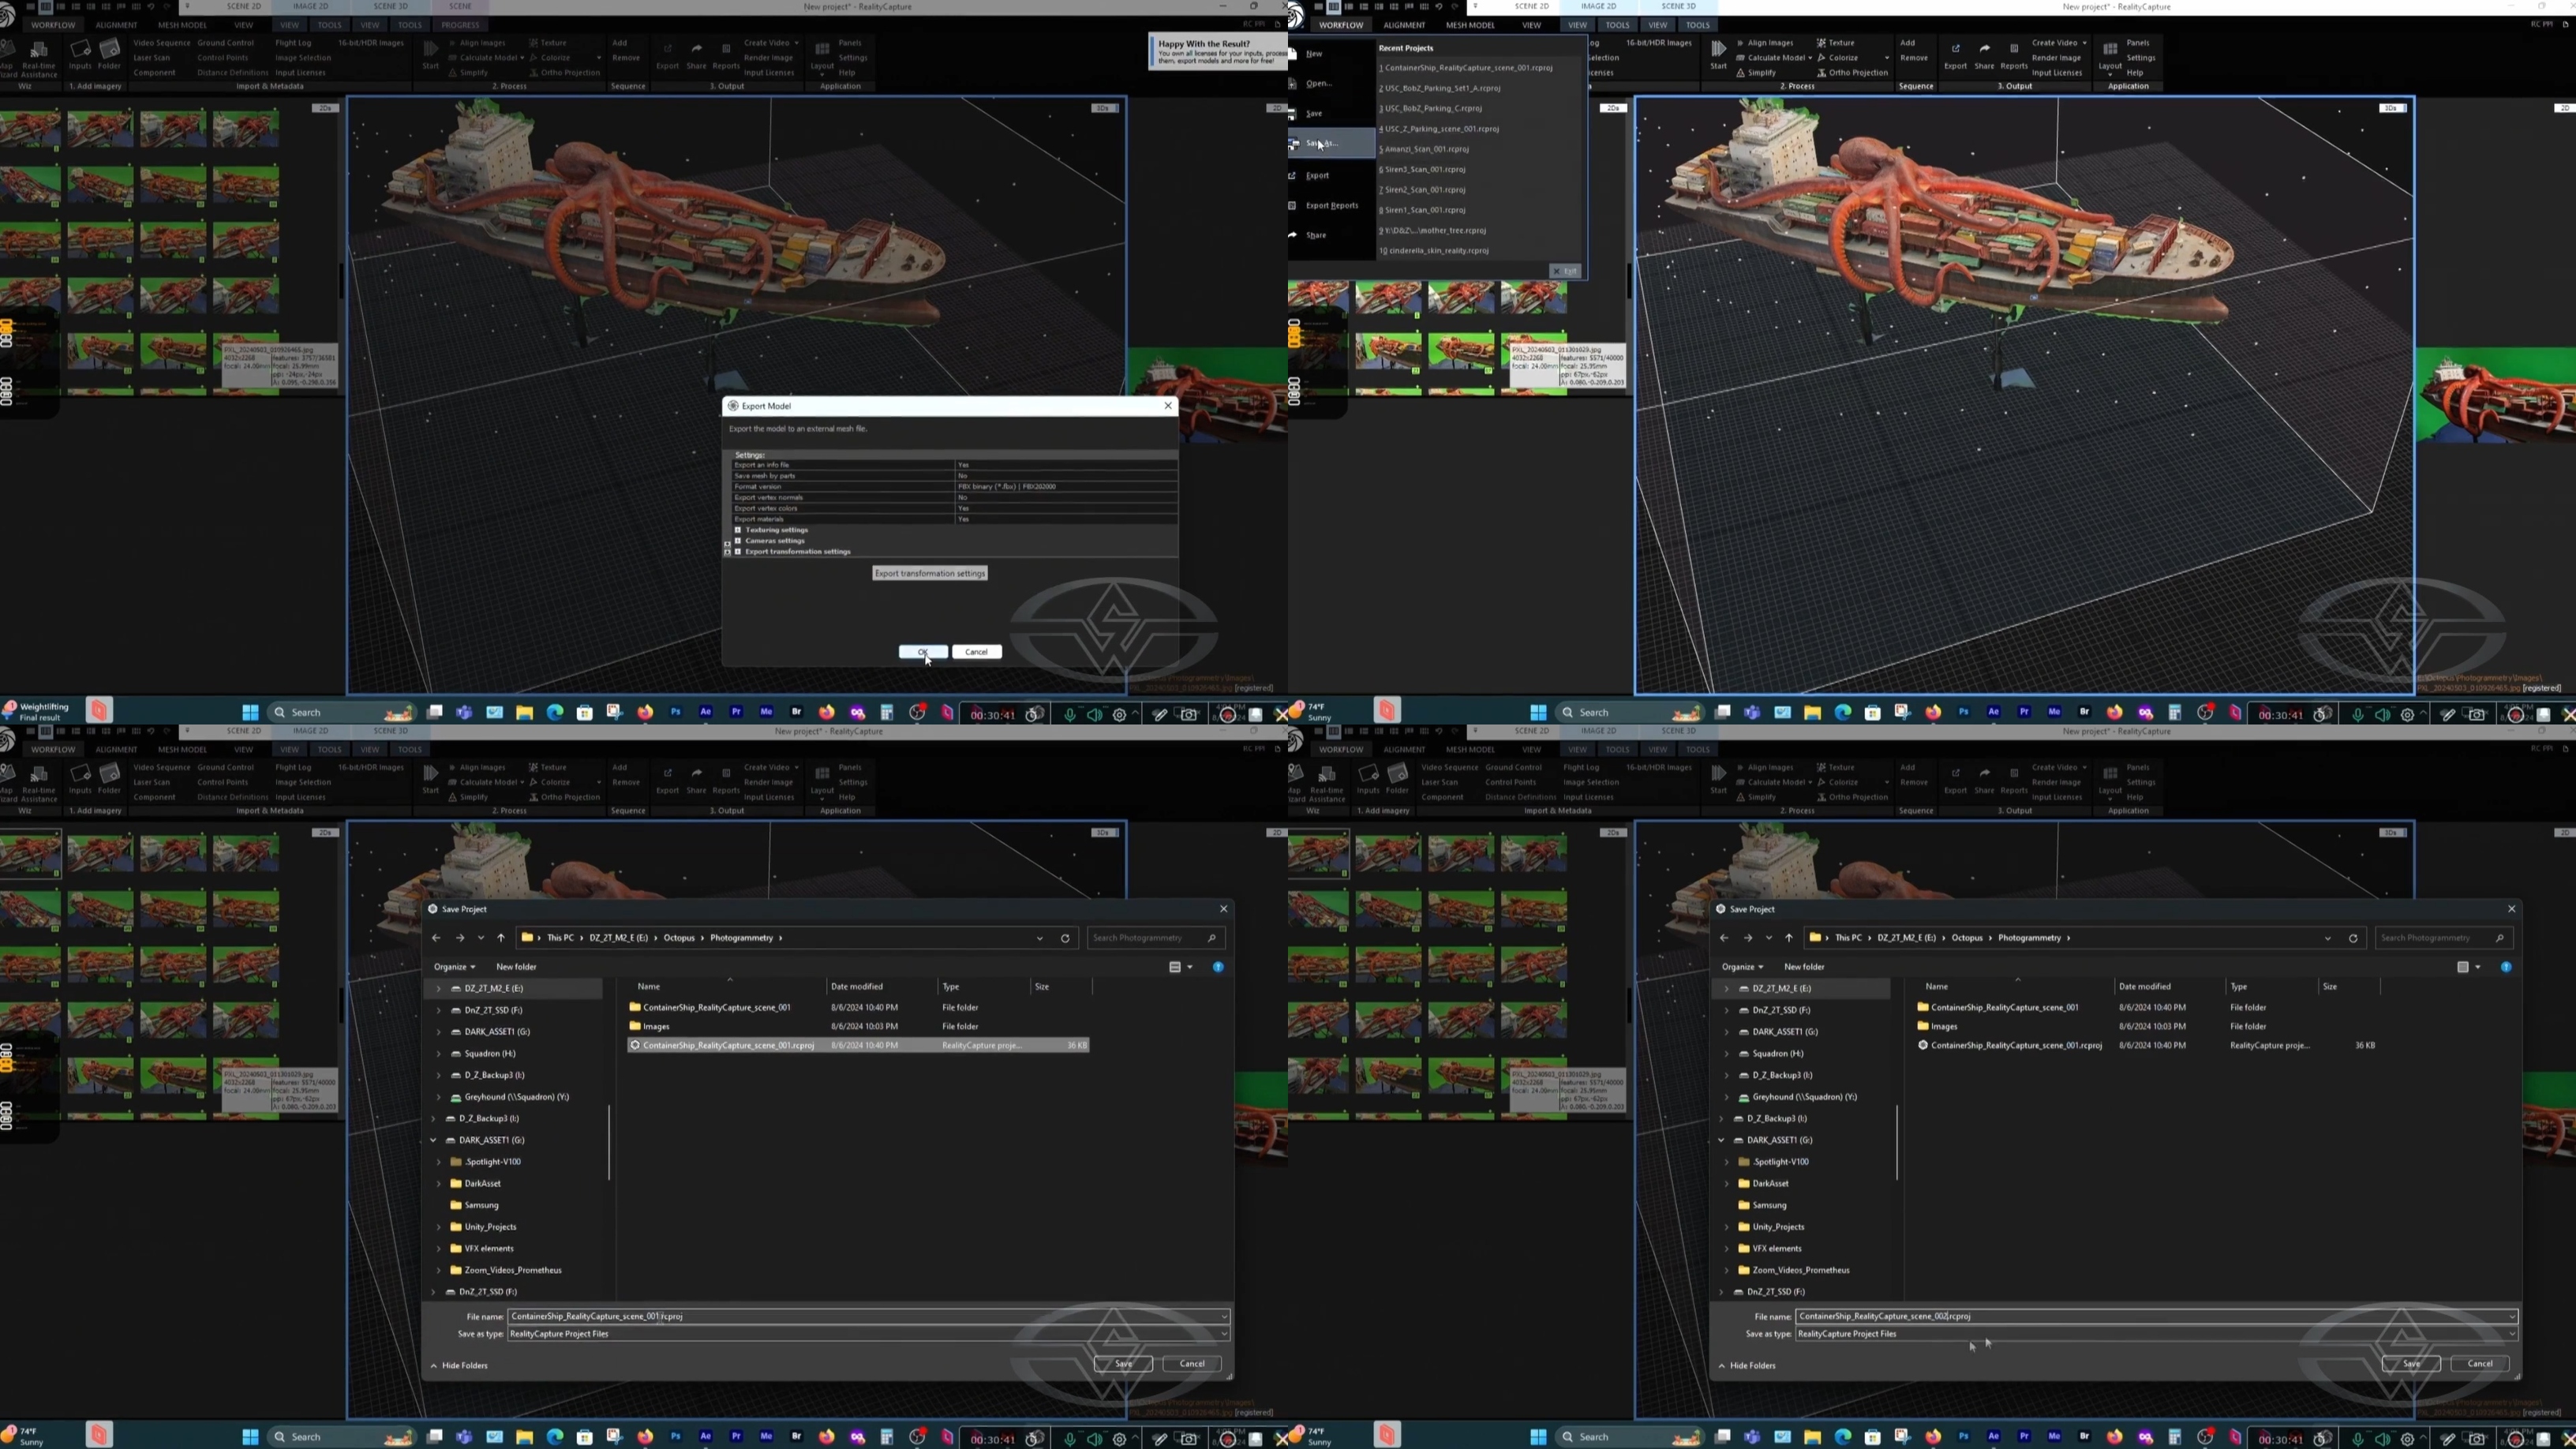 (Setareh Samandari's file structure showing the names and folders she uses to save her project.)
Always save your project. As it exports, you may have a license pop-up. Simply log in with your password and PIN number.
Best practice is to make an additional copy of the model for yourself as well. Samandari opts to save the RealityCapture scene as “ContainerShip_RealityCapture_scene_002.” Saving the model separately from the scene in your own folder outside of Maya allows you to have it in case you need to come back to it and resolve some of it or add more photos.
Now you're eady to bring your model into Maya as a hold-out mask for the digial ocean you're about to create.
Your photogrammetry-generated 3D model container ship is ready to go!
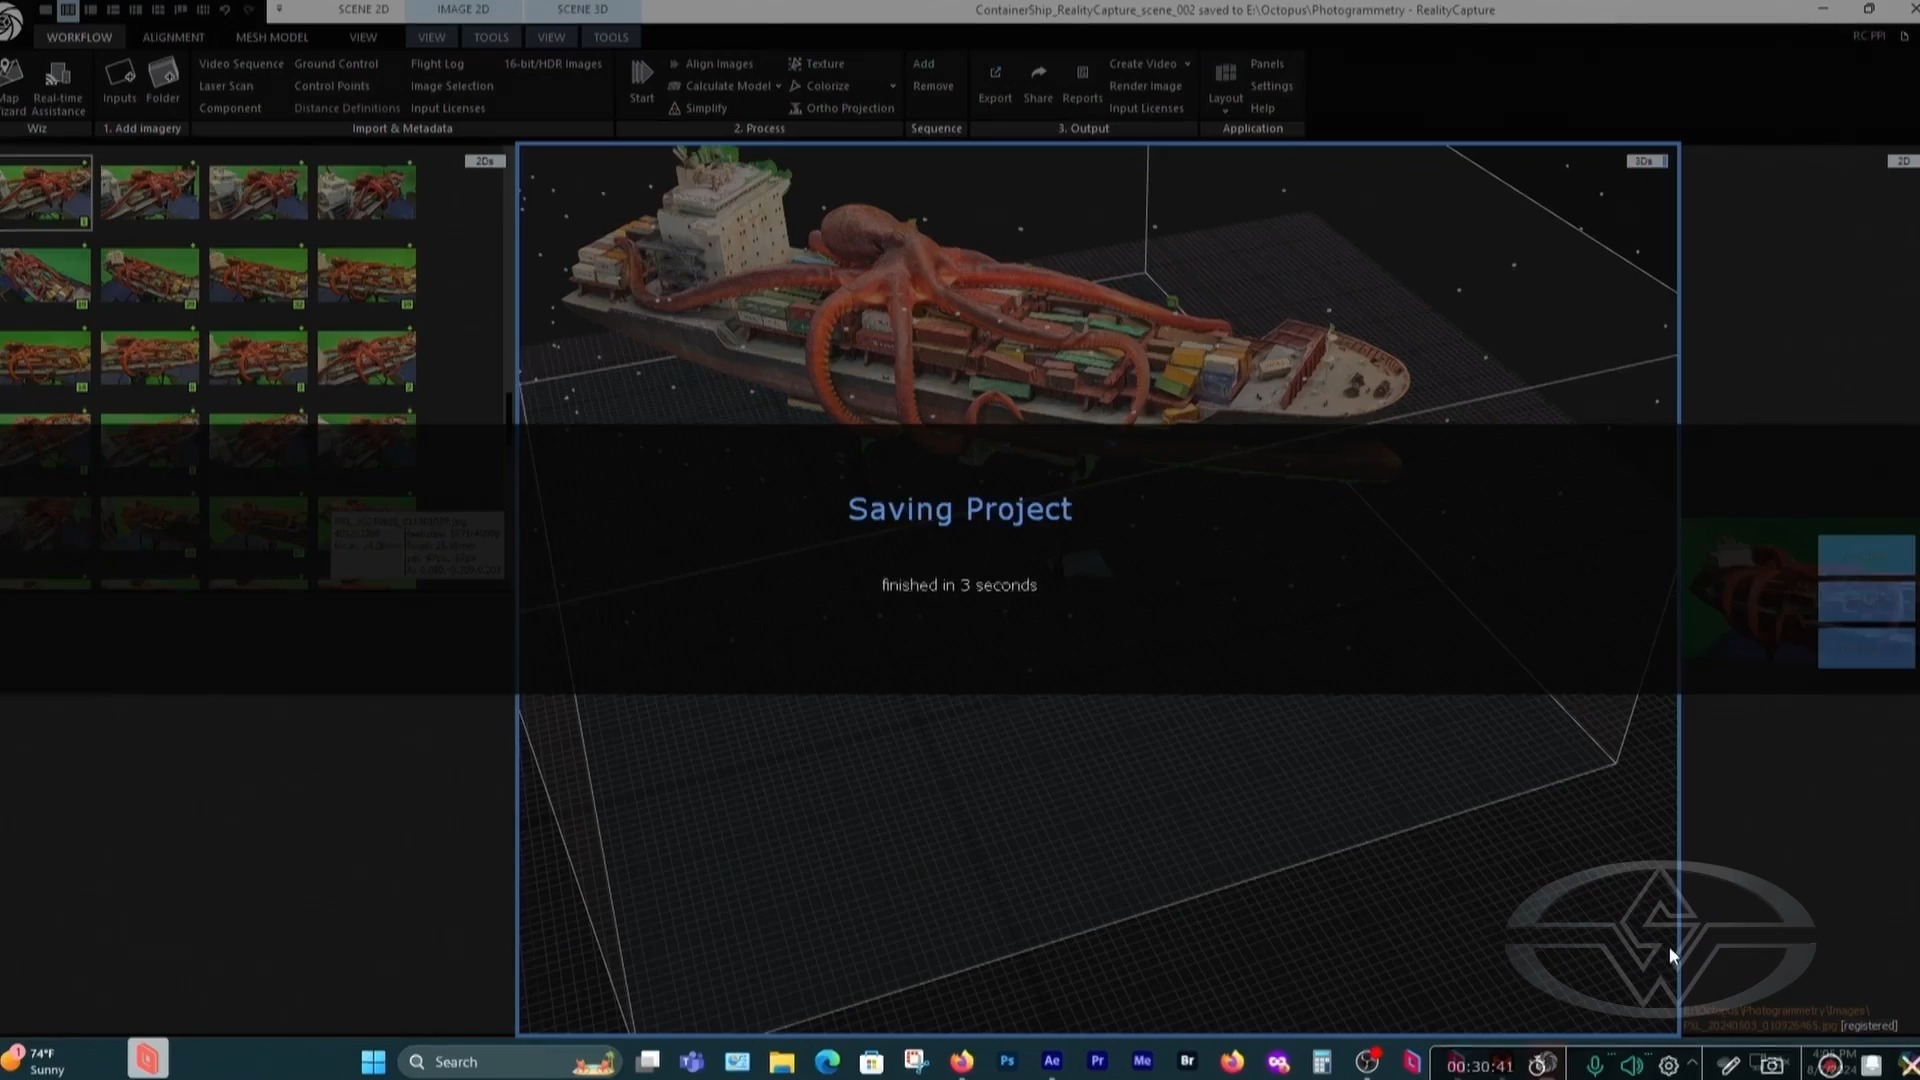 (Setareh Samandari saves her project.)
WATCH THE “VFX FOR MINIATURES” COURSE WITH SETAREH SAMANDARI:
VFX for Miniatures Part 1: Keying, Tracking & Rotoscoping
VFX for Miniatures Part 2: Assembling Elements for the Digital Environment
PART 3: Coming soon!