
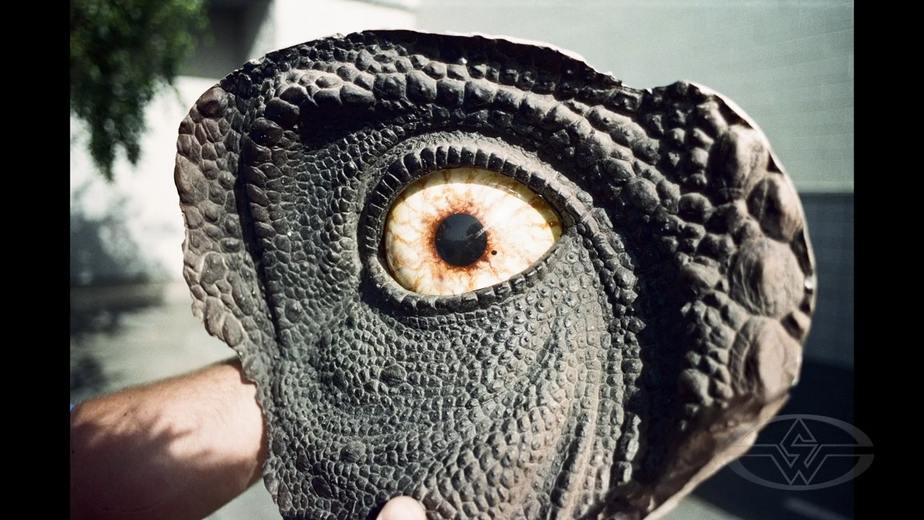
Making the Jurassic Park Dinosaur Eyes

In this FREE excerpt from the Stan Winston School of Character Arts course, Oversized Eyes Part 2: Molding & Casting, makeup effects artist and eye-making wizard, Rob Hinderstein (Aquaman, A Series of Unfortunate Events, Jurassic Park) shares the eye-opening, innovative techniques he developed for the Jurassic Park dinosaurs at Stan Winston Studio.
Jump To Section
- A Look at How the Famous T-Rex Eye Was Made
- Breaking Down the Creative Process for the Jurassic Park Dinosaur Eyes
- Revisiting Behind the Scenes Photos from Jurassic Park
- How Jurassic Park Established the First Eyes and Teeth Department in Studios
To watch the complete video, click the player above!
Jurassic Park premiered in 1993. The film's special effects were groundbreaking, and the film became a true blockbuster. The Stan Winston Studio crew worked to create effects for the film that were so monumental, terrifying and dramatically compelling, that the film would end up spawning one of the most famous and successful film franchises of all time.
You'll definitely want to feast your eyes on this lesson in which Rob Hinderstein breaks down the painting processes he used 30 years ago. From there, you can apply these same techniques to your own pair of lifelike creature eyes! (With these techniques, your creature eyes are sure to be dino-mite?)
Ready to learn how modern techniques can create prehistoric-looking eyes?
In the words of Sam Jackson's Ray Arnold, “Hold onto your butts.”
A Look at How the Famous T-Rex Eye Was Made
 (Rob Hinderstein shows a comparison of the T-Rex eye and an original concept based on an eagle eye.)
A fun Jurassic Park fact: The original concept for the T-Rex eye was based on an eagle eye!
"I know that for a lot of the dinosaurs, Stan wanted to see the whites of the eyes, like a big cow eye. I want to see something going on," Rob says.
Rob and the team made several designs that consisted of an iris that ended, a scleral lens, and a color. This technique was applied to the eyes for the Brachiosaurus, sick Triceratops, and baby Triceratops.
 (The design for the baby Triceratops eye, which, ultimately, didn't make it into the film.)
"I don’t know at what point, and I think it was Spielberg [who] changed his mind and wanted to see this because he didn’t want to see a white back and forth," Rob says. "He kind of just wanted the eye on there."
 (An example of the type of design director Steven Spielberg wanted for the dinosaur eyes.)
When it came time to show their ideas to Stan Winston and Steven Spielberg, Rob and the team demonstrated what the eyes might look like on each dinosaur using a full-size sculpted eye-socket.
 (The team had meetings with Stan Winston and Steven Spielberg to discuss what kind of eyes worked for certain dinosaurs.)
"When we did tests, we would put eyes behind so you could see what’s going on in there," Rob says. "'What are we really going to see? What’s the movement going to be?'"
Breaking Down the Creative Process for the Jurassic Park Dinosaur Eyes
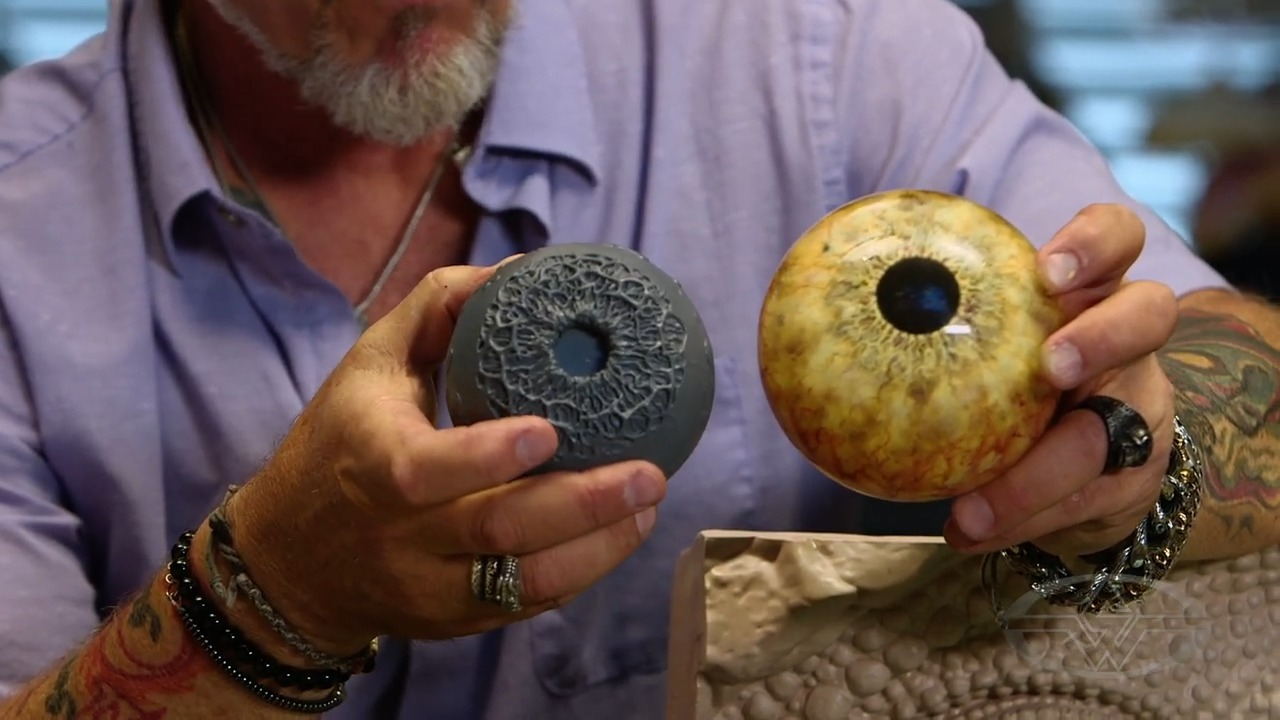 (The first layer of the eye versus the finished product.)
Rob shows another dinosaur eye that has a dimensional appearance despite not having an iris. Rob says that the secret to achieving depth is colors and layers.
"It does have a drop down brown look that stimulates something’s going on under it," Rob says.
 (Rob Hinderstein points out the darker layer near the pupil.)
Whenever Rob is doing his layering process, he says he tries to do a darker layer first because there’s always a slightly darker layer around the pupil that fades off to the iris. The iris has the secondary level and opens cells that you can punctuate with color.
 (Rob Hinderstein shows the cell structure in eyes (e.g. veining) that give a latticework of texture and depth.)
Rob showcases yet another example of what ocular cells look like. He explains how human eyes have a lot of cell structure, corrugation, and veining. "This is what we're trying to do [with creature eyes]. We're trying to create that latticework and give [eyes] depth," he says.
 (Rob Hinderstein shows the details in the velociraptor eye, such as a sculpted core and high rise on the pupil, that give it a three-dimensional look.)
The velociraptor eye was a sculpted core and sculpted with all the cracks. The pupil itself had a small high rise on it, which was the basis of 3-D designing, the features aren't just flat-painted on. This design also had cells and pockets all over the scleral surface.
Rob says if he were to design this eye again, he would use the entire eye as an under layer, go back over the top of it with more veining, break some of it up, and give it more depth.
Revisiting Behind the Scenes Photos from Jurassic Park
 (A blast from the past! Young Rob Hinderstein painting the original dinosaur eye with an iris, as based on an eagle eye.)
Revisiting photos from 30 years ago, Rob recalls what he was working on and its purpose for the iconic film.
 (Top: the second T-Rex eye art design Rob Hinderstein worked on. Bottom: additional T-Rex and baby Triceratops eyes, along with paint concept designs.)
The team made several different designs to see if they were taking the appropriate creative direction.
"The good thing is that the color that we chose stayed," Rob says. "We didn’t really deviate from the ochres, the yellows, and the browns. Everything pretty much stayed color-wise in that arena. So, it was just coming up with the art now for it."
 (Rob Hinderstein hand-painting eye bucks.)
Even though there was only one T-Rex, Rob painted a lot of eyes for it. His technique included both airbrushing and hand-painting.
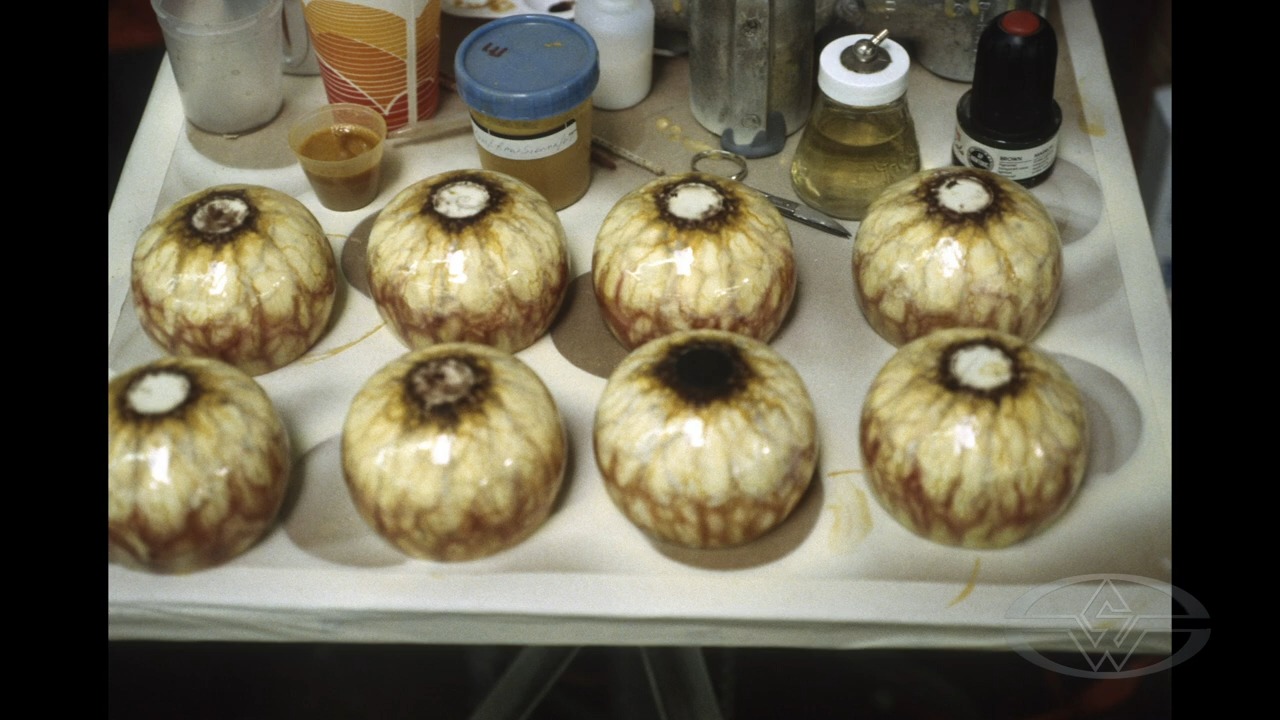 (These eye bucks perfectly illustrate how a dark under layer gives the eye depth and texture.)
"You can see how dark it is around the pupil that will then be covered up with a lot of veining and mucilage of the iris itself, to collect that and to punch out the pupil so it didn’t look so ruddy and dirty," Rob says. "Which, I think is why they went with this concept. It didn’t have a lot of that explosion of dark color coming out around the pupil."
 (Look familiar? This is the famous, nightmare-inducing T-Rex eye. Turn the light off!)
The T-Rex eye that the filmmakers eventually chose had a dark center pupil set off with a less defined iris that blends smoothly into the mottled sclera leaving the pupil to pop even more dramatically.
 (Rob Hinderstein working on variations of the velociraptor eye, along with the final design.)
The velociraptor eyes were based on a snake and underwent about 15 different designs. The final product included a sculptured core and cell work.
 (Rob Hinderstein working on dinosaur accessories including toenails and spikes for the sick Triceratops.)
"We really didn’t have anyone to do any of the accessories," Rob says. "I was the dinosaur accessories guy."
Rob came to Stan with the idea to streamline the accessory pieces by using the same process he used for the eyes: making a buck, painting on it, and encasing it in dental acrylic.
"We ended up doing that, and the toenails and spikes gained a lot of life because there was more clarity around the paint job. The paint job was now internal so you could go over it, and it wouldn’t scratch off," Rob explains. "That was the other thing that was a godsend ... you wouldn’t have to touch up because the entire paint job was surrounded by clear dental acrylic.”
Rob also sculpted all of the spikes for the top of sick Triceratops for Joey Orosco's sculpture. In the photo above, you can see the two layer process: the bucks, which are the lighter tan color, and then the darker colored pieces which are the nails over the top of it.
How Jurassic Park Established the First Eyes and Teeth Department in Studios
 (Rob Hinderstein working on batches of T-Rex eyes.)
When reflecting on Jurassic Park, Rob says, "That was the beginning of what was an incredible ride for me. It was history-making for the movie industry. It was the beginning of eye and teeth departments in studios. Stan had the first dedicated shop within a shop department for doing eyes and teeth. I was in charge of doing anything that was acrylic, anything that we had to do that was an accessory. And there you go!"
 (Rob Hinderstein gives one of his creations a poke in the eye.)
Want to feast your eyes on more lessons to create the most lifelike, oversized creature eyes?
WATCH THE ENTIRE “OVERSIZED EYES” COURSE:
Oversized Eyes Part 1: Digital Sculpting & 3D Printing