

How To Make a Glowing T-800 Eye
In this FREE excerpt from the Stan Winston School of Character Arts course, Terminator Makeup FX Part 1: Cast, Rig & Prepaint, Academy Award and Emmy-winning makeup effects artist, Steve LaPorte (Terminator 2 & 3, Beetlejuice, The Lost Boys) shares eye-opening methods on how to add an LED to a prosthetic and route the wiring and electronics so you can apply them to your very own cyborg characters!
Jump To Section
- Gathering the Materials for Your Terminator Eye
- Inserting the Eyepiece for Your LED Terminator Eye
- Soldering Your Wires
- Finishing Your Terminator Eye
To watch the complete video, click the player above!
In this lesson, Steve LaPorte discusses how to rig electronics in makeup appliances as used to make the Terminator 2-inspired cyborg eye. He will teach you the methods he used to update the processes Stan Winston Studio originally developed to create the battle-damaged T-800 appliances for Arnold Schwarzenegger.

Want to know how the menacing, glowing red eye was made?
Come with us if you want to learn!
Gathering the Materials for Your Terminator Eye
“Things that move or things that light up always add a little bit of bling factor to your makeup,” LaPorte says. “I always like makeup to have a little something going on.”
While the T-800 has a futuristic look of the year 2029, the materials to make a Terminator eye are both affordable and easy to find online and at your local hardware, electronics, and model train stores.
 (All the materials starting from the top left: cr2032 3V battery, a battery containment piece, 3.2 volt LED, and a package of wired connectors with "ins" and "outs.")
The materials you’ll need for this lesson include:
-
cr2032 battery (Can be found at a local hardware or electronics store)
-
3.2 V LEDs (Can be found on Amazon)
-
Male and female wired connectors (Online or at a model train stores)
Inserting the Eyepiece for Your LED Terminator Eye
After you’ve gathered your materials, it is time to insert your eyepiece! If you’d like to take the same approach as LaPorte, you can paint your silicone eye appliance beforehand. LaPorte adds a bit of red nail polish inside to fill it out. Once your piece is finished as you like it, you’ll place the classic Terminator lens—a small vacuum-formed piece painted a translucent red—over the top to seal everything.
 (Steve LaPorte shows his pre-painted appliance and placeholder for where the red vacuum-formed lens will go when finished.)
First, you’ll make a small hole in your appliance to place the LED. You can either use a leather punch or take a pair of scissors to cut a criss cross slice through the middle of where you want your LED to go.
Then you push the LED in so that it finds its mark. After doing so, you’ll notice that you’ll have wires sticking out. You don't want pointy wires poking your performer's eyes, so you can bend the wires at a 90 degree angle so that they lay perfectly flat under the piece.
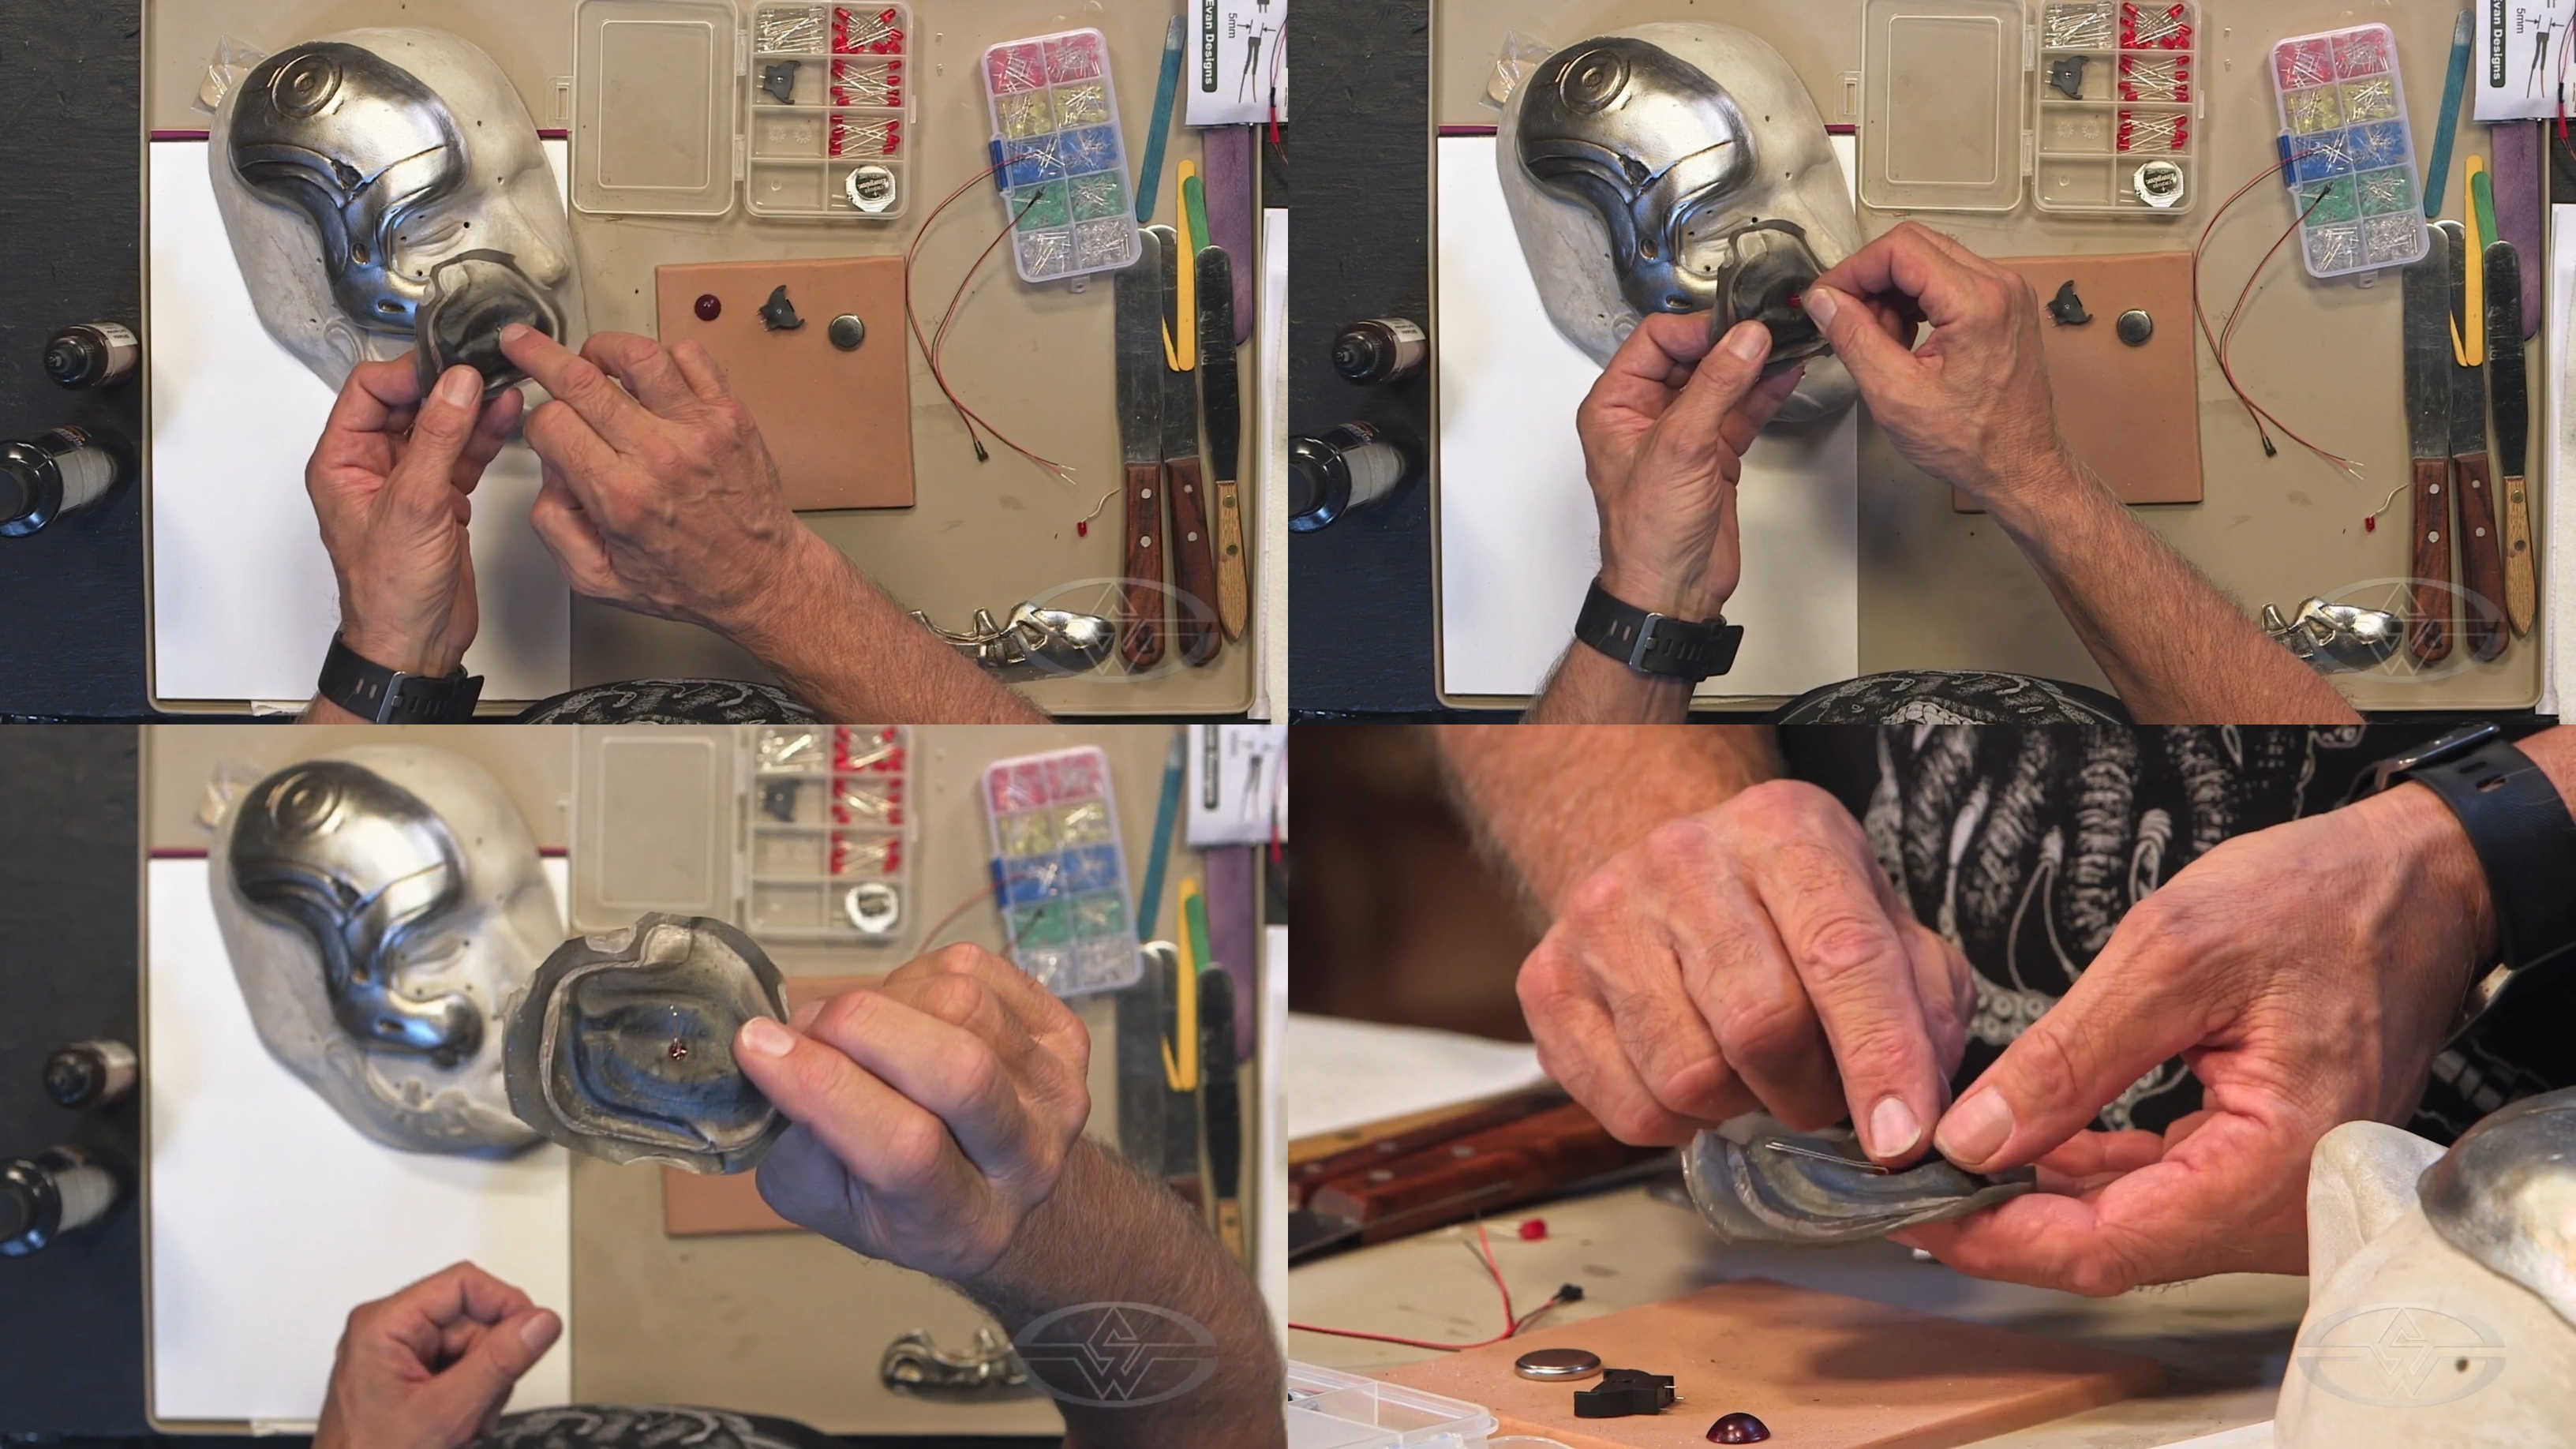 (Steve LaPorte indicates the channel running on the back of the appliance and pushes the LED through the hole, laying the wires into the channel.)
Pro-tip: Always test the components before assembly; take your battery and stick it in between the wires to make sure the LED lights up. Add the little red lens to diffuse some of the light and give it more of a Terminator-esque look.
 (Steve LaPorte shows a successful test, with and without the lens.)
Once the contour of the LED is in an ideal position, you’ll then remove the lens and solder on your wires.
Soldering Your Wires
LaPorte uses a fine, thin wire in order to keep a low profile to the appliance. With two loose ends, you'll solder one end into your LED and the other end to your battery source. Apply solder flux to both your red wire and black wire and solder them to the LED. It doesn't matter which color is on which side of the light or battery as long as it's matched up and the battery is in correctly.
 (Steve LaPorte shows what the alignment of the LED should look like prior to removing it from the appliance, the soldering process, and finally, reinserting the LED.)
Once soldered and in place, reinsert the LED. LaPorte recommends making sure it’s properly aligned. Bend the wires to your liking until they lay flat and follow the contour of the back of the appliance.
Finishing Your Terminator Eye
Next, apply a small amount of caulking silicone or seal epoxy over your LED to seal it and prevent it from coming loose. LaPorte also puts hot glue around his entire connection. "You don't want two wires next to each other that might touch and kill your circuit," LaPorte says. Encapsulating everything helps to make it one solid state. But don't glue the battery in. In the event that your battery runs out, you have an easy of fix of slipping it in and out.
Hit your piece with the blow dryer afterward, and give the whole thing about half an hour to set.
 (Steve LaPorte uses caulking silicone to seal his LED.)
At this point, you’ll have a sealed-down silicone piece with wires extending off with a male or female plug. (LaPorte prefers the male plug hanging off so he can plug into it later.) You should see the wires protrude through the groove in the side of the prosthetic.
Lastly, add your lens cap. Now, you’ve got yourself an eye-conic Terminator peeper!
 (Steve LaPorte adds the red translucent lens cap to his piece as a finishing touch, then tests it.)
LaPorte recommends always testing your LED. To do so, put your battery pack in, match up the wires and plug, and check to make sure it lights up.
When in place on the face, the performer will be able to see a little bit of red light with their eyes open and nothing at all if they’re closed. You can run the entire piece down the performer's back so the battery can fit in their pocket, on the back of their neck, or wherever the character's look allows.
And there you have it — your very own T-800 LED glowing eye!
WATCH THE “TERMINATOR MAKEUP FX” COURSE SERIES WITH STEVE LAPORTE: