

Making Ridges for Goat Horns
In this FREE excerpt from his Stan Winston School of Character Arts course, Costume & Mask Fabrication Part 2: Secondary Forms & Foam Antlers/Horns, master creature fabricator and specialty costumer, Fred Fraleigh (Where the Wild Things Are, Blade: Trinity, Men in Black 3) shares his techniques for making ridges for horns.
To watch the complete video, click the player above!
The smallest details can make the biggest difference in your costume and mask-making projects, especially when using real creatures as references. Getting the details right will instantly make your work look more lifelike.
Jump To Section
- Using a Wild Horned Goat as Reference for Your Ridges
- Sanding Tubes of Foam Until Smooth
- Slicing Small, Curved Sections to Create Ridges
- Laying Out Ridges to Spray with Glue
- Drying the Ridges and Applying Them to the Horn
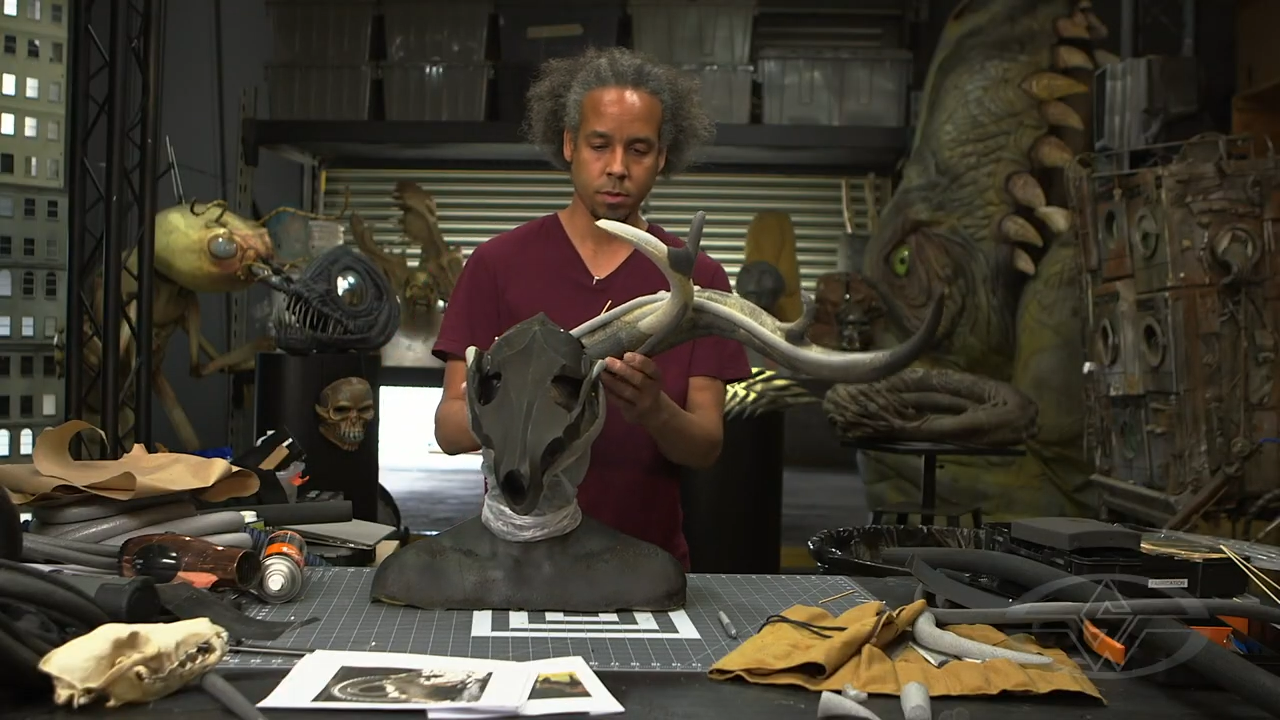 (Fred Fraleigh examining the horns on his mask.)
In this mini-lesson, first-rate fabricator Fred Fraleigh explains how you can take your mask’s appearance to the next level by using foam to create ridges for your horn!
To get started, you’ll need the following materials:
- Spray glue (3M Spray 74 Foam Fast Adhesive)
- Sandpaper (3M Drywall Sanding Screen, 220 Grit)
- Paper
- Straight pins
- A foam pipe insulation tube
- A razor blade
- A hair dryer
- A pointed wooden dowel
Using a Wild Horned Goat as Reference for Your Ridges
Male ibex are known for their remarkably large, curved horns. Using this wild goat as a reference when making a mask, you'll want to mimic the ridges onto the horn you've fabricated.
You’ll need to cut small notches to create the ridges. You’ll then line those ridges up in a row for about a foot—or hoof—in length along the horn shape.
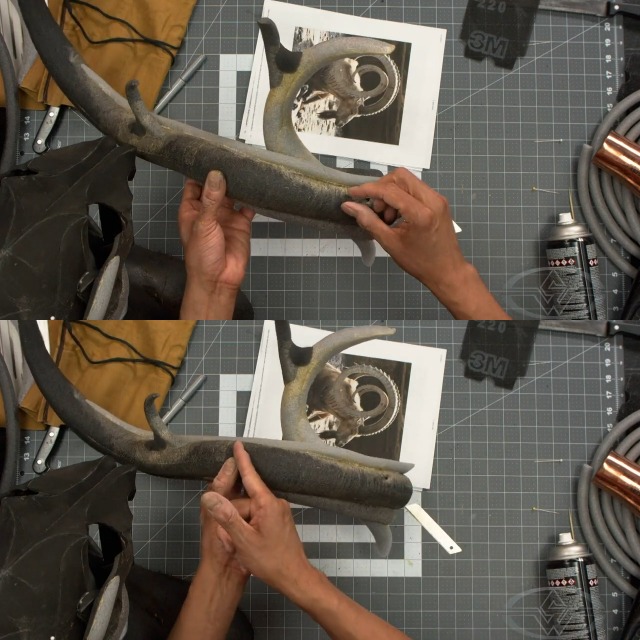 (Fred indicates the spacing and position for the ridges on the horn.)
Sanding Tubes of Foam Until Smooth
You’ll want to give your foam pipe insulation tube a very smooth finish.
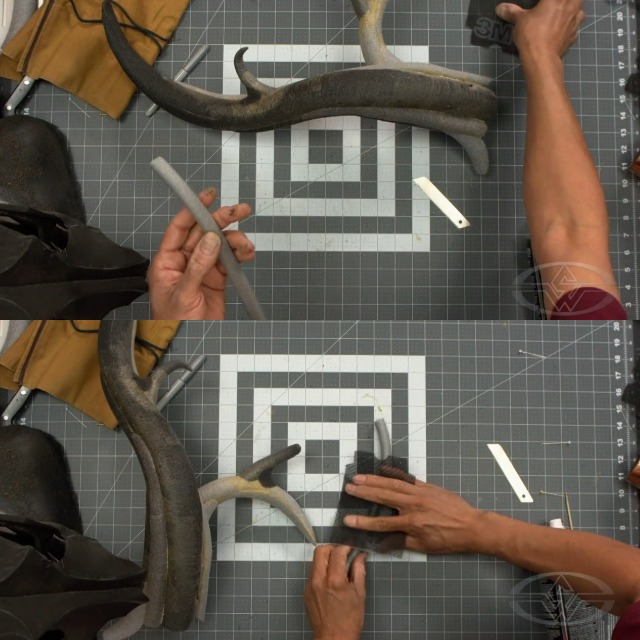 (Fred uses a 3M drywall sanding screen of 220 grit to prep the surface for cutting.)
Using 220 grit sandpaper—scrub the skin off the entire piece of foam until you’re satisfied with the look.
Slicing Small, Curved Sections to Create Ridges
Next, you’ll take the foam pipe insulation tube and slice a curved section with a razor blade.
 (Fred cuts notches of foam to create ridges.)
Repeat until you have about 10 ridges.
Laying Out Ridges to Spray with Glue
Grab a fresh piece of paper to lay out your ridges. Prepare to add texture to your horn by spraying a few coats of 3M Spray 74 Foam Fast Adhesive. Then, spray your ridges.
 (The ridge sections on a strip of paper with spray glue applied.)
Drying the Ridges and Applying Them to the Horn
To seamlessly glue your ridges onto your horn, you’ll want to blow dry the ridges and horn. Blow dry the ridges for 15 seconds and the horn for five seconds.
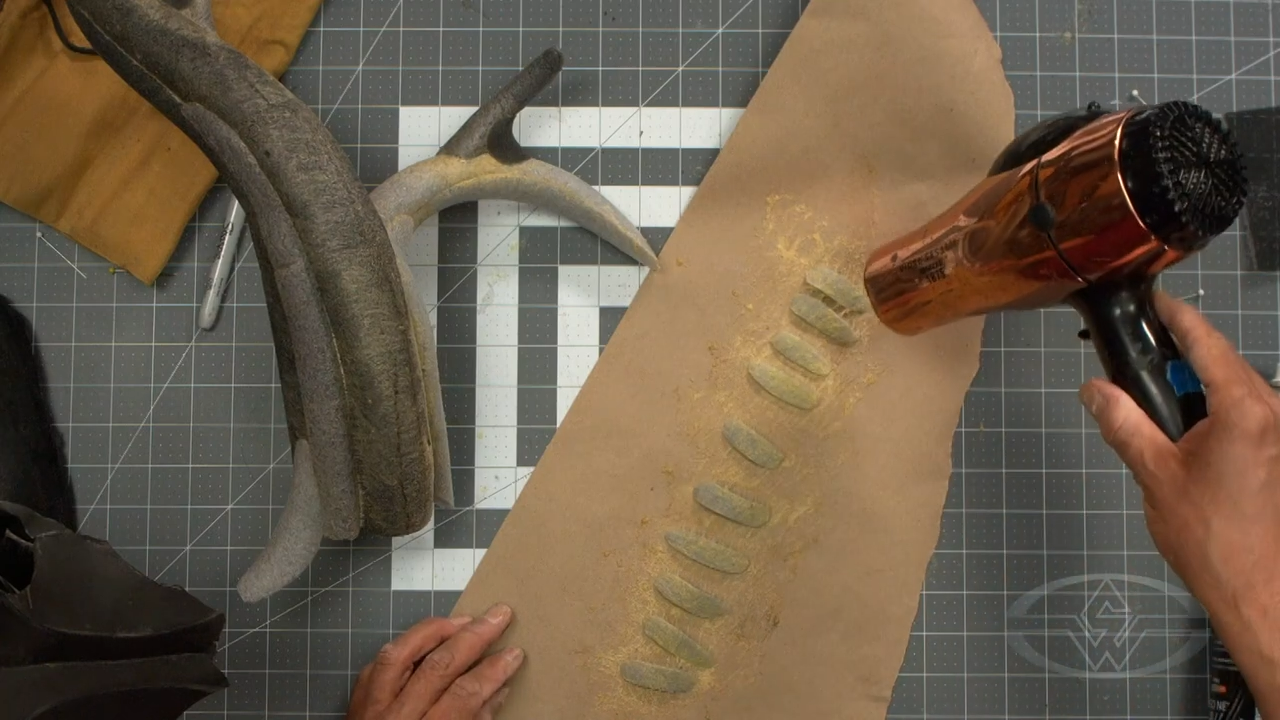 (Fred speeds up the drying process with his hair dryer.)
Lift the ridges from the paper using a wooden dowel and begin applying them to the horn from bottom to top. For a natural look, slightly space some of the ridges apart so they don’t appear too uniform.
 (Fred is careful to place the ridges along the horn with increasing spaces between the ridges.)
Now, you've got yourself an impressive ibex horn!
 (Fred mounts the fully-ridged horn onto his mask.)
You can apply these techniques to horns, antlers, or other organic alien shapes that may come from your imagination. Details like these ridges will certainly enhance your mask and costume projects. Happy fabricating!
WATCH FRED FRALEIGH’S “COSTUME & MASK FABRICATION” COURSE:
Costume & Mask Fabrication Part 1: Pattern, Cut & Assemble
Costume & Mask Fabrication Part 2: Secondary Forms & Foam Antlers/Horns
Costume & Mask Fabrication Part 3: Surfacing, Biomechanical Elements & Paint