

How to Make a Wearable Mask With Bruce D. Mitchell
By David Sanger
To watch the FREE lesson preview, simply click on the player above. Check out the Full Lesson page HERE: HOW TO MAKE A MASK - WEARABLE DYNAMIC ART.
Growing up in the STAR WARS generation, Bruce D. Mitchell was bit by the movie bug early and turned his natural ability as an artist into a career as a fabricator for many world-renowned creature effects shops: KNB, Steve Johnson's EDGE FX, ADI, Tatopolous Effects, and Legacy Effects, to name a few. But despite the certain pleasures and thrills of contributing to exciting creatures and characters, there is more to Mr. Mitchell than commercial art. Bruce makes masks as a hobby, a meditation, a refuge, and a way to hone his skills and express his imagination without the pressures of client deadlines or the confinements of specific job demands. In today's lesson from the Stan Winston School, Bruce shares the intricacies, innovative techniques, and disciplines of his preferred art with you.
Jump To Section
- Using Magic Sculpt to Create Your Mask
- Building Your Mask
- Finding the Character in Your Mask
- Detailing Your Mask With a Dremel
- Working the Hardened Magic Sculpt Material
- Using Tools to Add Character to Your Mask
- Preparing for the Finishing Touches
 (A head form (available commercially from monstermakers.com) serves as the base for the mask, which Bruce builds up with a clay layer.)
Using Magic Sculpt to Create Your Mask
Bruce's dry engaging humor and no-nonsense approach to art is refreshing and makes every aspect of this lesson a pleasure to watch and learn from. It's like being able to eavesdrop on the creative process of an artist demonstrating while he explains his methods. You'll learn the sad truth about the demise of Klean Klay the long-time industry-preferred clay for rough modeling and under forms, and the alternatives now on the market. (Bruce uses a version by Van Aken.) But the lesson takes off when Bruce gets to the amazing wonder-substance, Magic Sculpt™. He explores the techniques of using this two-part epoxy clay from mixing the hardener and epoxy to application and shaping.
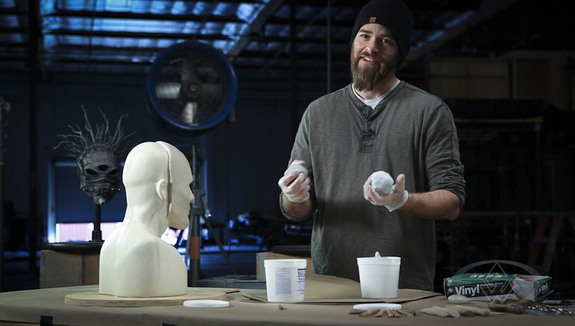 (Bruce D. Mitchell wonders aloud, "Is there any better substance than Magic Sculpt for mask making?" We don't think so.)
In addition to the visual treat of actually witnessing the properties of the material change over time as it hardens, Bruce gives invaluable tips along the way for the first-time Magic Sculpt user. You'll understand why he asks everyone using this material to make a test marble--a simple and effective gauge that you end up using both to test your techniques and tools, and also to serve as your control, so you can tell by feeling how hard your hero sculpture is getting without having to poke and press at it directly.
 (The two-part epoxy self-hardening resin clay that is Magic Sculpt must be thoroughly kneaded and blended to an even consistency before use.)
Building Your Mask
Bruce moves from basic coverage to building up specific areas, knowing that he will shape and detail the areas later. He uses traditional wood sculpting tools to push forms into the clay and you'll learn not to be fussy and obsessive about detail. The early stages of Magic Sculpt are all about freedom and exploration -- detail comes later, after the clay begins to harden and the character's already started to emerge. Bruce, who didn't go to Art School but came up as an apprentice sculptor, reveals the secret to sounding educated in the industry in four simple words: Zygomatic Arch and Mastoid Process. "If you know how to say, zygomatic arch and mastoid process and know where they go, the rest, they're going to listen to." Whether he's being specific about designating certain areas or referring to the "doohicky thing above your lip," Bruce's advice about his path to pursue his passion is invaluable. "If you didn't go to the best school, you got horrible grades, whatever, if you live this stuff and you pursue it, you're good at it, you give it the time and the effort, you're gonna discover your niche in it."
 (The Magic Sculpt goes on tacky, wet, and fast, so you can move and shape it to whatever you envision for your character, like working with traditional WED clay.)
Finding the Character in Your Mask
Bruce covers matters of symmetry, broad shapes, and how to remove or add material to create an appropriate thickness as you go. He's mindful of where the mask will meet the wearer and shows you what to look out for as you shape the edge of the mask. As the clay gets harder, Bruce can work harder against it, using more aggressive tools to give it deeper creases and lines. Once the material hardens to an appropriate point, Bruce is able to remove the mask from the form and he continues tooling it in his hands. For the budding artist, Bruce shares advice and experience that will challenge you to follow your dreams and take steps to achieve them. He underscores the importance of finding your own thing as an artist to keep you inspired and prevent the tendency to become jaded by the less creative aspects of commercial art. He describes the wonder of learning from other sculptors and artists who were inspirational for him as he came up in the industry, from Steve Wang to John Rosengrant.
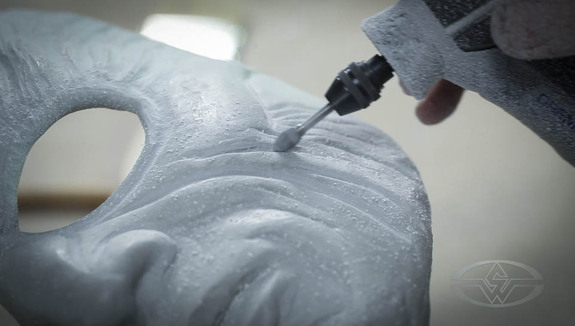 (The real fun of Magic Sculpt comes when it hardens, allowing you to use carving tools, such as the Dremel, to enhance and detail your sculpture, like a carving.)
Detailing Your Mask With a Dremel
If you've never used a Dremel tool before, or even if you're an old pro, Bruce will introduce you to the versatile and wondrous multi-capability of this powerful tool as he digs into the detailing process of the lesson. Using various attachments and bits, he can create a variety of gross shapes and designs, ridges and plateaus as he begins to explore the possibilities of this specific mask. Pronounced radiating trenches emerge from beneath the tip of Bruce's dremel, followed by crazy, intricate scoring and channeling, making a texture that brings to mind ancient creatures deep with wisdom. Smooth planes established previously when the clay was more malleable become fractured and increasingly detailed with lines that speak to character and experience.
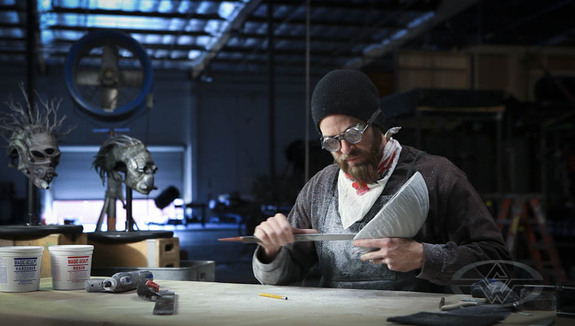 (Bruce D. Mitchell uses a heavy rasp to cut detail and shape in his latest piece of dynamic wearable art.)
Working the Hardened Magic Sculpt Material
Bruce gives a tour of his file and rasp collection and indicates which files have the deepest teeth for removing lots of material and which files work better for shaping and planning. His favorite file is an awesome, heavy-duty file he acquired from a woman who shoed horses and gave it to him when it became too dull for her use. The demonstration of what each file is able to do with the dense, hardened Magic Sculpt material will open your eyes to the possibilities no matter what shape your personal sculpture takes. Sanding and smoothing out rough spots on the interior of the mask and shaping the brow, chin and cheekbones leads to more dremeling until finally Bruce starts getting into much more intricate wrinkles and cracks in the face that truly define the expression of the character.
 (If there's a more versatile, useful tool than the Dremel portable drill with a good set of bits, we don't know what it is. The model pictured here has a wire brush sanding attachment. Perfect for fine detail wrinkles and texture.)
Using Tools to Add Character to Your Mask
As Bruce continues to work the piece, adding character and shape with his hand-held Dremel tool as well as other aggressive hand tools such as the file rasp and the wire brush, the face begins to take on characteristics beyond what we know from human anatomy. The ridges, lines, and grooves that spiderweb all over the face begin to impart or hint at a life form that isn't quite of this earth. This is where the fun begins. As the character emerges, Bruce is as much the creator as he is an explorer, letting the mask show him what it wants to become.
 (A basic, watered-down acrylic wash brings out all the painstakingly carved and etched highlights and shadows in the piece.)
 (Showtime. Bruce D. Mitchell tries the mask on for fit. Even without final paint, inner padding, and the leather strap to hold it on, the character certainly comes through.)
Preparing for the Finishing Touches
Bruce brings his mask to a point where he can be satisfied with the surface detail bringing out the character depth and complexity of the sculpture itself. The next steps will be determining the final detail paint and adding the cosmetic ornamentation and wearer interface (pads and cushioning). There will be a leather webbing that holds the mask securely on the wearer's head as well as a bit of further ornamentation--simply having the mask on and watching as your behavior changes traits and flourishes will be suggested and later implemented in PART II of HOW TO MAKE A MASK - WEARABLE DYNAMIC ART with Bruce Mitchell. Won't you join us?
- David Sanger
- SEE the full lesson HERE: How To Make A Mask - Part One: Sculpting And Carving
- Part Twoo: How To Make A Mask - Part Two: Painting And Leather Work
- Part Three: How To Make A Mask - Part Three: Sculpting Goggles & Mouthpiece
- Part Four: How To Make A Mask - Part Four: Detail Sculpting & Adding Magnets
- Part Five: How To Make A Mask - Part Five: Leatherwork, Painting, And Finishing
Bruce shows some young visitors the magic of Magic Sculpt in our first "Creature Kids" installment HERE (It's FREE.): Creature Kids - Sculpting, Detailing, Painting & Finishing a Monster Claw