

Adding Finishing Touches to Your Mask With Bruce D. Mitchell
To watch the FREE lesson preview, simply click on the player above. Check out the Full Lesson page HERE: HOW TO MAKE A MASK - WEARABLE DYNAMIC ART - PART TWO.
If you've been following along with PART ONE you've done your thing with Magic Sculpt, and you're ready to rock your mask. But there's a few more steps before you can wear that thing out. Respected fabricator Bruce D. Mitchell finishes what he started as he shows you the methods he uses to complete the work before he puts his face on. You'll see him work with leather, rivets, foam pads, velvet, paint, and the most essential item in any creature creator's spice cabinet: cyanoacrylate (aka Insta-Cure or Super Glue.) Follow along with today's lesson from the Stan Winston School; you'll not only have a keepsake art piece to display, you'll have a new identity you can wear at will. Whoever you want to be today, just wear your mask, and you're on your way.
Jump To Section
- Supplementary Work in Making a Mask
- Using Leather for Mask Straps
- Getting a Comfortable Fit
- Fastening Your Mask Straps
- Adding Washes of Color to Your Mask
- Adding Final Details
- Trying on Your Mask
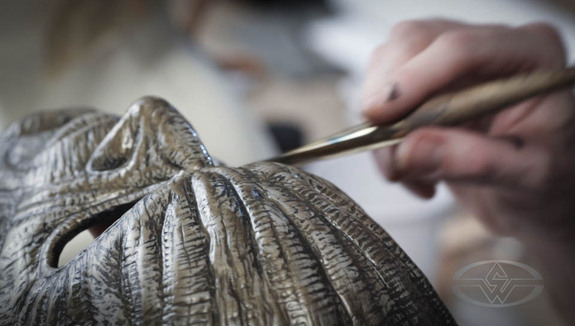 (Mitchell applies a wash to his mask infused with a metallic bronze powder.)
Supplementary Work in Making a Mask
As our lesson begins, some time has passed since Bruce left our cameras and the initial sculpt of the mask. Sure enough, Bruce couldn’t leave an unfinished mask to sit, and without our cameras there to see him, he did some further dremeling, adding a couple angular lines in on the cheeks. But Bruce is still comprehensive in reviewing the tools he’s used from the trusty dremel to a toothy model saw blade. Don’t worry, you won’t miss a thing.
 (A leather hide gets cut to a strap, which Bruce D. Michell then cuts and shapes into a harness to secure his mask.)
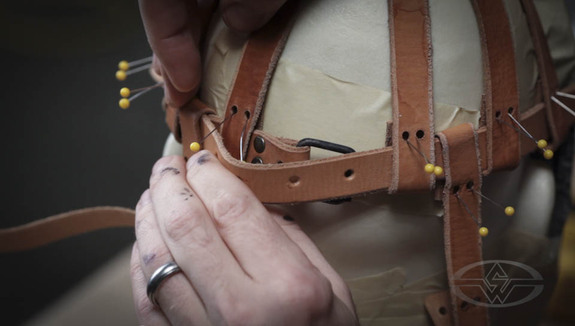 (Using pins to keep the straps in place, Bruce affixes burnished buckles and rivets to the holes he's punched in the leather.)
Using Leather for Mask Straps
The webbing is the strap that holds the mask on the wearer’s head. Bruce’s method is a step or two beyond the elastic straps we know from the Halloween masks we wore as kids, but the principle is the same—it’s something to attach the mask to your face. Bruce shows you how to make your own leather strips from raw leather hide. He displays the wonders and efficiencies of the strip cutter and edge skiver tools, and after a few slices, he’s got the raw material for his straps. From there, using the head form, Bruce lines up where he wants the straps to go and holds them in place with straight pins.
 (Using foam pads shaped and covered with black velvet, Bruce customizes the interior of the mask for a comfortable fit.)
Getting a Comfortable Fit
Going back to his roots in foam fabrication, Bruce cuts pieces of foam to fit the back of the mask and lines the foam pieces with some scrap velvet. Bruce shapes the foam with a razor blade and uses the foam fabricator’s trusty spray glue to lay down an adhesive layer to attach the velvet to the foam and the foam to the Magic Sculpt. By abrading the foam with his trusty Dragon Skin, he ensures that the glue has a surface it will bite into, so he doesn’t have to overdo the glue.
 (A bit of the wonder ingredient, Cyanoacrylate - in this case, brand name Insta-Cure - and the unrivetable rivet gets fixed in place.)
Fastening Your Mask Straps
Bruce uses a leather punch to put holes into his leather straps both for sizing and for fastening the straps to his mask using antiqued brass rivets. He demonstrates a hammer and die-pressed rivet but ends up using a slightly more expensive press tool to apply the majority of the rivets. However, there are places on the mask attachment where the force of a hammer or press would endanger the mask, and that’s where he breaks out the Cyno. A top ring, some buckles and clasps, and a 2nd row of belts adds a bit of hardware flare as well as keeping the mask securely on the form.
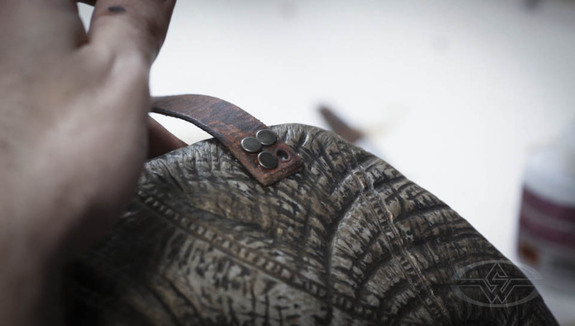 (Aging the leather with acrylic paint and using pre-aged rivets assures a well-worn, timeless look for the entire piece.)
Adding Washes of Color to Your Mask
Bruce mixes up an inexpensive acrylic paint to layer washes on top of his piece with just a bit of bronze pearlescent powder to give his piece a fine metal sheen. He applies the material generously with a simple brush to create the foundation. Next, he applies a bit of acrylic pigment to the leather to bring it in line with the tones he’s used in the face. Along the way, he cautions Cosplayers about dying leather—dyes and sweat don’t get along. Better to use acrylics since, as Bruce says, “When it’s dry, it’s dry.”
 (The mask is nearly ready to try. Just a little dry-brushing of copper to enhance the metal look, and Bruce will call the piece done...for now.)
 (A transformed Bruce D. Mitchell peeks out from his newly finished mask. What's next? If only we knew, but the face is inscrutable...a mystery.)
Adding Final Details
A helpful tip regarding spray glue: add a little direct heat from a hair dryer on high, and it reactivates the tack! Mrs. Mitchell was kind enough to provide her hair dryer for the demonstration. Domestic lessons aren’t usually our stock in trade, but Bruce is sure to credit the source of his hand-held hair dryer, “I’d like to thank the Missus for letting me borrow this on such short notice that she’s probably unaware it’s gone.” A copper color added to the surface with a dry brush, and the mask is ready-to-wear!
 (Bruce D. Mitchell wears SIRRUS REX, one of his previous masks/artworks. This one incorporates tinted reflective lenses from a pair of sunglasses salvaged from a gas station.)
Trying on Your Mask
Though Bruce is happy with where his piece leaves off, he will often revisit his masks later, adding apparatus such as goggles, horns, respirators, and other accouterments. When your mask is done, don’t forget to try it on. Look at yourself in the mirror and let the vision that presents itself to you inform the character you’ve created. Does it want to have further adornments and flourishes? Now that you’ve seen the foundational approach to mask-making, you can add more…take your sculpture further… see what a simple pair of sunglasses can do, then pop out the lenses and make your own eye gear! There are no limits to what you can create.
 (Another custom mask/art piece by Bruce D. Mitchell. This one incorporates a detachable magnetically affixed mouthpiece and goggles.)
As Bruce says, “Please try it. Get a shape, and smooth it out. It doesn’t have to be that detailed to learn something by doing it….Build something!” And that’s why Bruce is here and, ultimately, why we’re here too!
Build something, now.
- David Sanger
- SEE the full lesson HERE: How To Make A Mask - Part Two: Painting And Leather Work
- Part One: How To Make A Mask - Part One: Sculpting And Carving
- Part Three: How To Make A Mask - Part Three: Sculpting Goggles & Mouthpiece
- Part Four: How To Make A Mask - Part Four: Detail Sculpting & Adding Magnets
- Part Five: How To Make A Mask - Part Five: Leatherwork, Painting, And Finishing
Bruce shows some young visitors the magic of Magic Sculpt in our first "Creature Kids" installment HERE (It's FREE.): Creature Kids - Sculpting, Detailing, Painting & Finishing a Monster Claw